Okta SCIM Setup
Last updated: July 27, 2026
The Prerequisites
Before integrating Okta with SpotDraft, ensure the following:
Your organization has Single Sign-On (SSO) included in your SpotDraft subscription.
You have Admin access to the Security & Identity section in SpotDraft.
An existing Okta account is necessary.
Supported Features
SpotDraft currently supports the following provisioning features through Okta:
Create Users: Users assigned to the SpotDraft application in Okta are automatically added to your SpotDraft workspace.
Update User Attributes: Changes made to user profiles in Okta are reflected in SpotDraft.
Deactivate/Reactivate Users: You can deactivate or reactivate users in SpotDraft via Okta.
Push Groups: Okta groups pushed to SpotDraft are synced to their corresponding SpotDraft teams.
Update Group Membership: When you add or remove a user from a pushed group in Okta, the change is reflected on the mapped SpotDraft team at the next sync.
Remove Groups: Removing a pushed group, or removing all of its members, in Okta updates the mapped SpotDraft team accordingly.
Unsupported Features
The following Okta provisioning features are not supported by SpotDraft at this time, though they may be considered for future releases:
Import Users: SpotDraft does not support importing users created in SpotDraft into Okta, either for matching with existing Okta users or adding new ones.
Import Groups: SpotDraft teams cannot be imported as groups into Okta.
Bidirectional Sync: SpotDraft does not support syncing changes back to Okta. Deleting users in SpotDraft will not update Okta. All deprovisioning should be done through Okta to maintain consistency. If a user is deleted in SpotDraft, manual removal from Okta is required. To recreate the account, remove the user from Okta first, then re-add them to SpotDraft via Okta.
Adding SpotDraft App to Okta
Skip this section if already completed.
Step 1:
If you haven’t already, sign into your Okta Administrative portal https://${yourOktaDomain}-admin.okta.com.
Step 2:
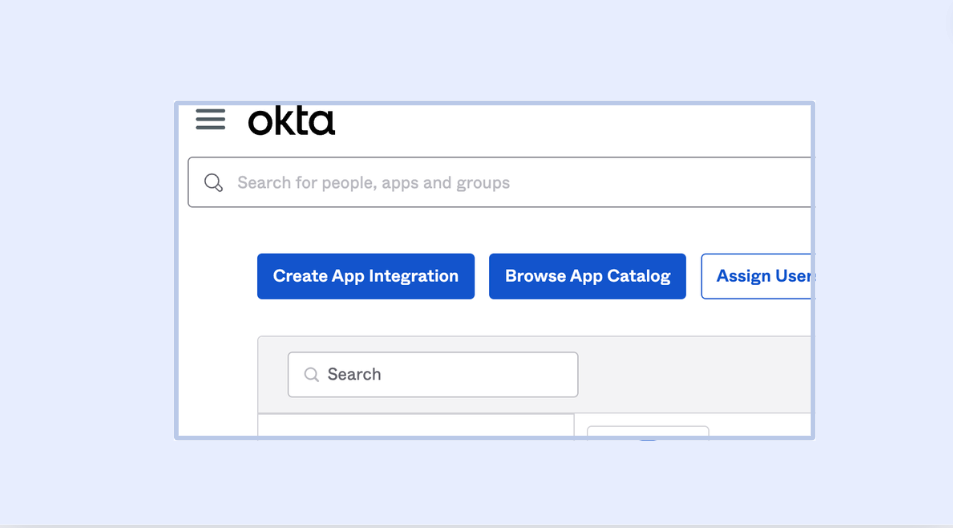
Once signed in, click Applications in the left-hand sidebar, and then Browse App Catalog near the top of the resulting page.
Step 3:
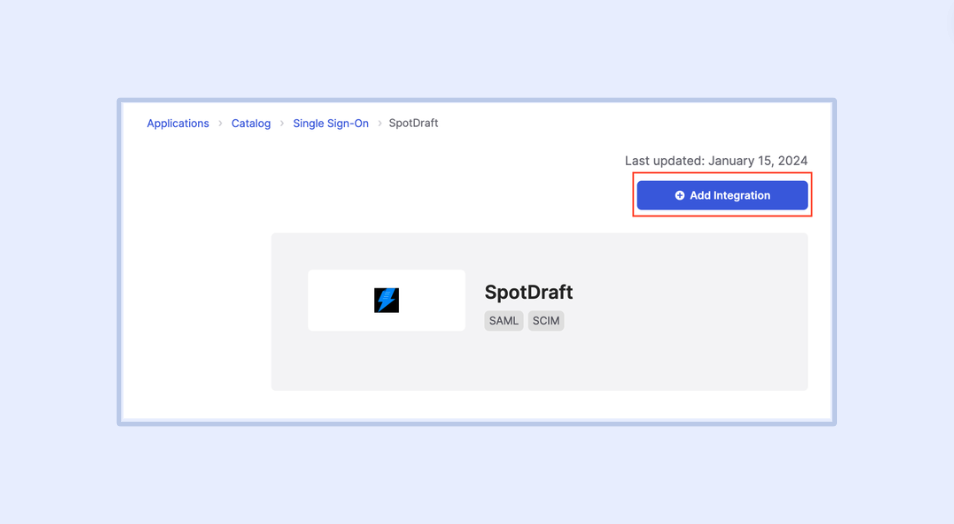
Search for “SpotDraft” in the search bar, and then click the SpotDraft integration from the results. Click the Add Integration button to add the SpotDraft integration to your Okta instance.
Configuring user provisioning with SCIM
Step 1:
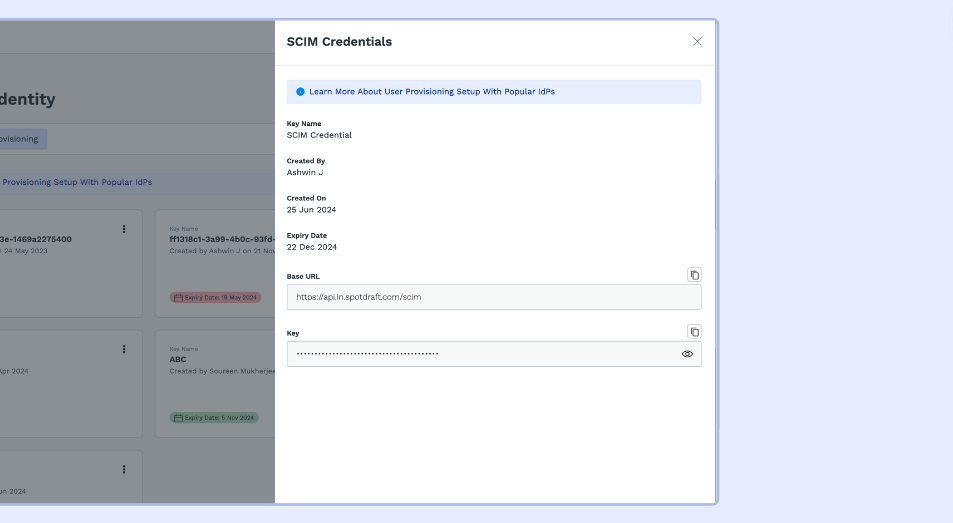
Open SpotDraft to generate the SCIM credentials.
Navigate to the Provisioning tab under the ‘Security and Identity’ section.
Click on Generate SCIM Credentials.
Enter a Key Name for the credentials.
Copy the Base URL and Key.
Step 2:
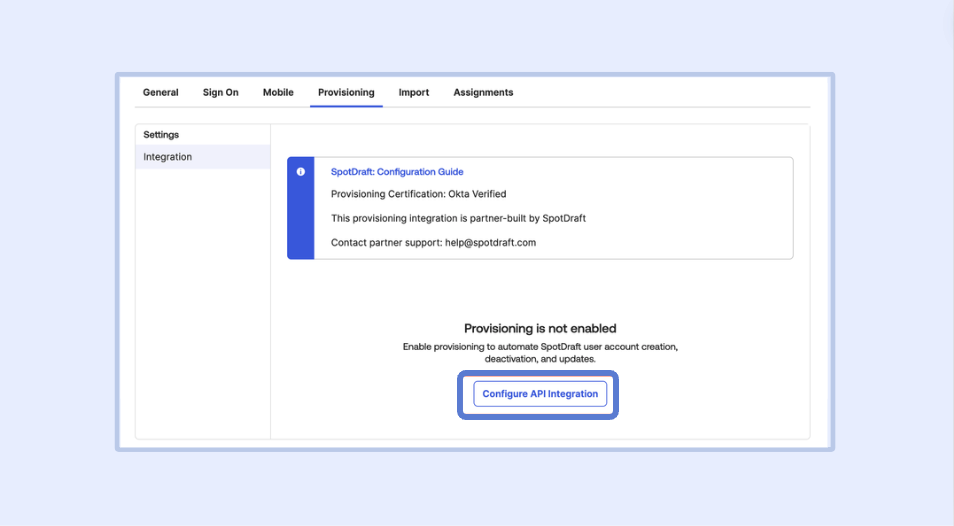
Navigate to the SpotDraft app on Okta.
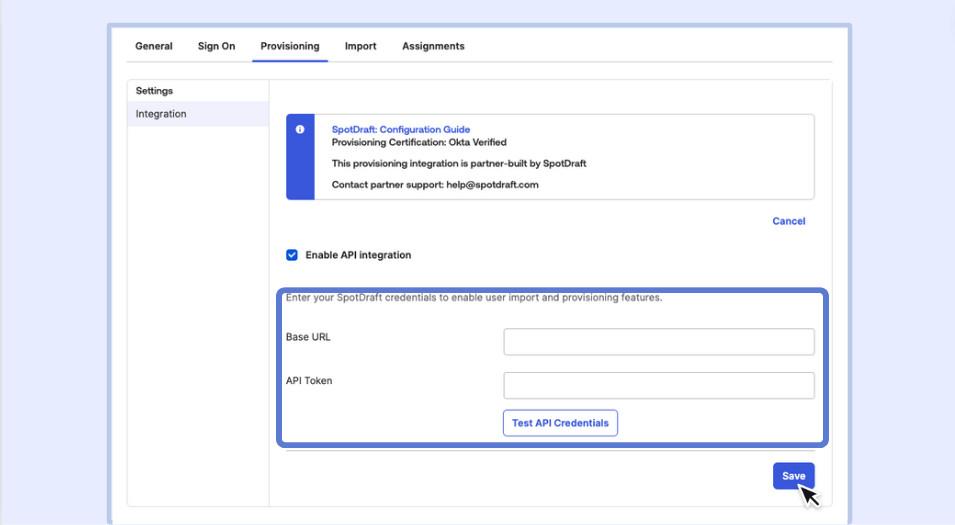
Click on Configure API Integration under the Provisioning tab.
Step 3:
Check Enable API Integration.
Paste the Base URL & Key generated from SpotDraft in the Base URL & API Token fields in Okta respectively.
Click Test API Credentials to confirm the connection works.
Click on Save.
Step 4:
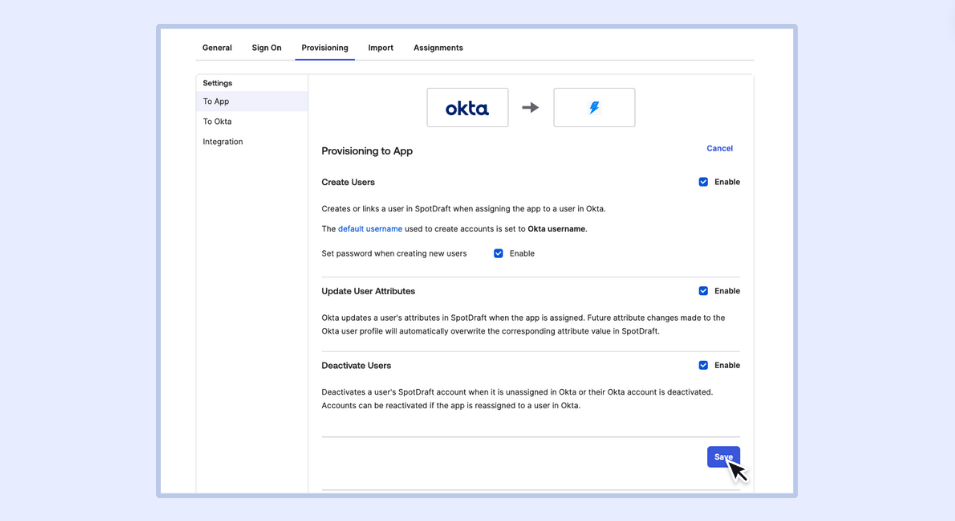
In the To App section under the Provisioning tab, make sure the following options are checked:
Create Users
Update User Attributes
Deactivate Users
Click on Save.
Step 5:
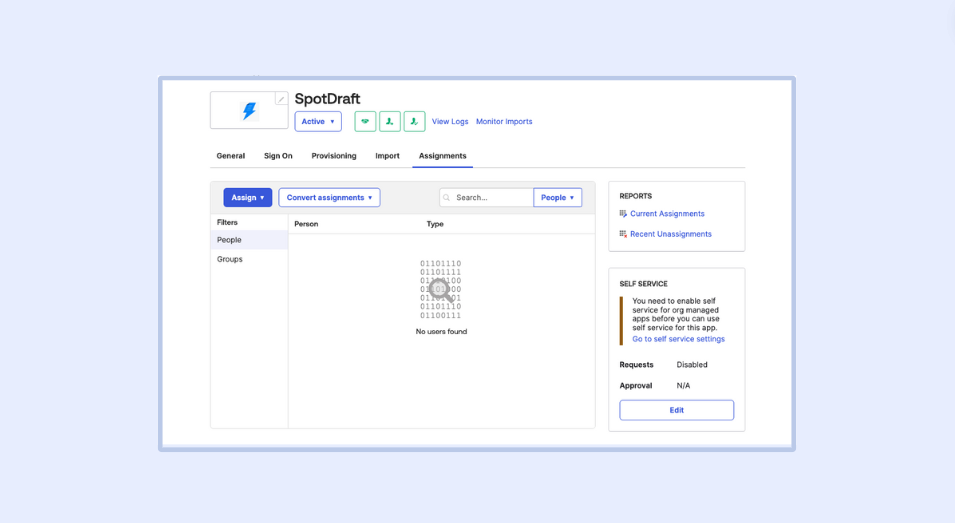
Now start Provisioning/Deprovisioning users to SpotDraft from the Assignments Tab.
Provisioning Teams with Push Groups
Push Groups lets you sync your Okta groups to existing SpotDraft teams. When a group is pushed, its members are added to the mapped SpotDraft team, and any subsequent membership changes in Okta are reflected in SpotDraft automatically.
Before you start: Confirm with your SpotDraft point of contact that group provisioning is enabled for your workspace and that your Okta groups are mapped to the correct SpotDraft teams. Groups that are not mapped to a SpotDraft team will be ignored. SpotDraft syncs to existing teams only and does not create new teams from Okta groups.
Step 1:
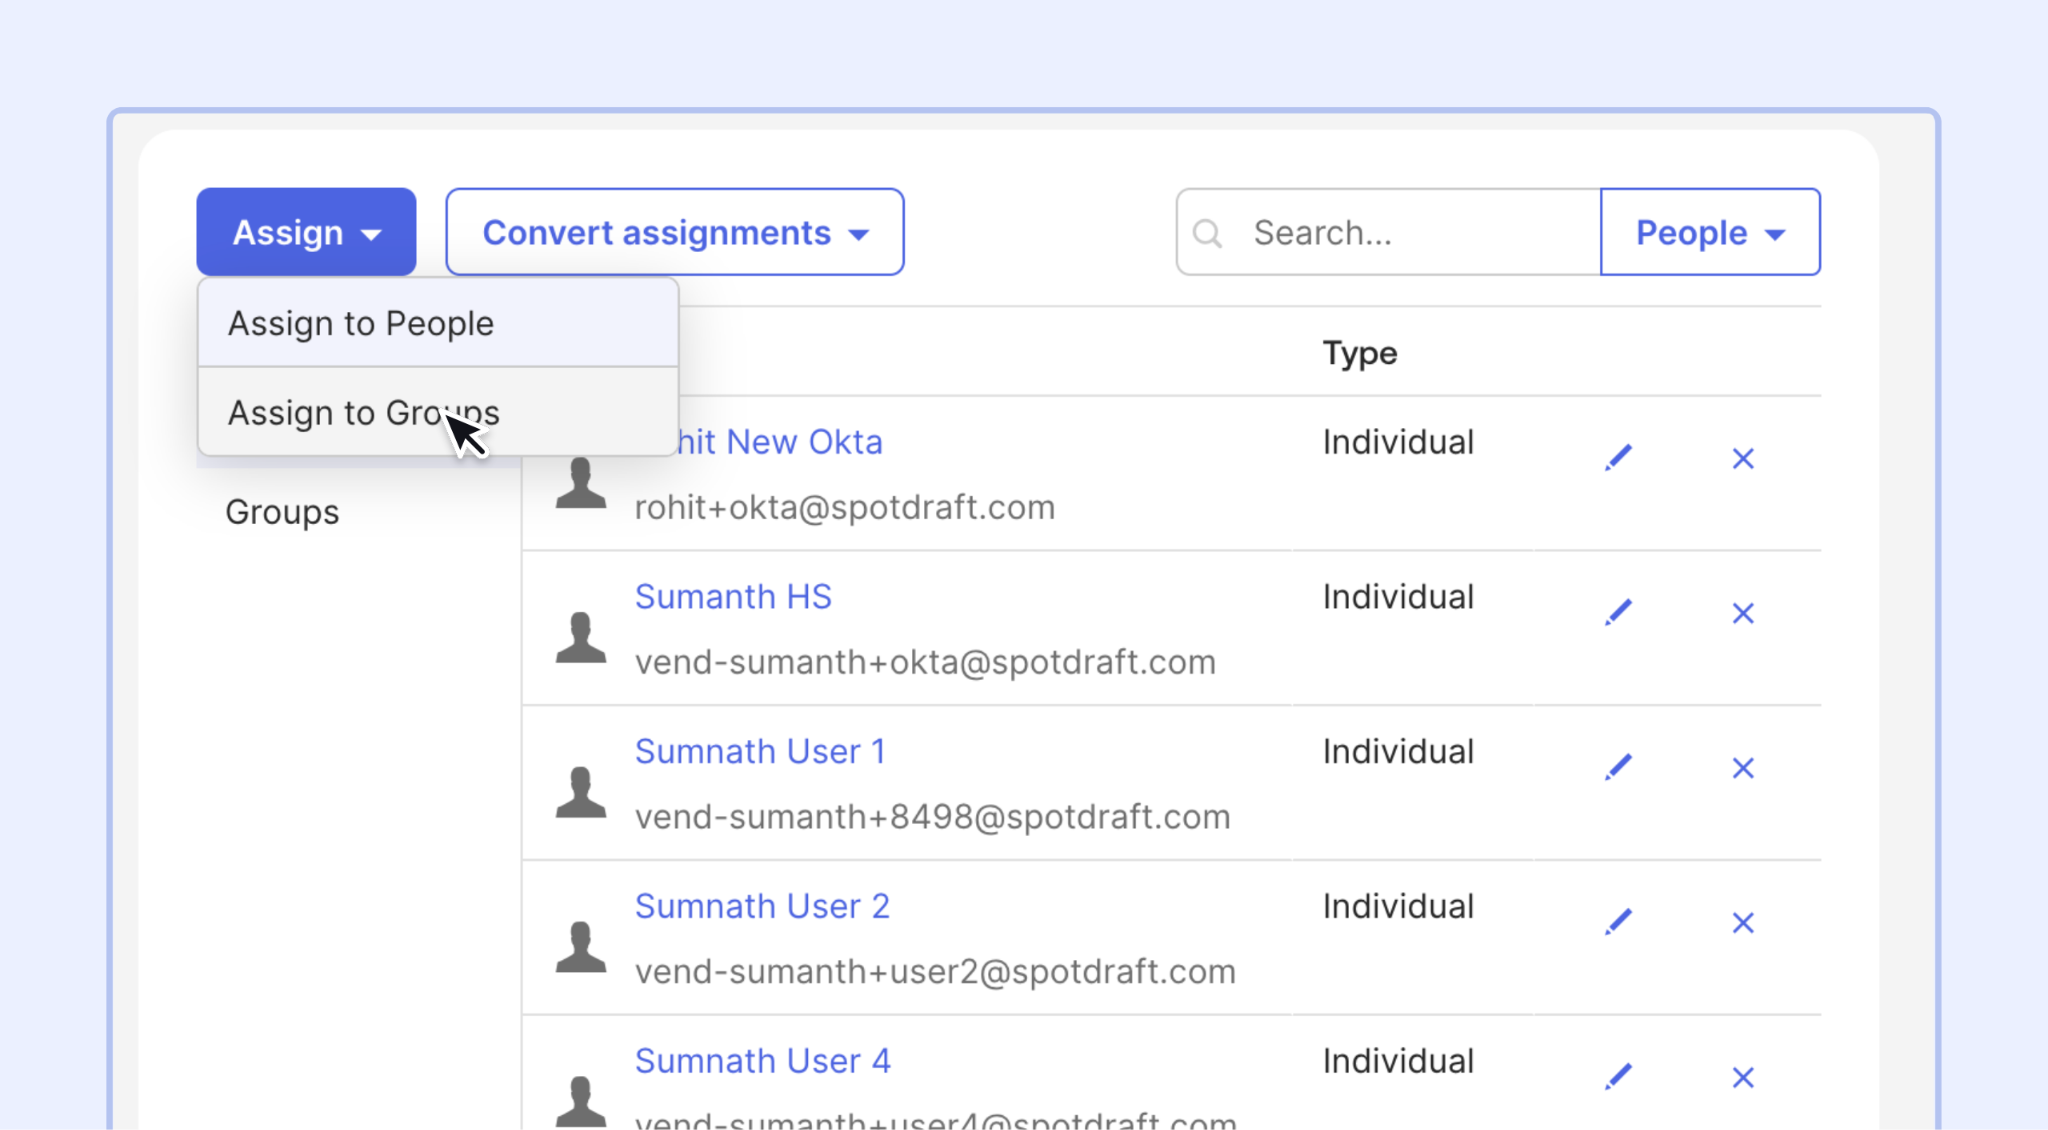
In Okta, within the SpotDraft application, select the Assignments tab.

Step 2:
Go to the Assign to Groups section and assign the groups that you want to be mapped to SpotDraft. Once assigned, click Done.
Step 3:
In Okta, within the SpotDraft application, select the Push Groups tab.
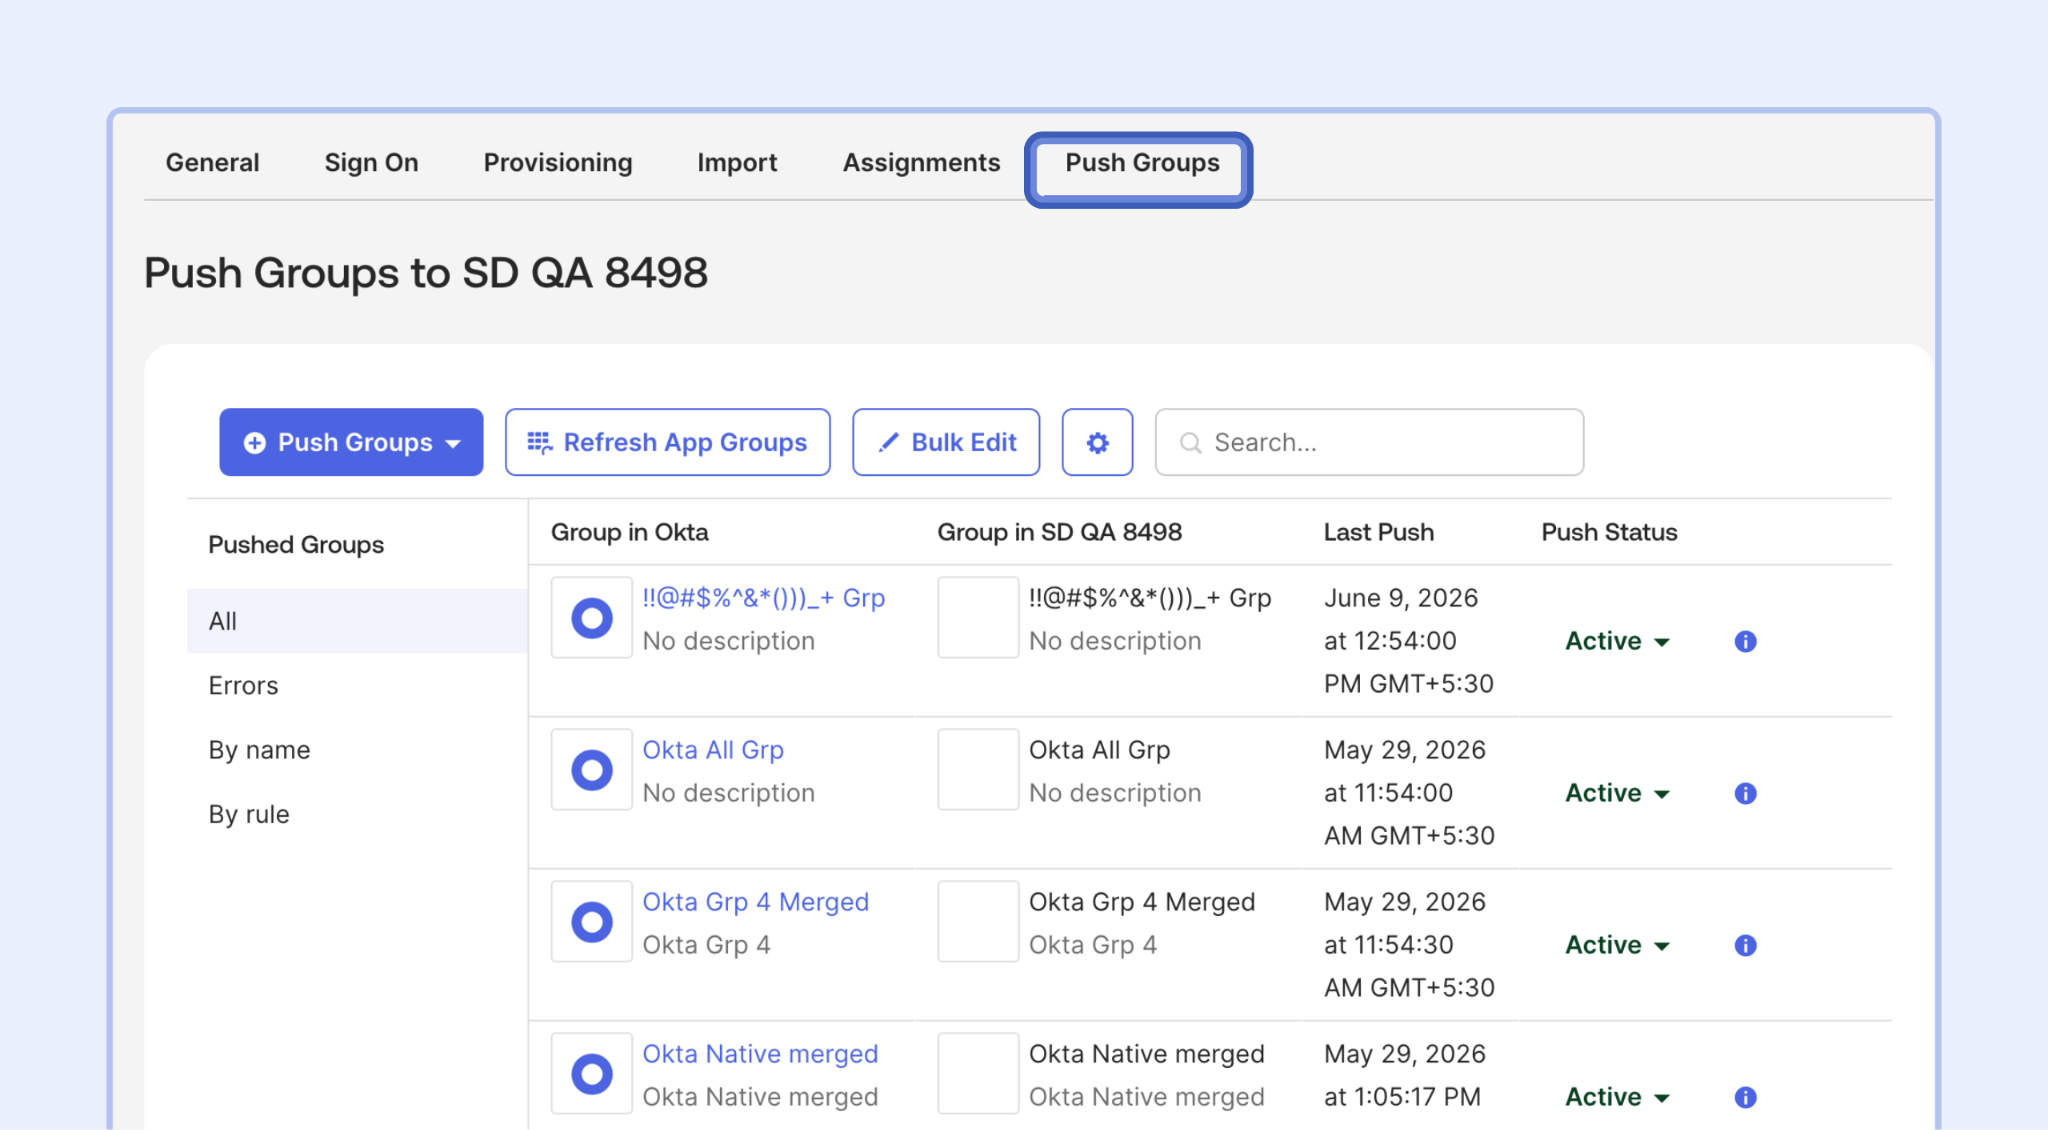
Step 4:
Click the Push Groups button and select the Find groups by name to choose the groups assigned in Step 2 to be pushed to SpotDraft.
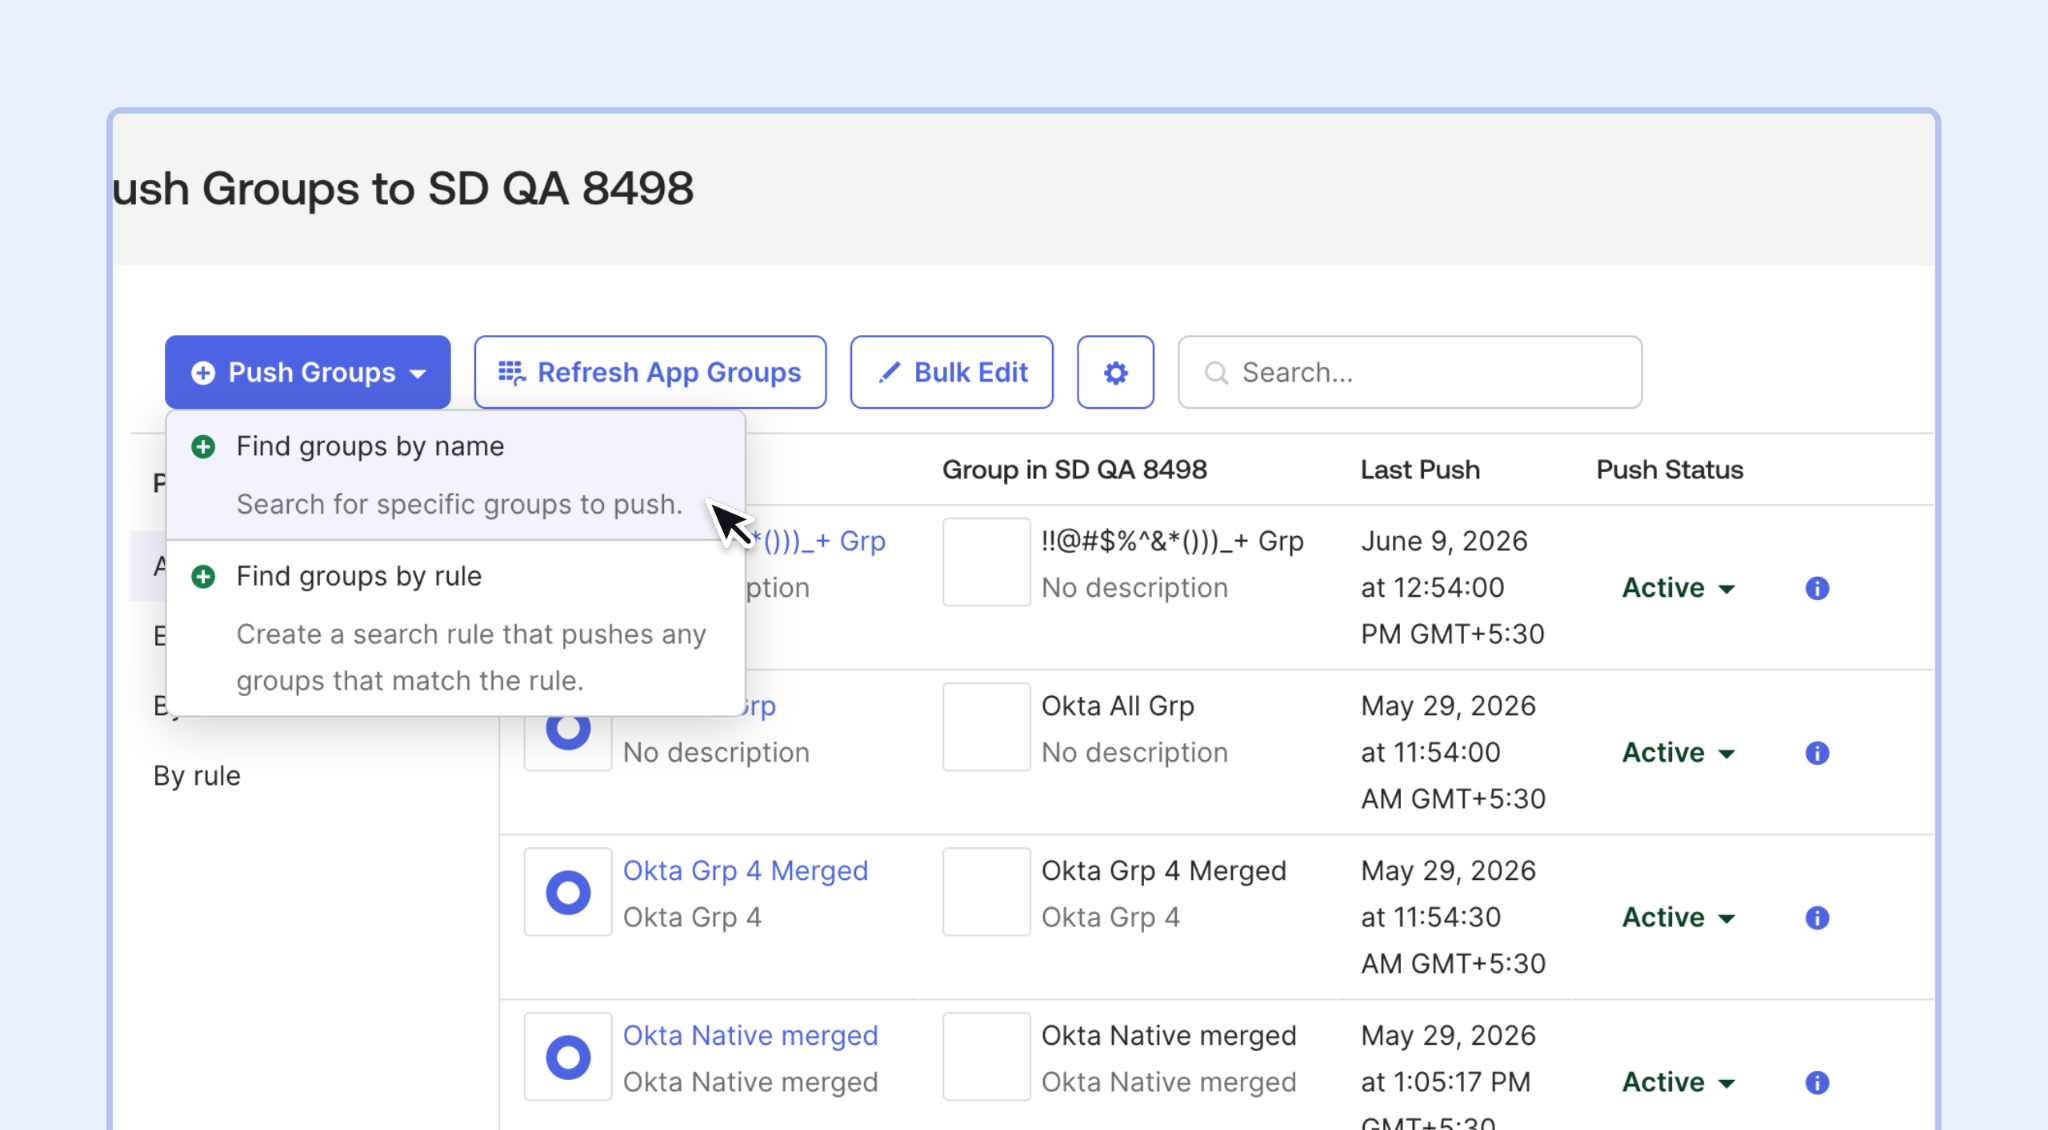
Step 5:
Under the Match result and push action column, select Create New group with the same name.
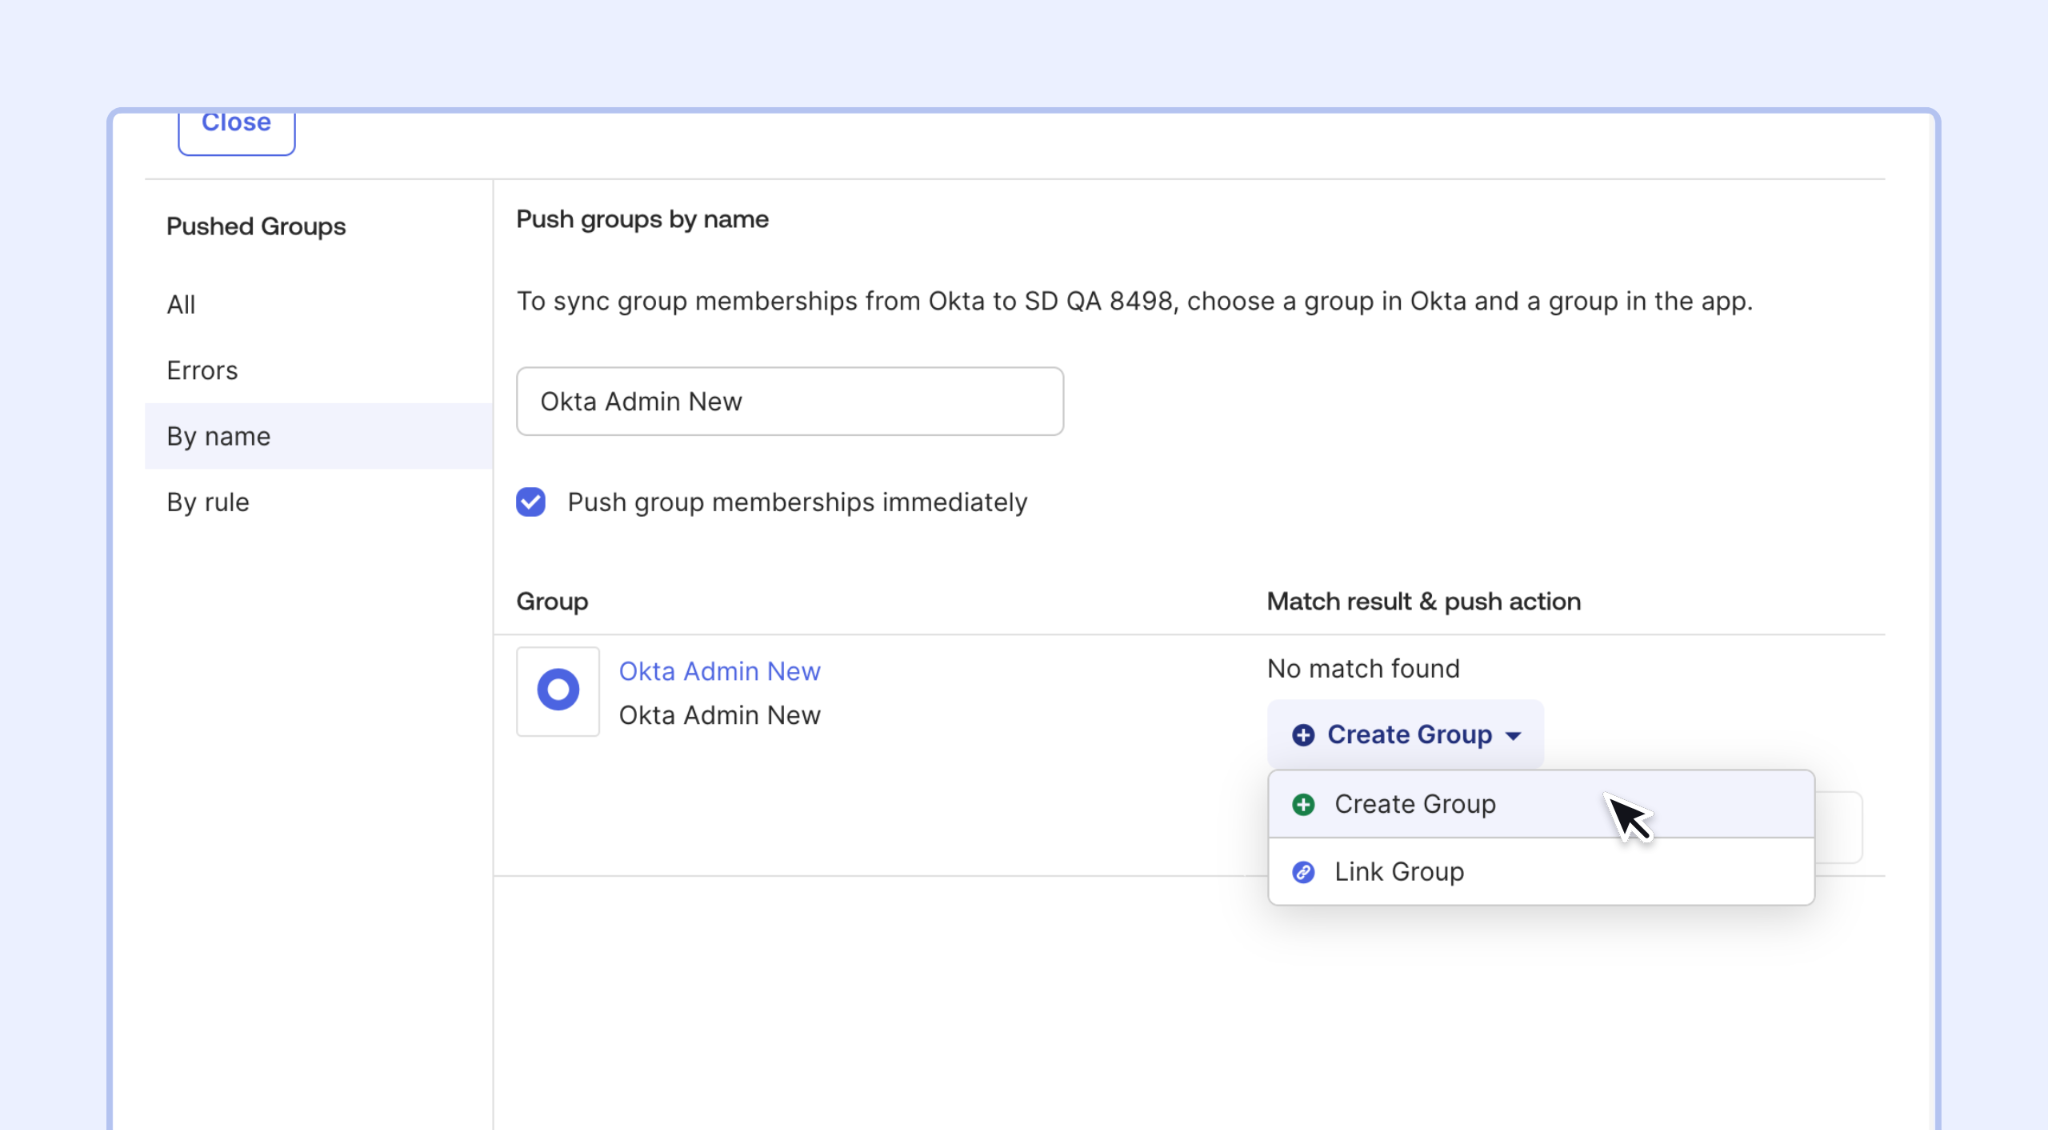
Step 6:
Click on Save and add another to keep adding groups to sync to SpotDraft. Once all groups are added, click Save. Pushed groups and their members are synced to the mapped SpotDraft teams on the next provisioning cycle.
How group changes sync
Adding a user to a pushed group in Okta adds the user to the mapped SpotDraft team on the next sync.
Removing a user from a pushed group removes the user from the mapped SpotDraft team on the next sync. If the user belongs to another pushed group mapped to the same team, they remain on the team.
Removing a pushed group clears the mapped SpotDraft team along with its permissions, and returns it to being a non-Okta managed team within your workspace. You can re-assign members and permissions within SpotDraft, or you can map the team to another group in Okta.
Renaming a group in Okta does not break the mapping or change the SpotDraft team name.
Group membership changes generally sync to SpotDraft within 40 minutes of the change being made in Okta, in line with Okta's standard provisioning interval.
Managing Okta-Synced Teams in SpotDraft
Synced teams are managed through Okta. To keep SpotDraft and Okta consistent:
Team membership for these teams are managed in Okta. Team names are locked post syncing to ensure the mapping remains consistent.
Permissions for teams synced from Okta continue to be managed by admins in SpotDraft, exactly as they are for other teams. Being synced from Okta does not change how you assign permissions.
Users provisioned through Okta cannot be deleted or deactivated directly in SpotDraft. Make these changes in Okta, and they will be reflected in SpotDraft.
Overriding User Name for SpotDraft in Okta
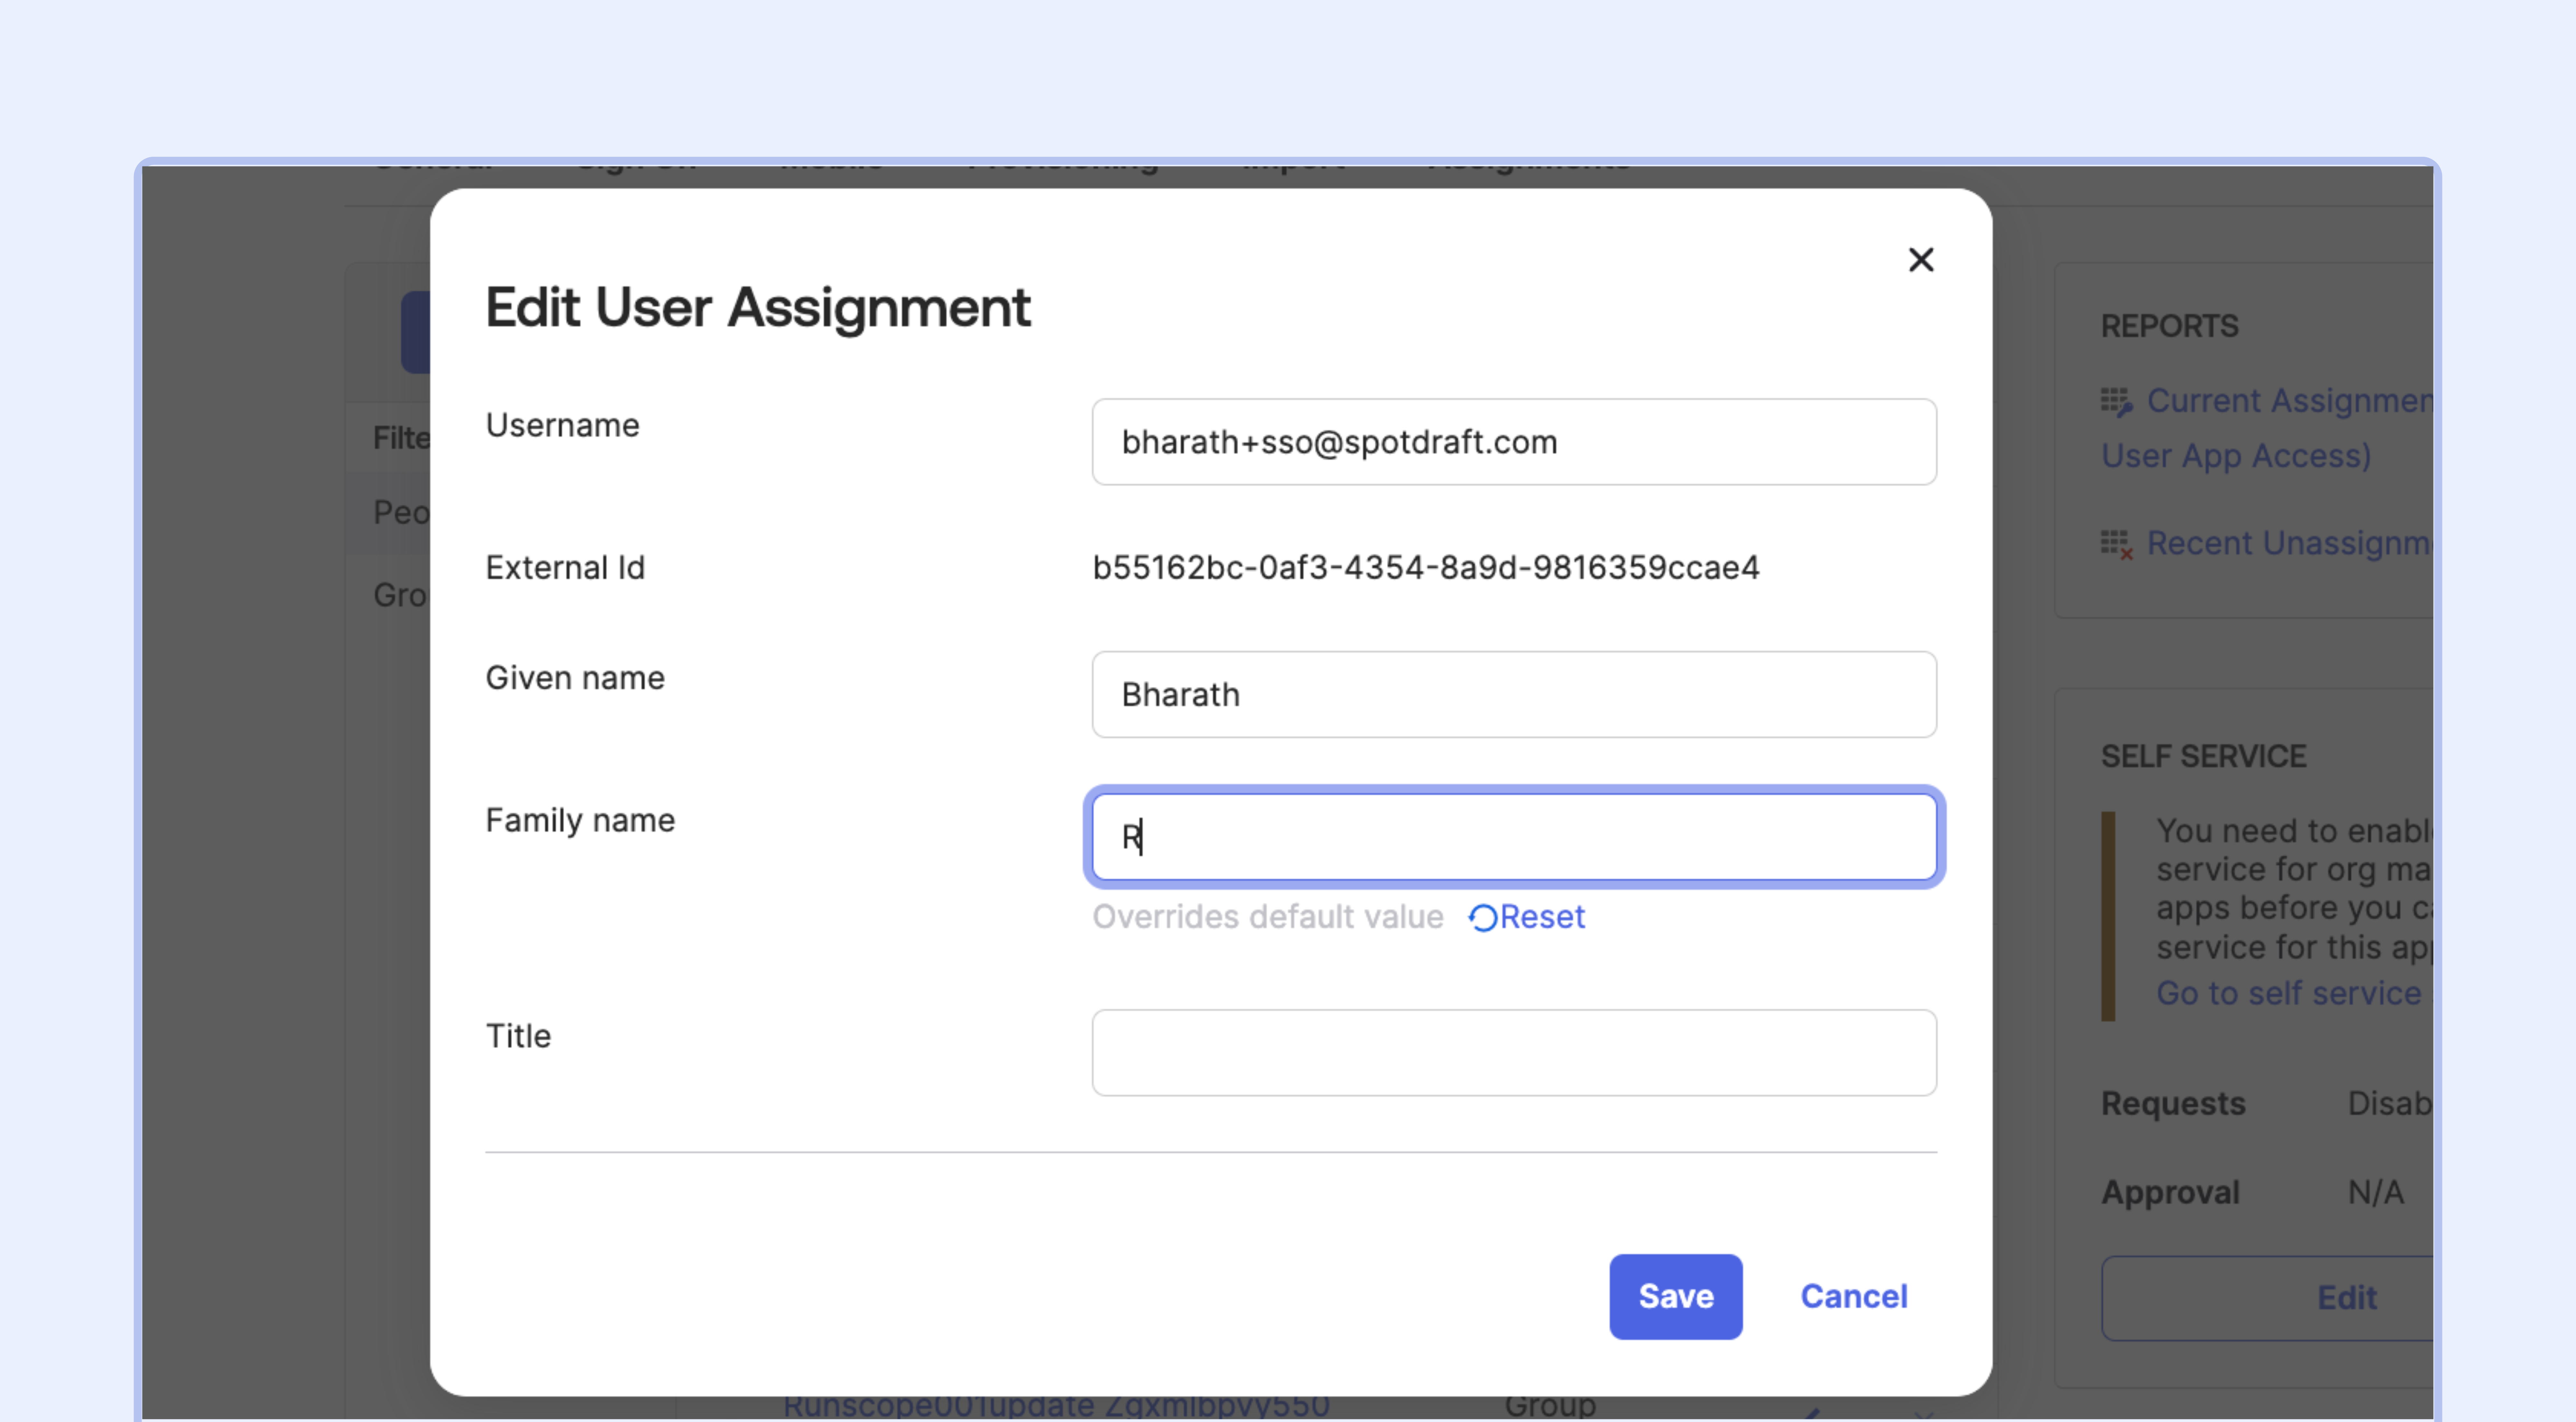
If you find that the name in the Okta Directory for a specific user is not what you need for a SpotDraft user, the global name in Okta can be overridden for the specific SpotDraft app in Okta while adding a user to SpotDraft.
Step 1: Override Name When Adding a User to SpotDraft
When adding a user to SpotDraft through Okta, override the user's name specifically for the SpotDraft application by entering the correct first and last name as required.
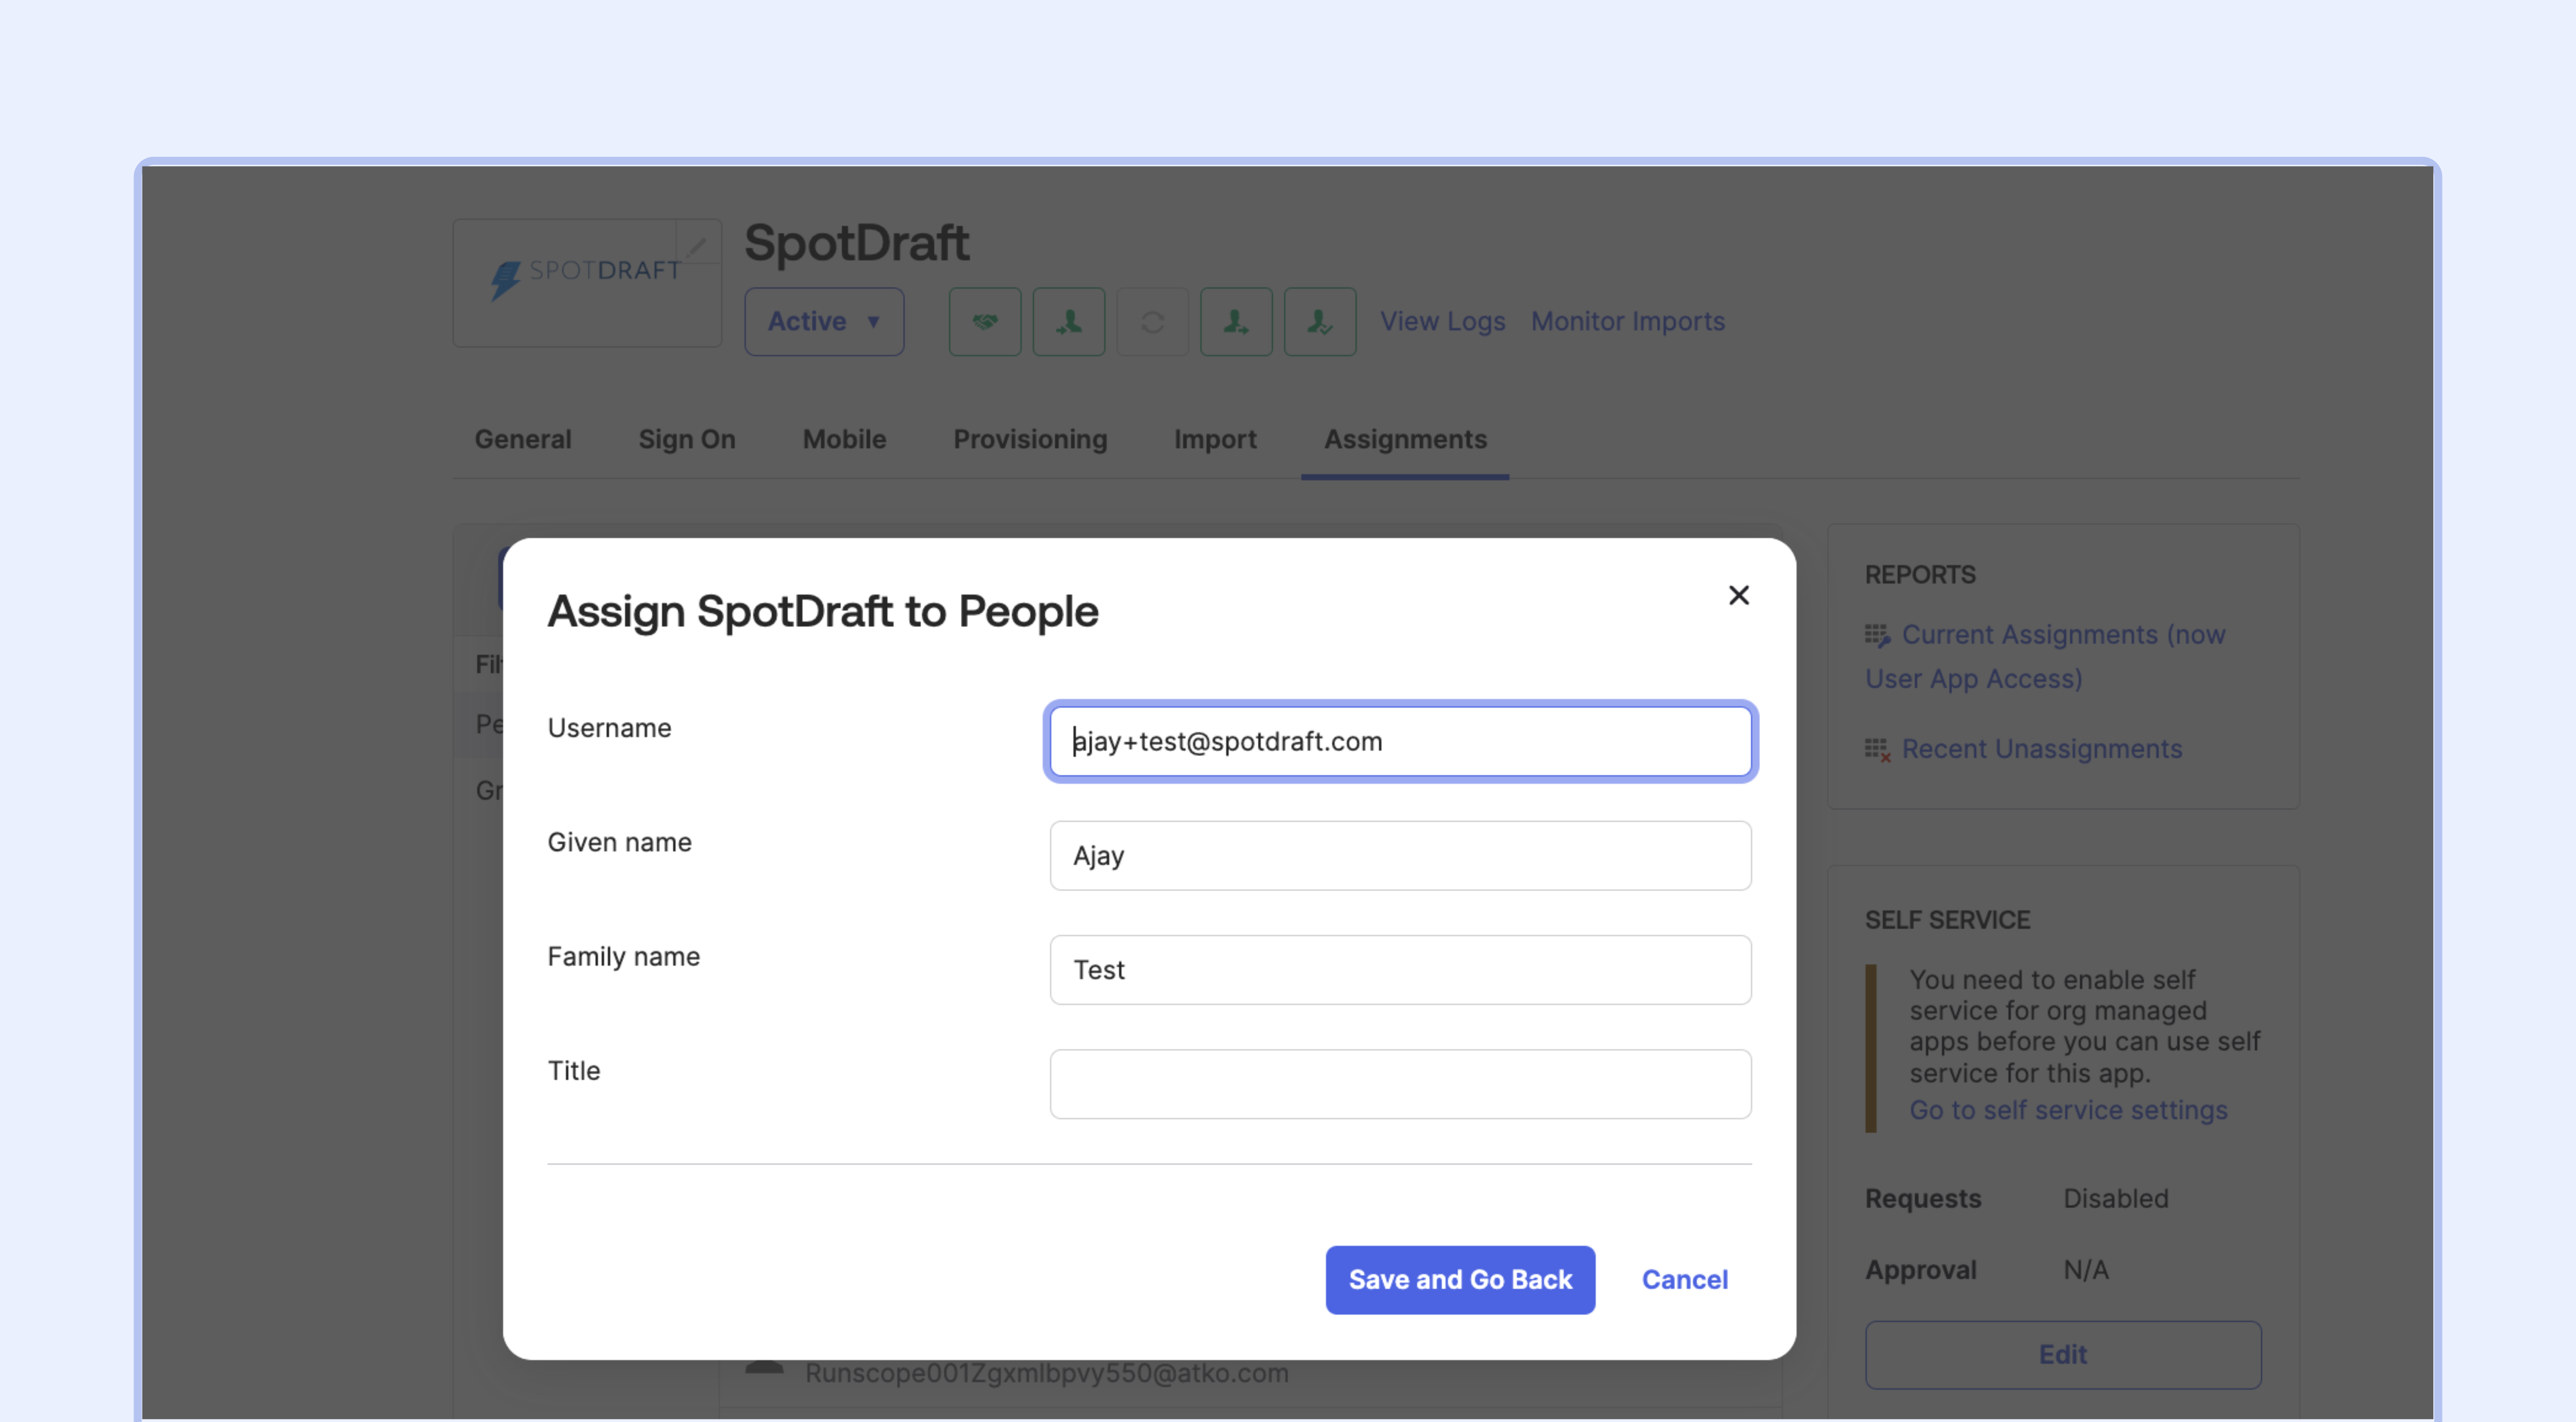
Step 2: Edit Name Later if Necessary
If you need to edit the name later, follow these steps:
Go to the Assignments tab under the SpotDraft app in Okta.
Click on Edit for the specific user.
Update the name as per your requirements.
Save the changes to ensure the correct name is displayed in SpotDraft.
For setting up SAML on Okta