Okta SAML Setup
Last updated: January 30, 2026
Prerequisites
- Your organisation should have SSO as part of your subscription
- You should be an Admin with access to the Security & Identity section on SpotDraft
- An existing Okta account
💡 SpotDraft supports SAML SSO initiated from both Okta (identity provider) and SpotDraft (service provider).
Adding SpotDraft App to Okta
Skip this section if already completed.
Step 1:
If you haven’t already, sign into your Okta Administrative portal https://${yourOktaDomain}-admin.okta.com.
Step 2:
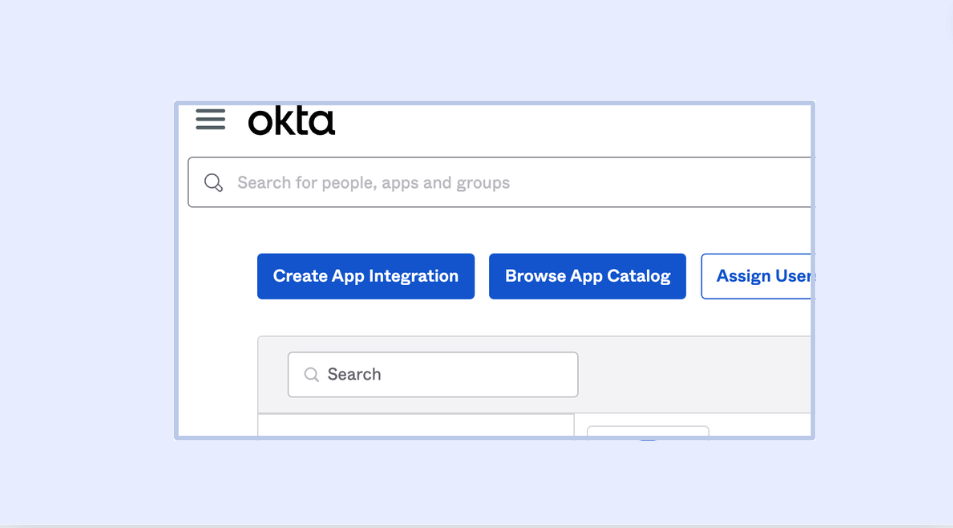
Once signed in, click Applications in the left-hand sidebar, and then Browse App Catalog near the top of the resulting page.
Step 3:
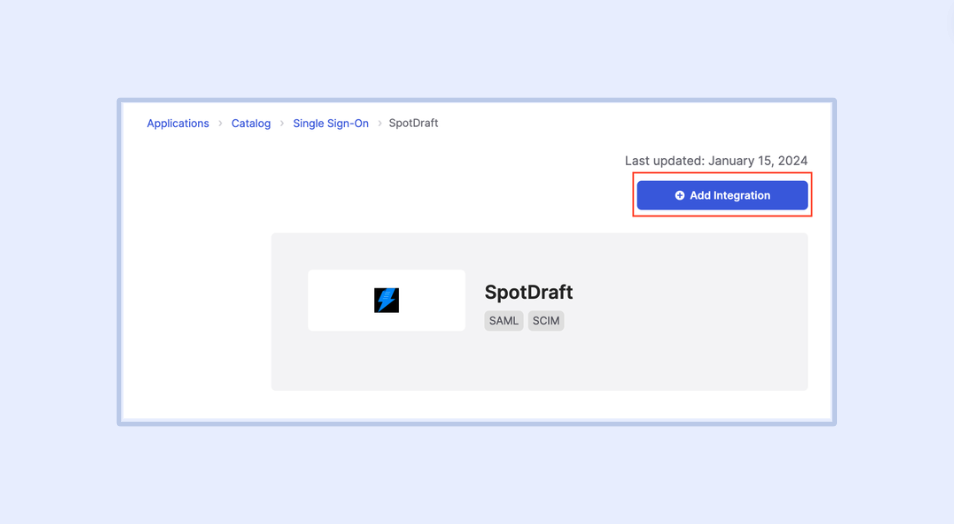
Search for “SpotDraft” in the search bar, and then click the SpotDraft integration from the results. Click the Add Integration button to add the SpotDraft integration to your Okta instance.
Configuring SAML SSO
Step 1:
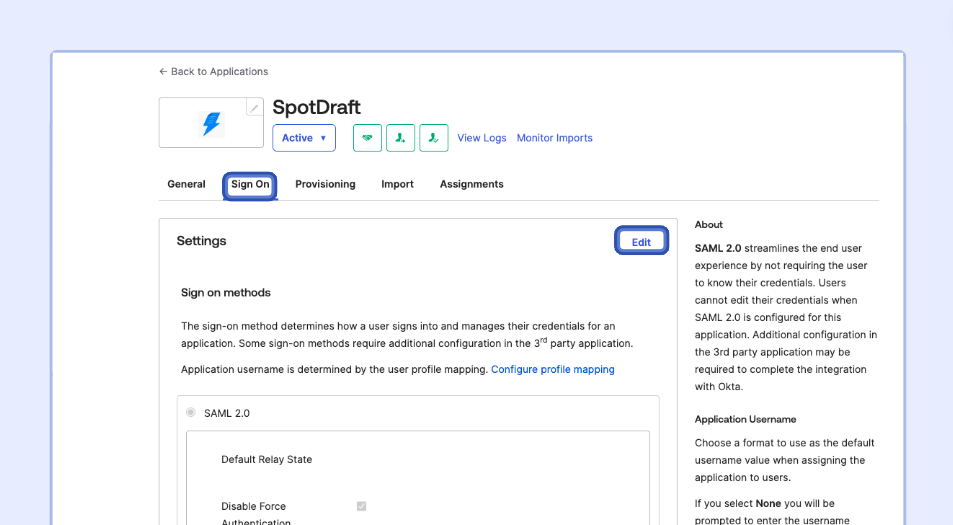
You will be redirected to the applications assignments page when the app integration is added to your Okta instance. Click on the Sign On tab then click the Edit button.
Step 2:
Scroll down to the Advanced Sign-on Settings section. Enter your SpotDraft Cluster ID, and Workspace ID and click the Save button.
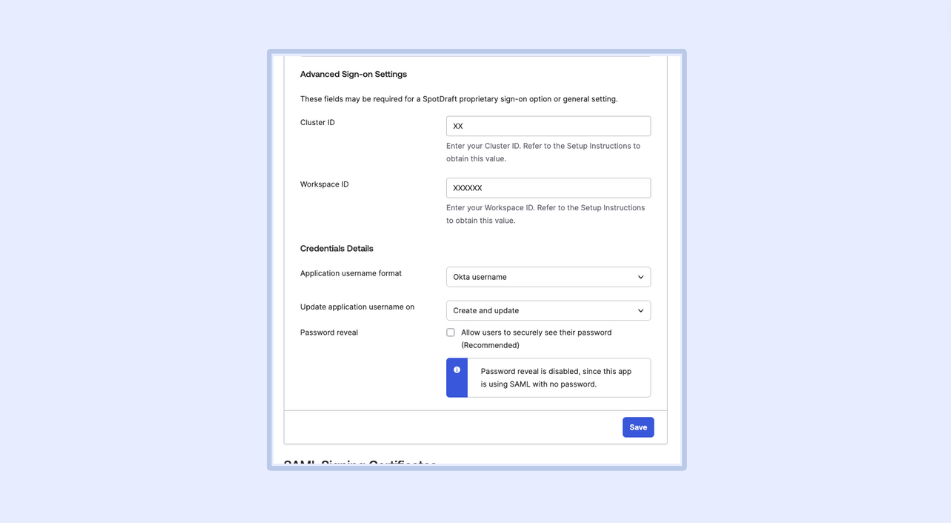
💡 Cluster ID and Workspace ID can be generated from SpotDraft by navigating to Settings → Security and Identity → SAML SSO. The Sign-on URL will be of the format https://api.
Step 3:
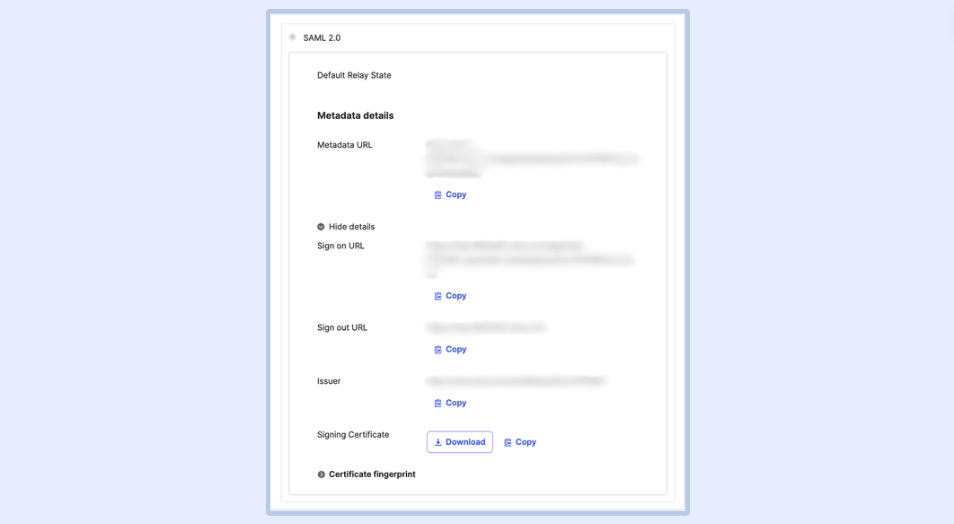
On the Sign On tab then click the More details disclosure under the SAML 2.0 Metadata details section and copy the values mentioned below:
- Sign on URL
- Sign out URL (Optional)
- Issuer URL
- Signing Certificate
Step 4:
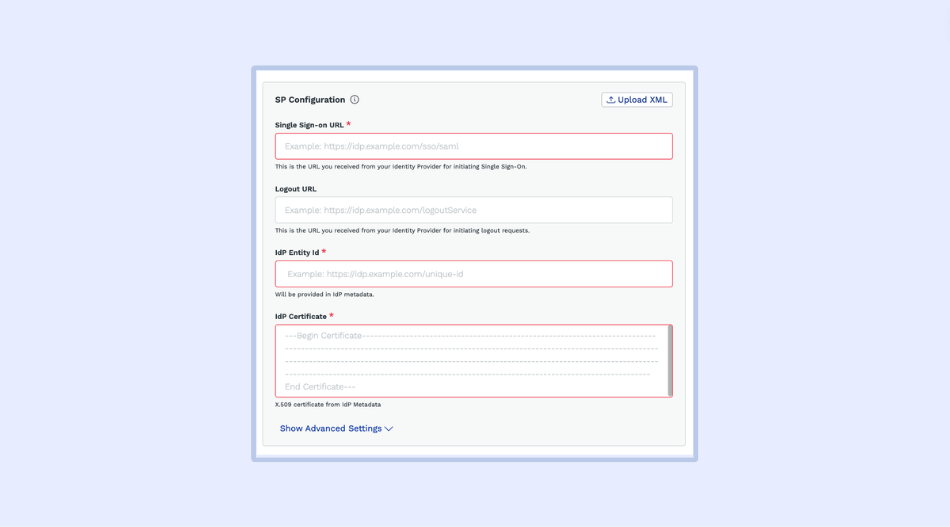
- Back on SpotDraft, navigate to Settings → Security and Identity → SAML SSO.
- Paste the values taken in Step 1 above into the SP configuration section.
- Click on ‘Save and Enable’.
💡 For SP-initiated login, go to: https://app.spotdraft.com/auth/login-sso.