Developer Settings
Last updated: May 19, 2026
💡 This comprehensive guide provides step-by-step instructions for configuring SpotDraft API credentials, setting up webhooks, and accessing webhook logs, empowering users to streamline workflows and enhance automation efficiently.
📘 Introduction
SpotDraft offers robust API functionalities and webhook integration capabilities, empowering users to streamline their workflows and enhance automation. This comprehensive guide aims to provide step-by-step instructions for configuring SpotDraft API credentials, setting up webhooks, and accessing webhook logs. For further details on SpotDraft's API and webhook features, refer to the SpotDraft Public API Documentation.
🔑 Generating API Credentials
SpotDraft API credentials are essential for authenticating requests made to SpotDraft's Public APIs. Here's how to generate API credentials:
Login to SpotDraft: Access your SpotDraft account by logging in with your credentials.
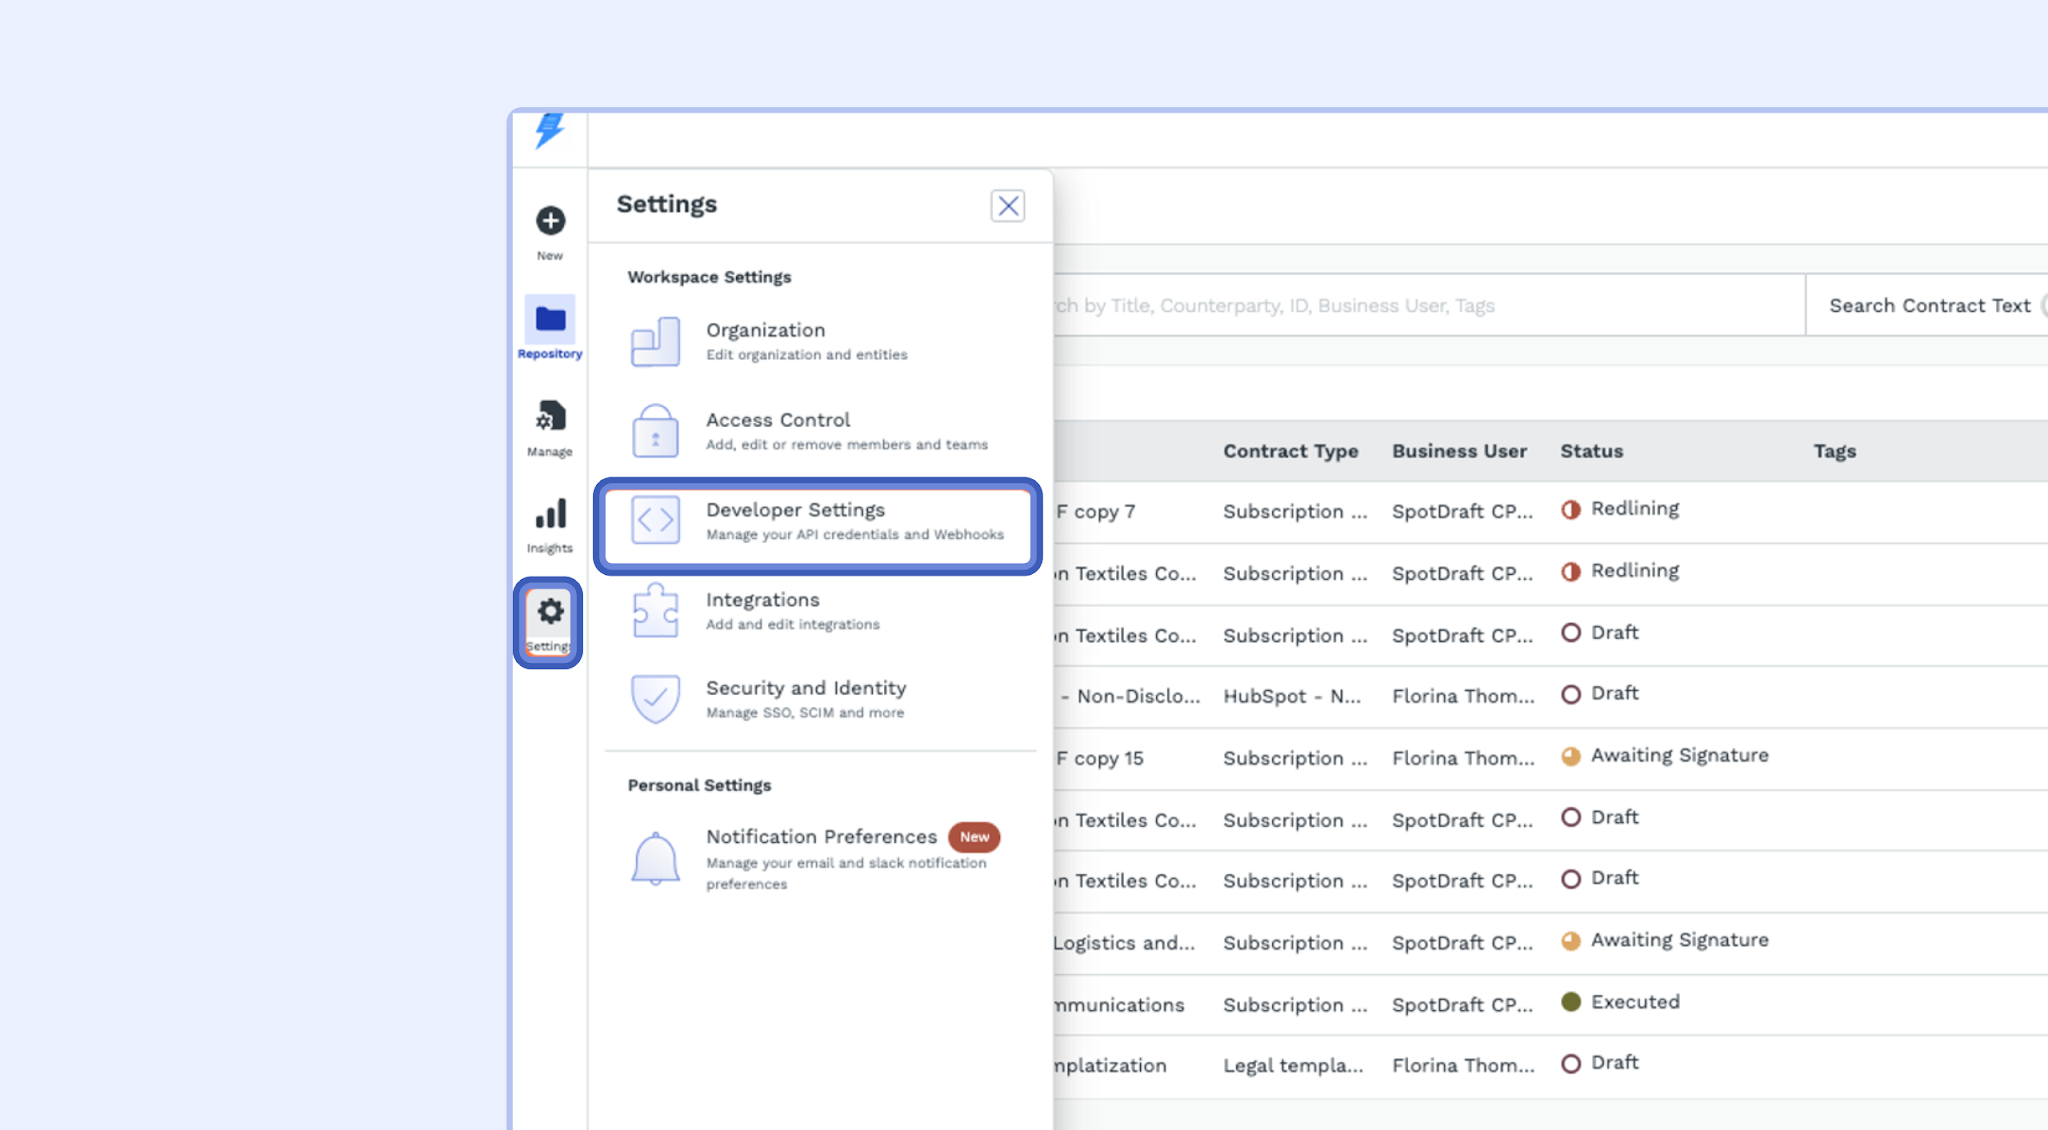
Access Developer Settings: Click on the "Settings" option in the main navigation menu and select "Developer Settings".
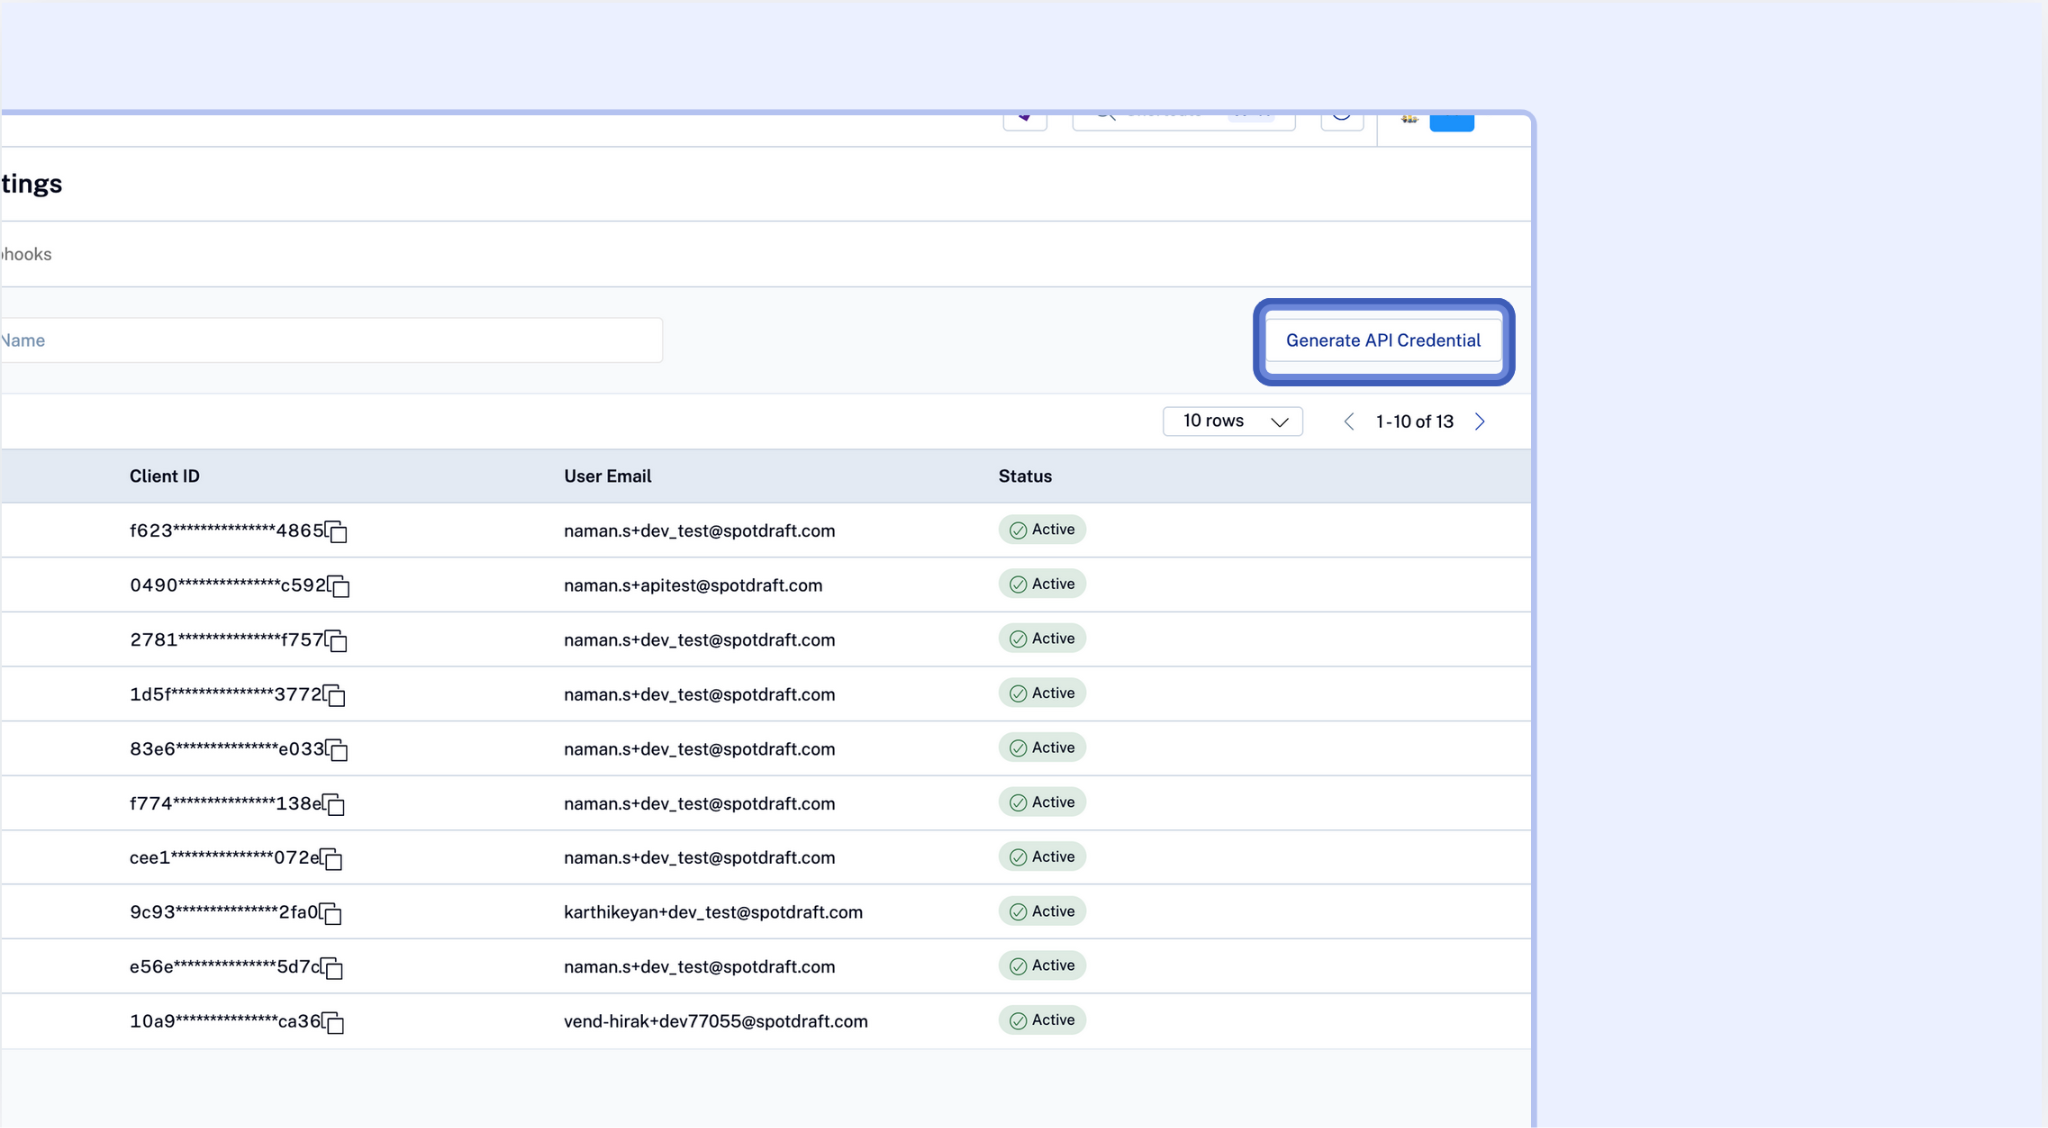
Generate API Credential: Under Developer Settings, locate the option to "Generate API Credential" and click on it.
Provide a Name: Enter a descriptive name for the API credentials you're generating.
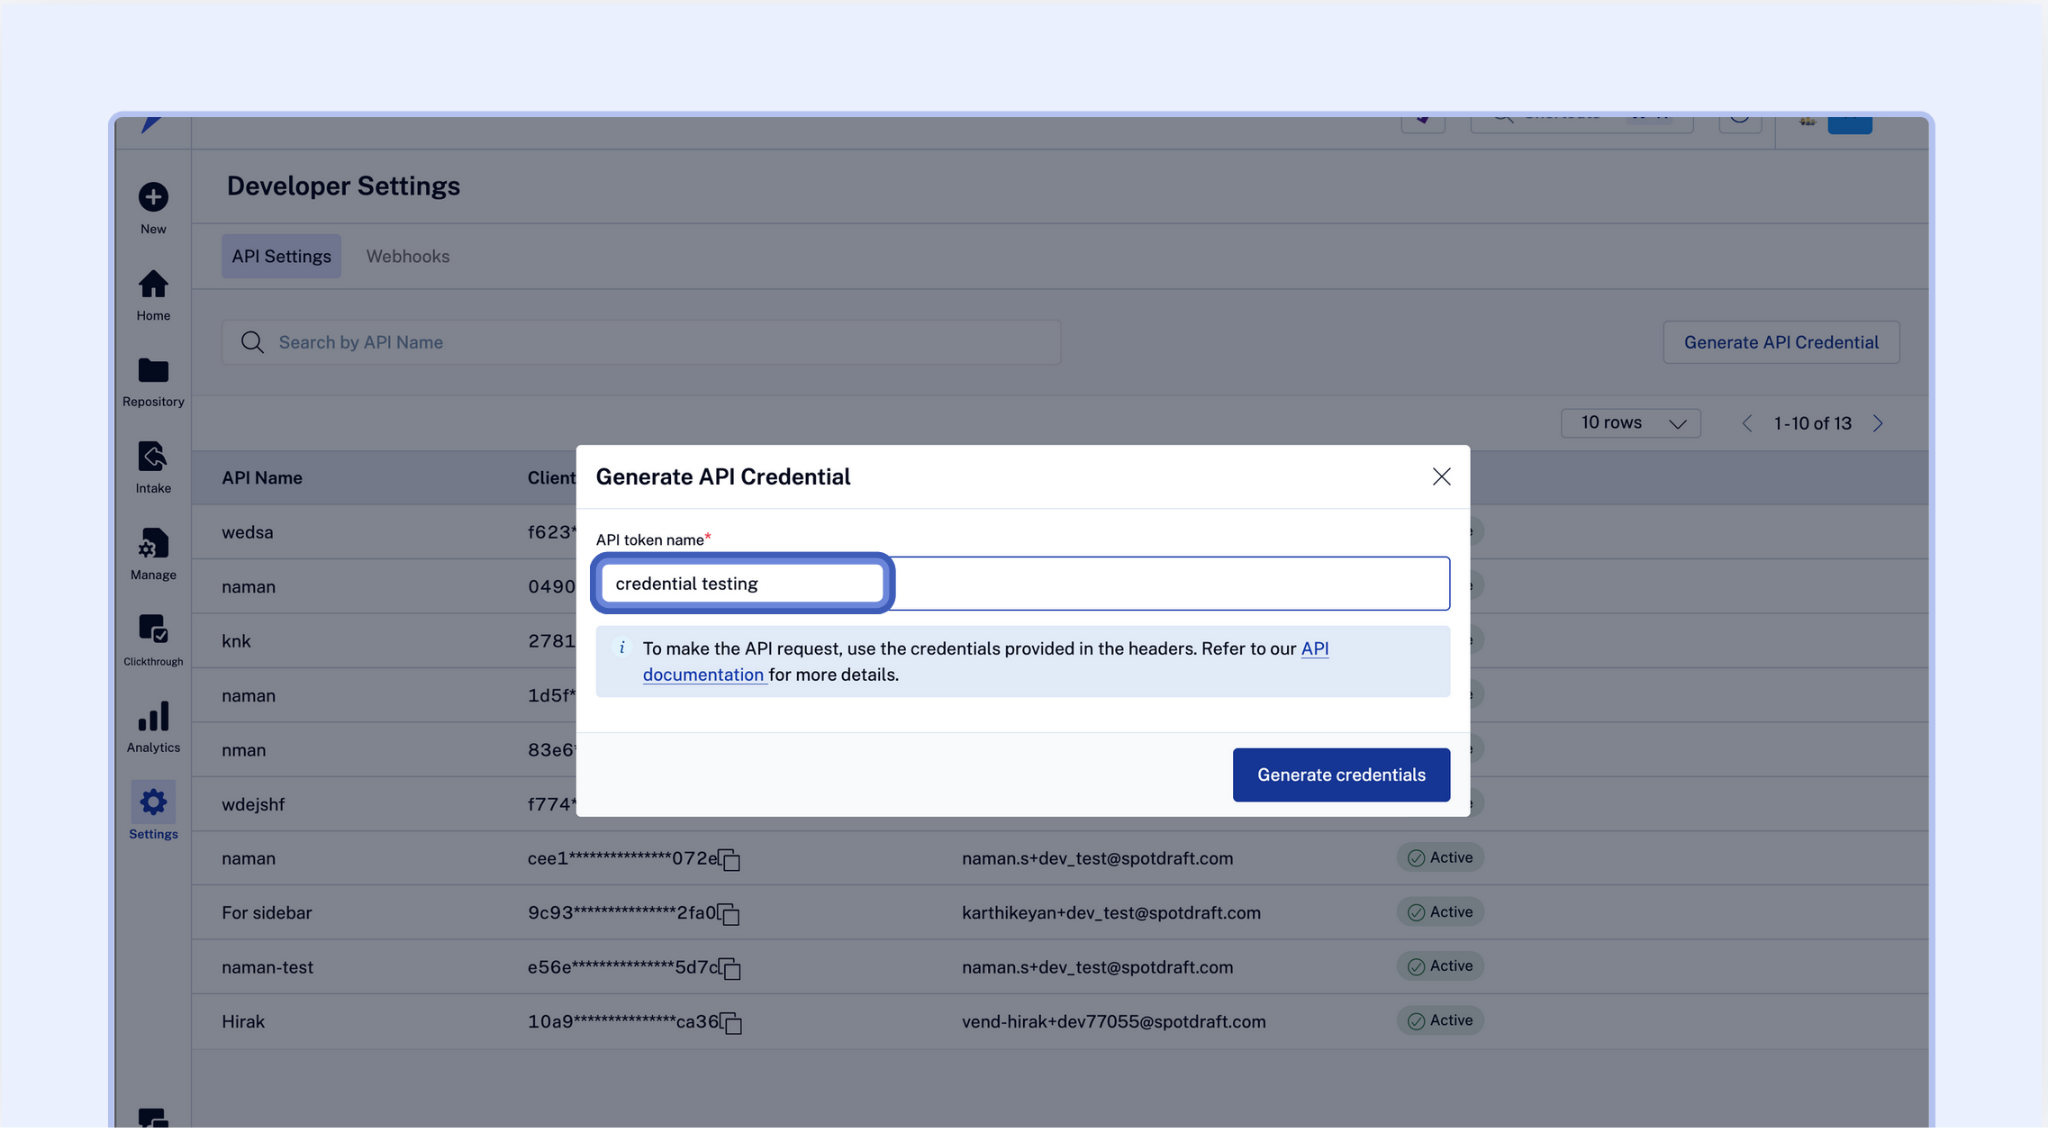
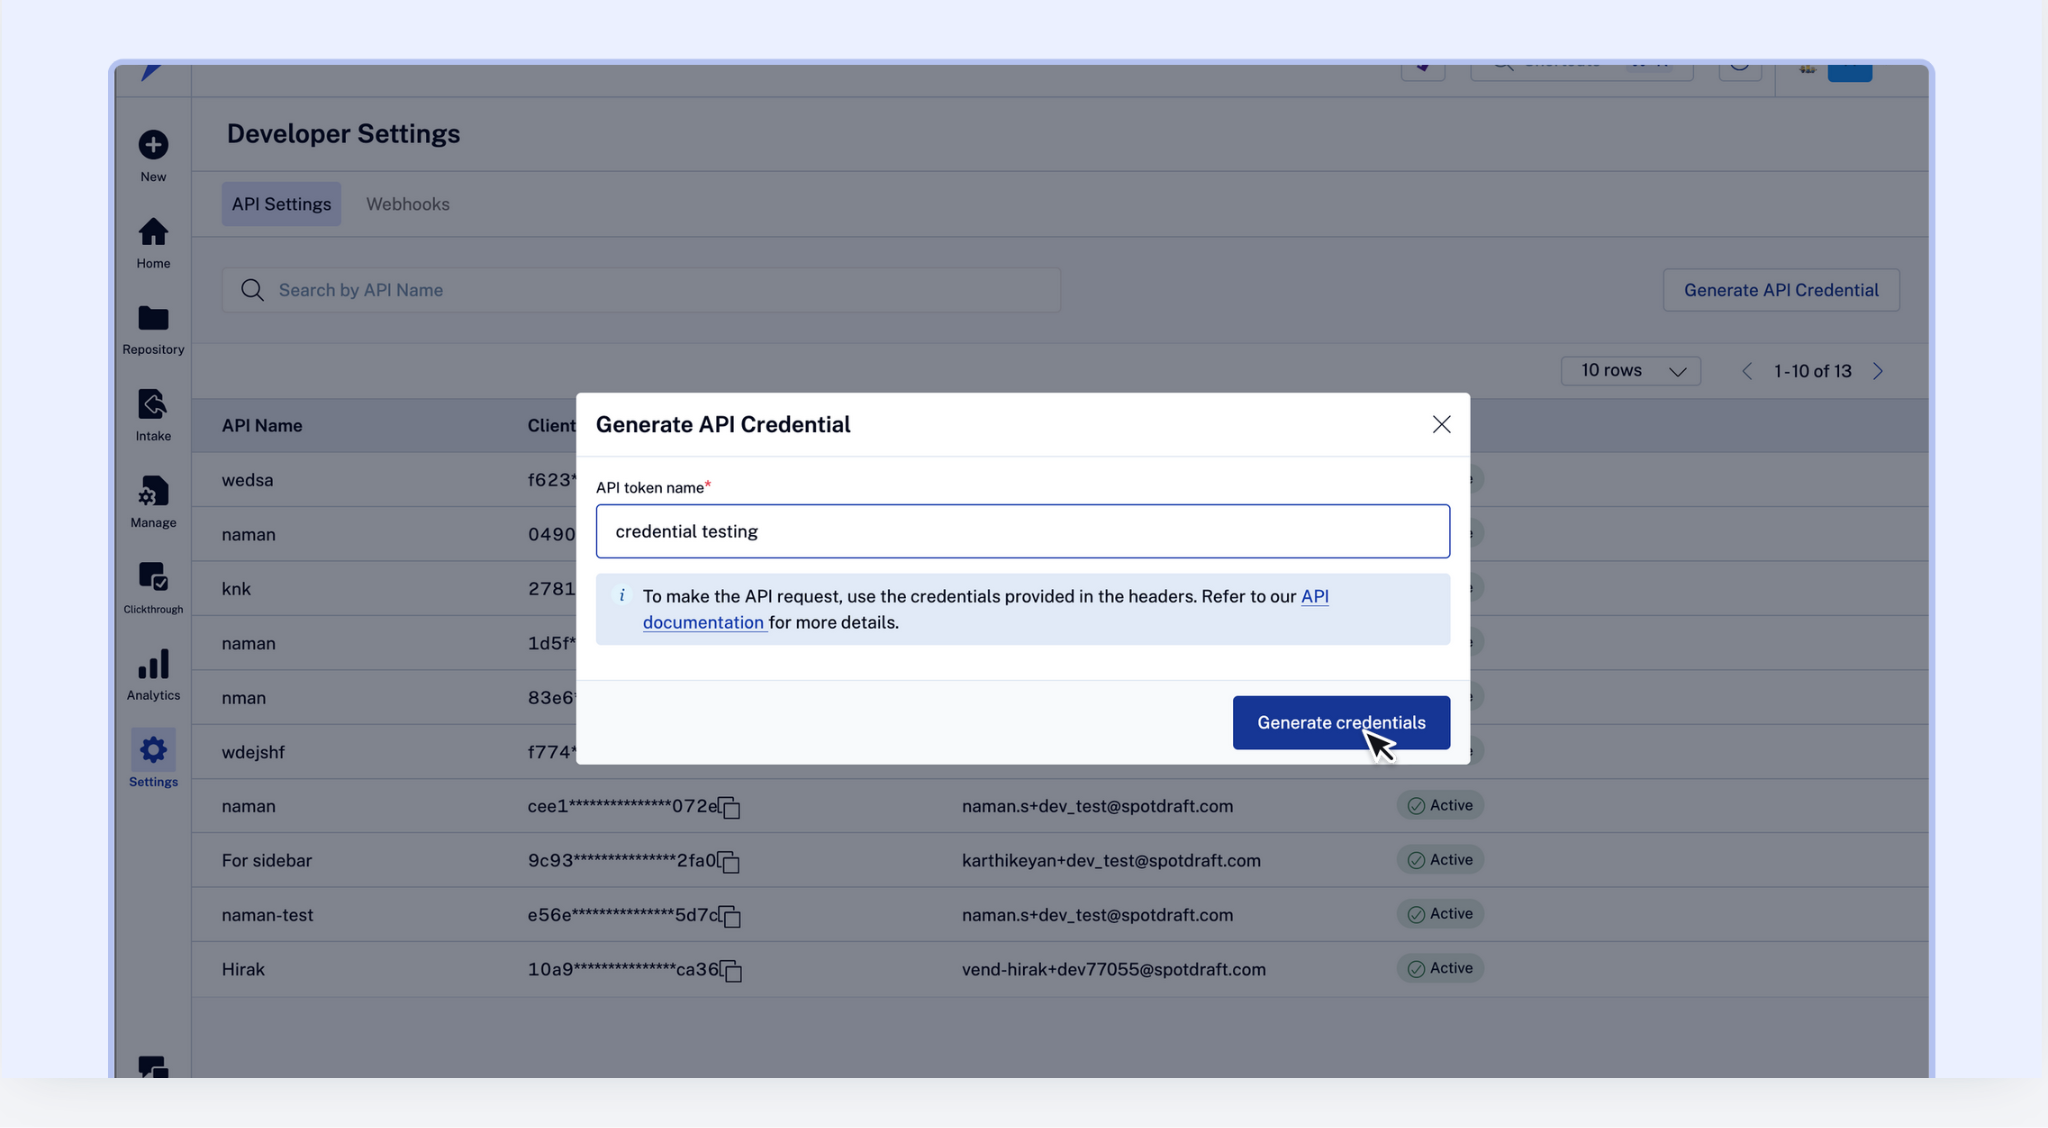
Generate Credentials: After naming the credentials, click on the "Generate" button to create them.
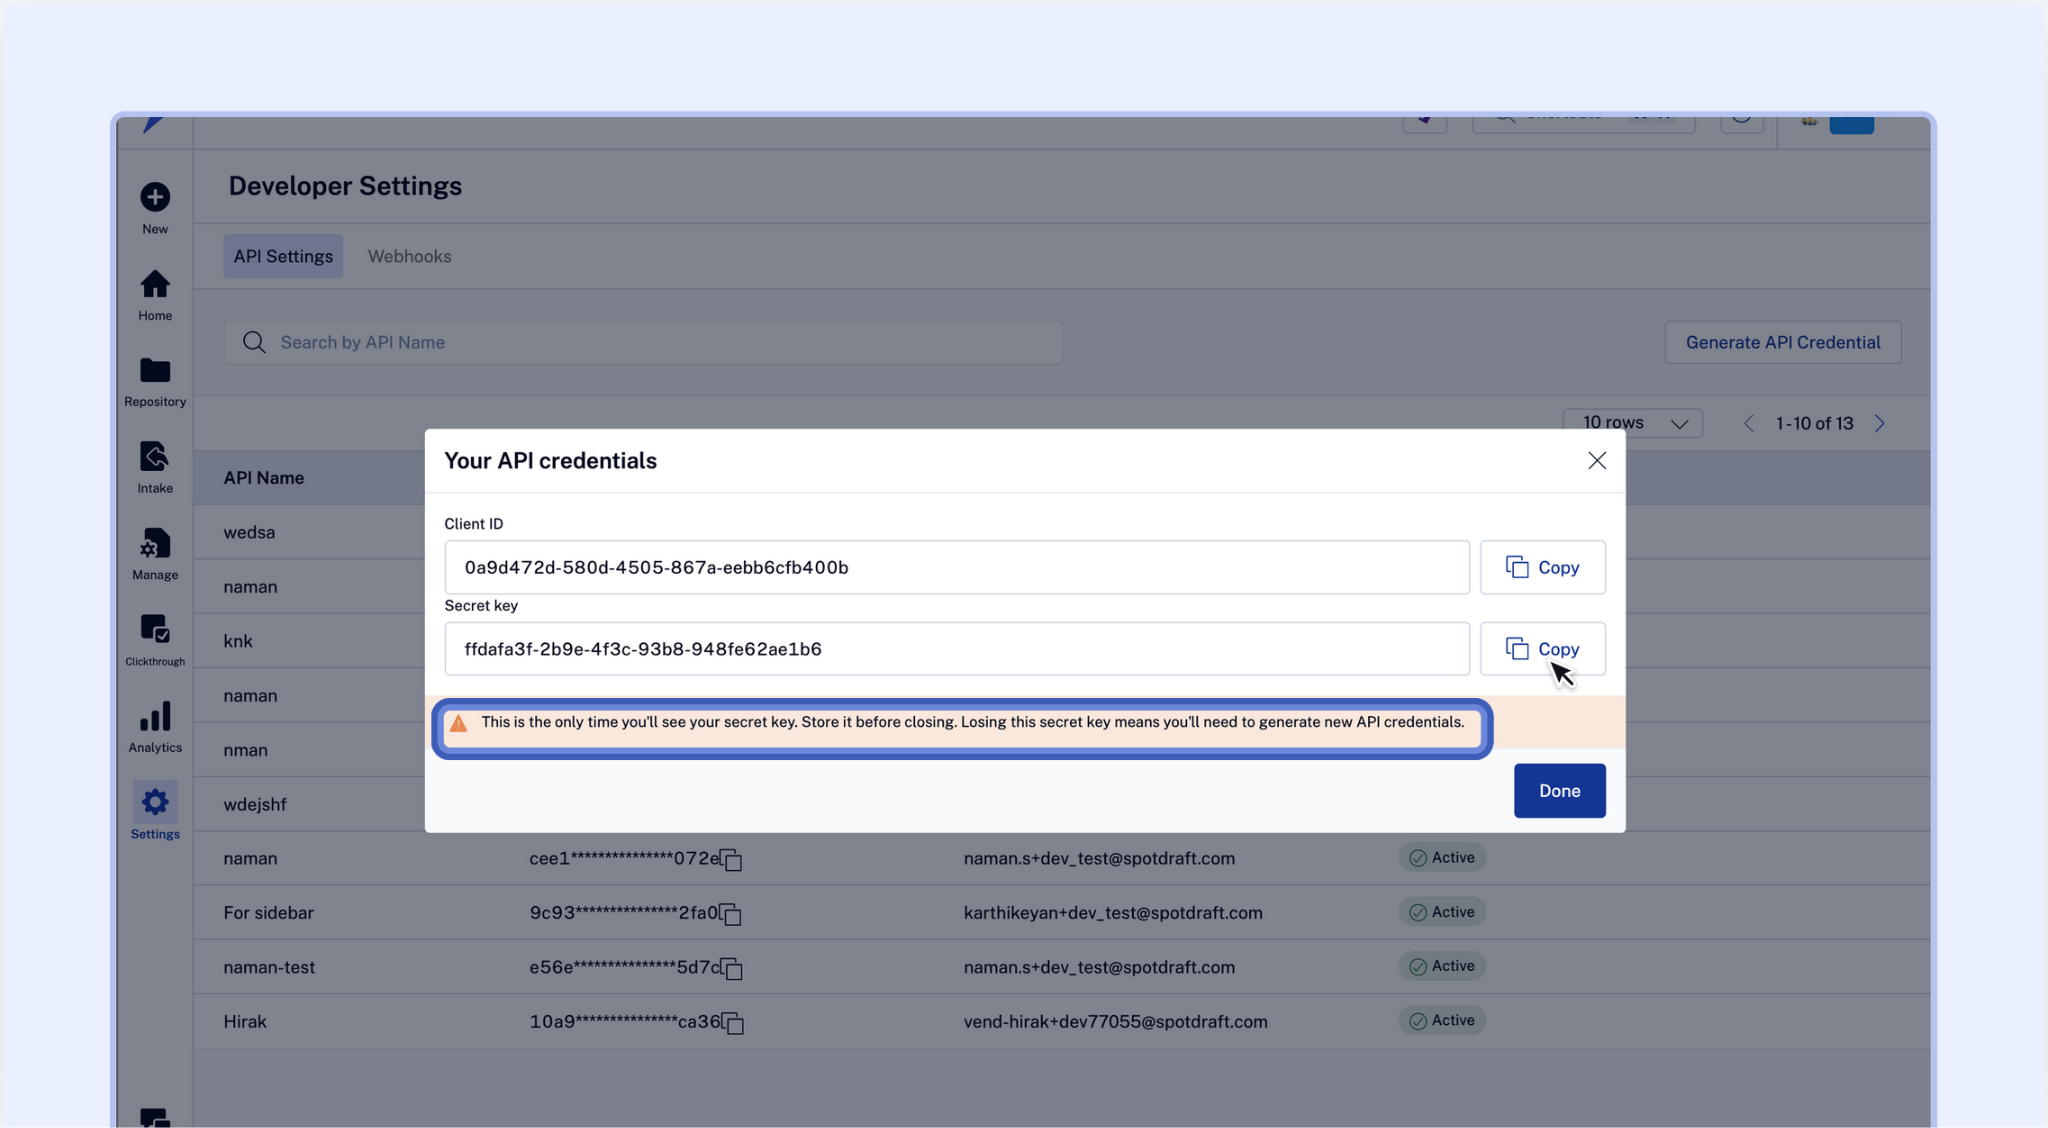
Copy Client ID and Client Secret: These credentials will be used to authenticate your API requests. Once generated, make sure to copy and securely save the Client ID and Client Secret provided. The Client Secret is only shown once and will not be visible again after you close this screen. If you lose your Client Secret, you will need to generate a new set of credentials.
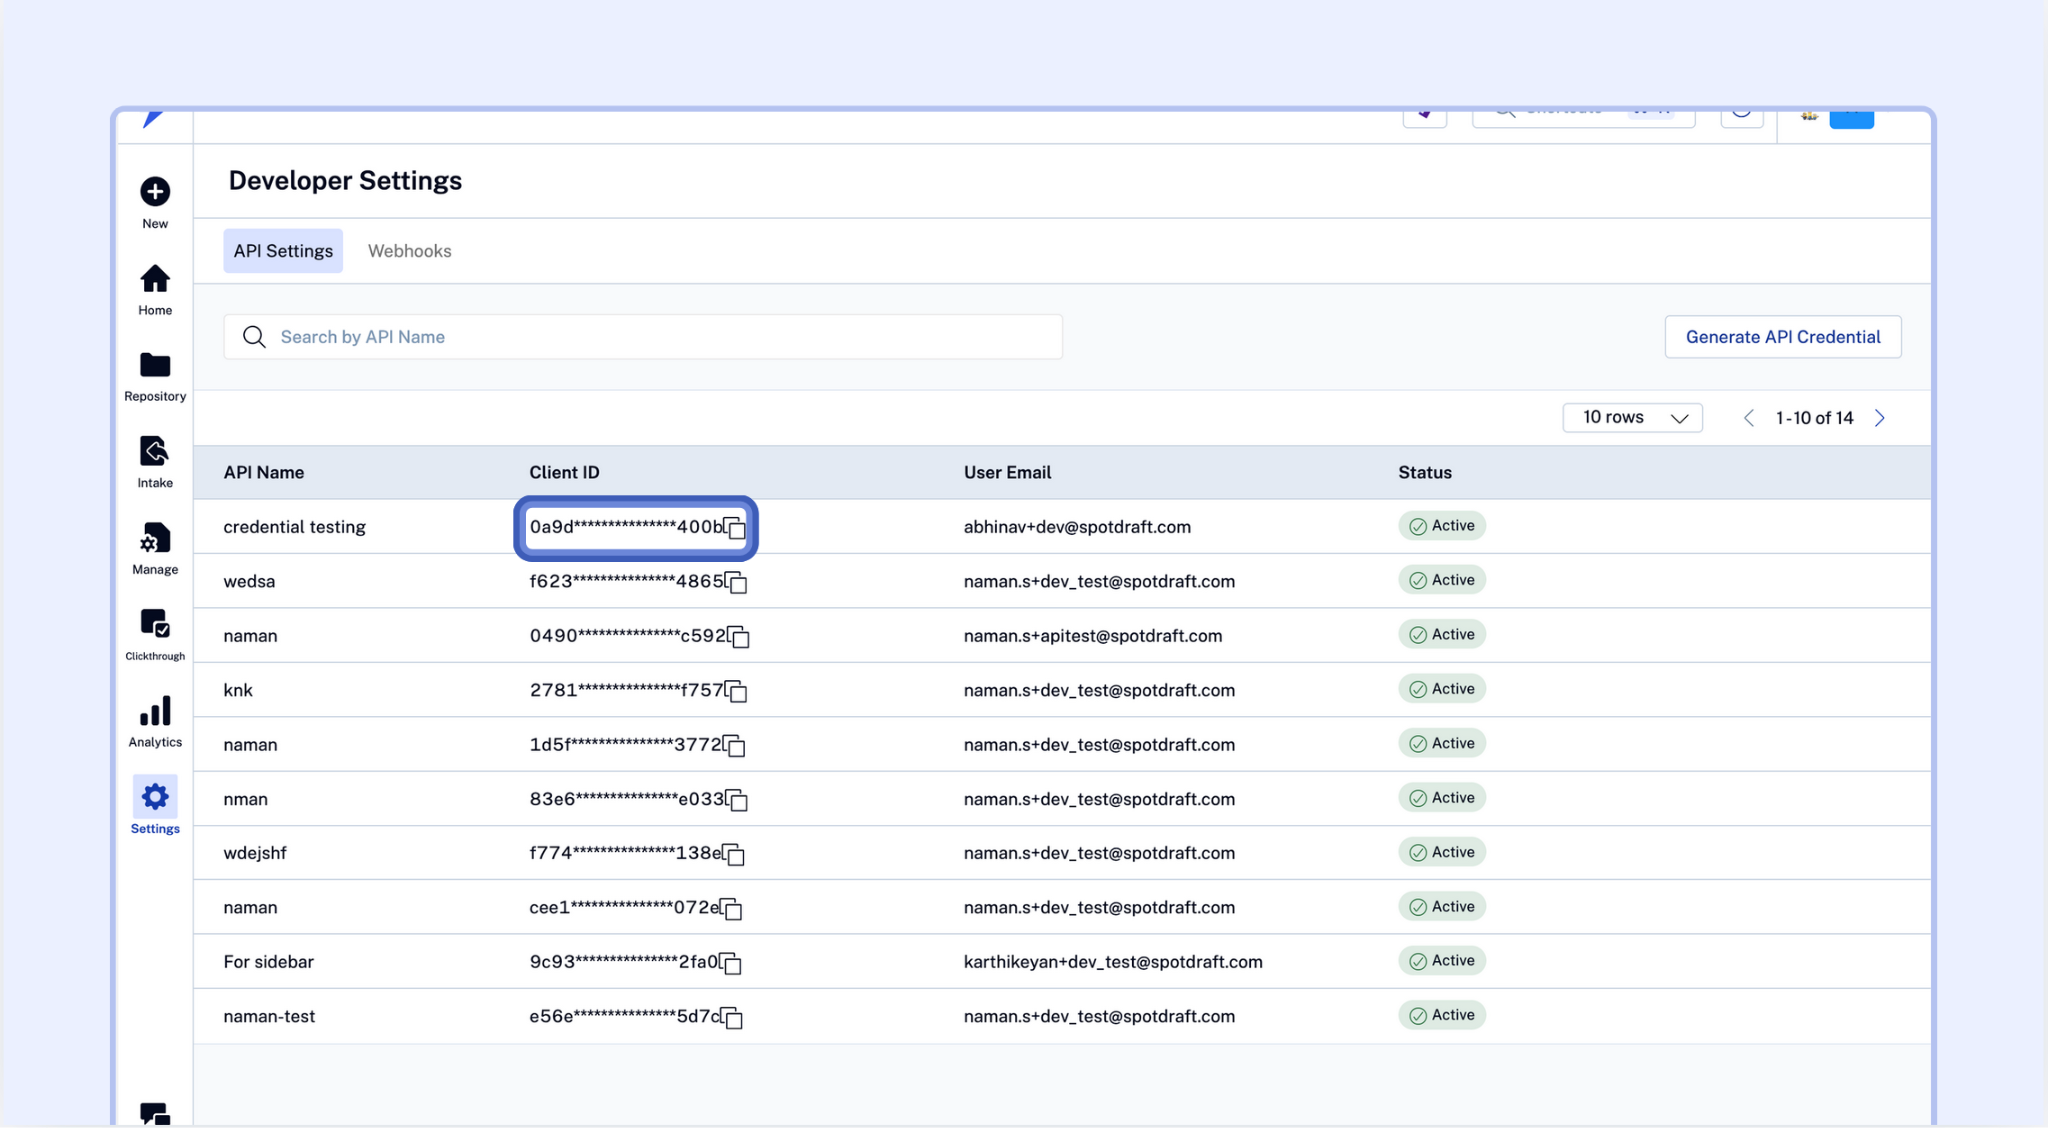
Viewing your credentials: After creation, you can view your API credentials in the Developer Settings page. You will only see credentials that you created. Admin users can see all credentials in the workspace for audit purposes, but Client Secrets remain hidden for everyone.
🔔 Setting Up Webhooks
Webhooks enable SpotDraft to send real-time notifications to your application when specific events occur. Follow these steps to set up webhooks:
Access Webhooks Section: Within your SpotDraft account, navigate to the "Webhooks" section, found within the Developer Settings.
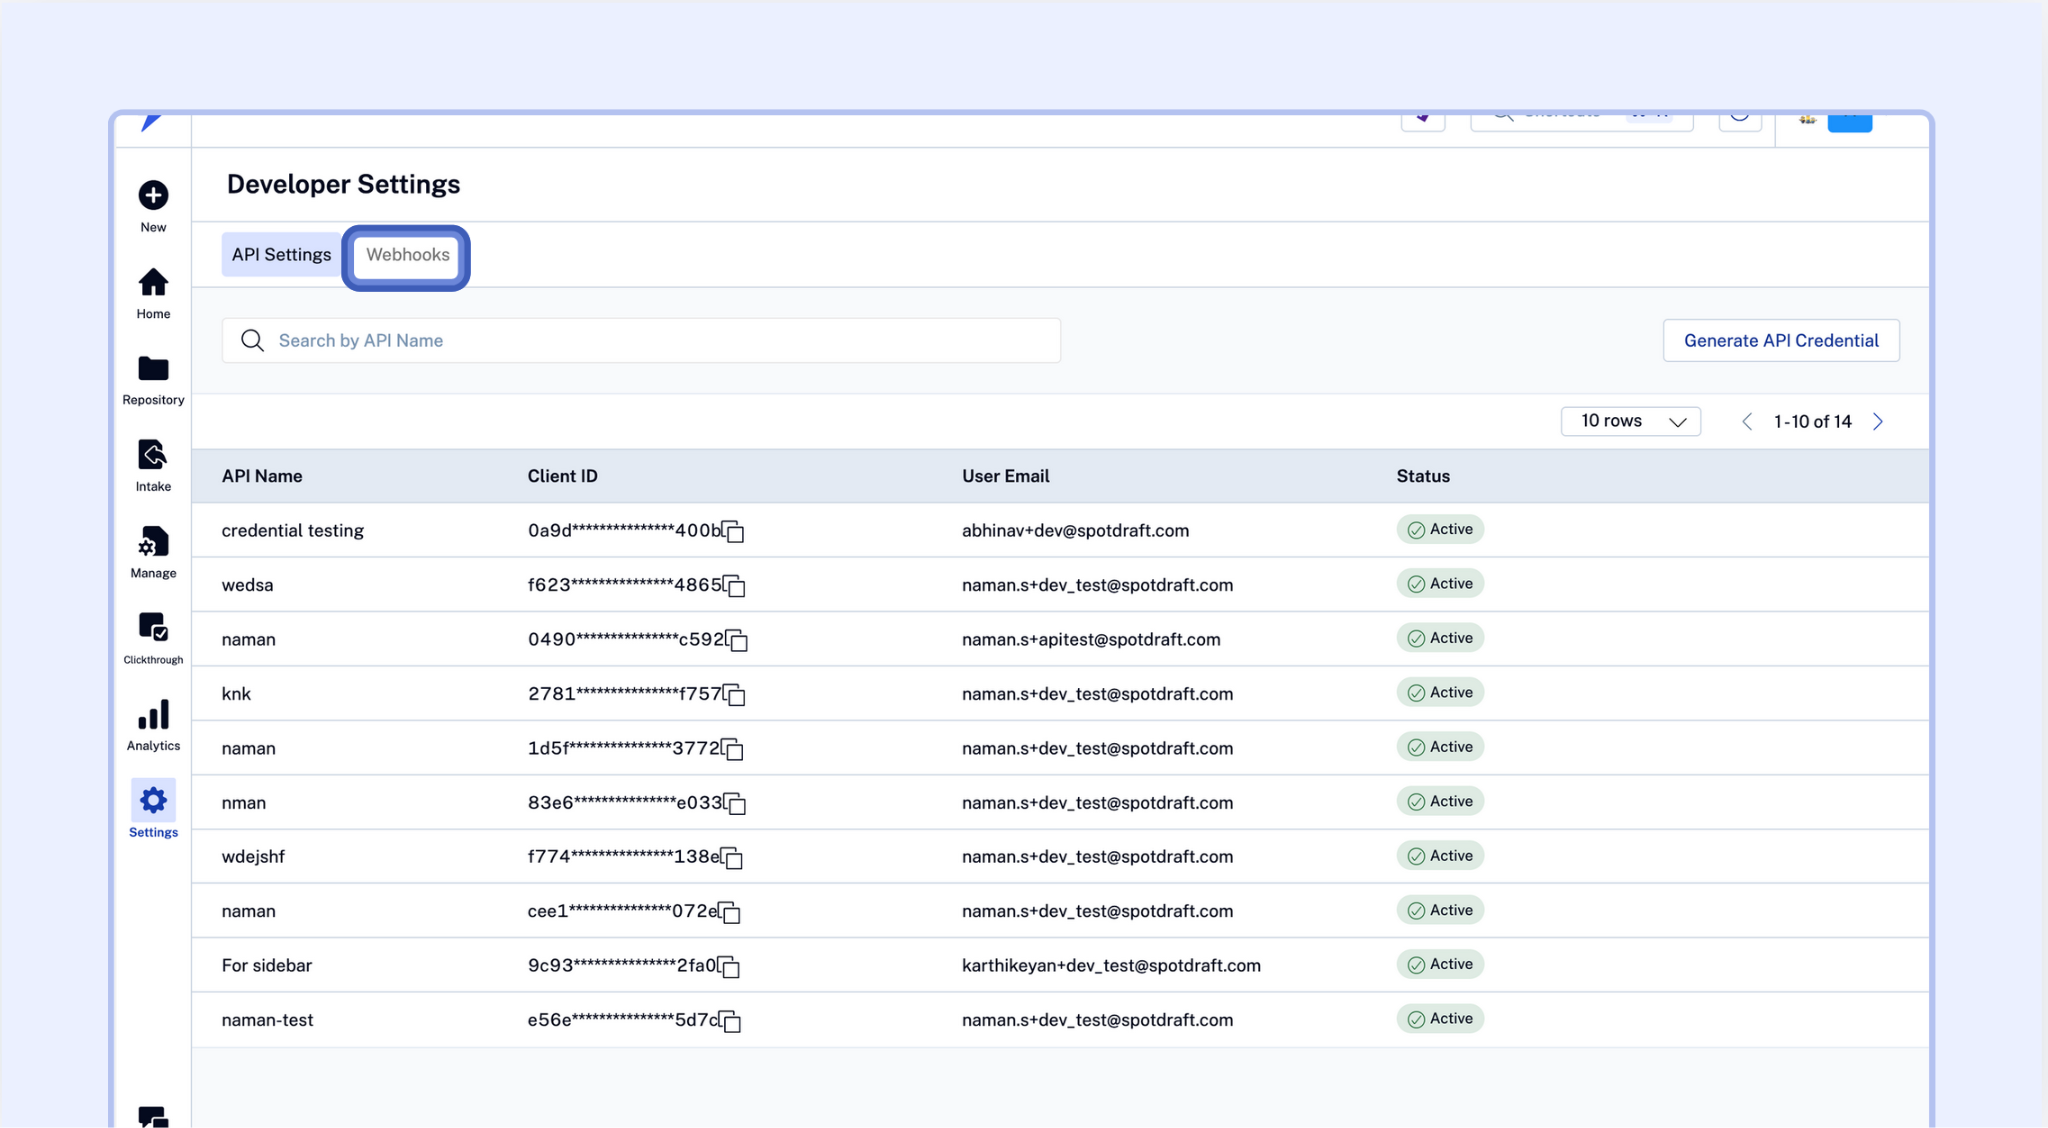
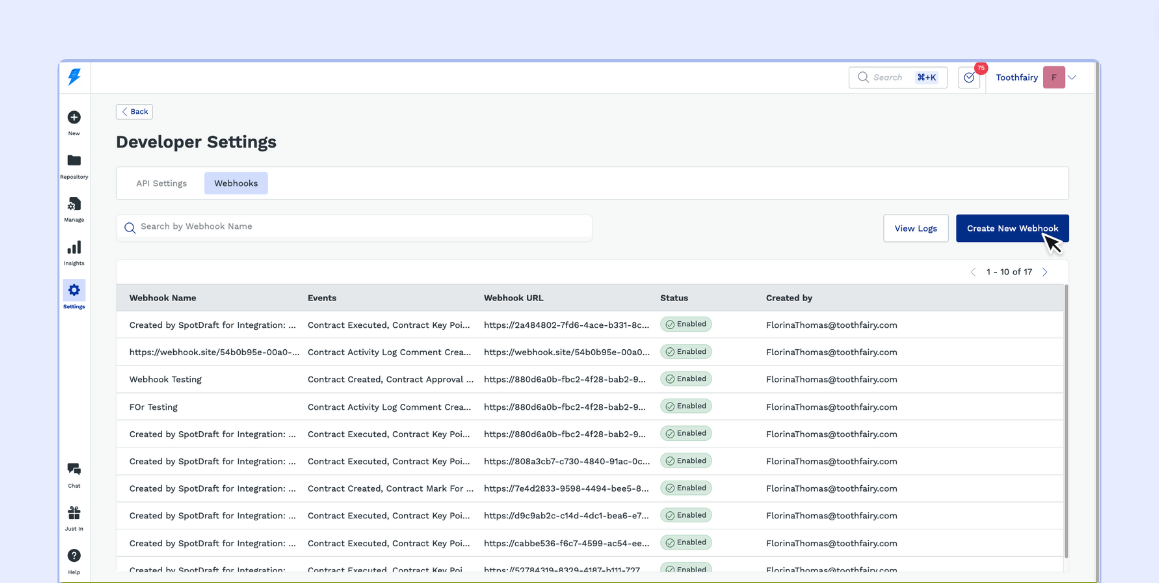
Create New Webhook: In the Webhooks section, look for an option to "Create New Webhook" and click on it.
Provide a Name: Enter a descriptive name for the webhook.
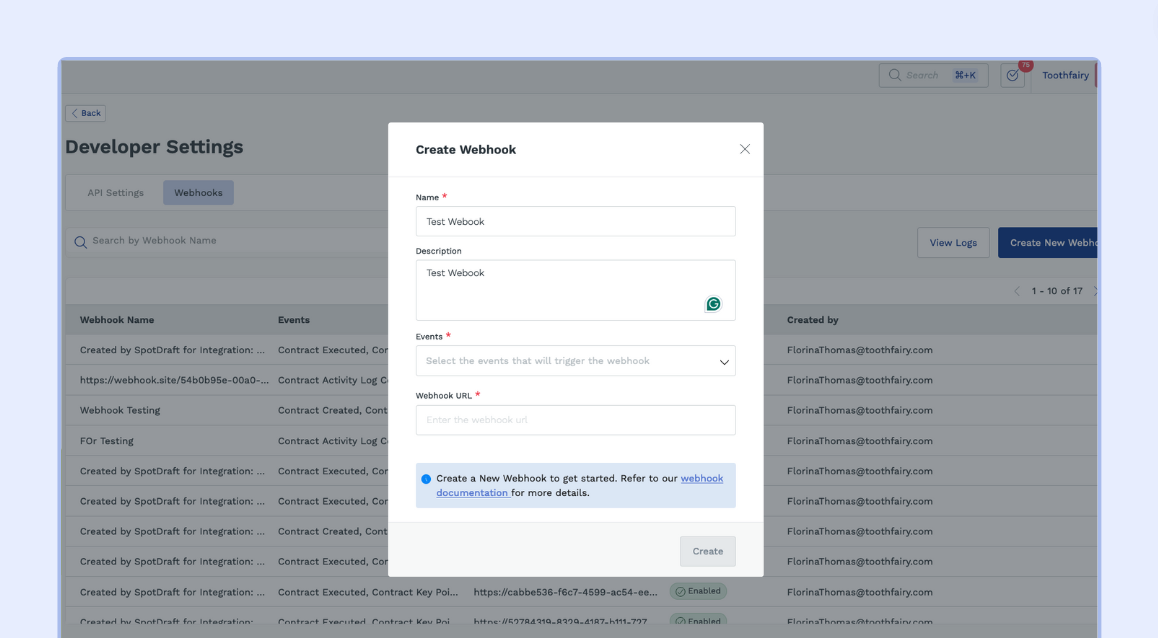
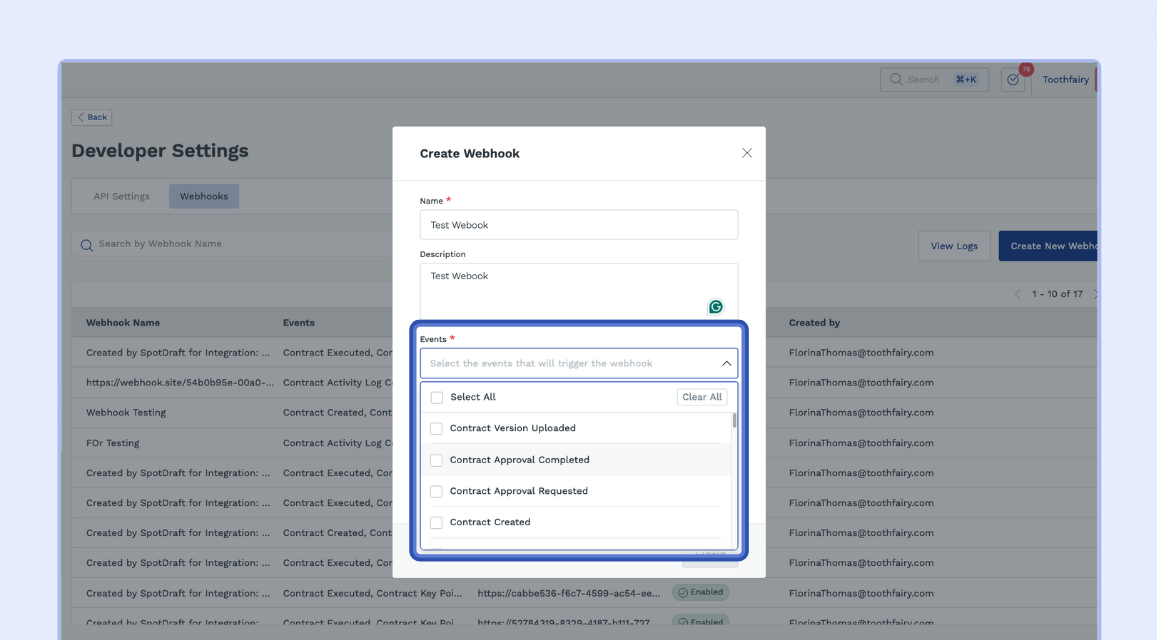
Select Trigger Events: Choose the events that should trigger the webhook from the available options.
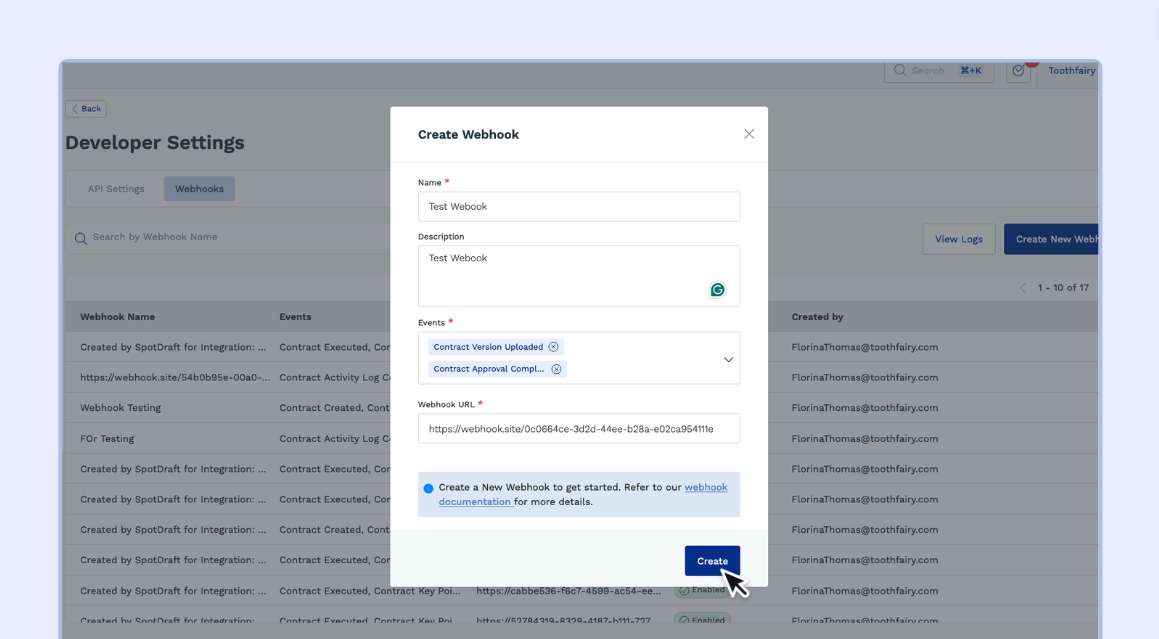
Enter Destination URL: Provide the URL or endpoint where SpotDraft will send webhook notifications.

Save and Activate: Click on the "Create" or "Save" button to activate the webhook.
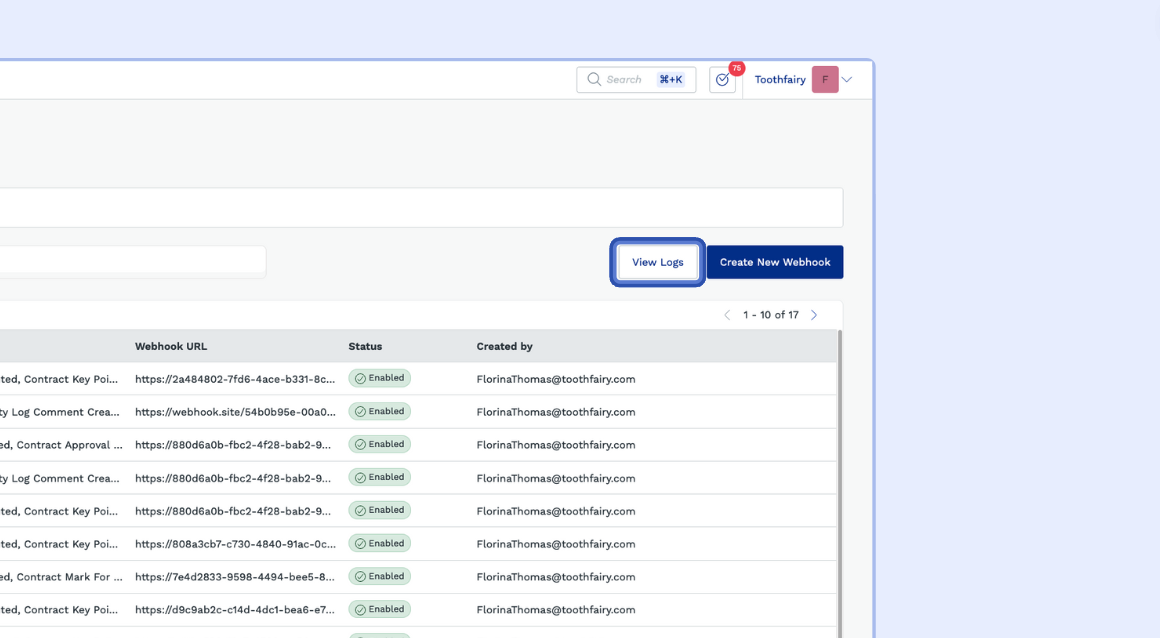
📊 Viewing Webhook Logs
SpotDraft allows you to view logs related to webhook activities for monitoring and troubleshooting purposes. Here's how to access webhook logs:
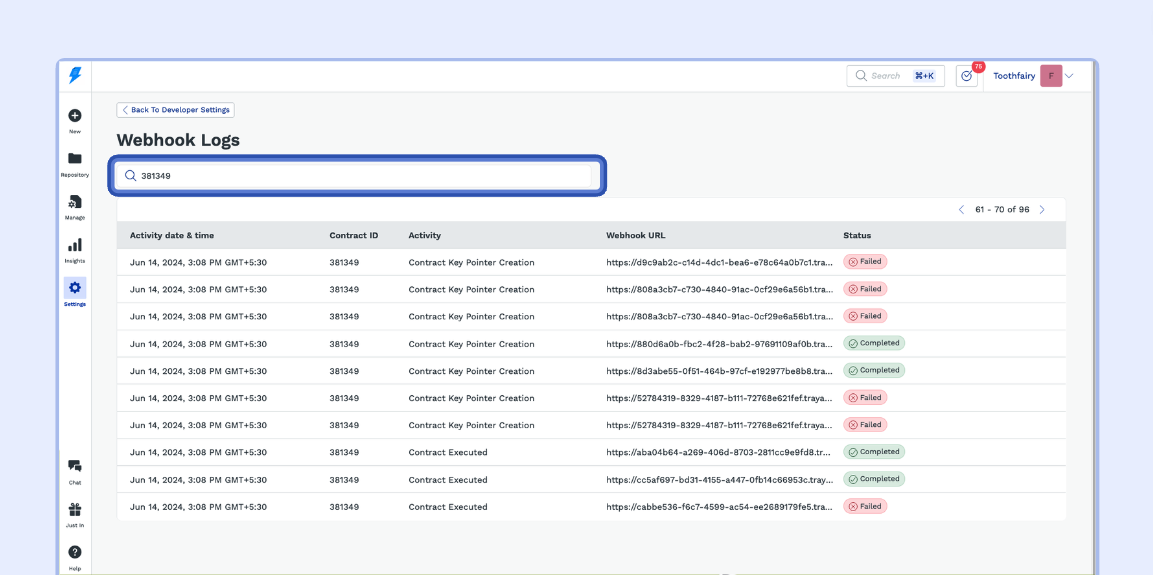
Navigate to Webhook Logs: In your SpotDraft account, locate the option to view webhook logs, usually found within the Webhooks section or under Developer Settings.
Search by Contract Id: If needed, search for specific webhook logs by contract ID to narrow down the results.
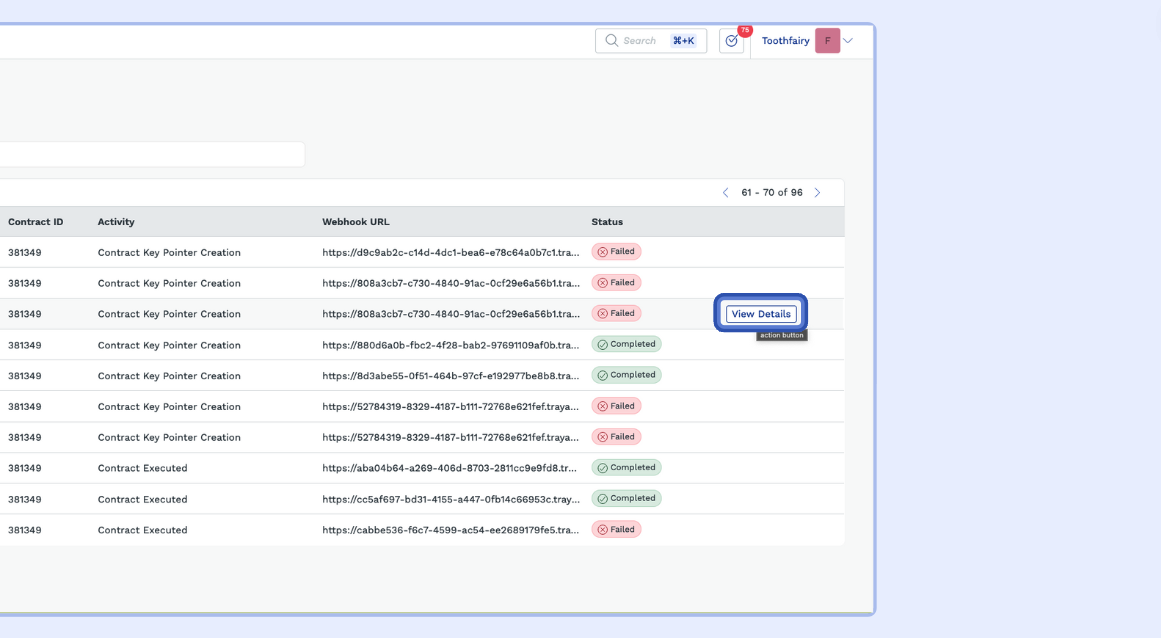
View Details: Click on "View Details" for a webhook trigger to get more information about the error.
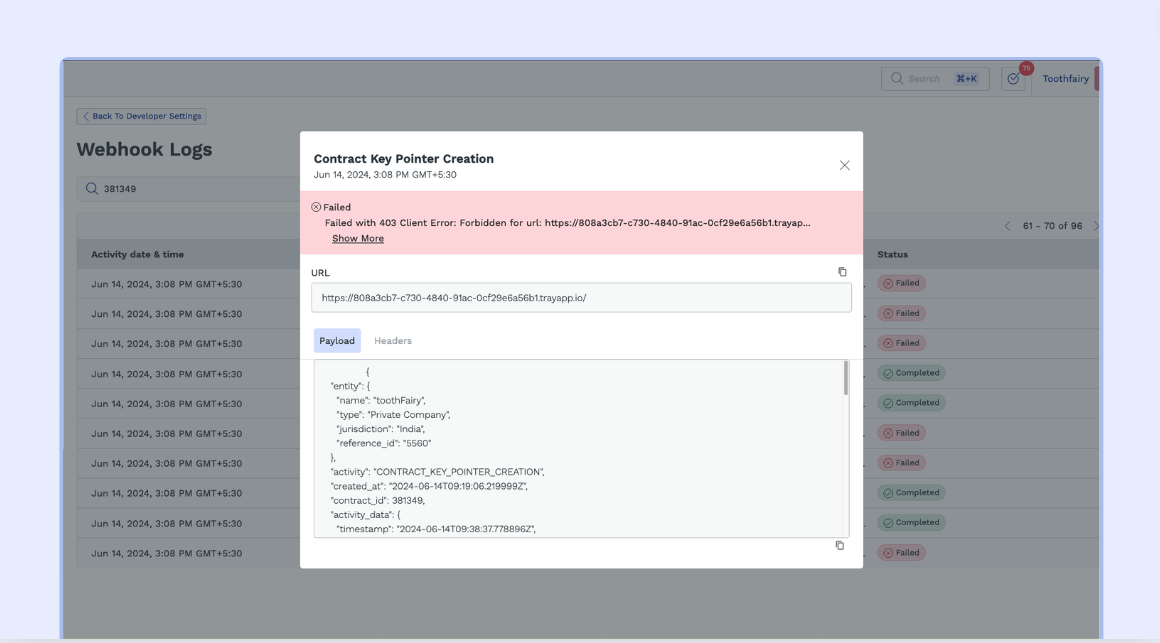
Check Payload: To inspect the payload of a webhook, click on "View More" and then select the "Payload" button.
🔚 Conclusion
In conclusion, configuring SpotDraft API credentials, setting up webhooks, and accessing webhook logs are crucial steps in leveraging SpotDraft's automation capabilities effectively. By following the steps outlined in this guide, users can seamlessly integrate SpotDraft with their existing systems and workflows, enhancing efficiency and productivity.