Setting Up Signature Settings in Workflows
Last updated: May 12, 2026
This guide explains how to configure Signature Settings (including conditional signatories), which allows you to automate who signs a contract and how, based on rules you define in your workflow.
What are the Signature Settings?
Signature Settings within the Workflow Manager allow you to create rules for the entire signing process. You can automatically add specific signatories, change the signing order, and even select the e-signature service based on contract data, such as value, department, or region.
Prerequisites
Before you can configure conditional signatories in Signature Settings, ensure that all contract types in your workspace are linked to published workflows.
To verify contract type linkage:
Navigate to Manage > Contract Types. The system will display a banner showing any unlinked contract types.
You can also verify in the Workflow Manager to see which workflows are configured and whether they are Template workflows or Third Party workflows.
Once all contract types are linked to published workflows, the unlinked contract types list should be empty, and conditional signatures can then be enabled.
If contract types remain unlinked, the conditional signatures feature cannot be activated.
How to Set Up Conditional Signatories in Signature Settings
Important: Every workflow must have at least one signatory configured in the Signature Settings for document generation to work properly. Without a configured signatory, contracts created from the workflow will fail to generate. This requirement enables auto‑sign capabilities across all workflow types.
Navigate to Signature Settings in Your Workflow
Go to Manage > Workflows.
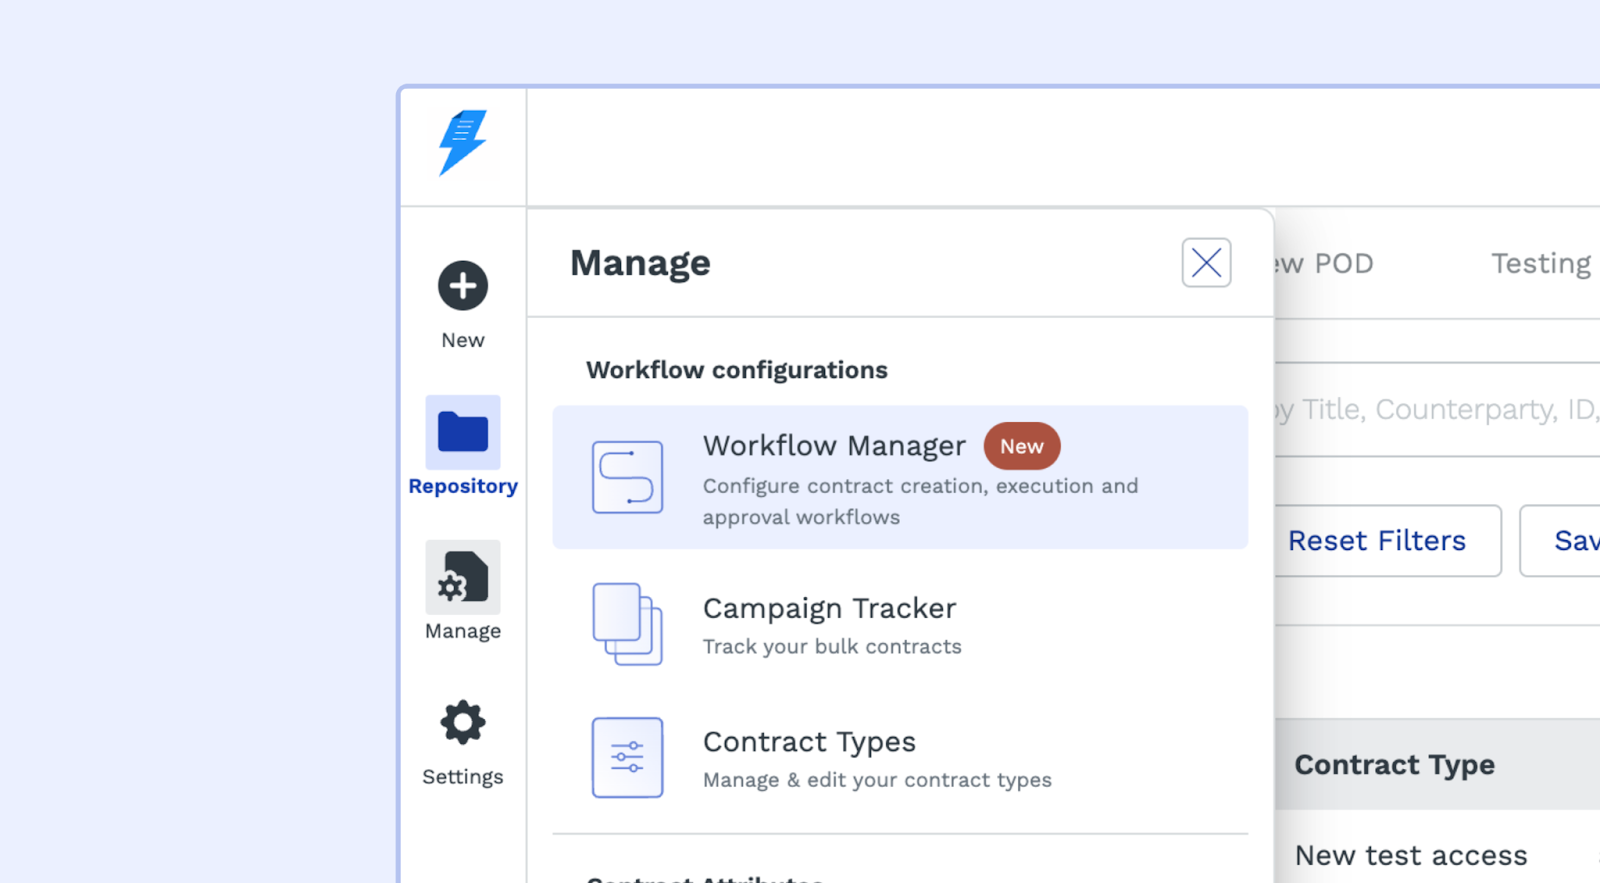
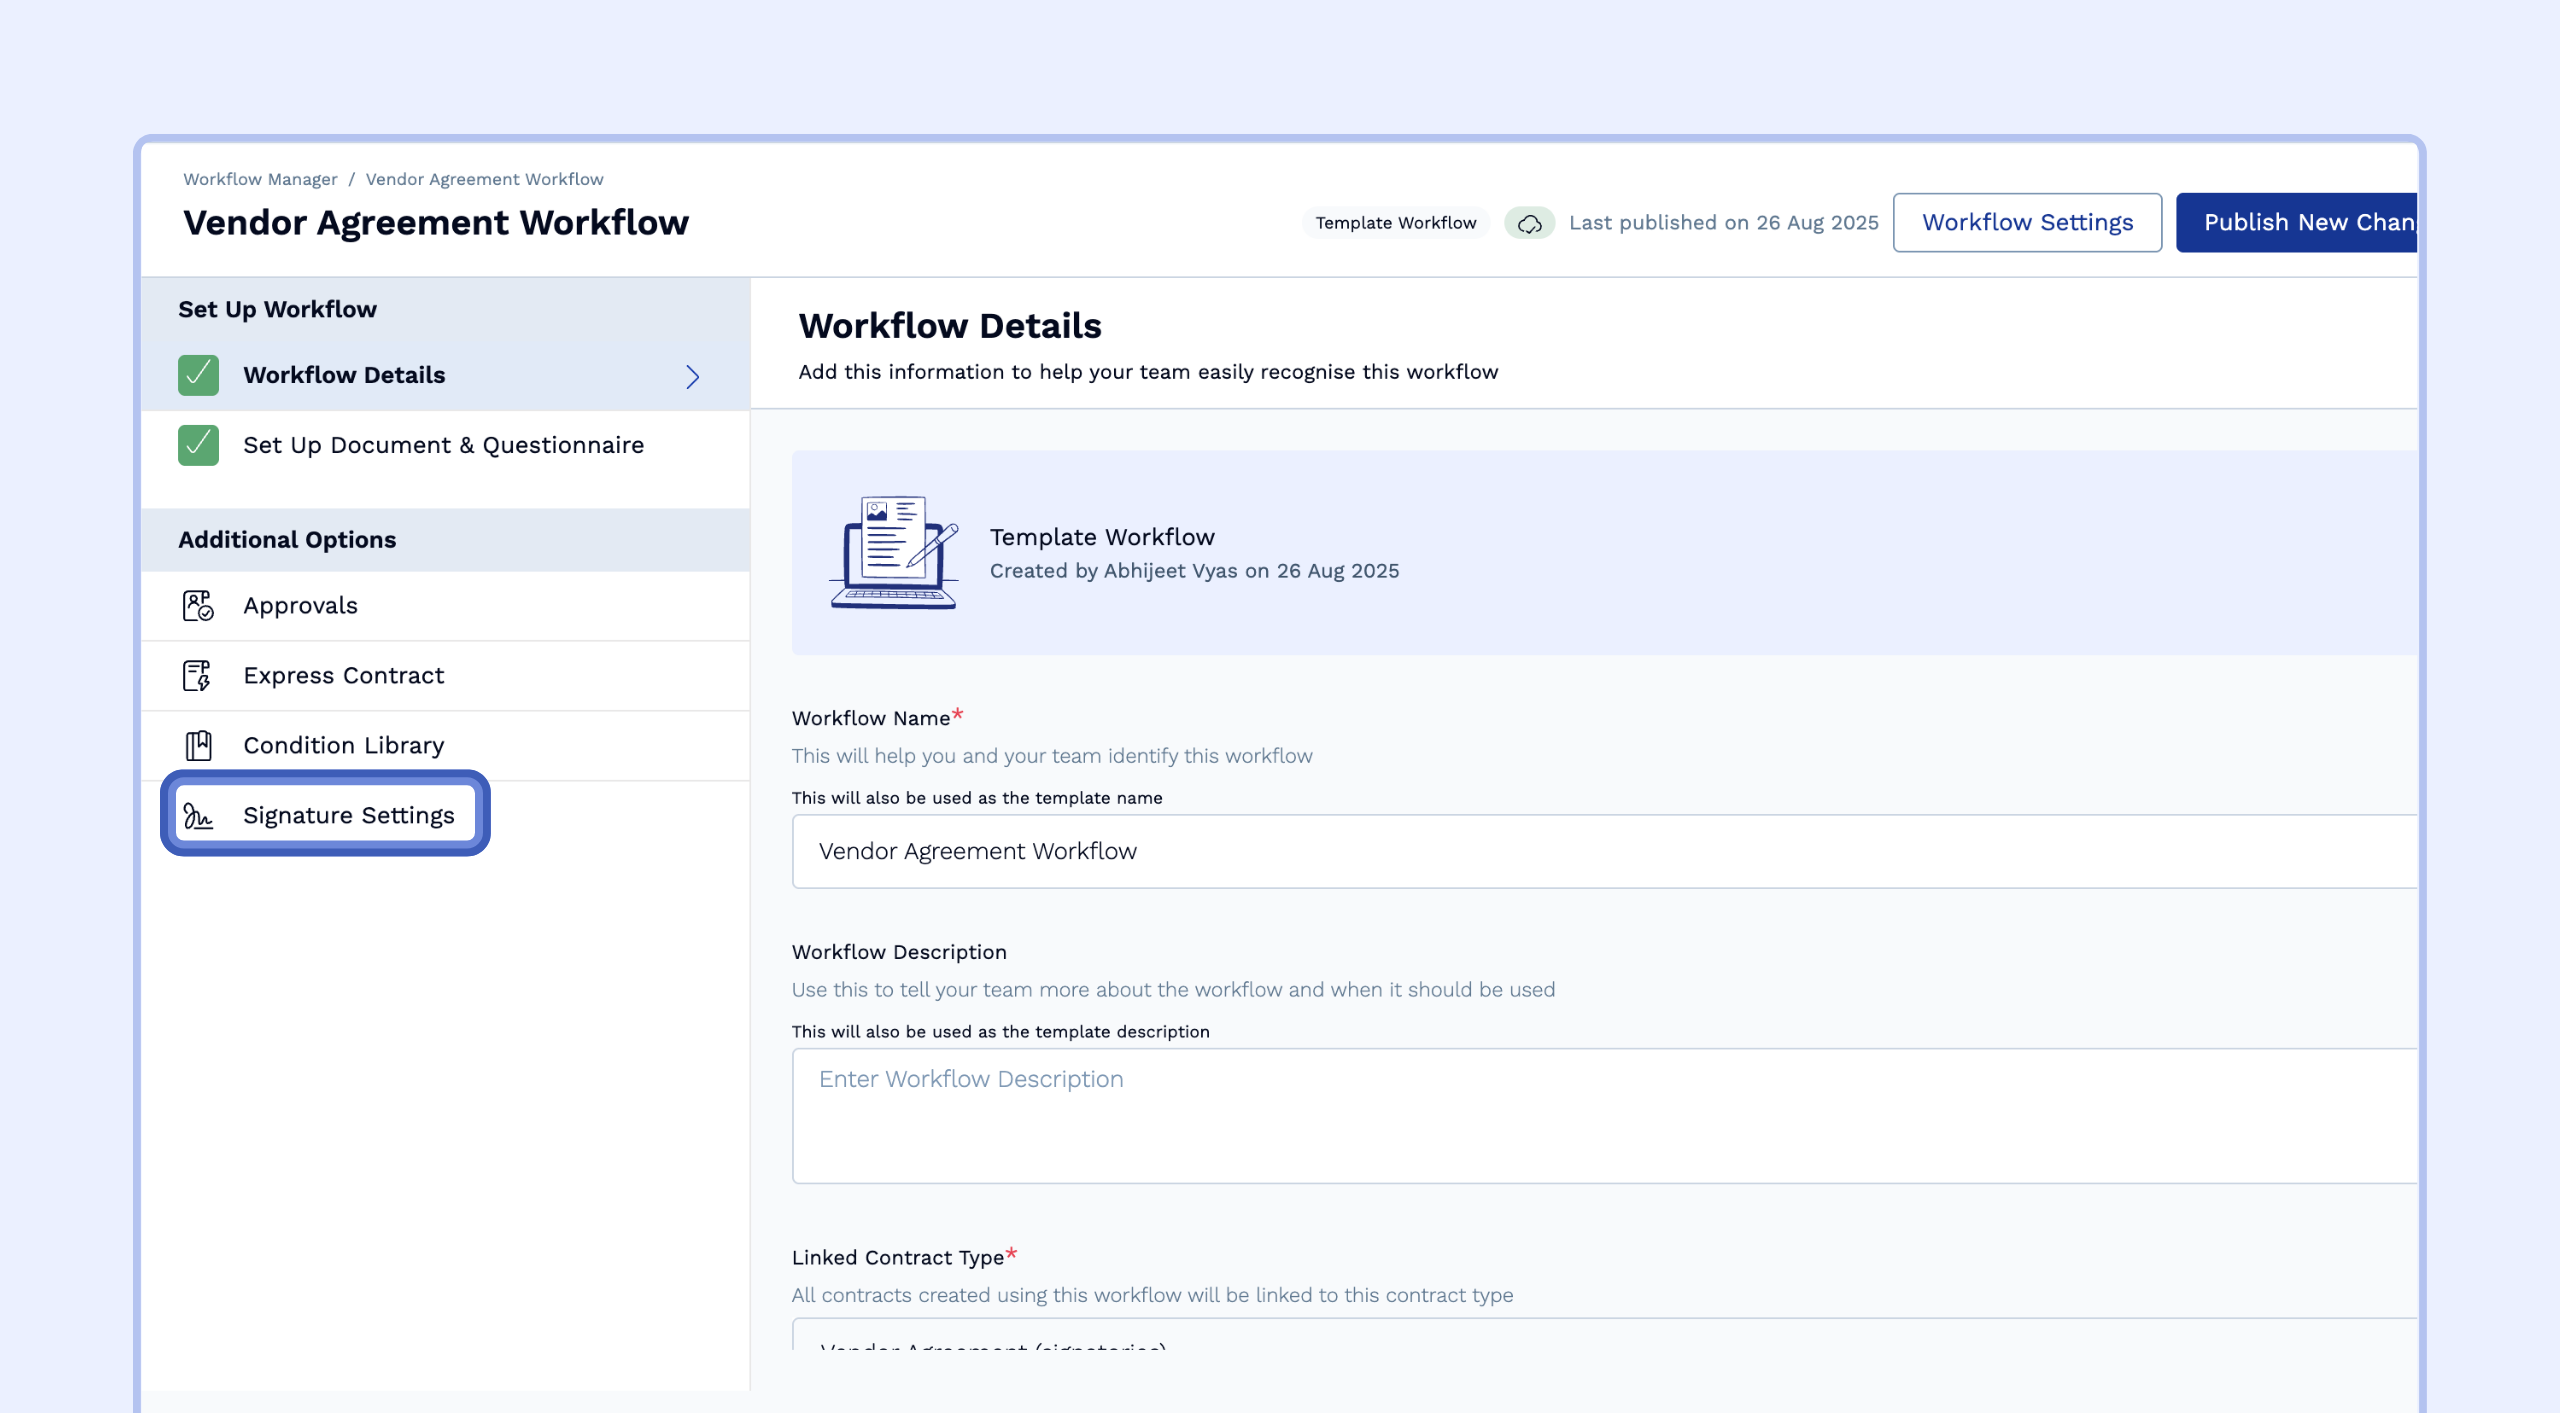
Select the workflow you want to edit.
From the left-hand menu, click on Signature Settings. This will open the configuration page.
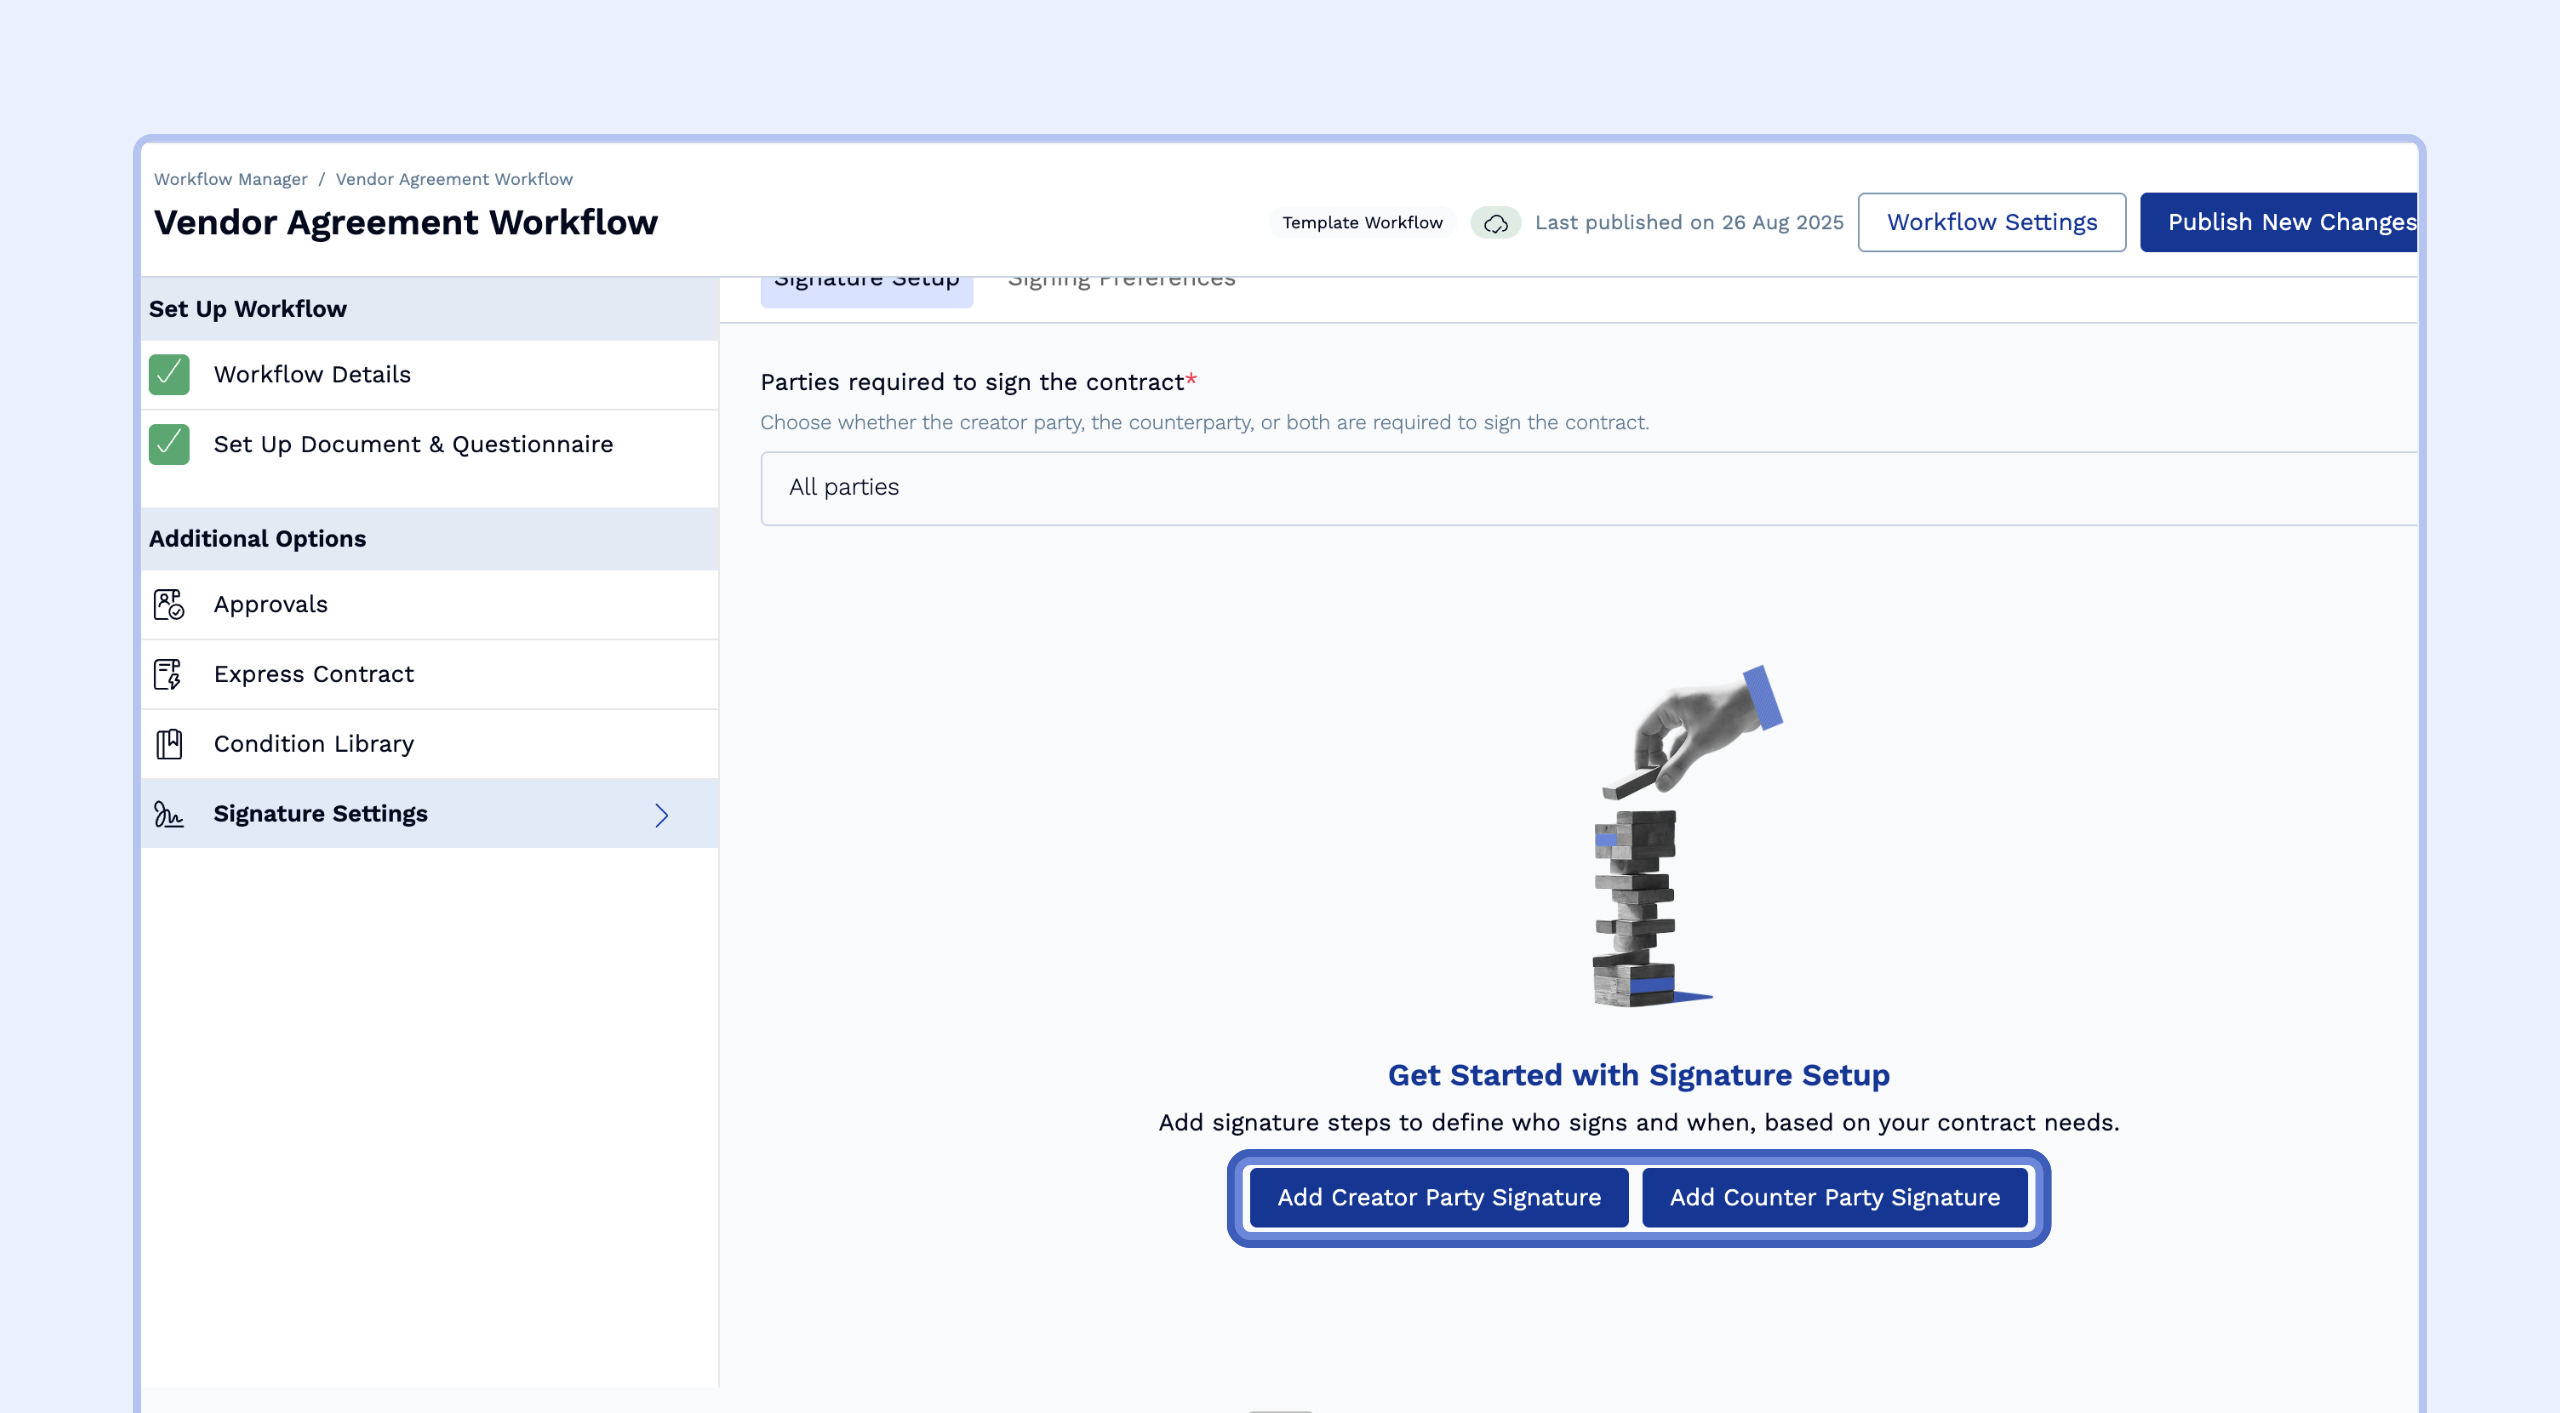
Add a Signature Step
On the Signature Setup tab, click "Add Creator Party Signature" or "Add Counter Party Signature."
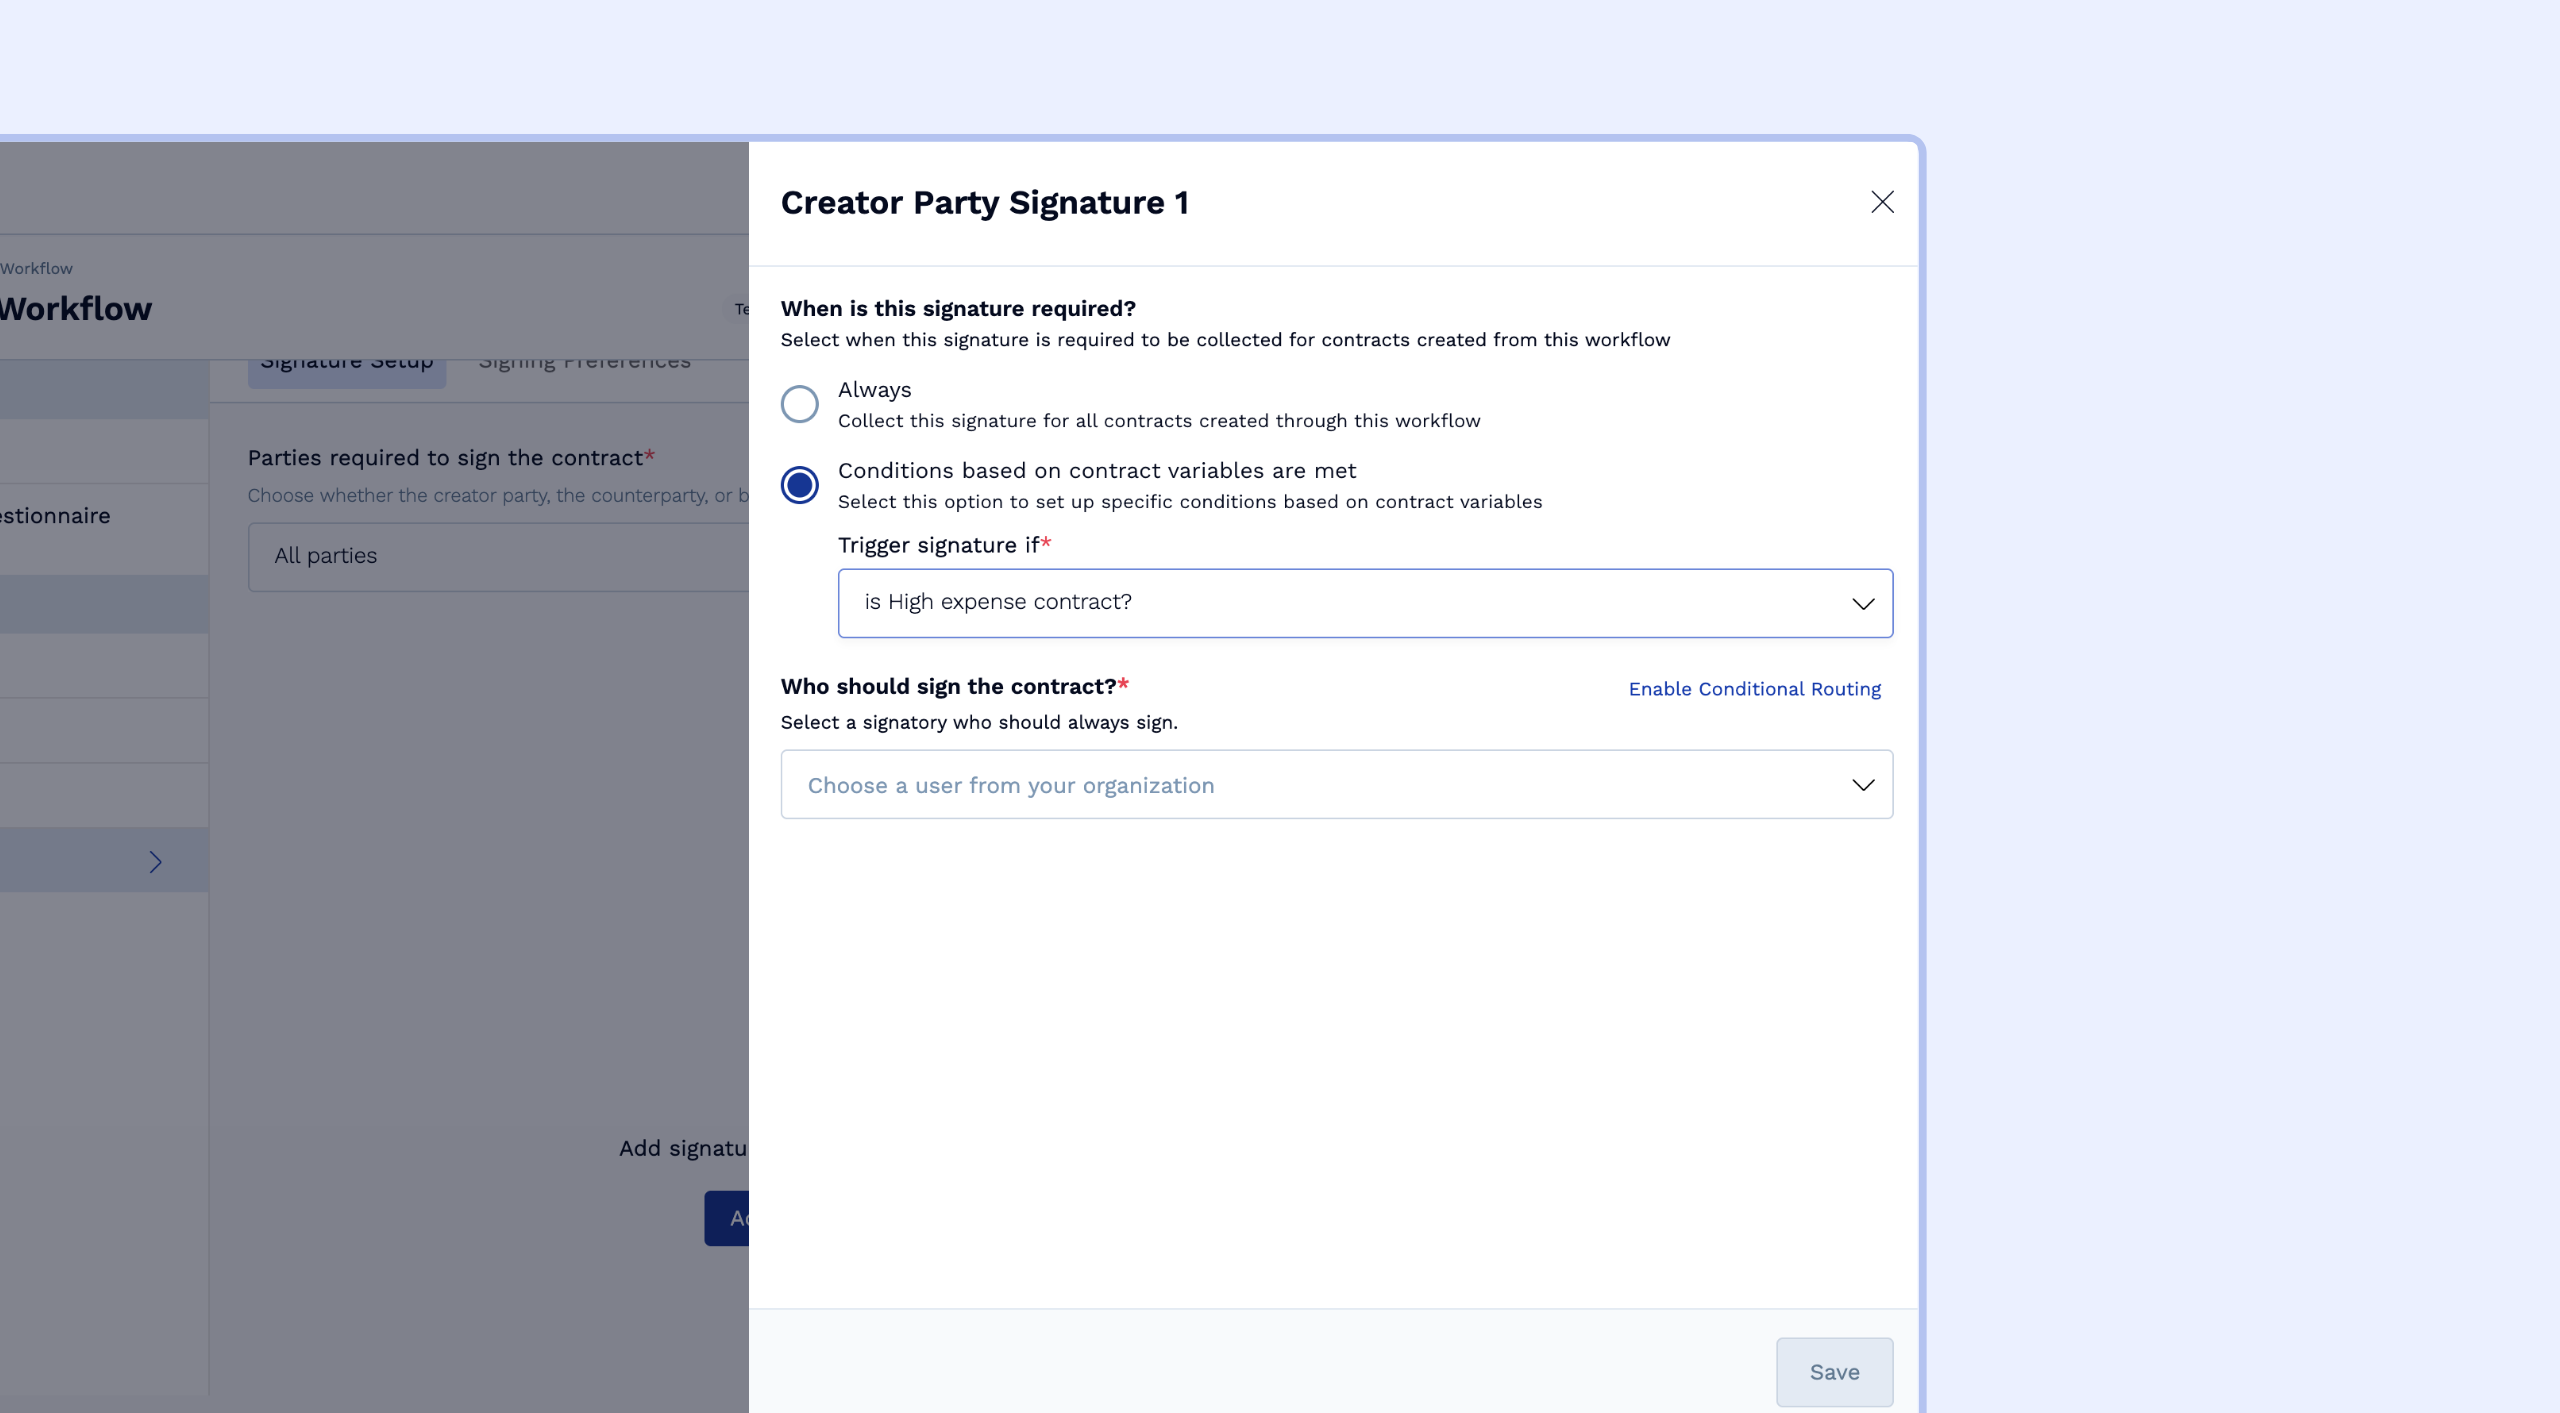
Once you click on "Add Creator Party Signature", a configuration panel will appear. You can apply conditions in two ways:
To make the entire signature step conditional:
This is used when a signatory is only needed under specific circumstances (e.g., a CFO signature for high-value contracts).Select "Conditions based on contract variables are met."
In the "Trigger signature if" dropdown, choose a pre-existing condition from your Condition Library (e.g., "Is High-Value Contract?").
Select the user who should sign when this condition is met.
If you want the contract creator themselves to be the signatory (rather than a specific named user), you can set up conditions that route to different users based on who creates the contract.
To assign different people to a signature step based on conditions:
This is used when a signature is always required, but the person signing changes based on the context (e.g., different department heads).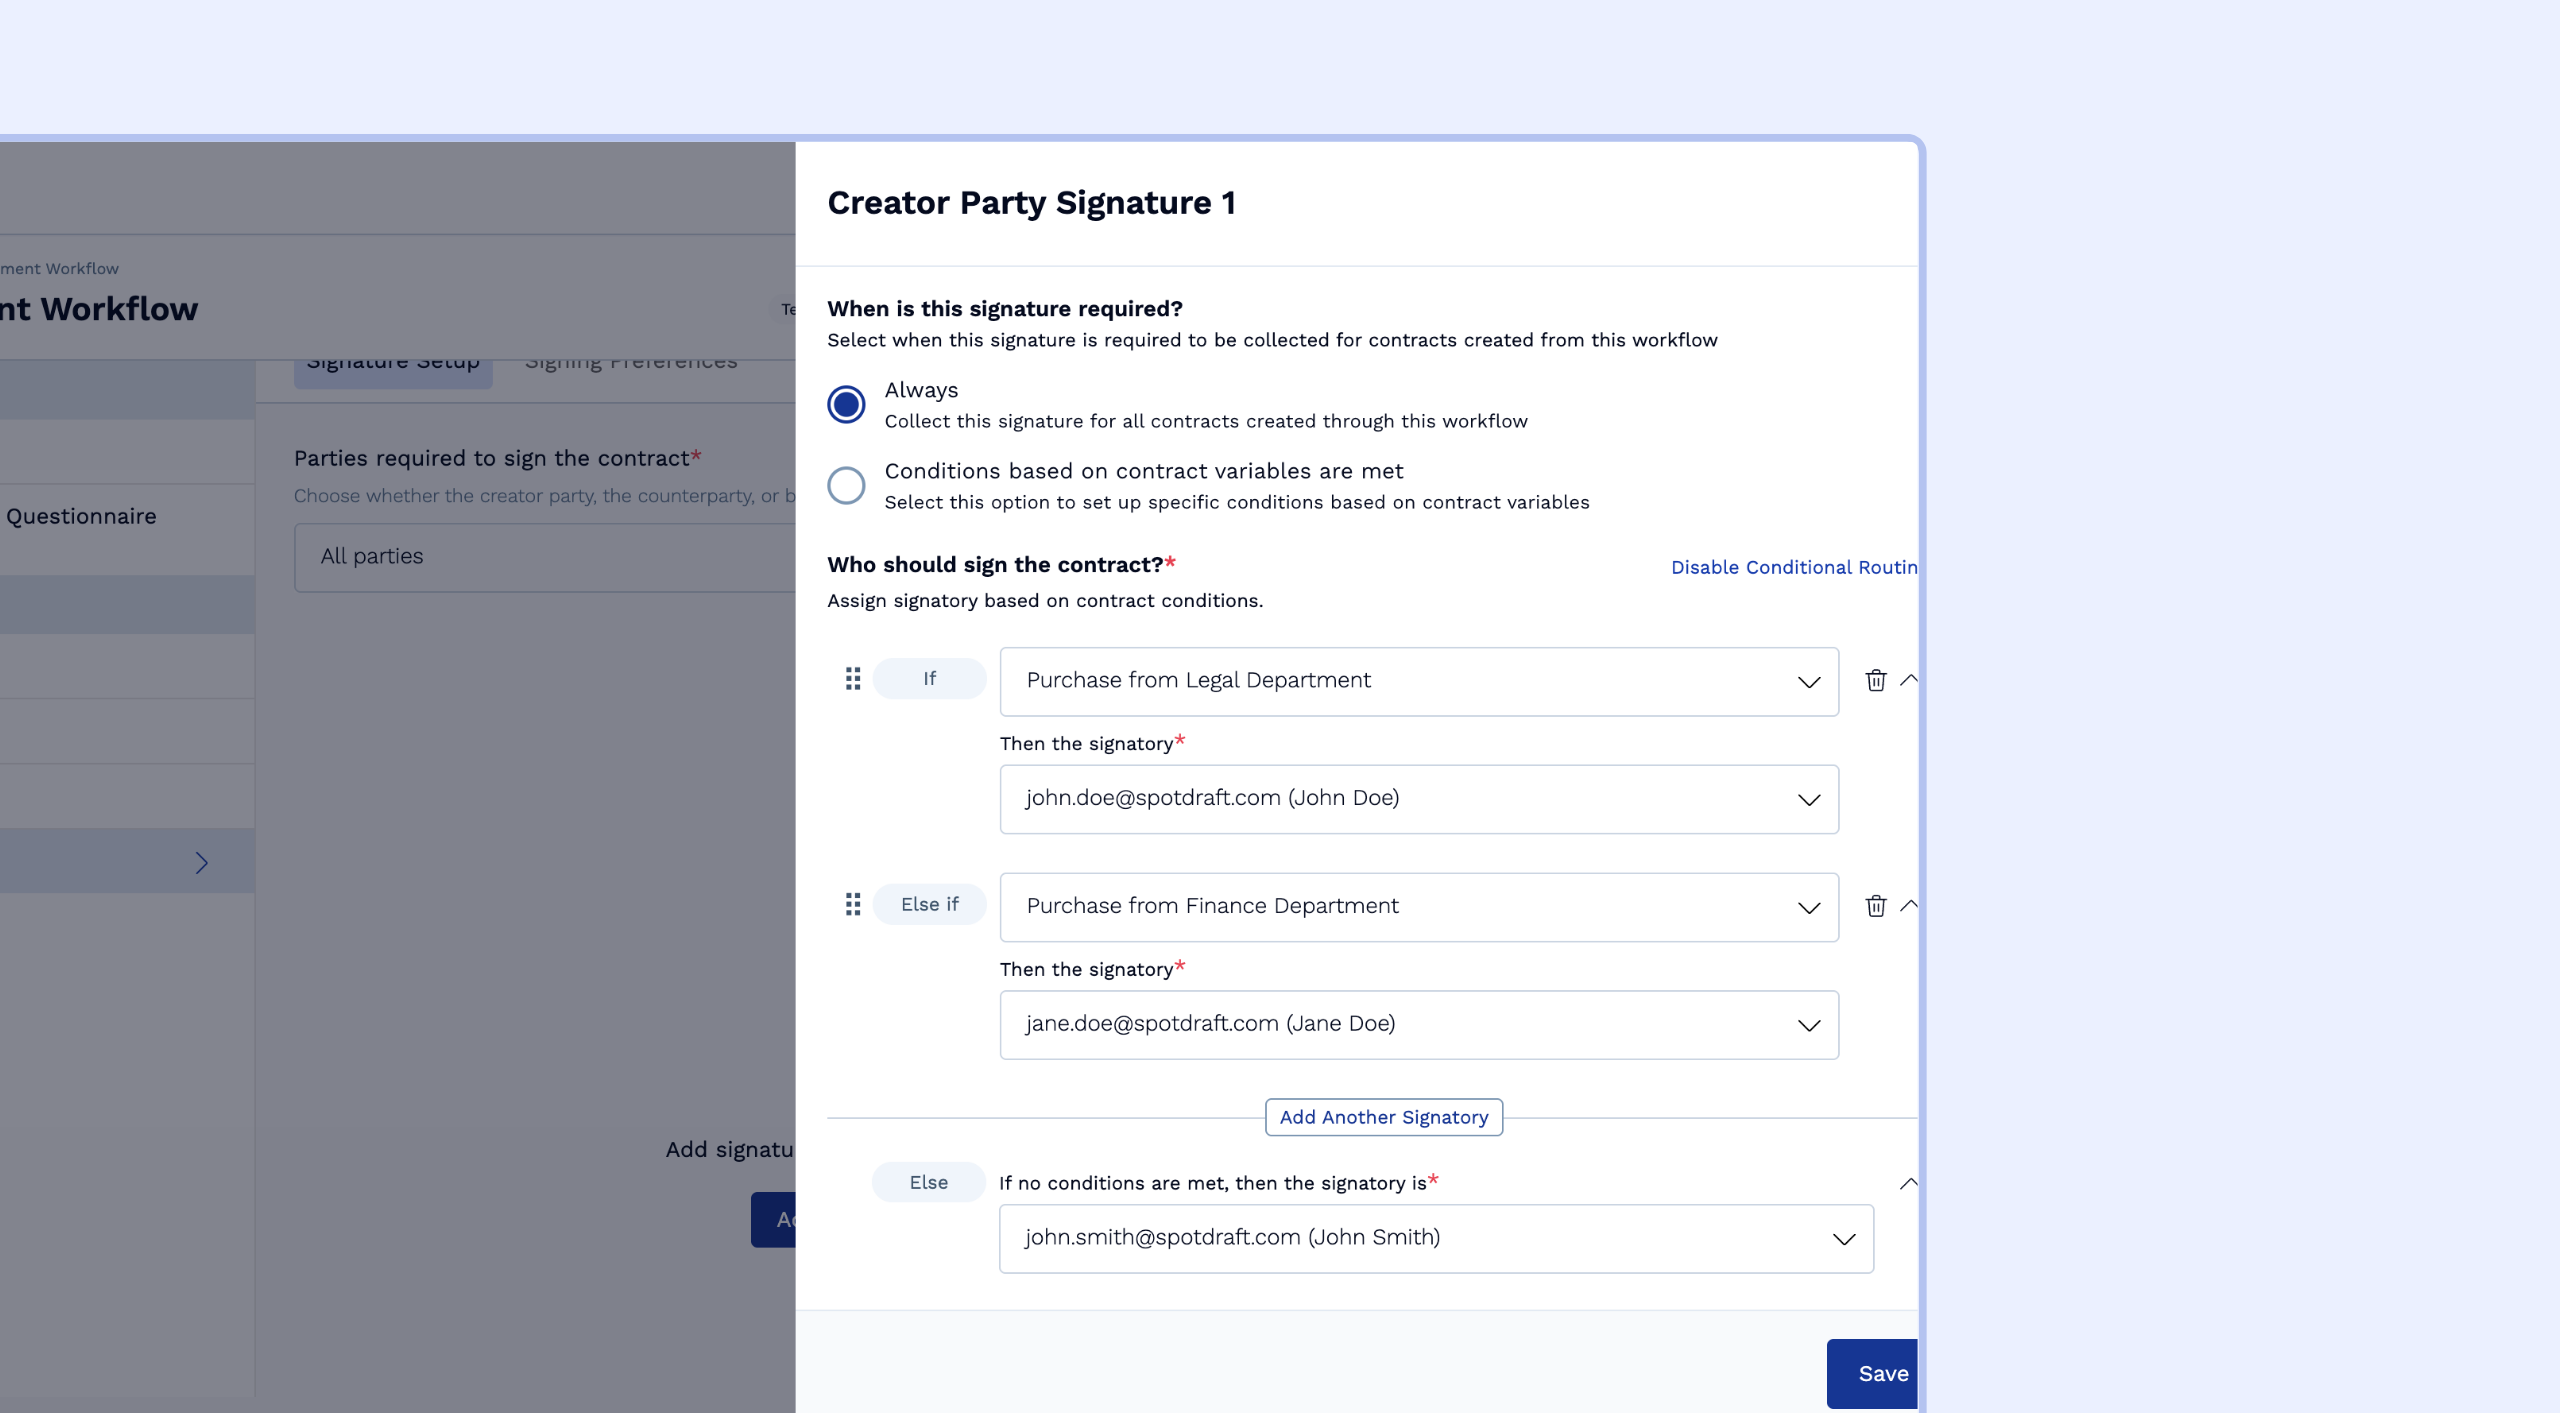
Under "Who should sign the contract?", click Enable Conditional Routing.
An "if/then/else" builder will appear:
If: Select a condition (e.g., "Department is Sales").
Then the signatory: Choose the user who should sign if that condition is true.
Else: Set a default signatory for when the condition is not met.
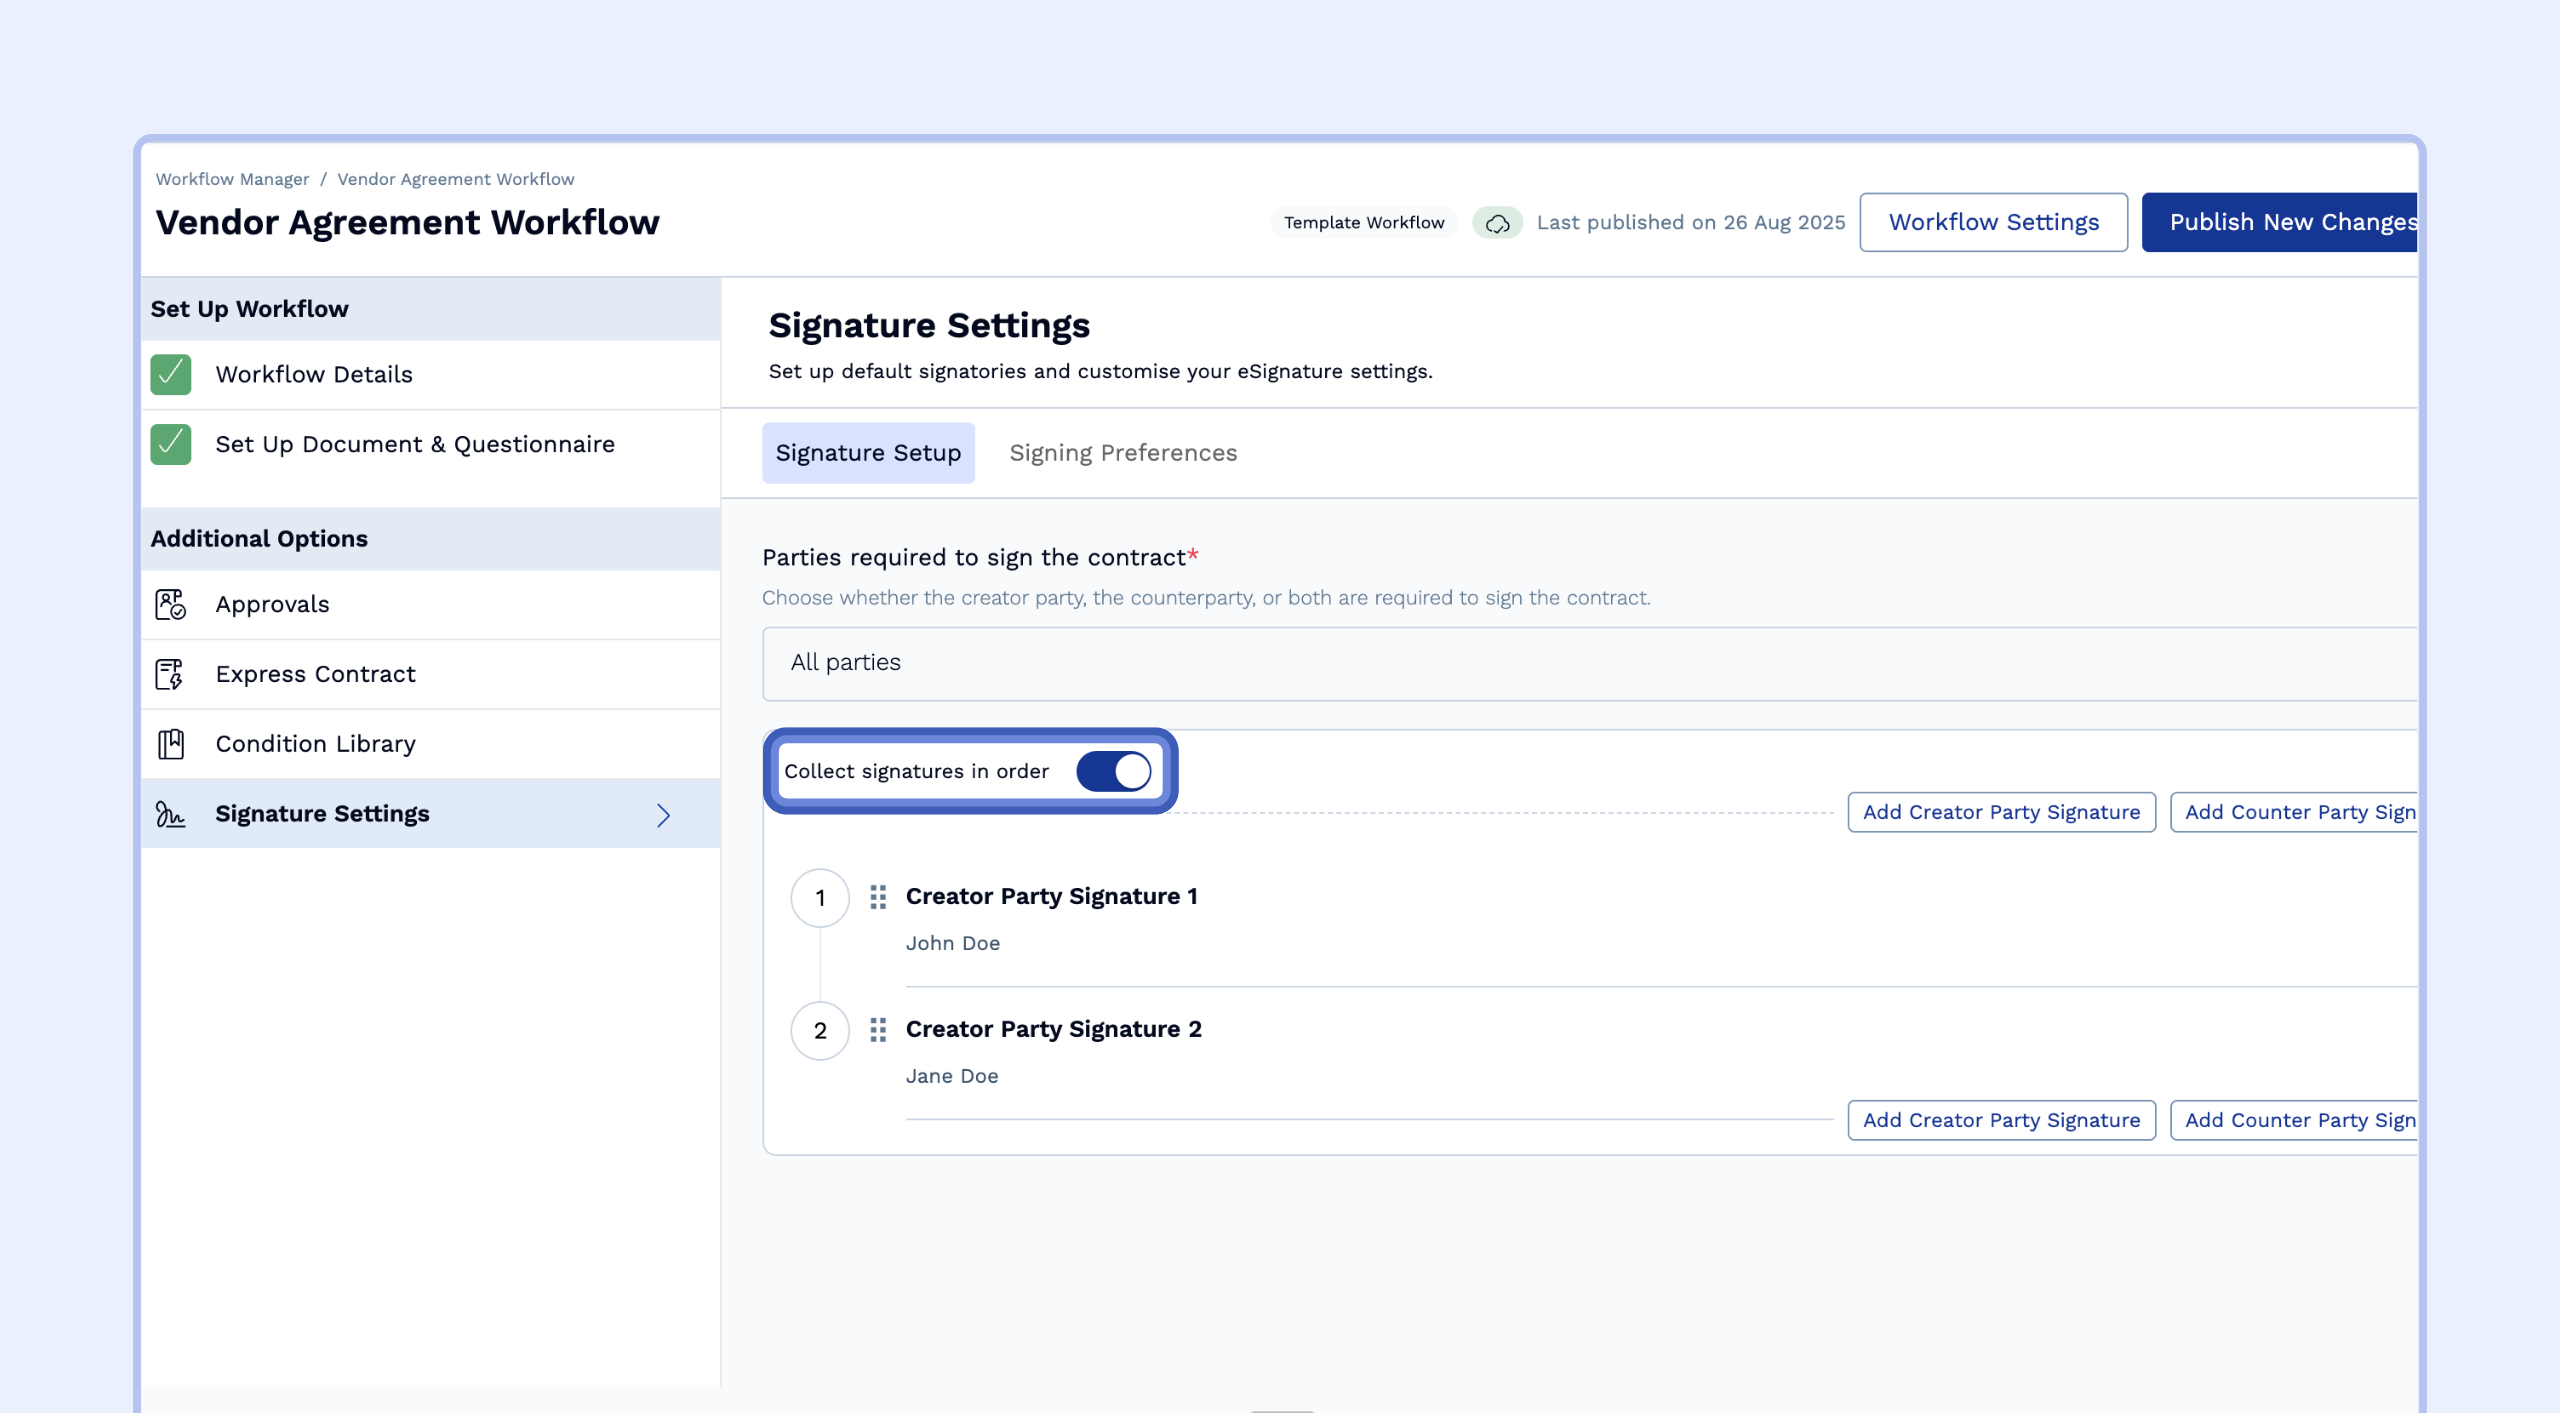
Set the Signing Order
If you have multiple signature steps, you can enforce a specific sequence.
Toggle on "Collect signatures in order."
You can then drag and drop the signatory blocks to define the signing order (e.g., Counterparty signs first, then the Creator Party).
How to Set Up Conditional Signing Preferences
Click the Signing Preferences tab to apply conditional rules to how contracts are signed. This allows you to automate specific signing requirements for different types of contracts.
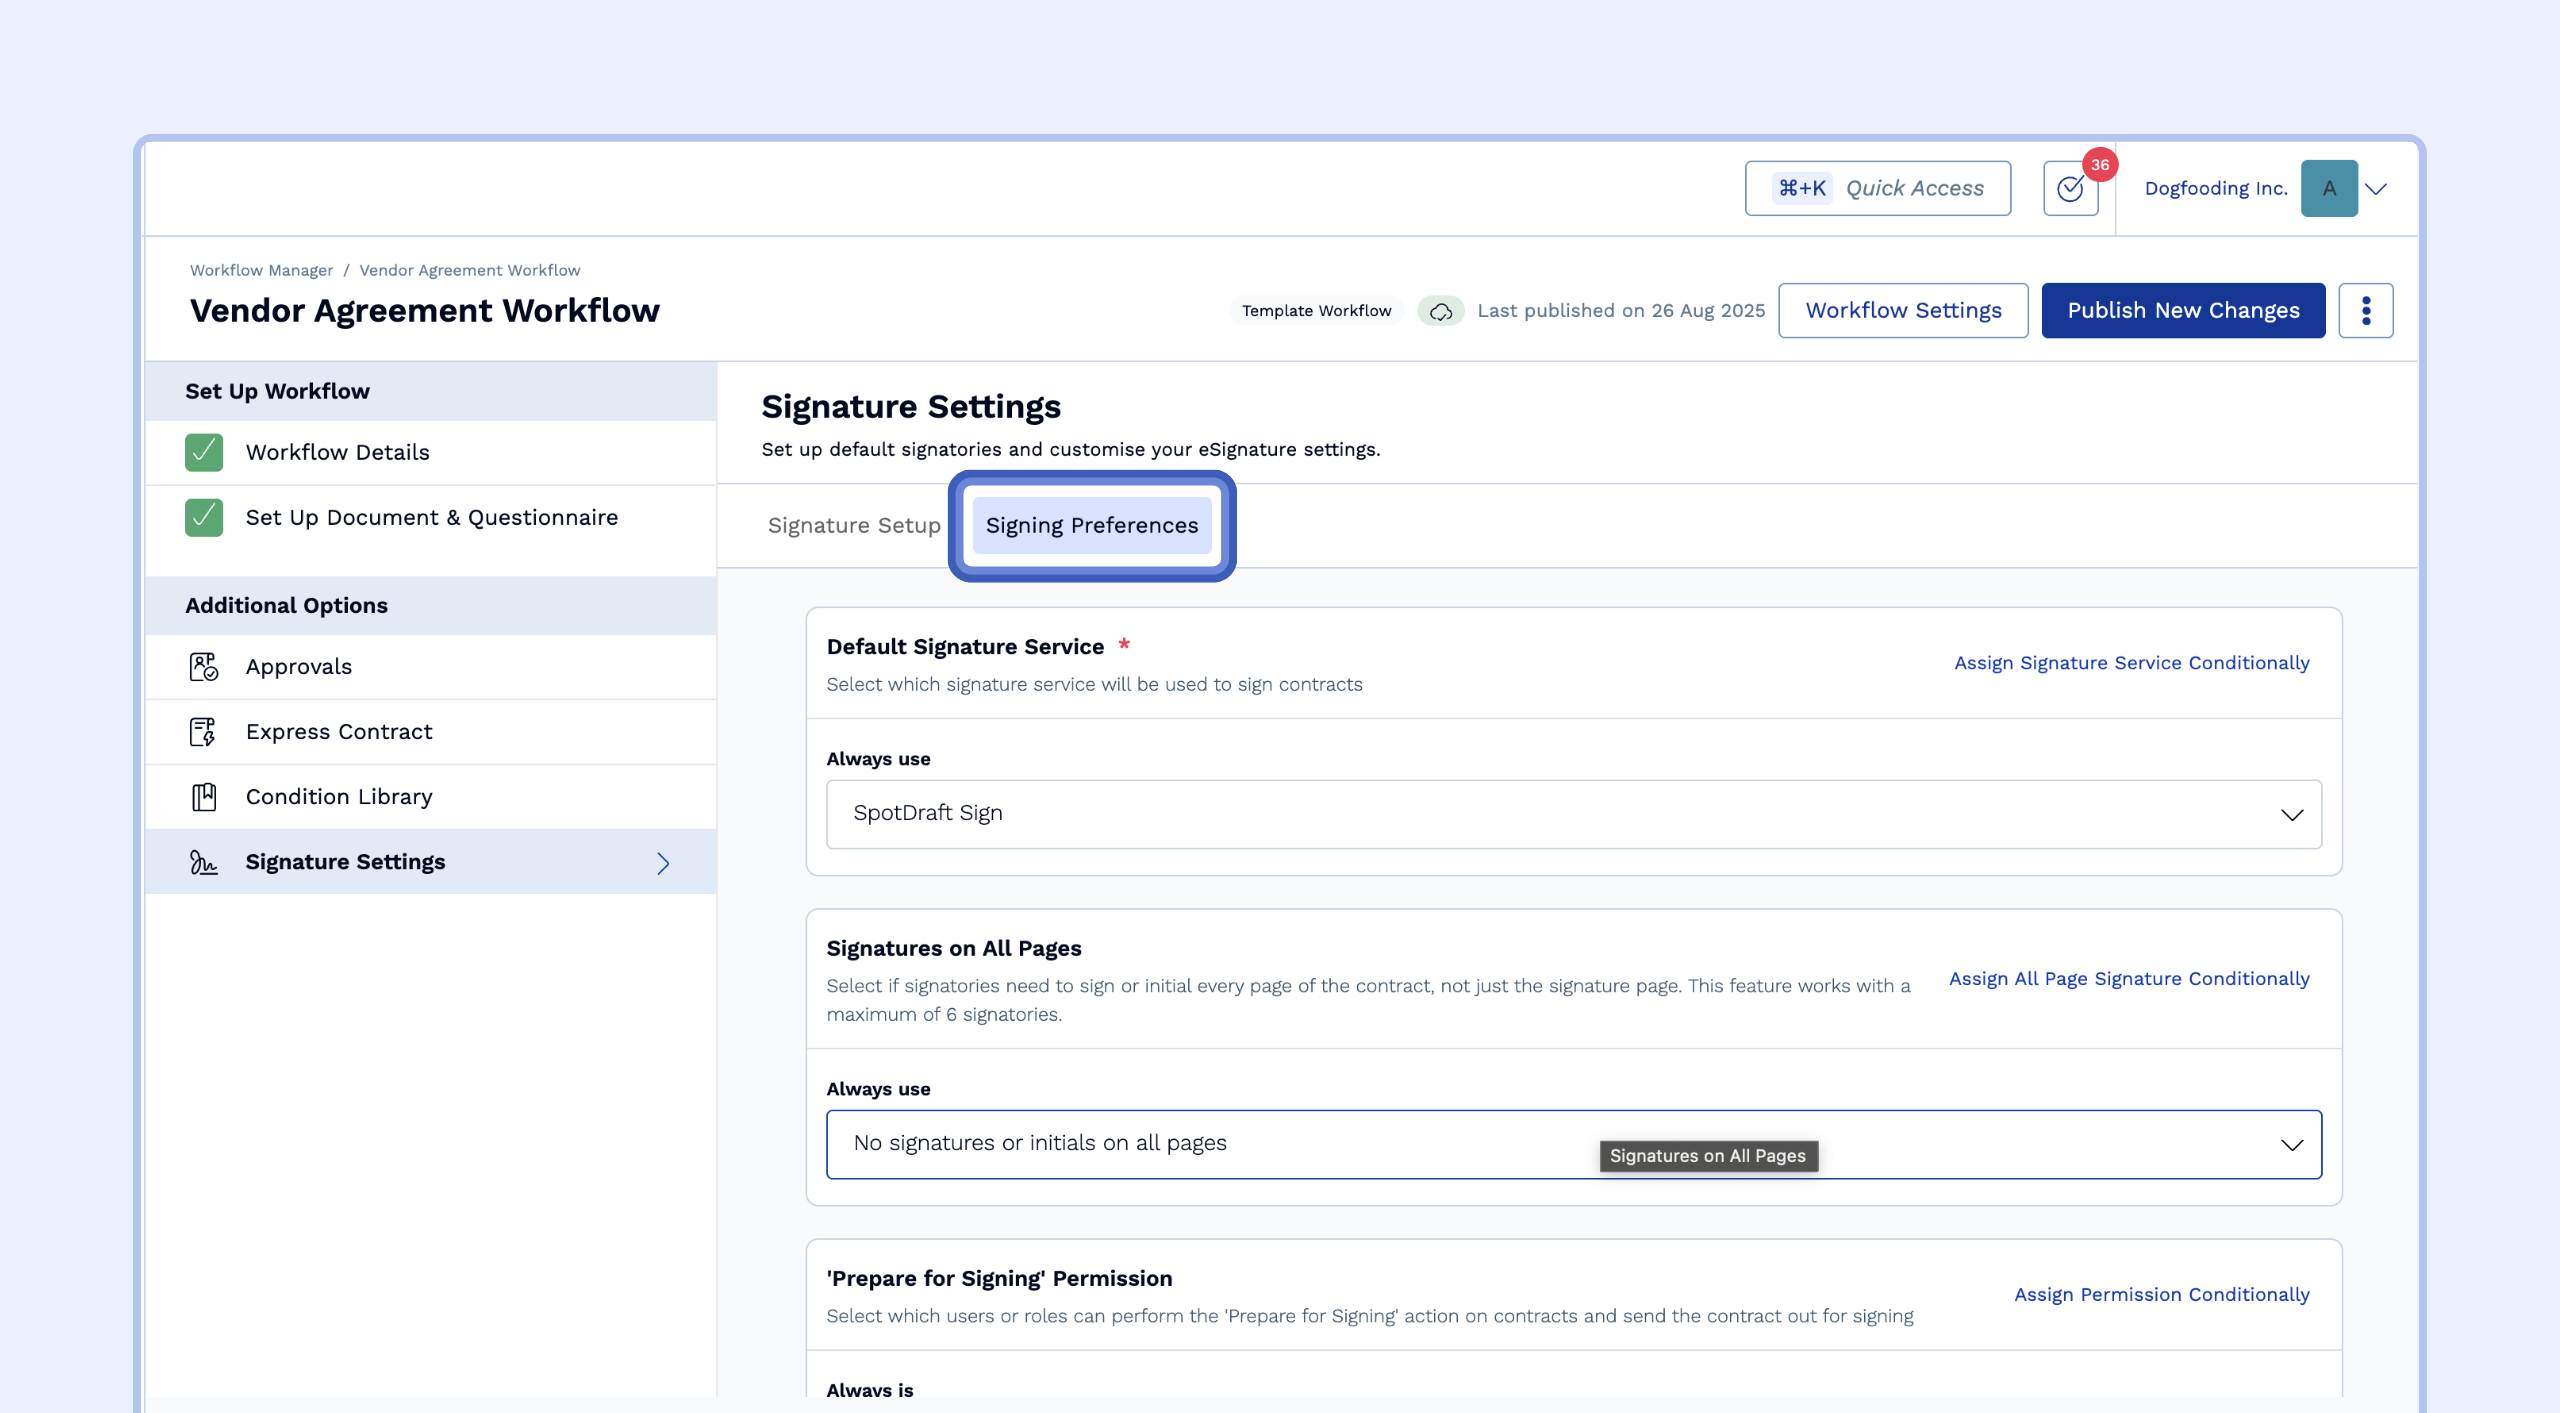
Default Signature Service
Why this is useful: You can comply with regional or entity-specific e-signature requirements automatically.
For example, you can set up a rule to use Aadhaar eSign for all Indian contracts, while using SpotDraft Sign for all US agreements, and for the rest, use DocuSign.How to set it up:
Click "Assign Signature Service Conditionally."
In the "if/then" builder, select a condition (e.g., "Jurisdiction is Delaware").
Choose the signature service to be used when that condition is met.
Set a default service for all other scenarios in the "Else" block.

Signatures on All Pages
Why this is useful: In specific countries, you may be required to have a signature or initial on every page. This feature automates that requirement. (Note: This is only available for Template Workflows with SpotDraft Sign as the signature service).
How to set it up:
Click "Assign All Page Signature Conditionally."
Select a condition (e.g., "Contract Type is Property Lease").
Choose the preference to require signatures on all pages when that condition is true.
‘Prepare for Signing’ Permission
Why this is useful: This gives you granular control over who can send contracts out for signature. You can ensure that high-value or strategically important contracts are reviewed and sent only by Admins, while allowing business users to manage more routine agreements.
How to set it up:
Click "Assign Permission Conditionally."
Select a condition (e.g., "Total Contract Value is greater than $100,000").
Define which user role (e.g., Admin User) is permitted to send the contract for signing when that condition is met.
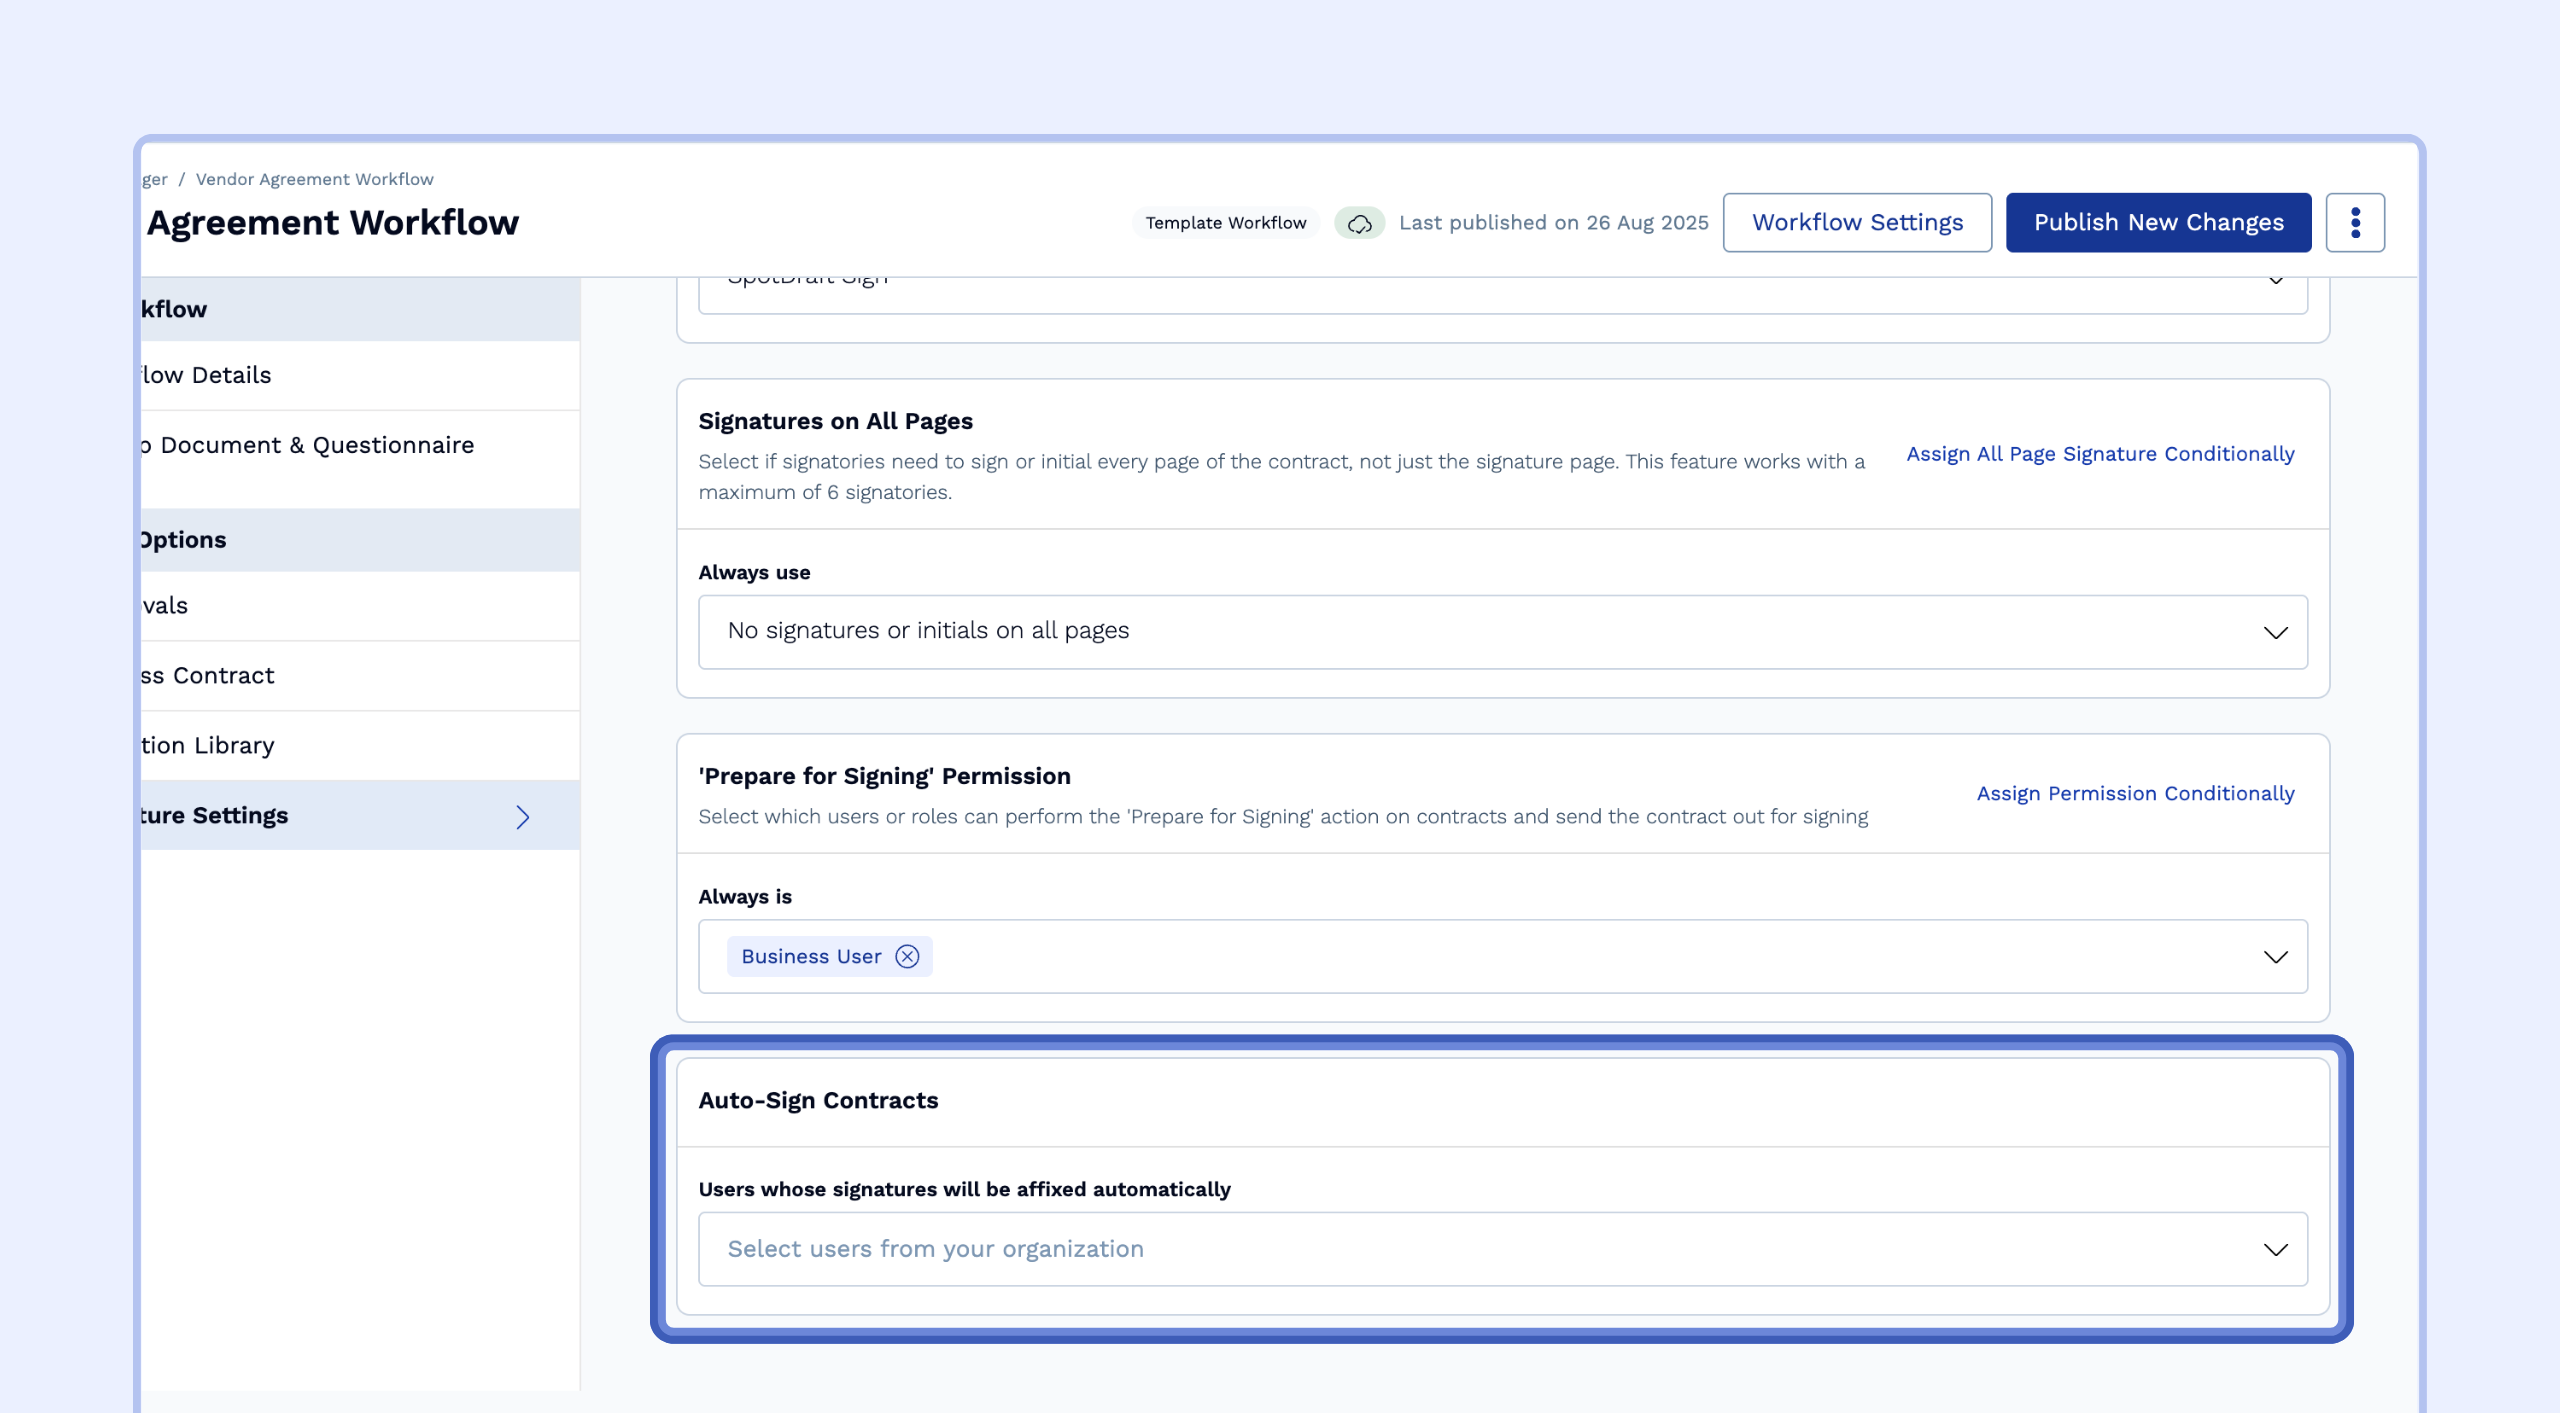
Auto-Sign Contracts
Why this is useful: For high-volume, standardized contracts like NDAs, you can automatically affix the signature of a designated internal user (e.g., the General Counsel) without them needing to manually sign each time. This significantly speeds up the execution of routine agreements. (Note: This is only available for Template Workflows with SpotDraft Sign as the signature service).
How to set it up: In the "Auto-Sign Contracts" section, select the user(s) whose signature should be automatically applied.
Signatory Assignment During Contract Creation
With the introduction of Conditional Signatories, you will no longer manually select signatories when creating a new contract from a template. Instead, as you fill out the initial contract details, you will see an informational banner notifying you that signatories will be assigned automatically based on the workflow's rules.
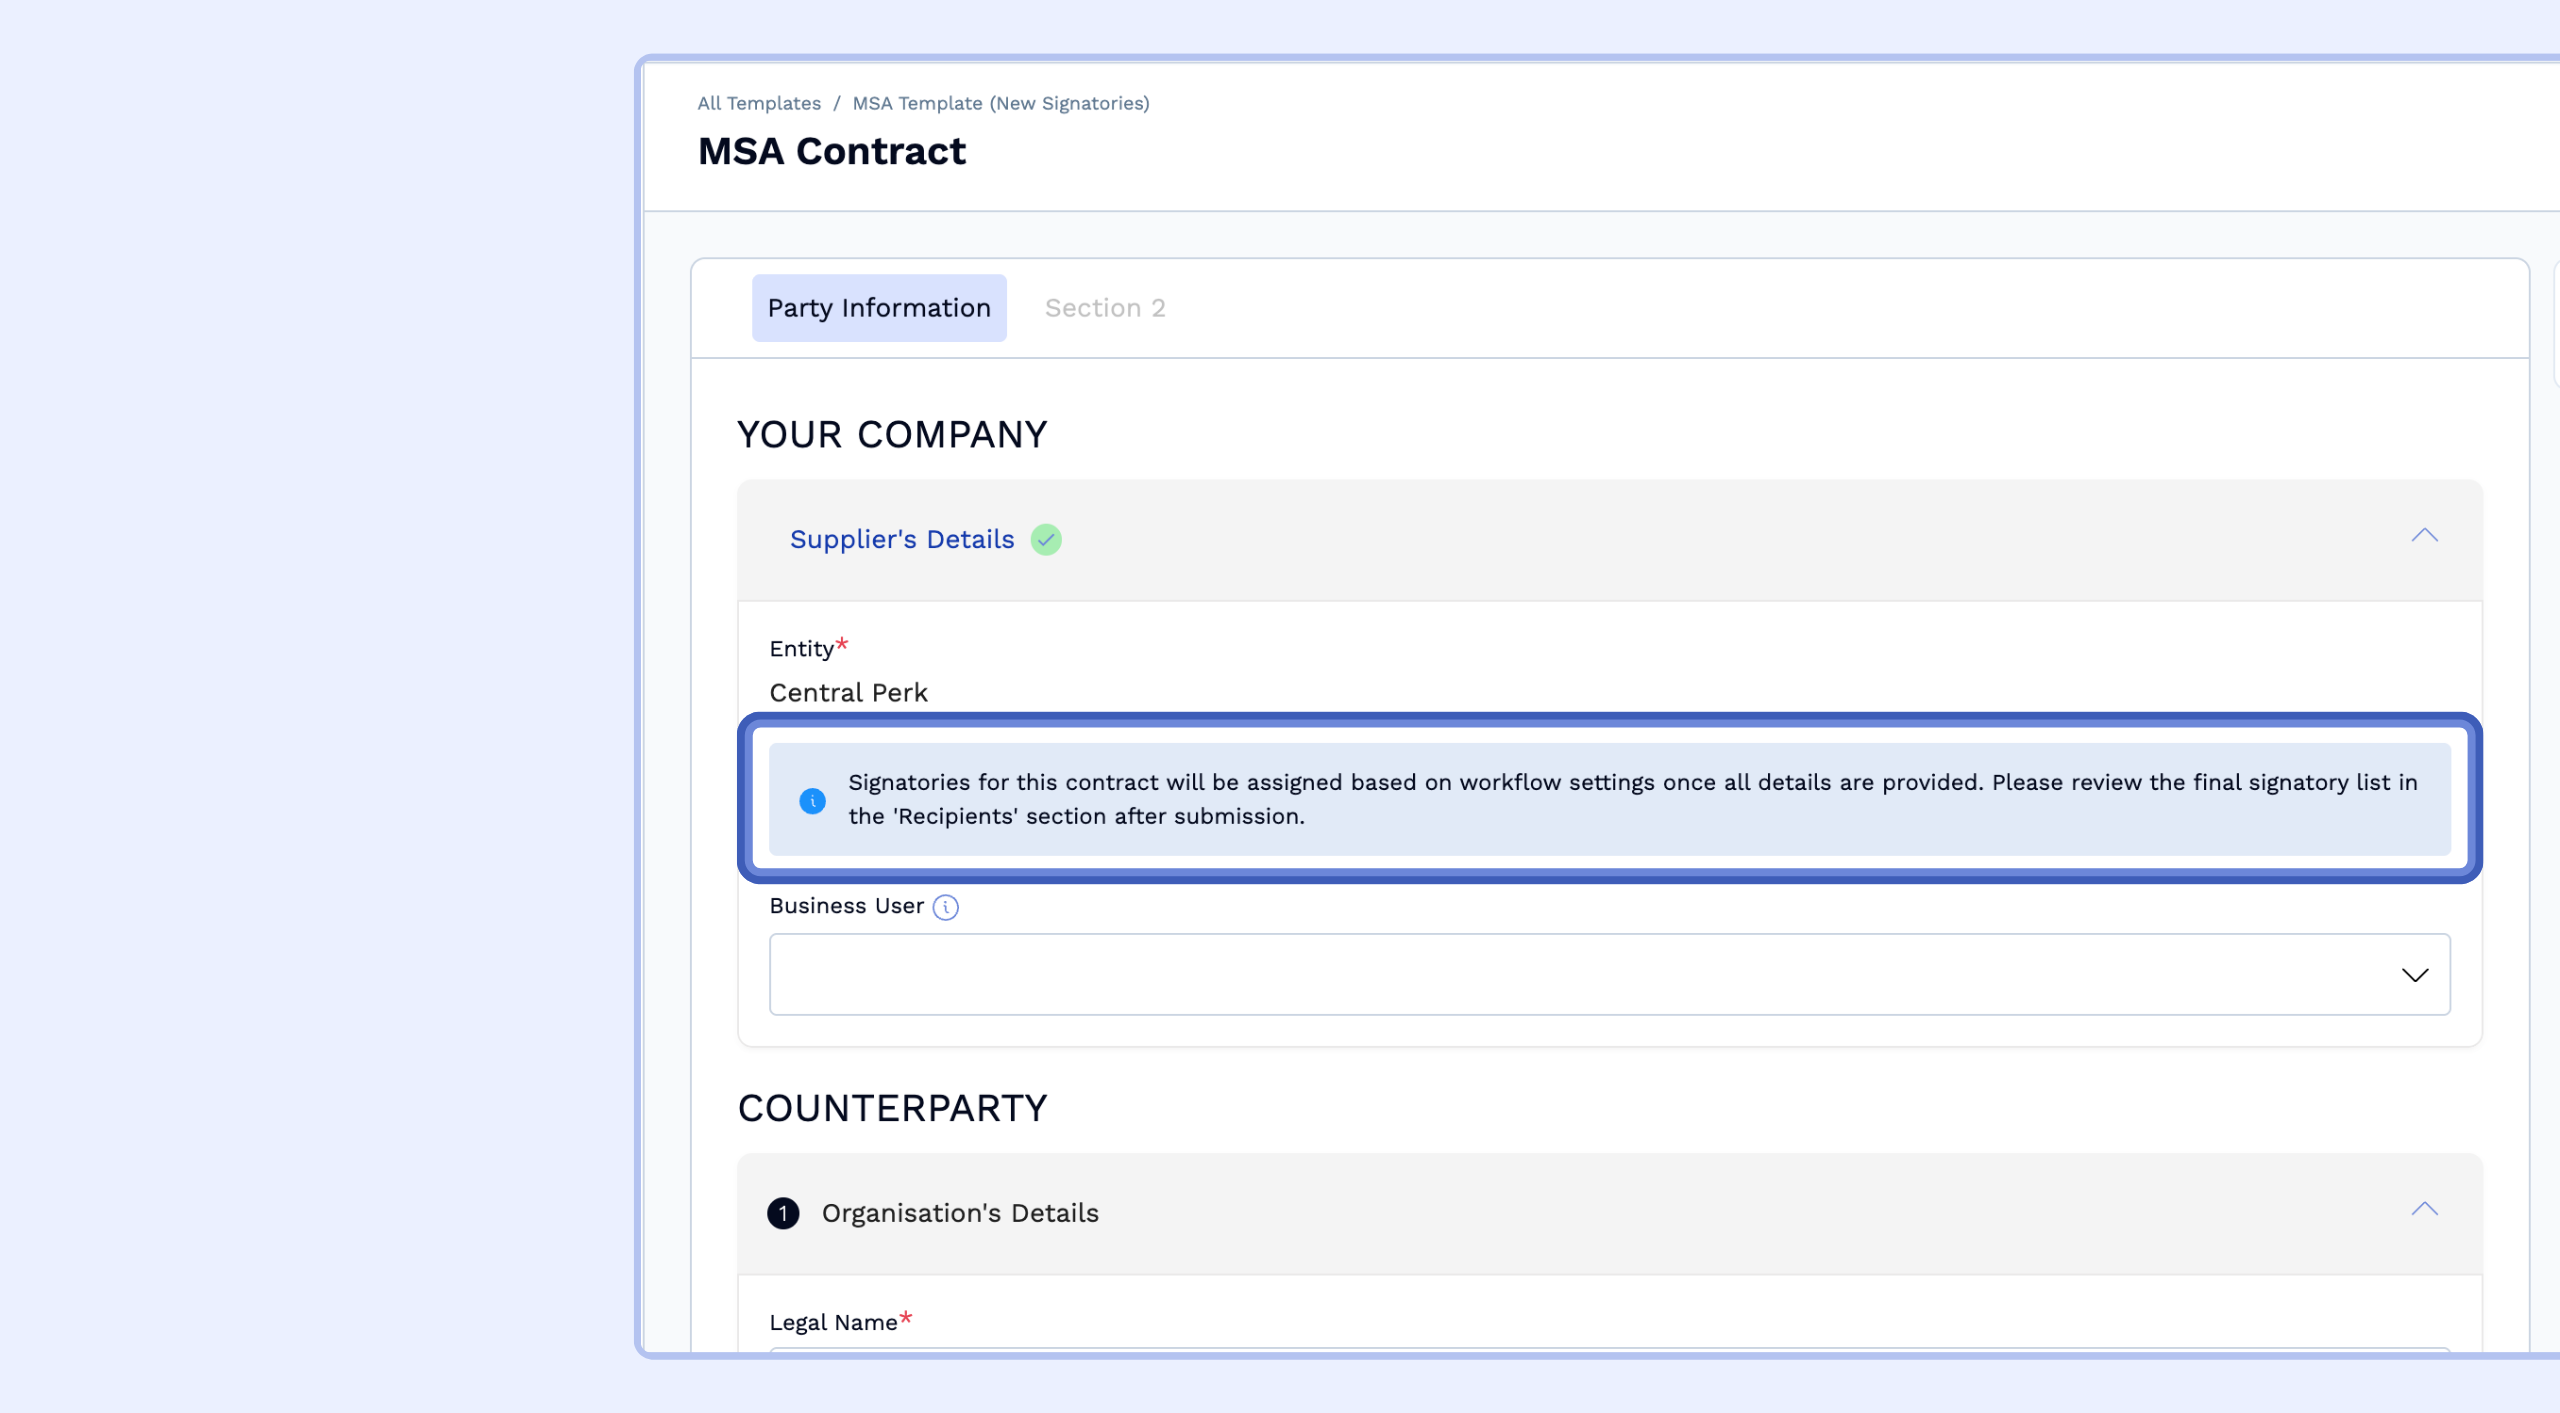
The system uses the information you provide in the questionnaire to determine the correct signatories, who will appear in the "Recipients" section only after you have submitted the details. This change ensures that the right people are always assigned based on the contract's specific context.
Understanding the 'Out-of-Sync' Signatory Status
Once a contract is created, its initial creator party signatories are determined by the workflow conditions based on the information provided in the intake form or questionnaire. If that information is later updated, the workflow rules may require a different set of creator party signatories.
SpotDraft will not automatically change the signatories on an in-progress contract. Instead, it will alert you that the current setup is out of sync with the workflow's setup.
If, at any point, the contract created from the workflow does not have the same creator party signatories as defined in the workflow conditions, it will show an "Out of Sync" status on the contract details page.
The "Out of Sync" modal does not consider the signing order, counterparty, or the order of creator party signatories. It simply checks whether the contract includes the exact number and exact creator party signatories that were set up in the workflow conditions.
Example:
Your workflow has a condition:
"If the Total Contract Value is over $100,000, the Creator Party signatory must be the VP of Sales. Else, it should be the Sales Director."
A sales team member creates a new contract and enters the value as $90,000. The workflow correctly assigns the Sales Director as the signatory. During negotiations, the deal value increases. The user goes back to the questionnaire and updates the Total Contract Value to $120,000.
The system now detects a mismatch. The contract still shows the Sales Director as the signatory, but the workflow rules require the VP of Sales. A banner will appear in the "Recipients" section stating: The current signature setup is out of sync with the workflow setup.
sadasd
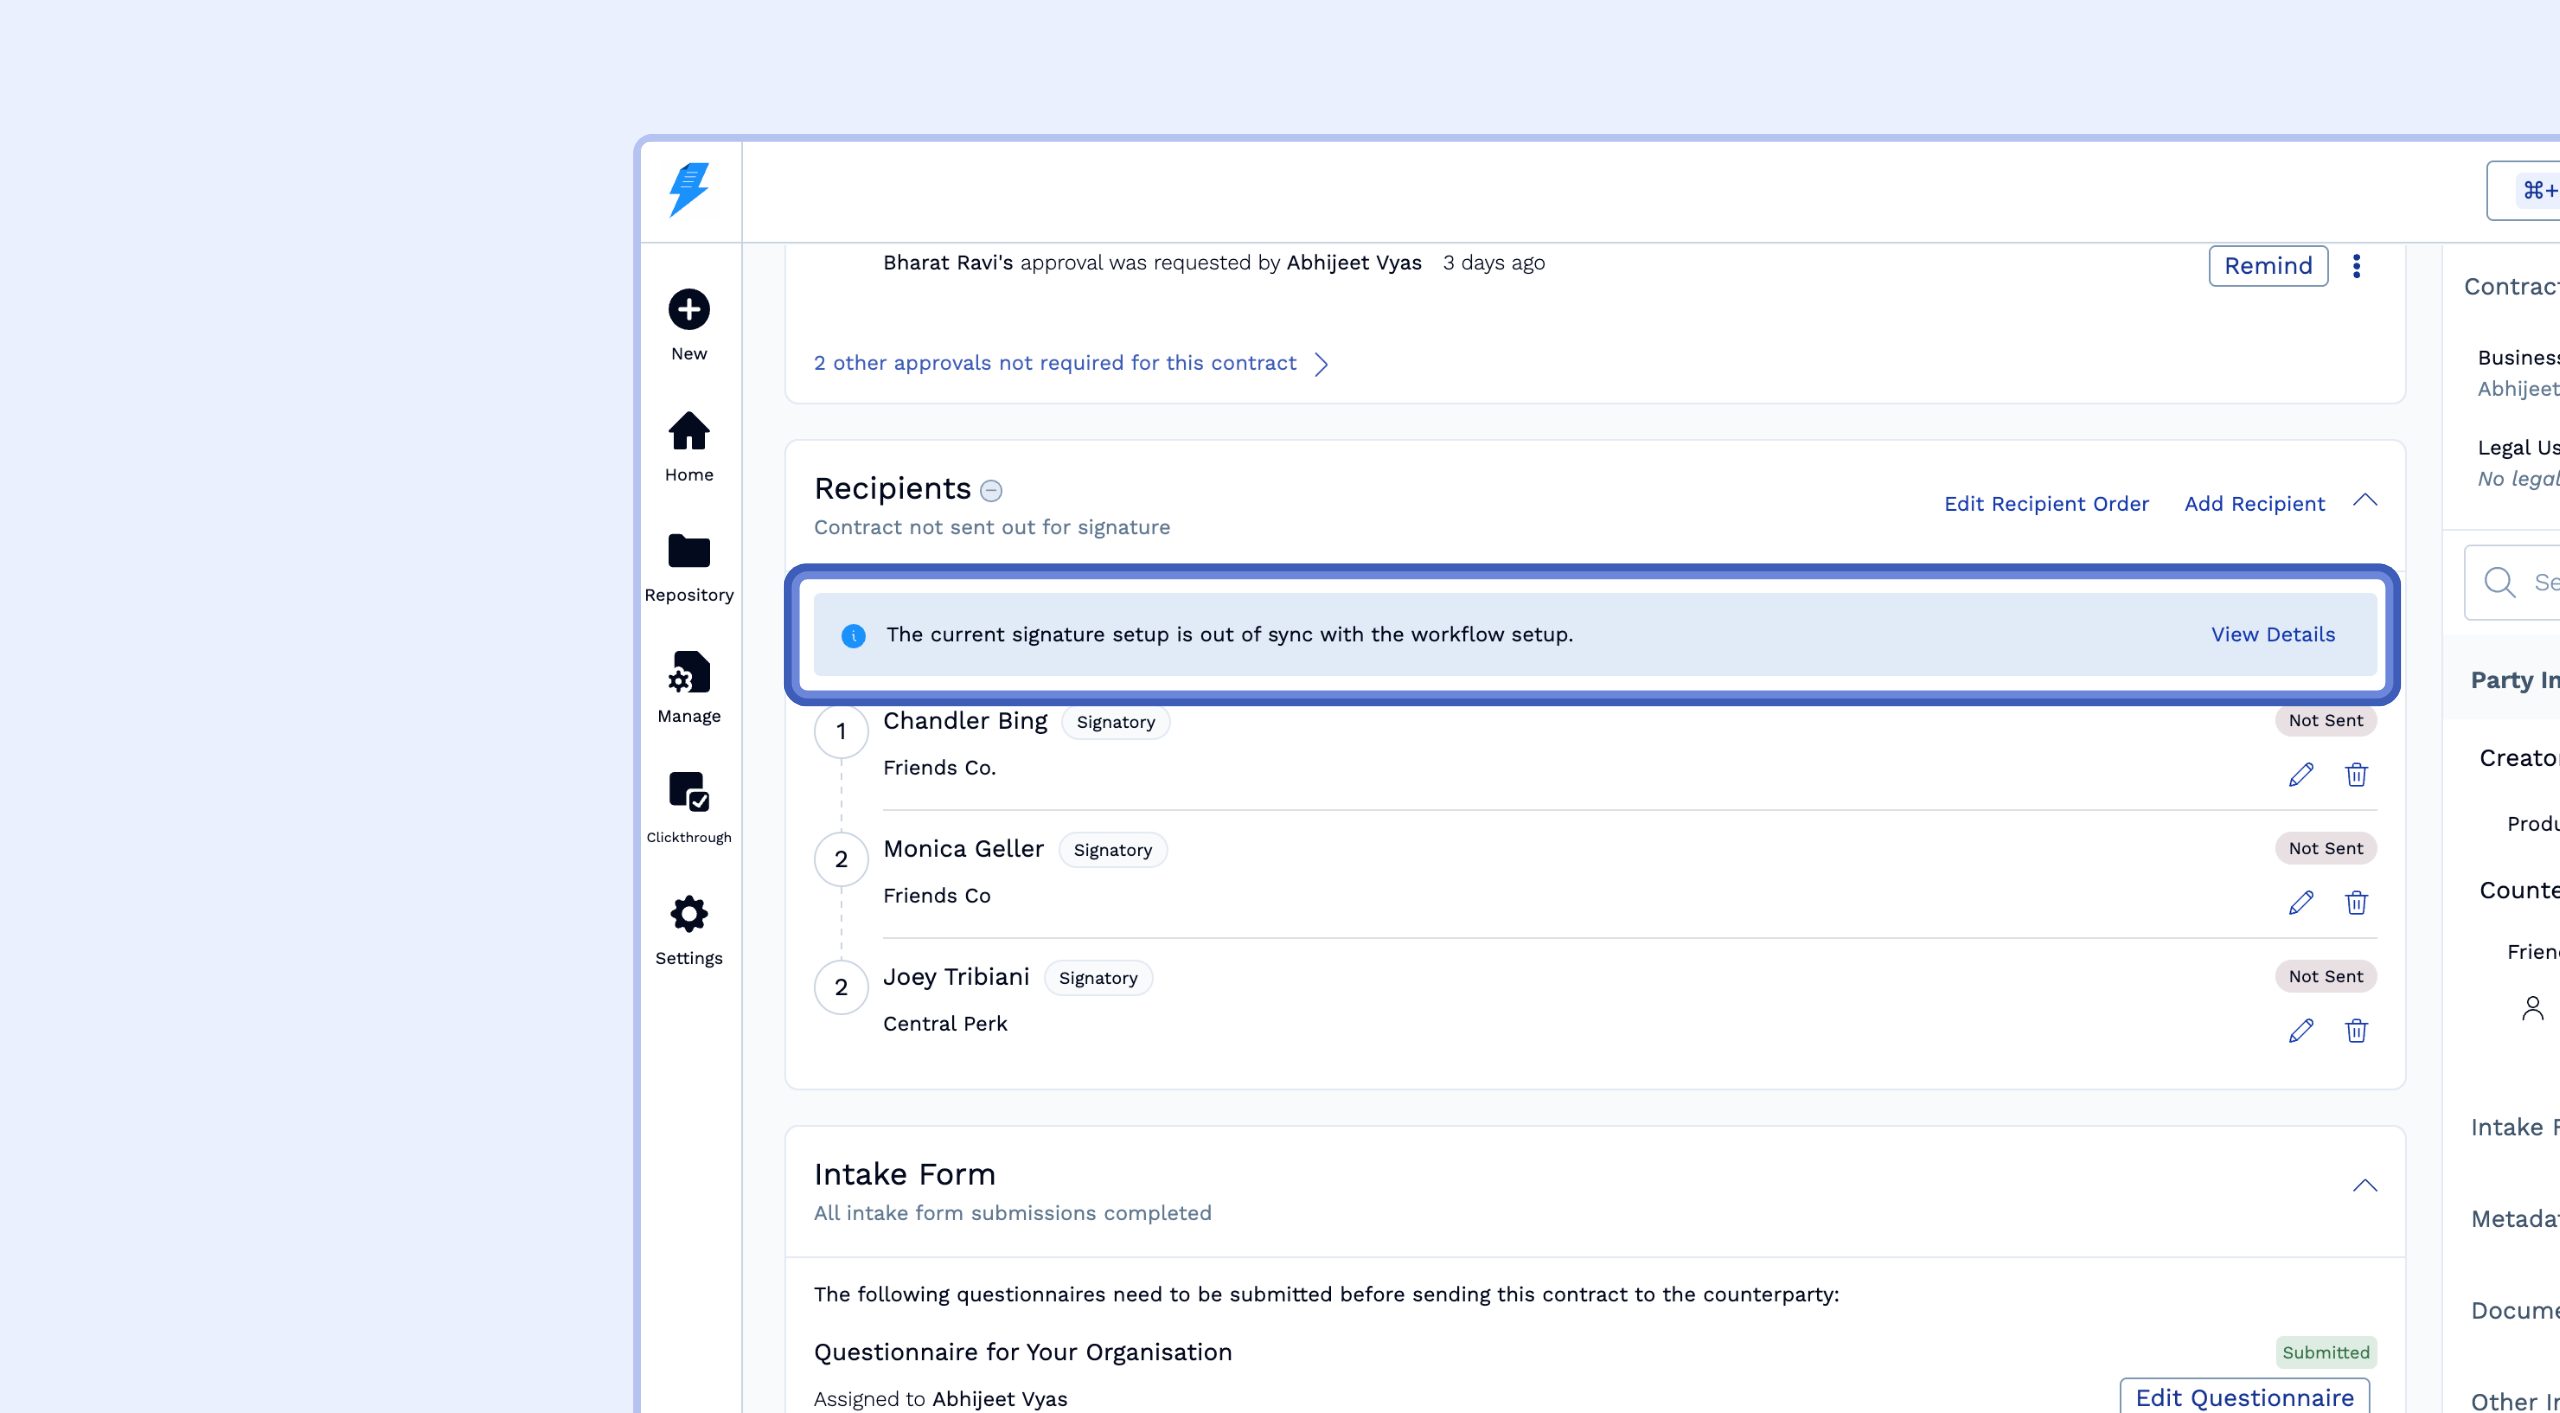
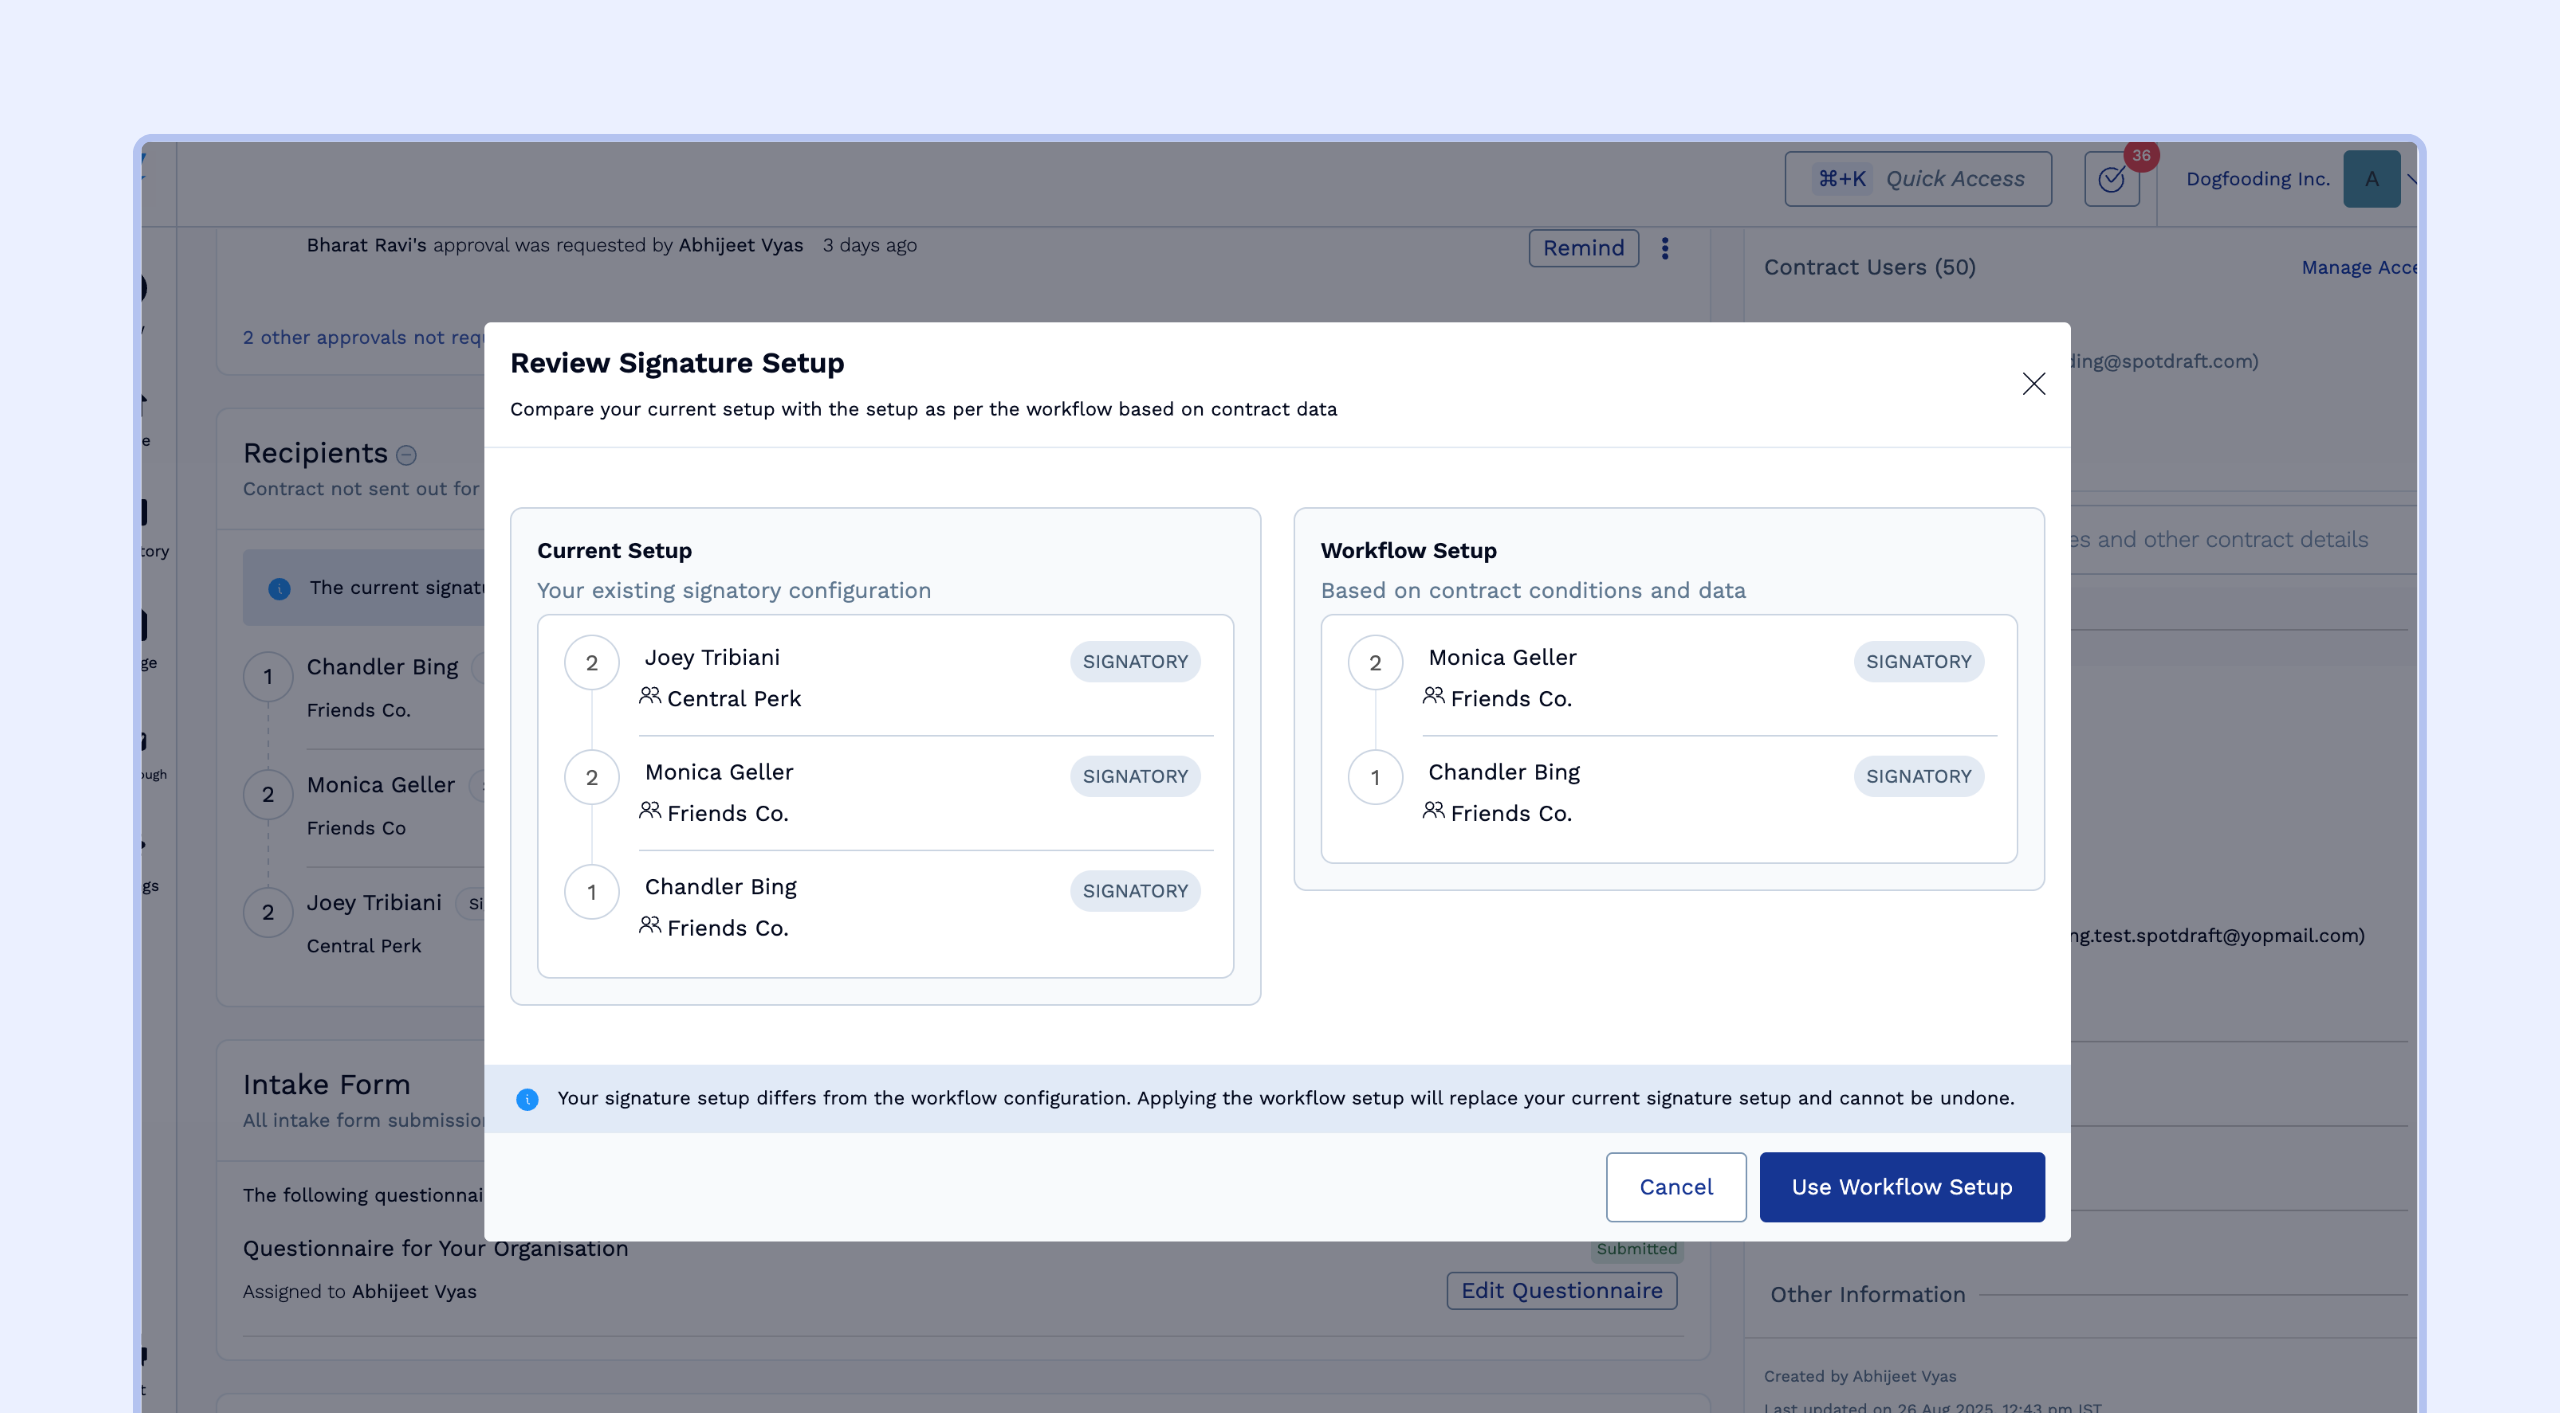
To bring signatories back in sync, you can click "View Details" next to the banner. A pop-up will appear showing you the Current Setup (Sales Director) versus the correct Workflow Setup (VP of Sales). To apply the correct signatory, click the "Use Workflow Setup" button. The signatory list will be updated instantly.
Other Important Points
New Contracts Only: These workflow settings will only apply to new contracts created after the workflow has been published. Existing contracts will not be affected.
Limited to Signatories: Only signatories can be set in the workflow manager. Other recipient types, like Approvers or Receivers, need to be added always at a contract level.
Signatory Configuration Required: At least one signatory must be configured in the Signature Settings for the workflow to function. Workflows without a configured signatory will fail during document generation.