Setup DocuSign Integration with SpotDraft
Last updated: June 16, 2026
Integrating with DocuSign
This section will guide you through the process of configuring the DocuSign integration within your SpotDraft workspace. This integration allows you to seamlessly send contracts for eSignatures using DocuSign.
Installation & Configuration
Navigate to Integrations: Log in to your SpotDraft workspace and navigate to "Settings" > "Integrations."
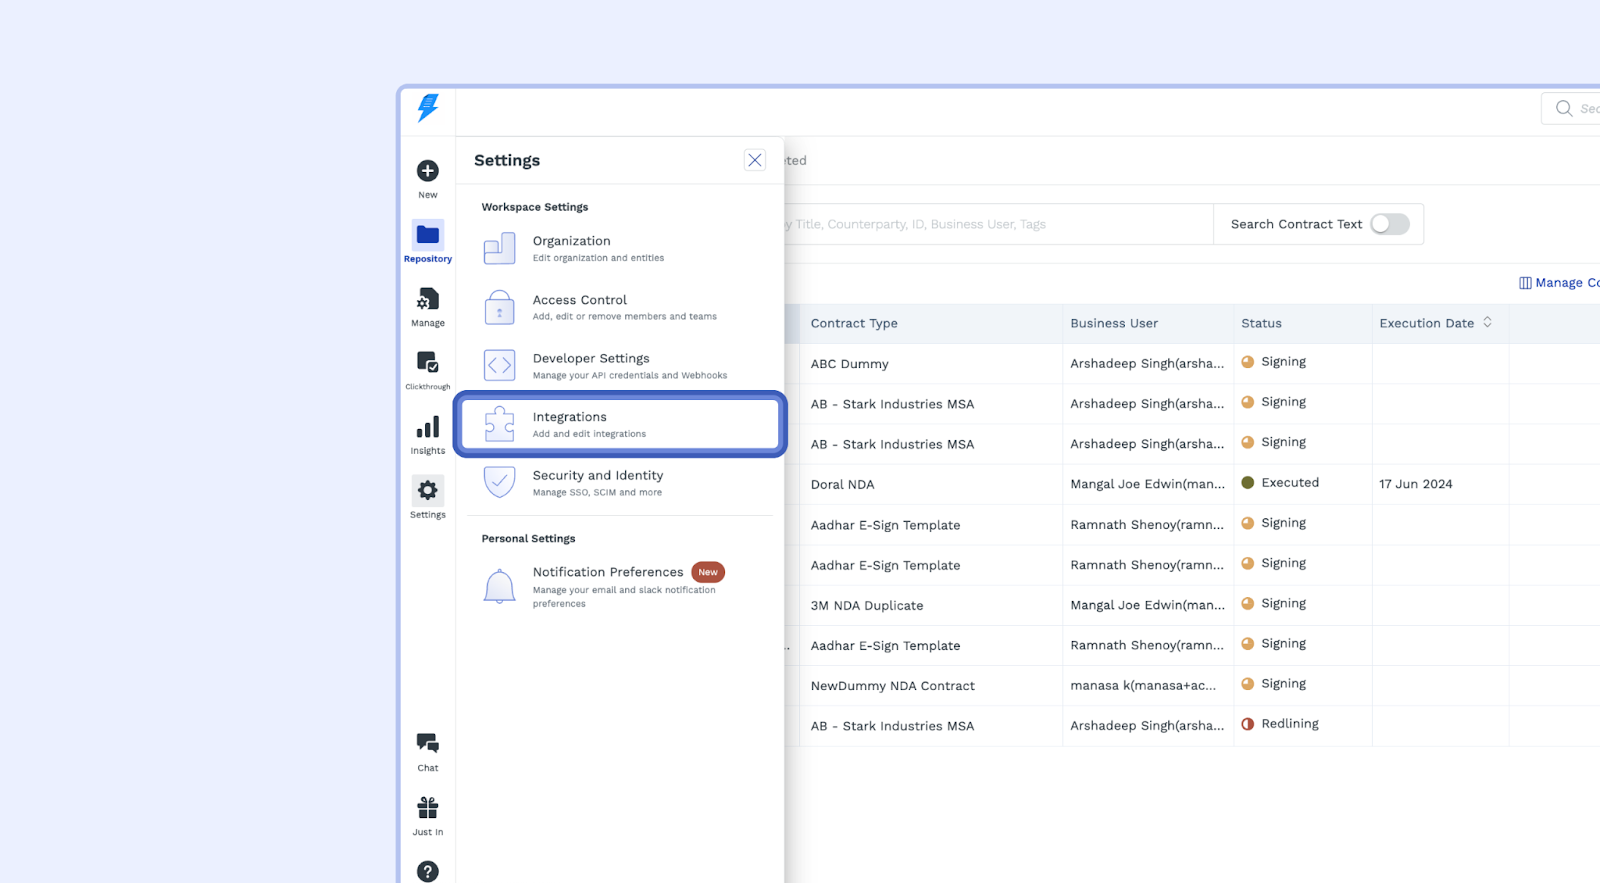
Select DocuSign: Inside the "E-Signature" section choose the "DocuSign" option.
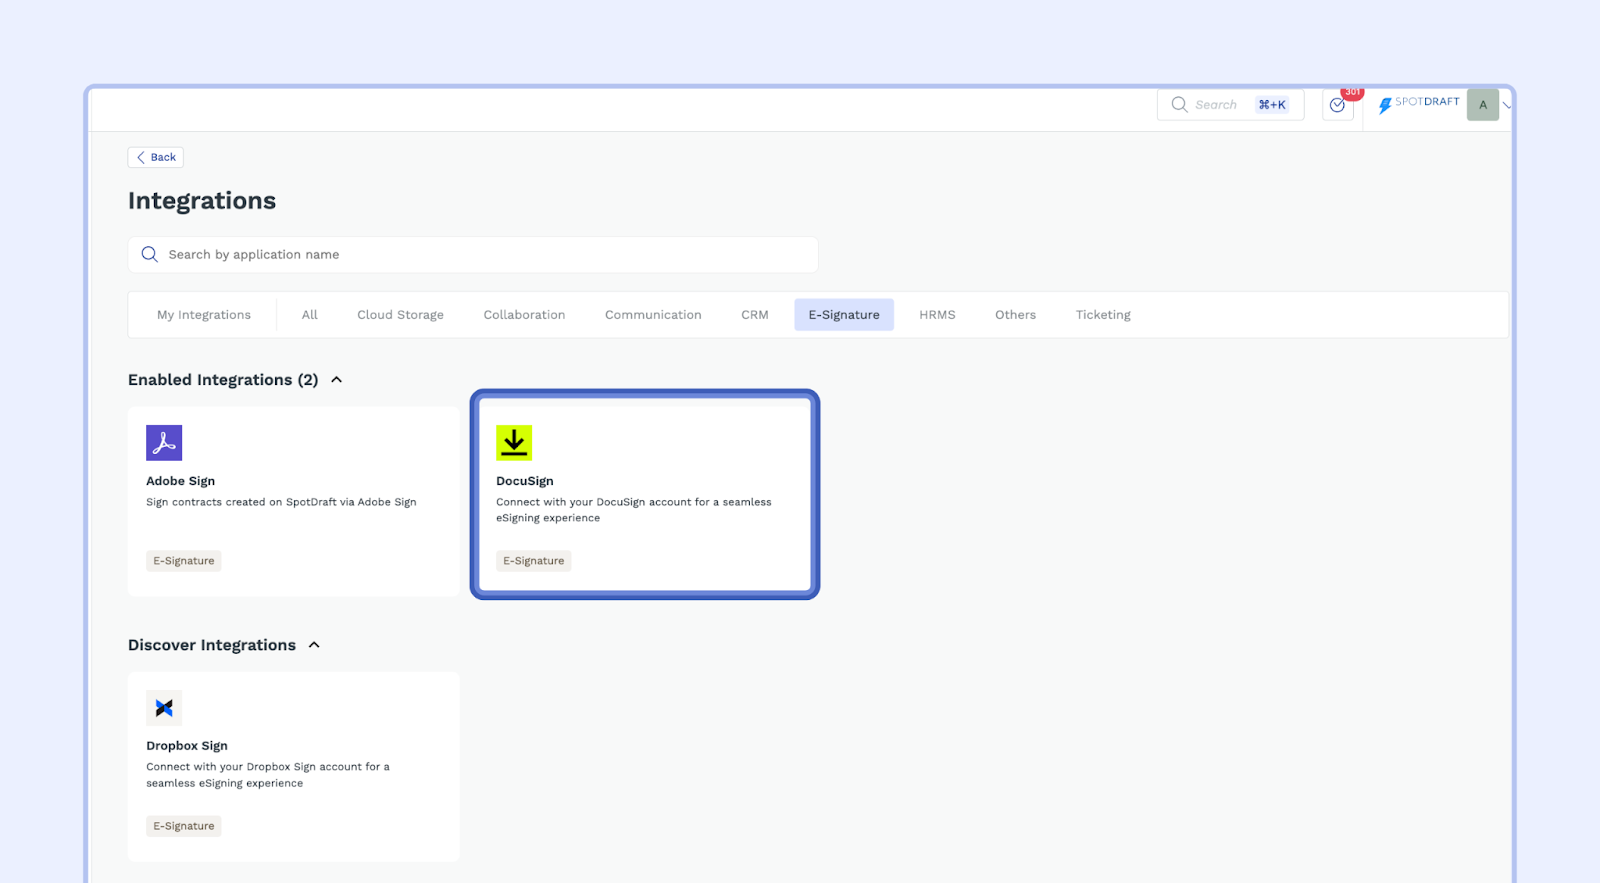
Setup and Connect: Click on the "Connect" button. A setup wizard will guide you through the next steps.
Authenticate DocuSign:
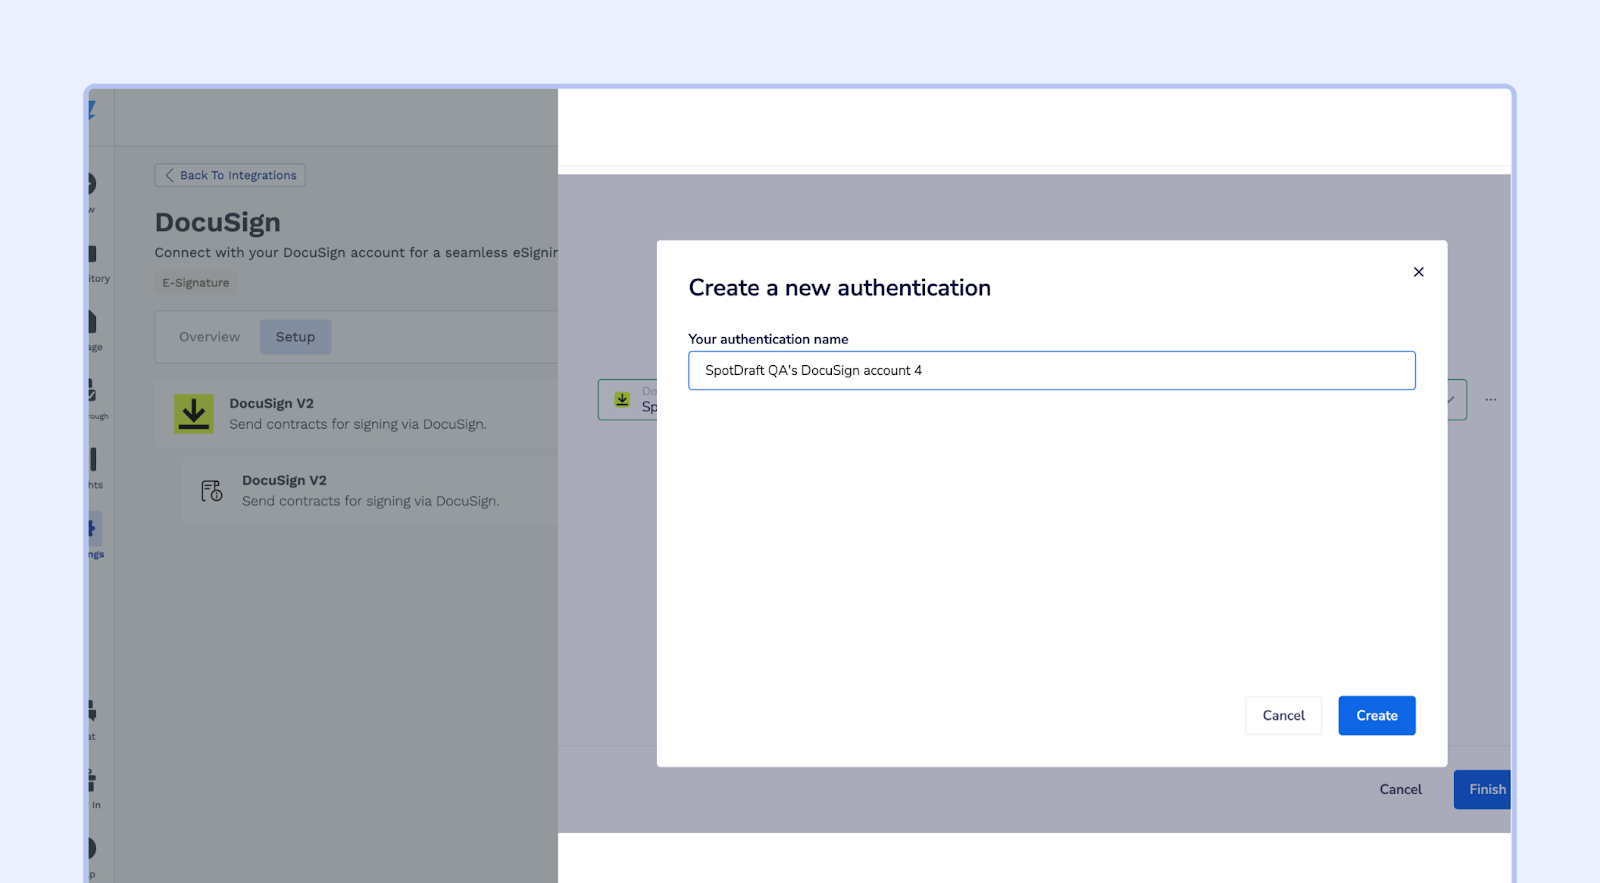
Click “Add a new account."
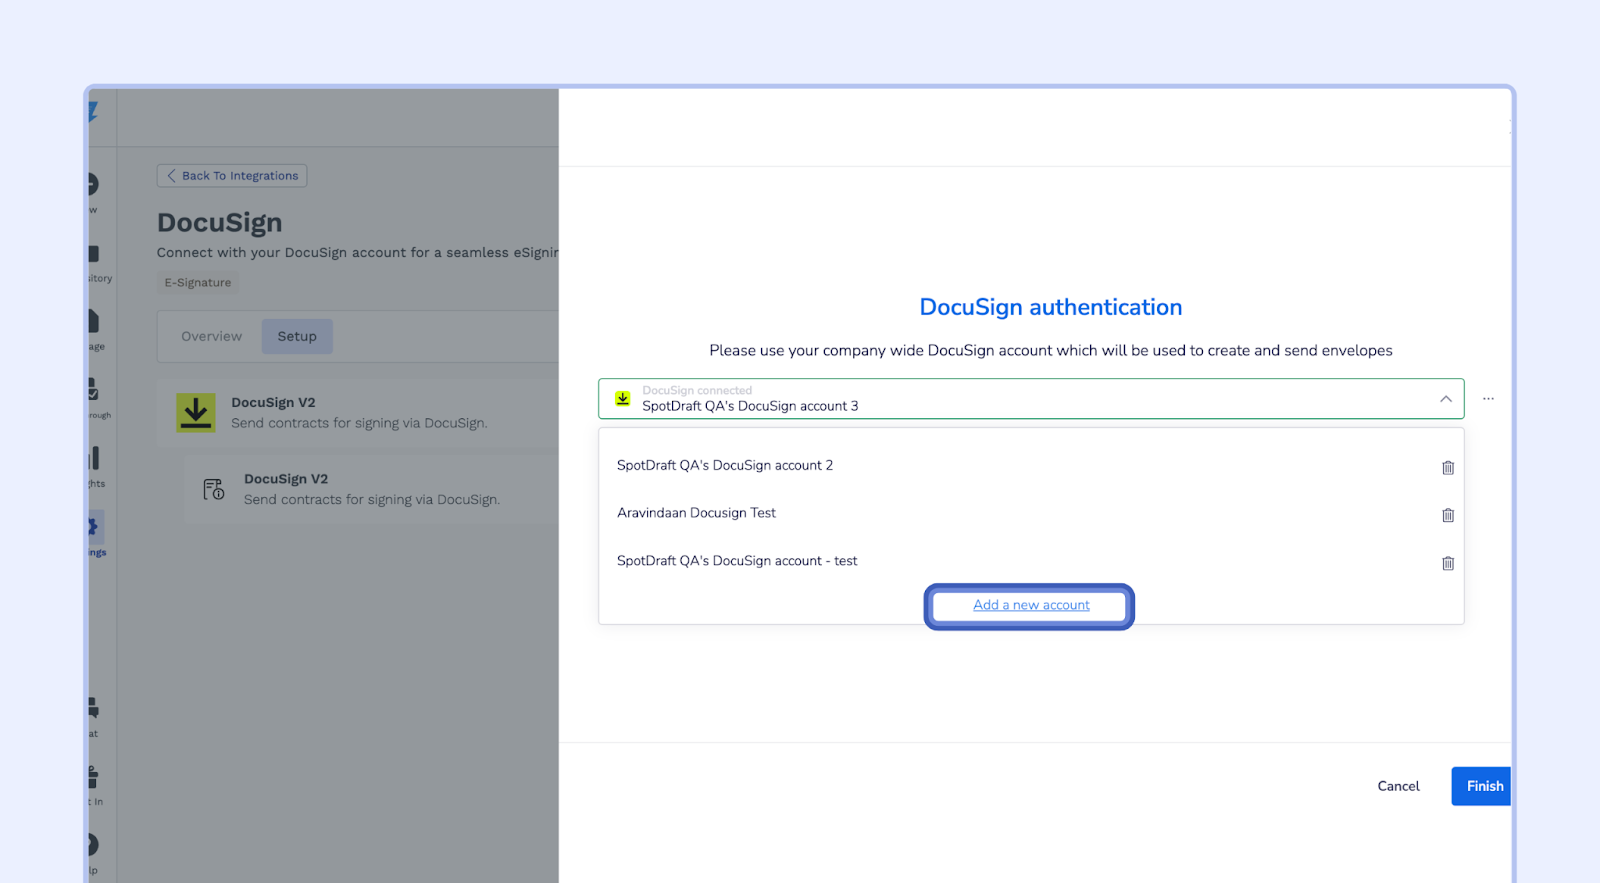
Set a name for the authentication, then click "Create."
Log in to your DocuSign account using the details provided in the prerequisites.
Click "Allow Access" to grant SpotDraft permission to access your DocuSign account.
Click "Finish" to complete the authentication process.
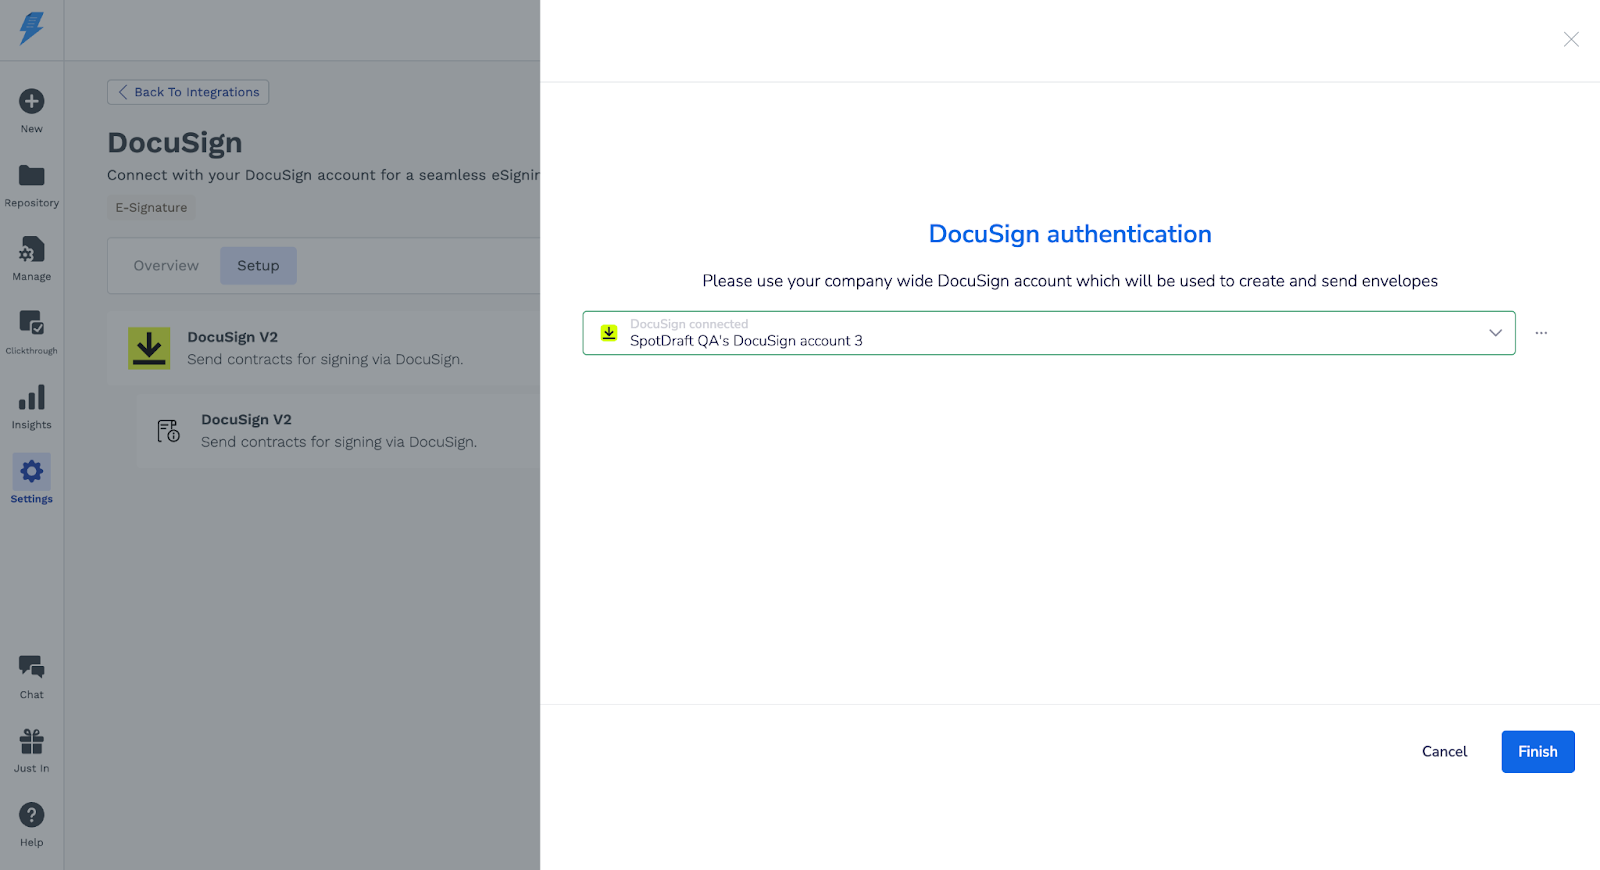
Confirm Installation: You'll be directed back to the integration page, and a success message confirming the successful installation will appear.
Set DocuSign as Default (Optional): If you want to make DocuSign the default eSignature service for certain contract types, you can set this up in the "Manage" > "Contract Types" section:
Select a Contract Type (e.g., CPQ).
Click "Signatories."
Select any Entity
Click "Edit."
Select "DocuSign" from the dropdown.
Click "Save."
Repeat these steps for each Contract Type where you want to use DocuSign as the default eSignature service.
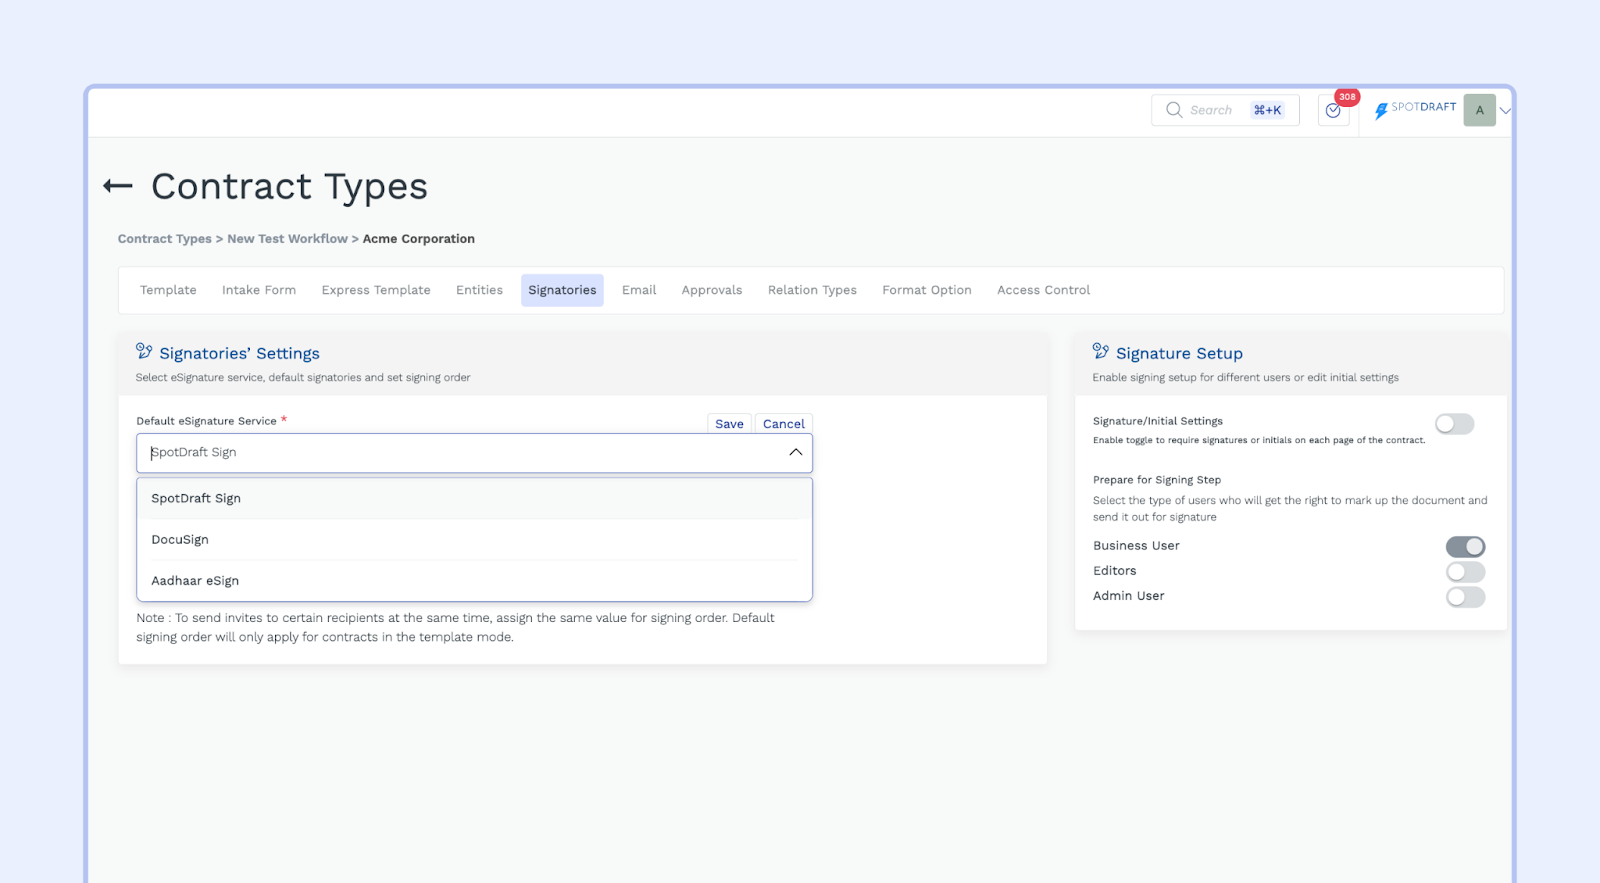
Note: This option is only available for contract types that are linked to a template.
Sending a Contract for Signature via DocuSign
Now that you've set up the DocuSign integration, you can send contracts for signature using DocuSign:
Introduction
This section will walk you through the steps of sending a contract for signature using the DocuSign integration within SpotDraft.
Prerequisites
Before you send a contract, make sure you have the following:
DocuSign Integration: You've successfully installed and configured the DocuSign integration.
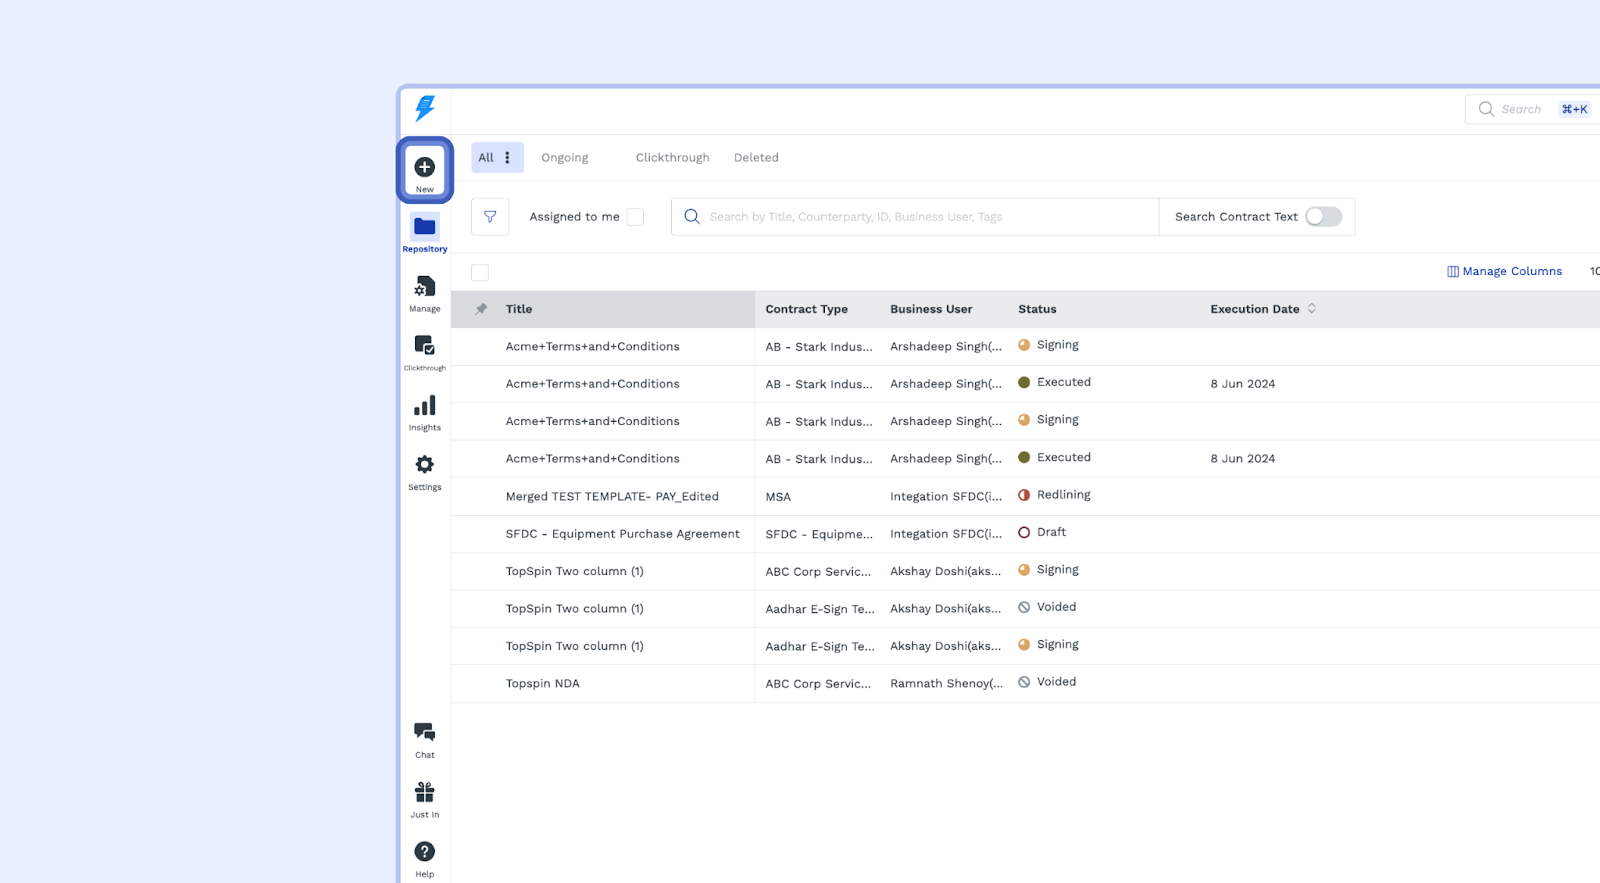
Step 1: Upload the Contract
Locating the +New Icon: From the navigation menu, Click on the +New icon : Upload a contract that you want to send for Signature via DocuSign.
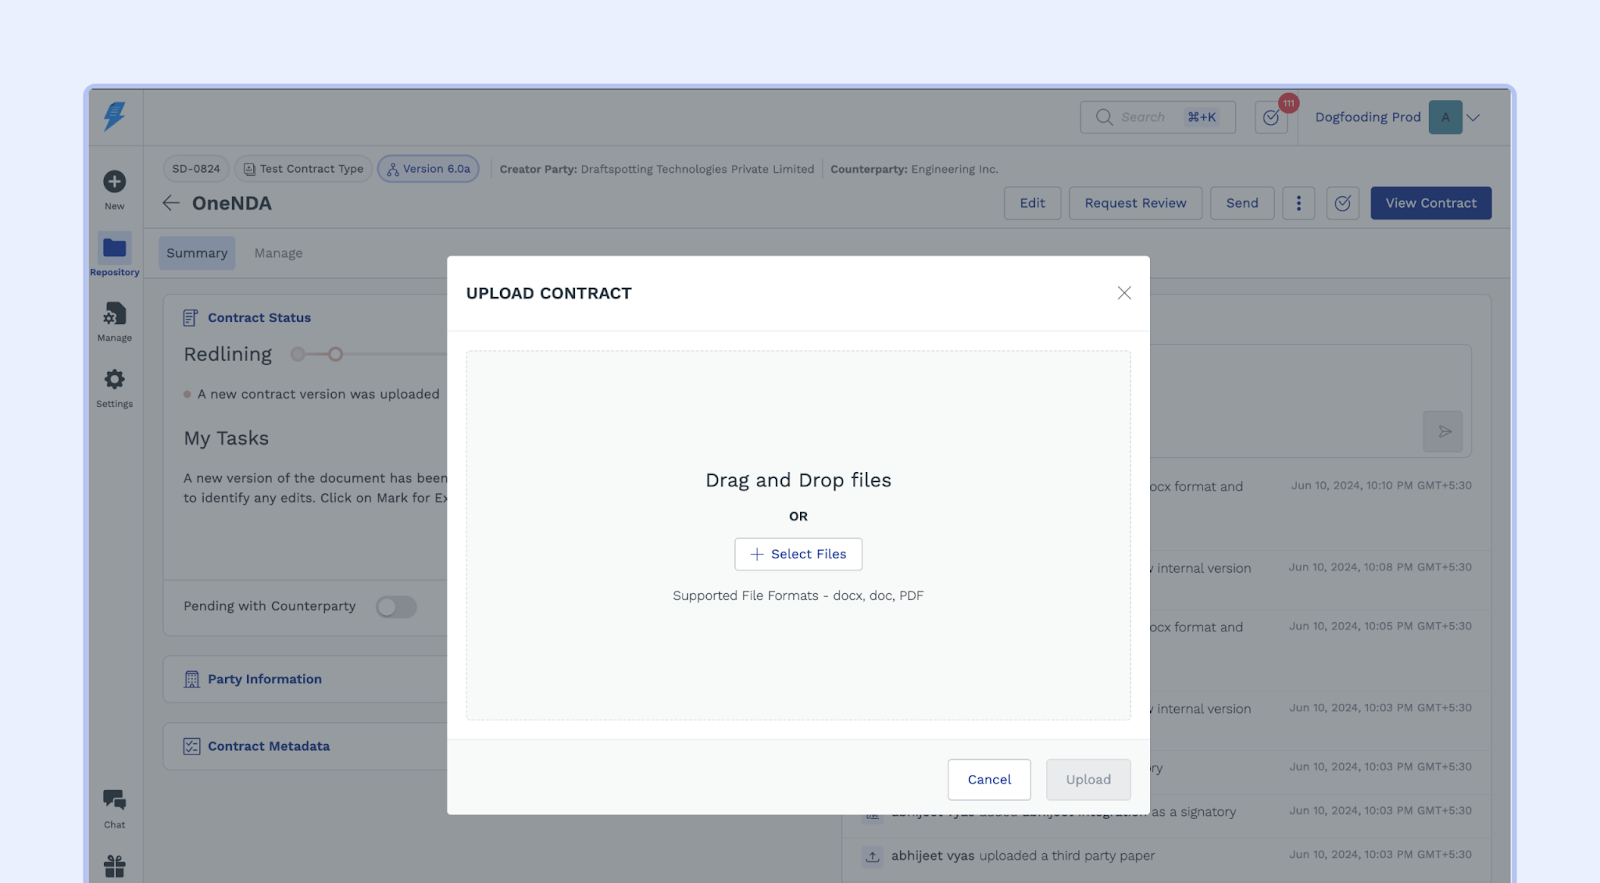
Send for Signature: Click the "Send for Signature" button.

Upload the Contract: Click the "Select Files" button and select the contract document from your computer. SpotDraft supports .doc, .docx, and .pdf file formats.
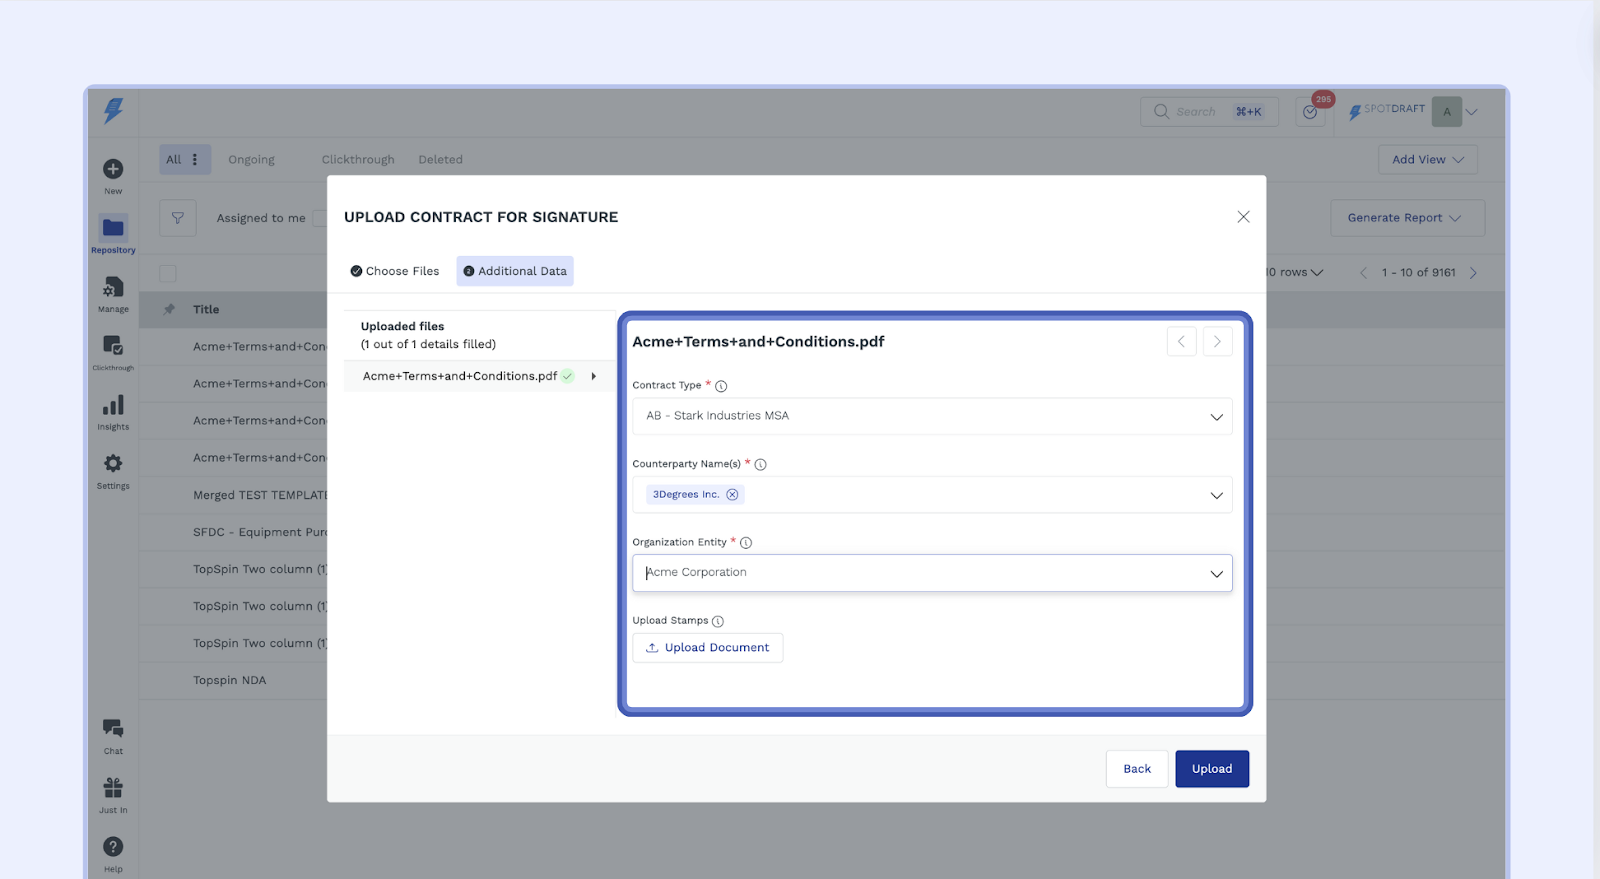
Step 2: Add Additional Data
Contract Type: Select the appropriate contract type from the dropdown list. This helps categorise your contracts and ensures consistency within your SpotDraft repository.
Counterparty: Choose the counterparty from the provided list. You can also add a new counterparty by typing their name and email address in the provided field.
Note: To add new counterparties or use AI suggestions, you must have the "Manage Counterparties" permission enabled. This permission is granted at the team level. If you can only select from existing counterparties in the dropdown, contact your Admin team to request this permission for your team.
Organization Entity: Choose the relevant organization entity from the dropdown list. This helps identify the specific organization associated with the contract.
Stamps(optional: only for Indian entities): Upload the stamp you want to be affixed at the top of the contract after it is uploaded.
Approvals(optional): You can collect pre-signature approvals before sending the contract out for signatures.
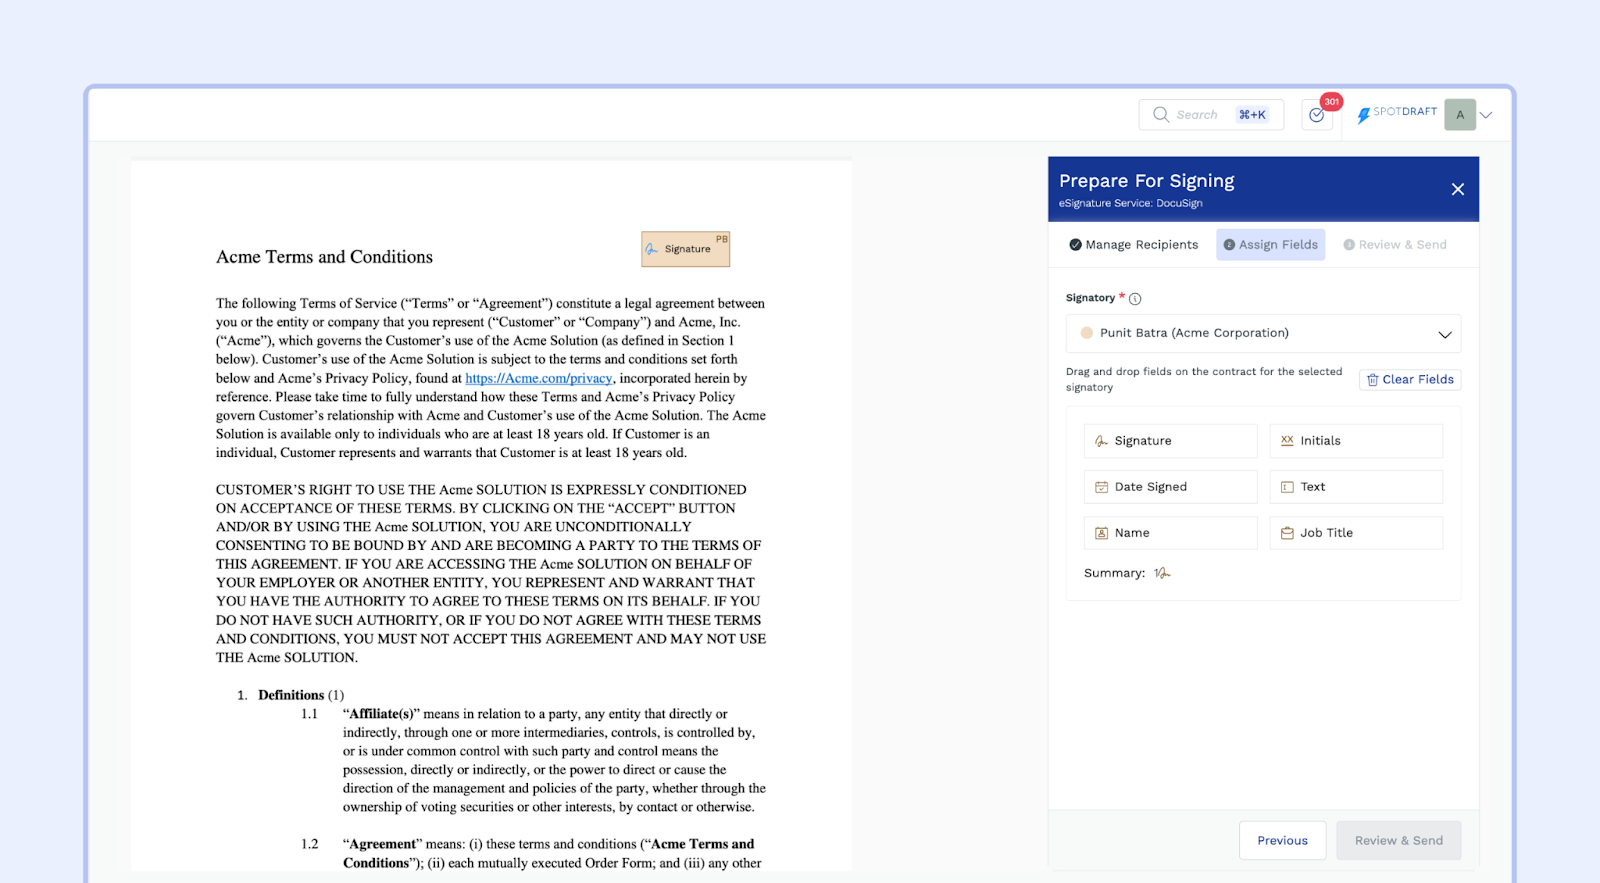
Step 3: Prepare for Signing
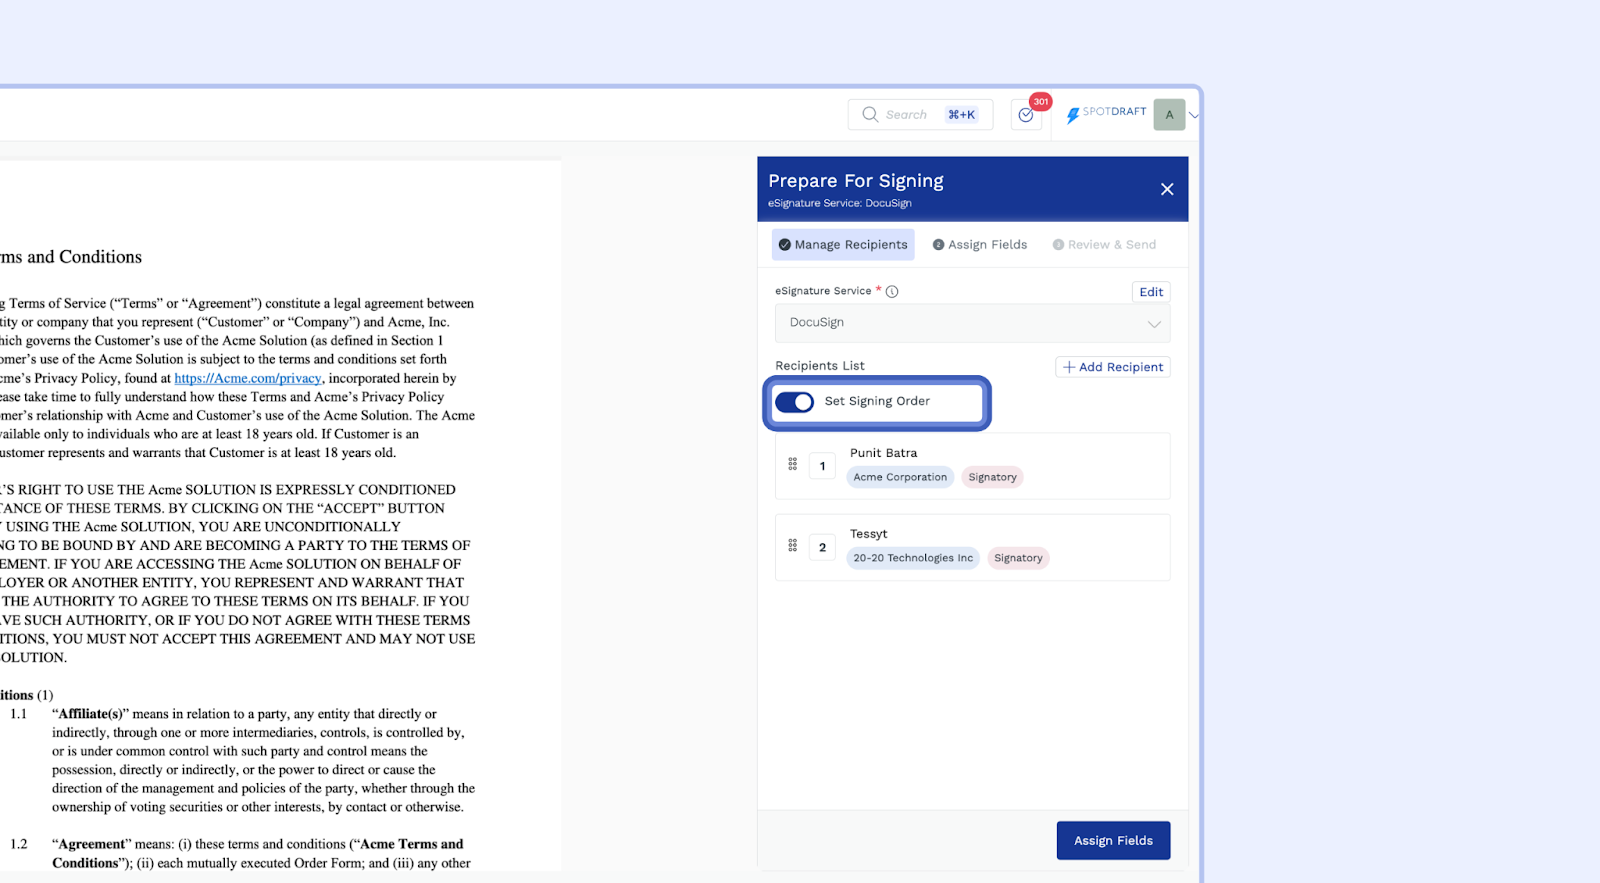
eSignature Service: Ensure that "DocuSign" is selected as the eSignature service.
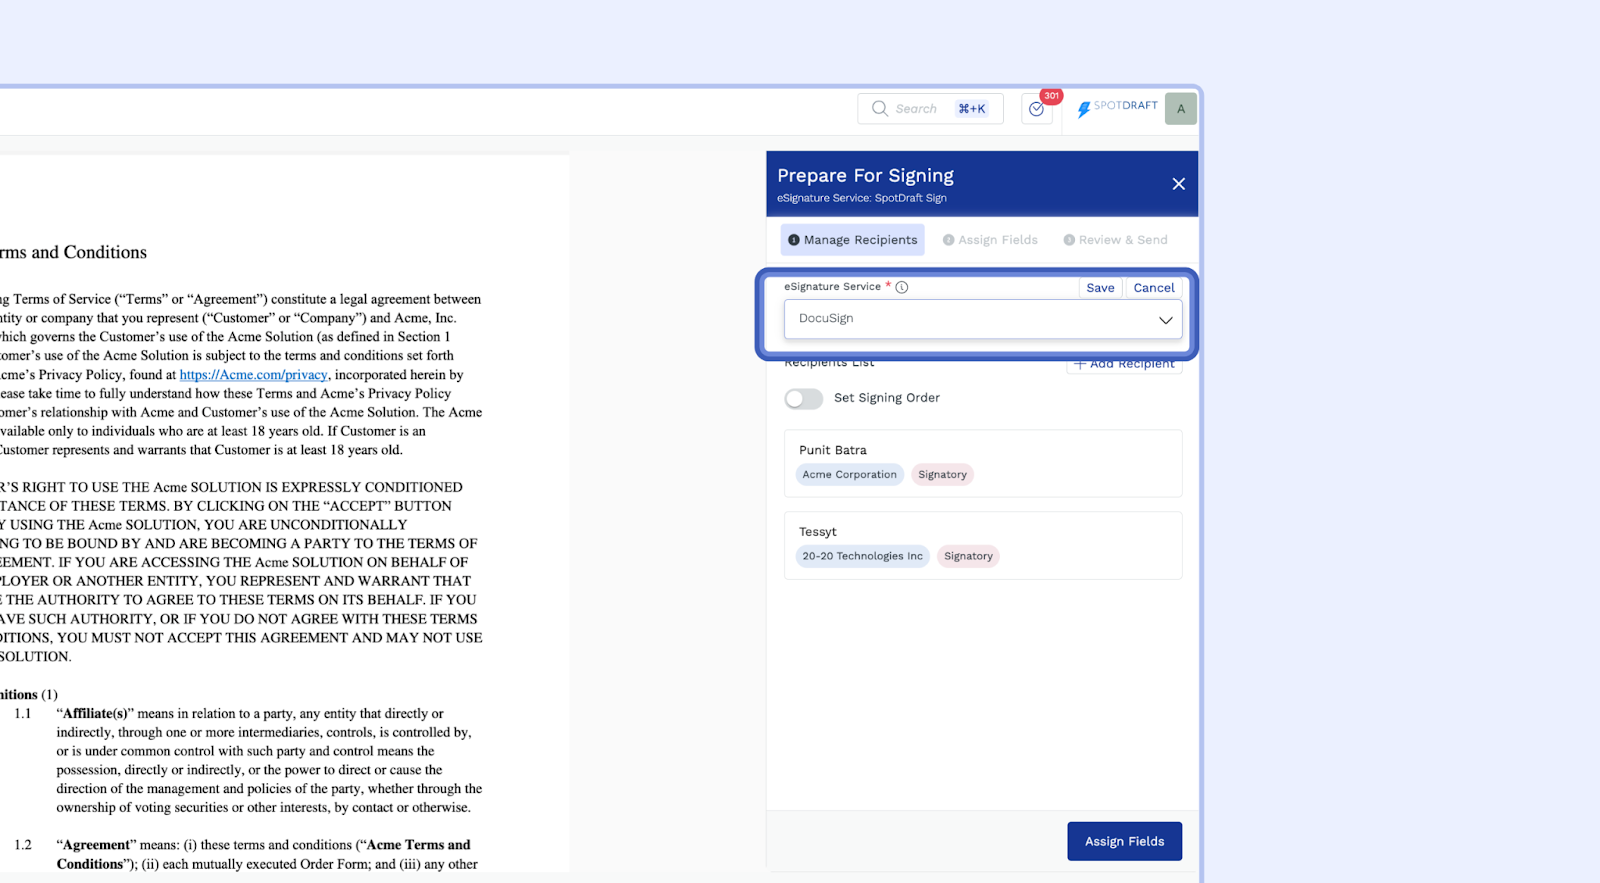
Manage Recipients: You can add signatories (recipients) to the contract using the "Add Recipient" button.
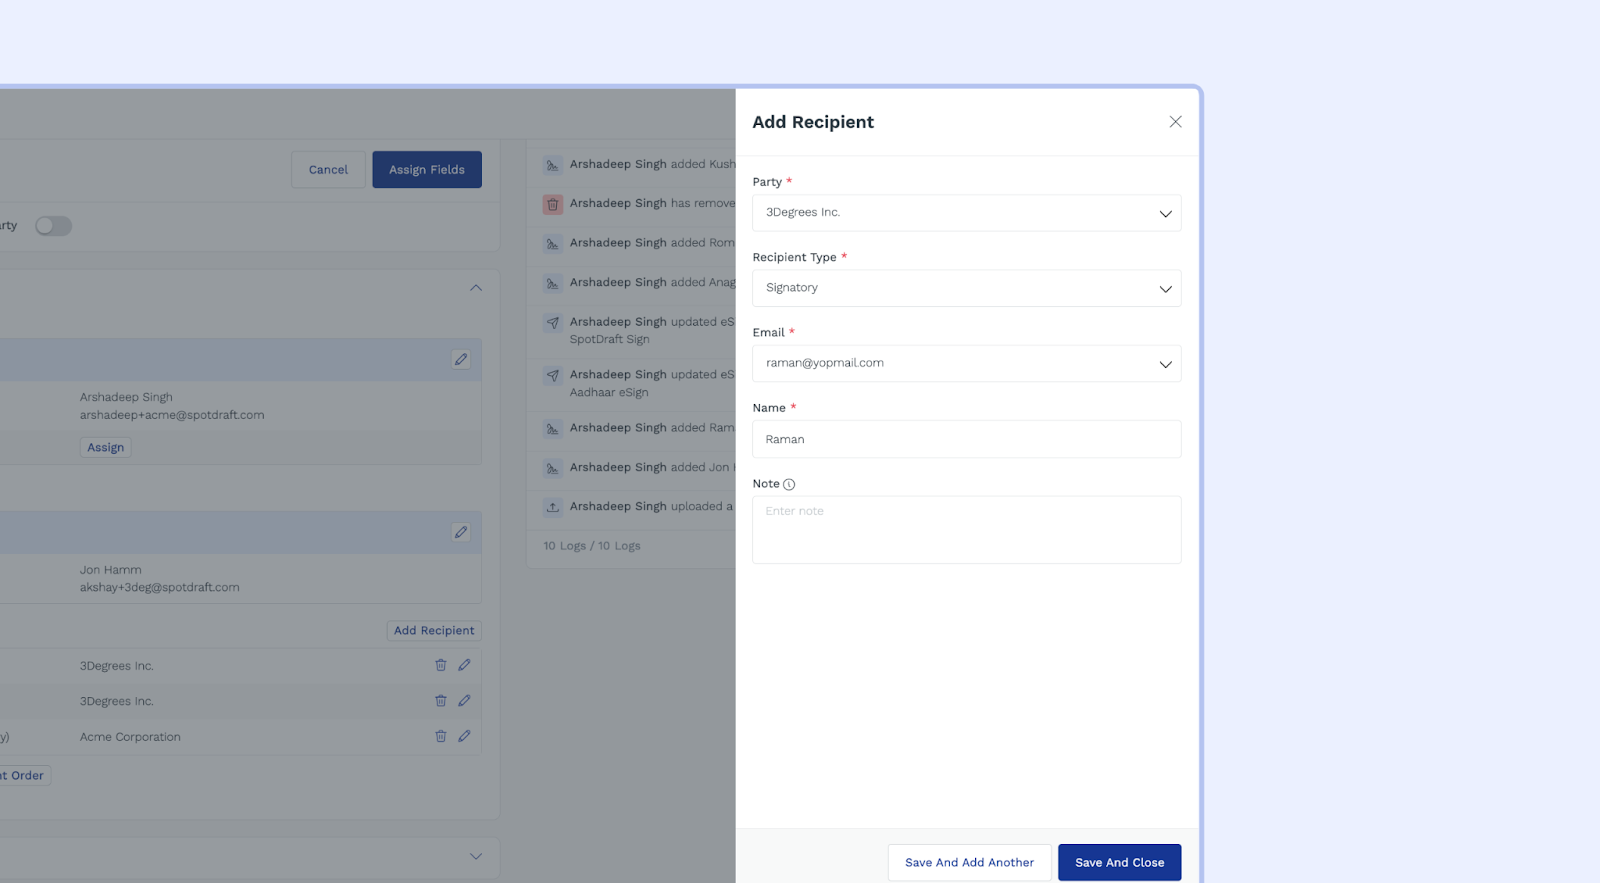
Note: Each recipient should be associated with a specific party (e.g., "Acme Corporation").Add Recipients:Click the "Add Recipient" button. In the pop-up window, select the appropriate party and recipient type (e.g., Signatory). Enter the recipient's email address and name, and add a note if necessary.
Save and Add Another: This option allows you to add the current recipient to the list and keep the side sheet open so you can add more recipients.
Save and Close: This option saves the current recipient to the list and closes the side sheet.
Set Signing Order: If needed, configure the signing order by dragging and dropping the recipients into the correct sequence.
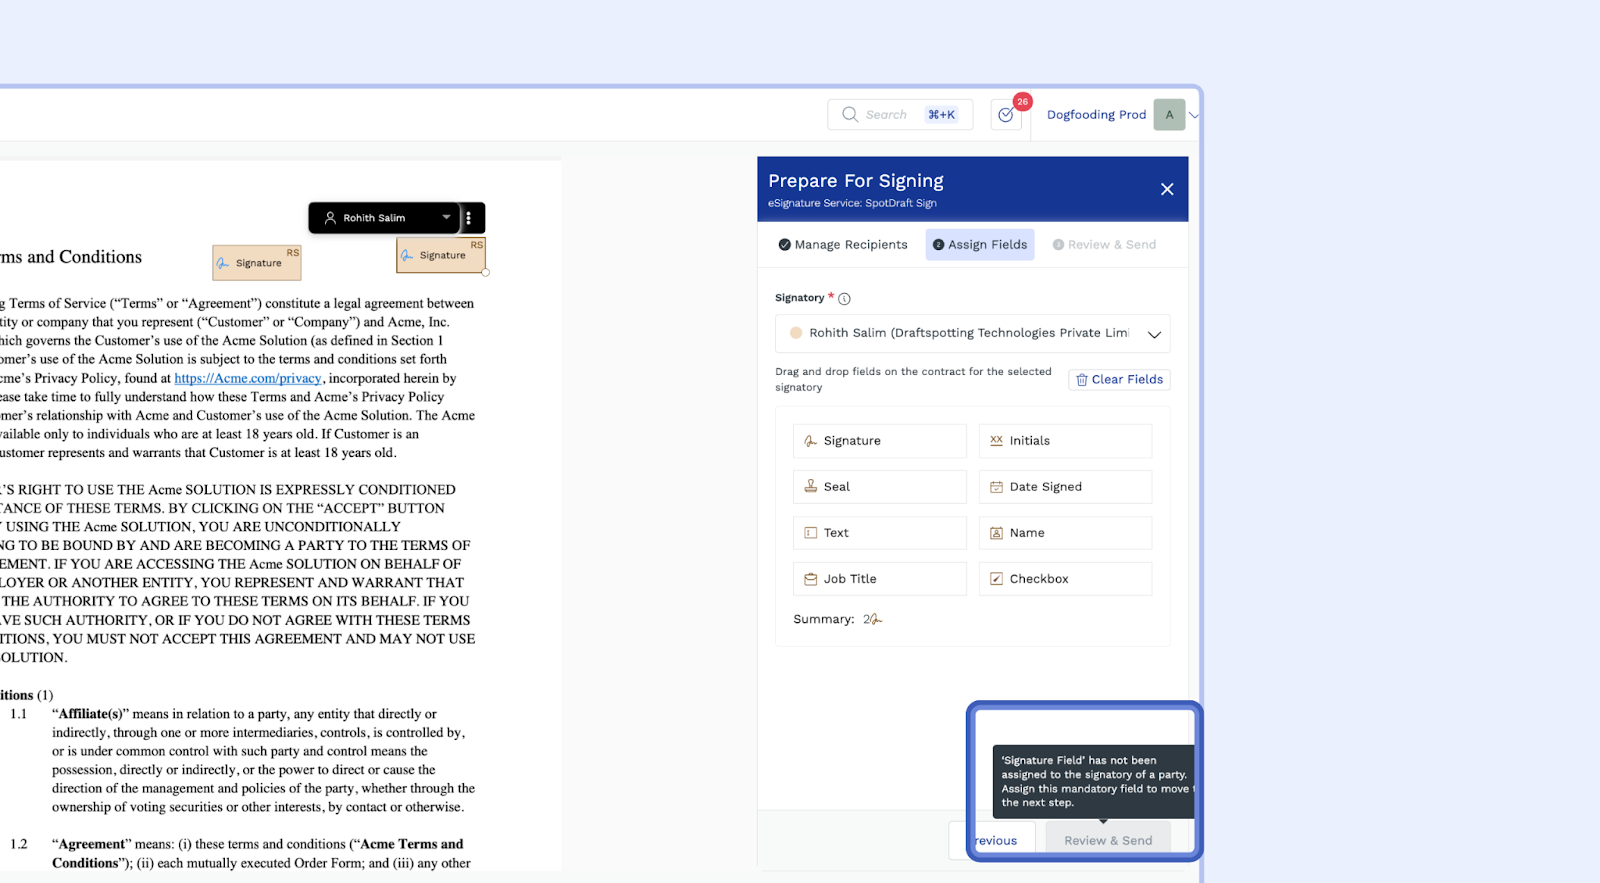
Step 4: Assign Fields: Click "Assign Fields."
Drag Drop Field Fields: On the "Assign Fields" screen, drag and drop the desired fields (The DocuSign integration in SpotDraft supports six fields: Signature, Initials, Date Signed, Text, Name, and Job Title) onto the contract page. You can also use the "Clear Fields" button to reset the assigned fields.
Note:- To proceed with preparing the contract for signatures, make sure to assign fields to all the signatories of the counterparty. If this isn't done, you will be blocked from moving to the next step.
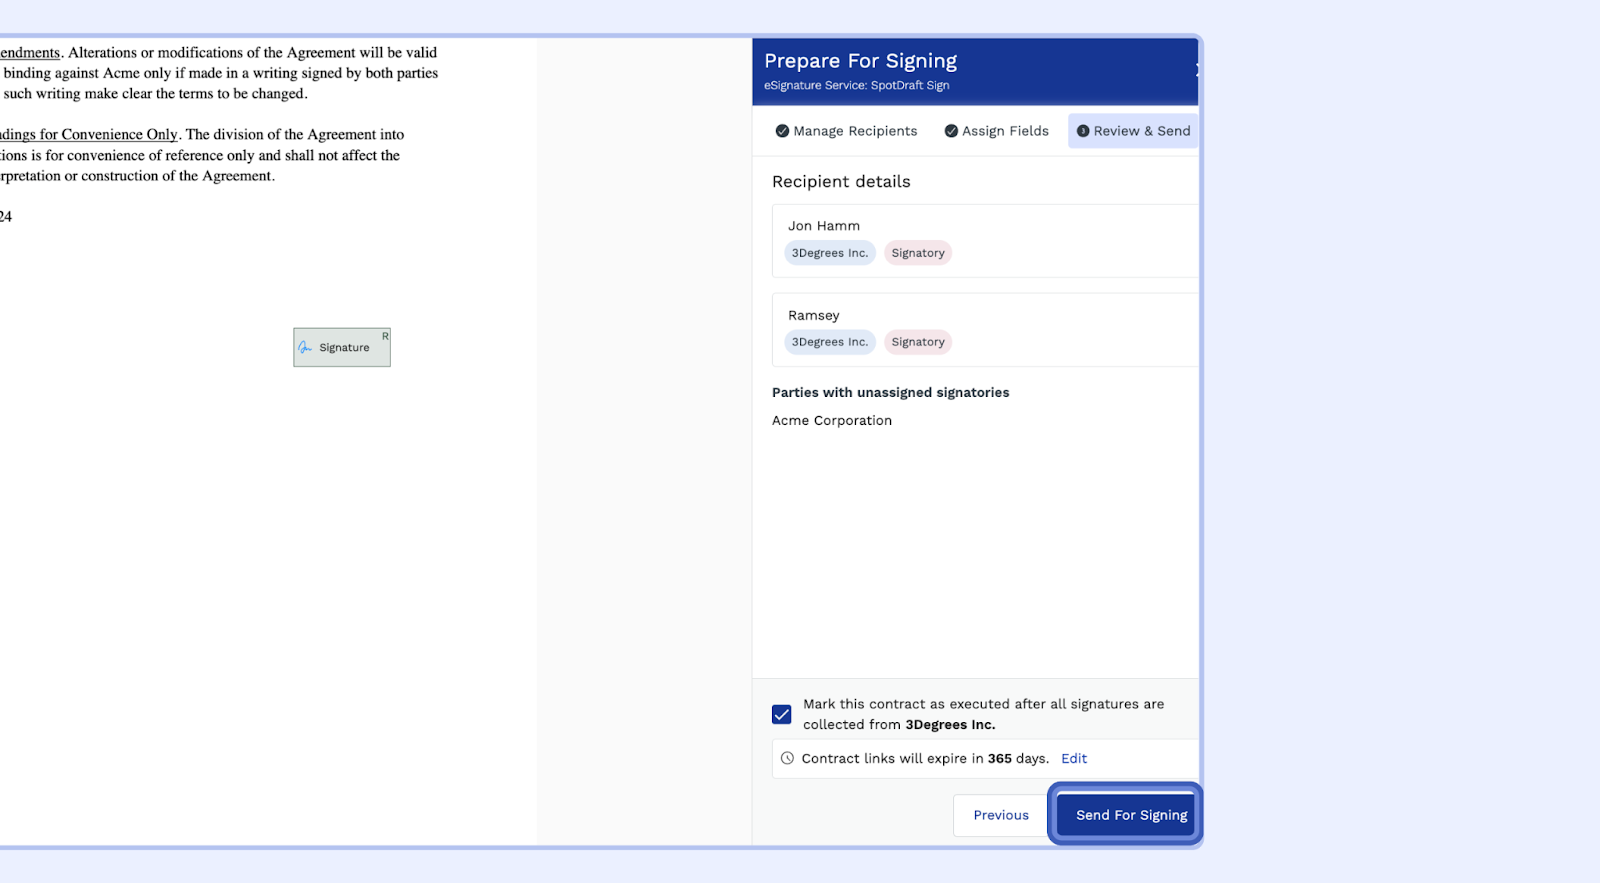
Step 6: Review and Send
Review: Carefully review the assigned fields and recipient information to ensure accuracy.
Send For Signing: Once you're satisfied, click the "Review & Send" button to send the contract for signature.
Additional Tips
Setting Default Signature Service
You can set up a default eSignature Service as DocuSign for contracts on the Contract Type level. To go to a contract type click from the side navigation menu Click on Manage → Contract Types → Signatories.This is specifically useful for contracts created via Template Flow.
Access to prepare the contract for signatures
You can control who has access to prepare a contract for signing by going to Contract Type → Choose the Entity. Then, in the Prepare for Signing settings, turn the toggle off for Business Users, Editors, or Admins, depending on your business use case. Note that at least one role must remain enabled to prepare the contract for signing.
Signatory Reassignment from DocuSign
When a signatory uses DocuSign's "Assign to Someone Else" option to redirect signing to another person, SpotDraft automatically syncs this change. Here's what happens depending on who the reassigned person is:
New person (not in SpotDraft), reassigned on behalf of a creator party signatory: The new person is added as a workspace user and linked as the signatory on the contract.
New person (not in SpotDraft), reassigned on behalf of a counterparty signatory: The new person is added as a counterparty contact and linked as the signatory on the contract.
Existing teammate in the same workspace: SpotDraft resolves the existing user and links them as the signatory.
Person who exists in a different SpotDraft workspace: The original signatory is retained on SpotDraft's side. Signing is completed on the original signatory's slot, and the activity log records that signing was performed by the reassigned person.
In all scenarios, the contract transitions to "Executed" once signing is complete. No manual intervention is required.
FAQs
Here are some commonly asked questions about the SpotDraft-DocuSign integration:
How to track a contract sent via DocuSign?
You can track the status of documents sent for eSignature in real time within the SpotDraft Activity Log.
What happens when I unmark the contract for execution on SpotDraft for a contract which was previously sent for signing via DocuSign?
When a contract is unmarked for execution, SpotDraft voids the current version on DocuSign and creates a new contract there.
What happens when a contract initiated on SpotDraft is voided through DocuSign?
If a contract initiated on SpotDraft is voided through DocuSign, it will also be voided on SpotDraft. The Activity Log will record the email of the user who voided the contract on DocuSign.
What happens when a signatory is reassigned on DocuSign?
SpotDraft automatically detects the reassignment and updates the signatory details on the contract. If the reassigned person is new, they are added as a workspace user (for creator party) or counterparty contact (for counterparty) automatically. If the reassigned person already exists in a different SpotDraft workspace, the original signatory is retained and the activity log captures who actually signed. The contract moves to "Executed" normally in all cases.
Troubleshooting
Common Connection & Setup Issues
Contracts fail to send or move forward: If a contract fails to progress to the signing stage, the integration may have been broken due to a password change on the authenticated DocuSign account. Re-authenticating the DocuSign integration typically resolves this issue.
Navigate to Settings → Integrations
Select DocuSign
Click Setup
Click Update
Click the three dots (⋯) next to your DocuSign account
Select Edit, then click Save
Once you see the "Re-authentication successful" message, click Next and Finish setup
DocuSign is missing as a signature option: If you cannot see DocuSign as an option when sending contracts, the integration may need to be refreshed. Try re-authenticating the connection. Ensure steps to connect with DocuSign are followed as mentioned in this article.
Re-authentication Tip: It is imperative to log out of all DocuSign accounts before re-authenticating. This prevents the system from automatically logging into the wrong account and ensures the integration is manually linked to the correct administrative account.
Resolving Error Messages
"Bad Request" error: This error usually indicates that the DocuSign account used for the integration lacks sufficient permissions. Ensure the linked account is a 'DocuSign Admin' or 'Sender account' with the authority to create and send signature envelopes.
"Session Timeout" or expired link errors: These errors occur when a signing link has timed out or expired. As a workaround, signers can log directly into their DocuSign account on the back end to access and sign the document.
Email & Notification Issues
Signers not receiving notification emails: DocuSign emails are sent directly from DocuSign’s servers rather than SpotDraft. If notifications are not being received, your organisation’s email security settings may be blocking them.
Signing Page Access
Cannot access DocuSign signing page from SpotDraft: Signatories who receive a SpotDraft link or task cannot click through directly to the DocuSign signing page from within SpotDraft. This is expected behavior in the current implementation.
Expectation: Signatories should use the DocuSign notification email sent directly from DocuSign to access and sign the document, or log into their DocuSign account directly to locate the envelope.
Resolution: Coordinate with your IT team to ensure DocuSign emails are not being filtered, blocked, or routed to spam.
Still need help? Reach out to support: help@spotdraft.com