Coupa Vendor Sync Integration
Last updated: November 19, 2026
Introduction
SpotDraft's Coupa integration lets your team create and manage contracts with supplier data from Coupa, without manual data entry. The Coupa Vendor Sync keeps your SpotDraft counter parties in sync with your Coupa suppliers.
This article has three parts: the OpenID Connect setup on the Coupa side, the field mapping and integration setup on the SpotDraft side, and the steps to verify the integration.
Important note
SpotDraft connects to Coupa through an OpenID Connect (OAuth2) client with the Client Credentials grant. Your Coupa administrator creates this client once and shares the credentials with SpotDraft. SpotDraft uses these credentials to read supplier data from Coupa and sync it to SpotDraft.
Pre-requisite
Complete the following before you start:
Coupa administrator access, so you can create the OpenID Connect client and generate the API credentials.
SpotDraft administrator access, so you can open Settings > Integrations > Coupa.
Agreed field mapping, so you know which Coupa supplier fields map to which SpotDraft counter party fields (see Part 2).
Step-by-step setup guide
This guide walks you through the full setup in three parts: the Coupa side, the SpotDraft side, and verification.
Part 1: Set up OpenID Connect in Coupa
Your Coupa administrator creates an OpenID Connect client with the Client Credentials grant and shares the credentials with SpotDraft.
Log in to Coupa as an administrator.
Go to Setup > Integrations > OAuth2/OpenID Connect Clients.
Click Create.
Enter a name, for example SpotDraft Vendor Sync.
Set the Grant Type to Client Credentials.
Add all the scopes listed below.
Click Save.
Copy the Client ID and Client Secret.
Share the Client ID, Client Secret, and your Coupa instance URL with SpotDraft, through a secure method.
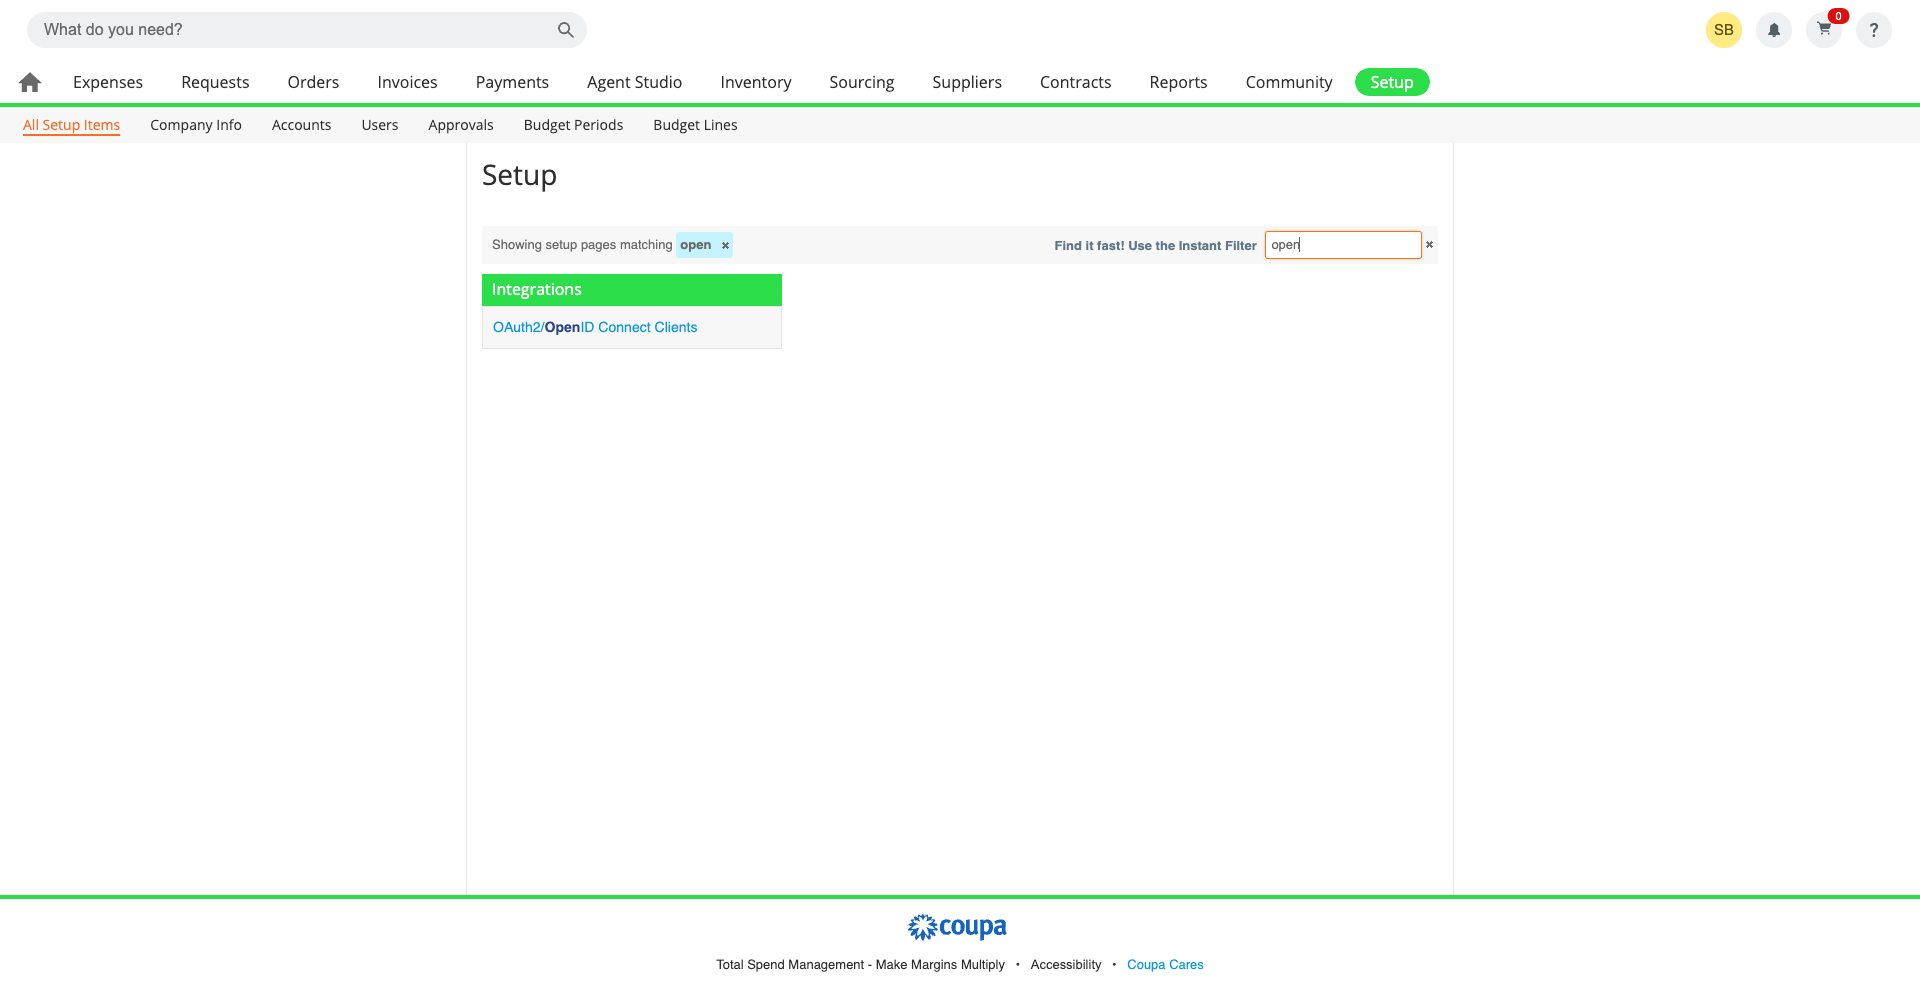
[Screenshot: Coupa — OAuth2/OpenID Connect Clients list under Setup > Integrations]
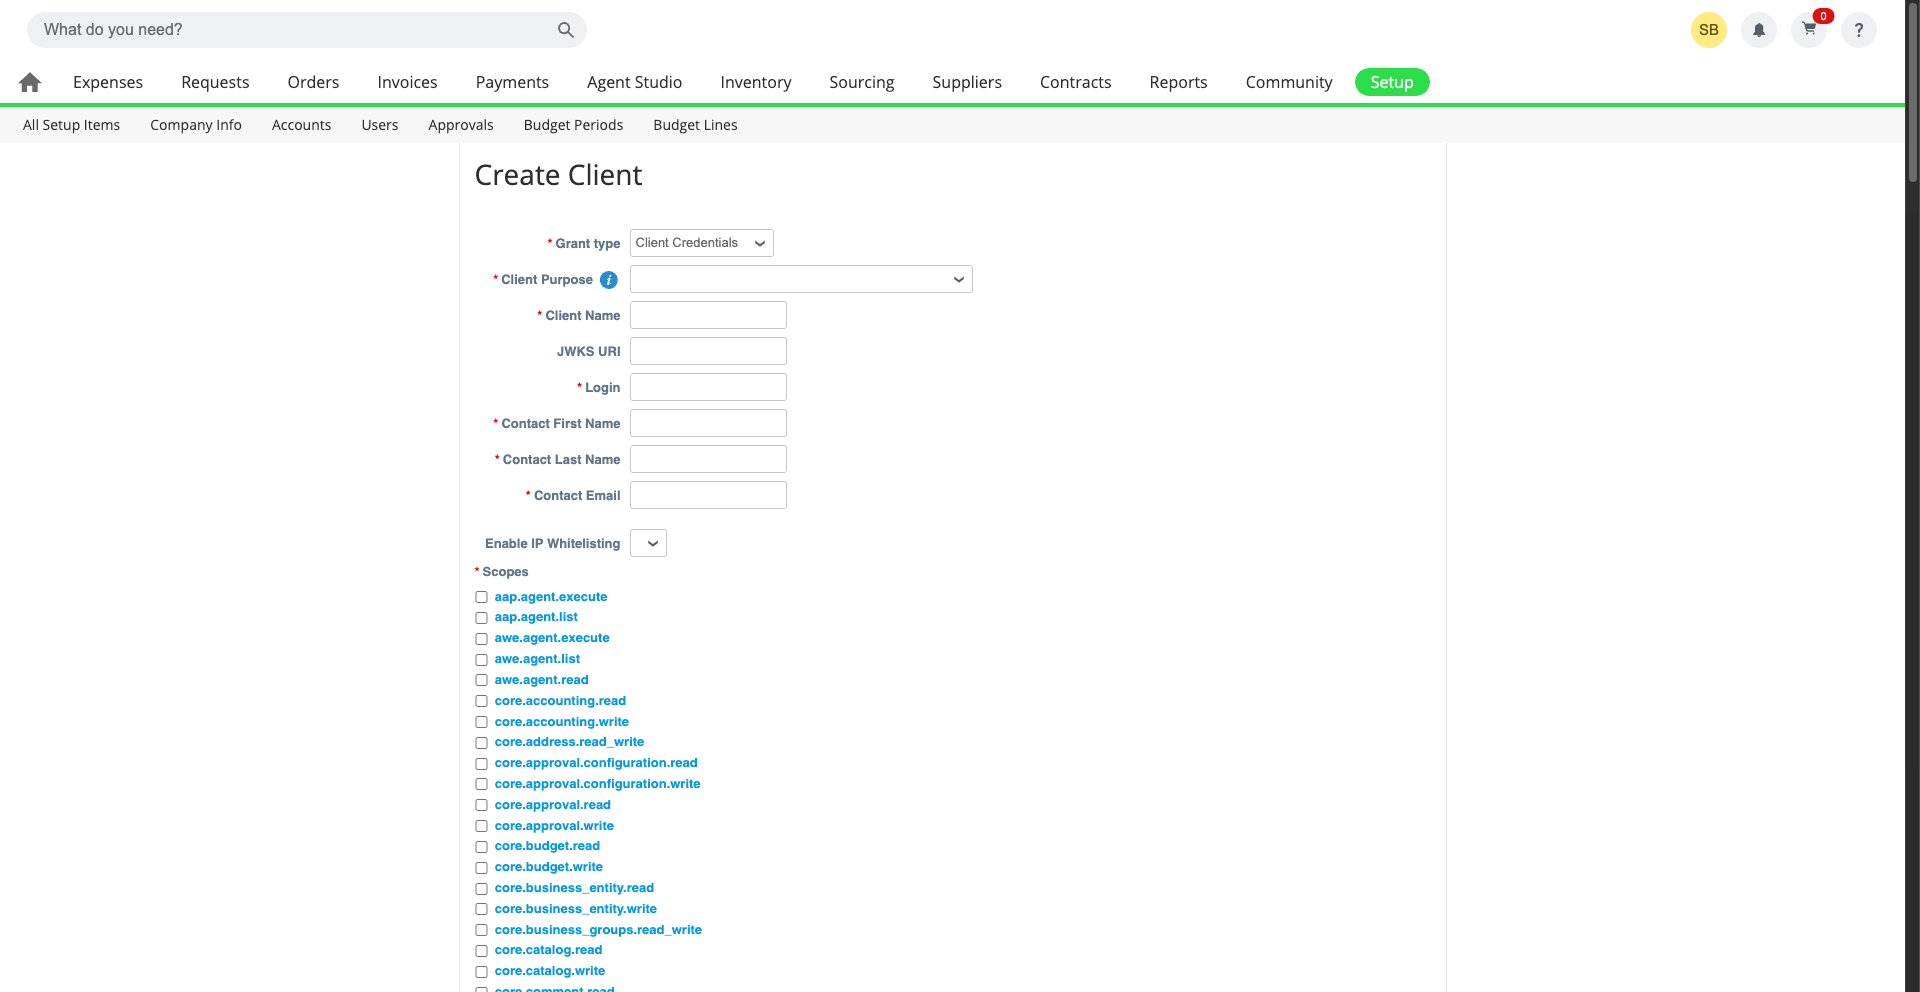
[Screenshot: Coupa — Create client form with Grant Type set to Client Credentials and scopes selected]
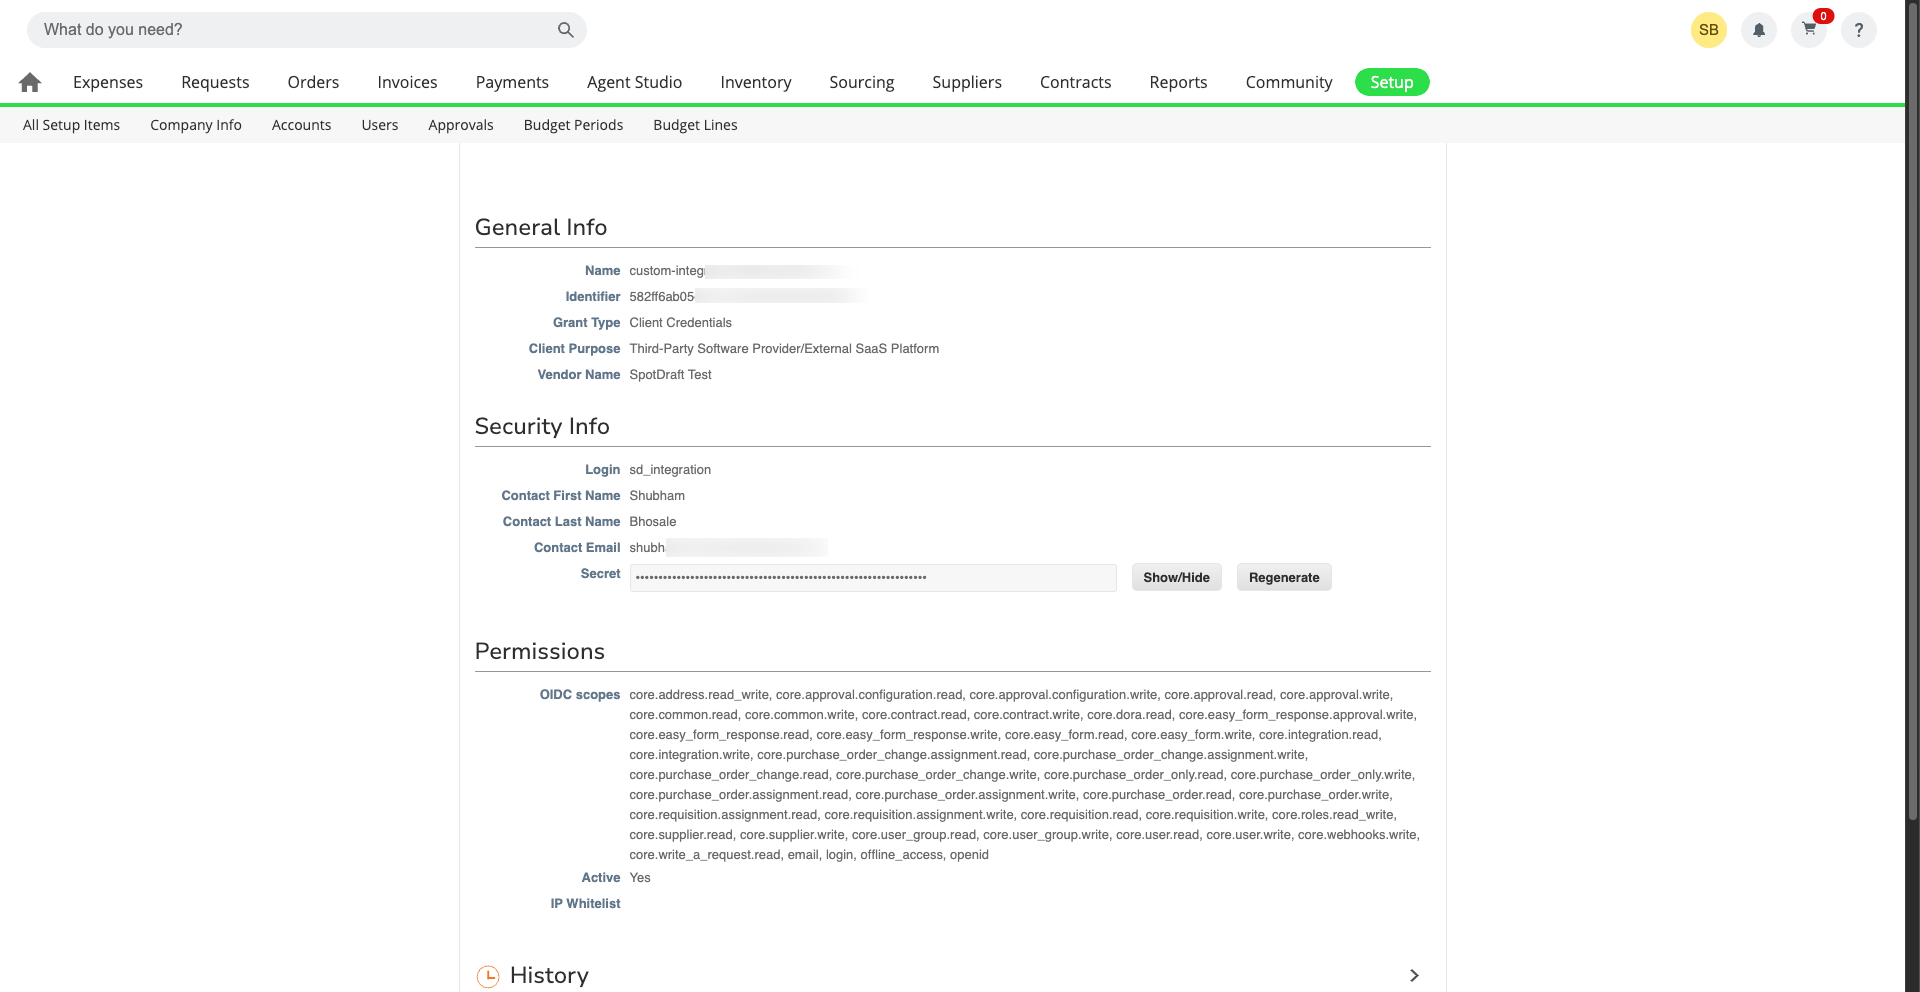
[Screenshot: Coupa — Client ID and Client Secret shown after the client is created]
Add all of these scopes:
core.approval.write core.common.read core.contract.read core.contract.write core.easy_form_response.read core.purchase_order.read core.purchase_order.write core.requisition.read core.requisition.write core.supplier.read core.supplier.write core.user_group.read core.user.read offline_access openid core.easy_form_response.write core.easy_form.read core.easy_form.writeNote: The scopes must match exactly. openid and offline_access are required for the connection.
Part 2: Configure the integration and field mapping in SpotDraft
After Coupa shares the credentials, add the authentication, enable the integration, and map the fields in SpotDraft.
Add the authentication
In SpotDraft, go to Settings > Integrations > Coupa and open the Sync tab.
Add a new authentication. Enter the Coupa Client ID, Client Secret, and instance URL from Part 1.
Save the authentication.
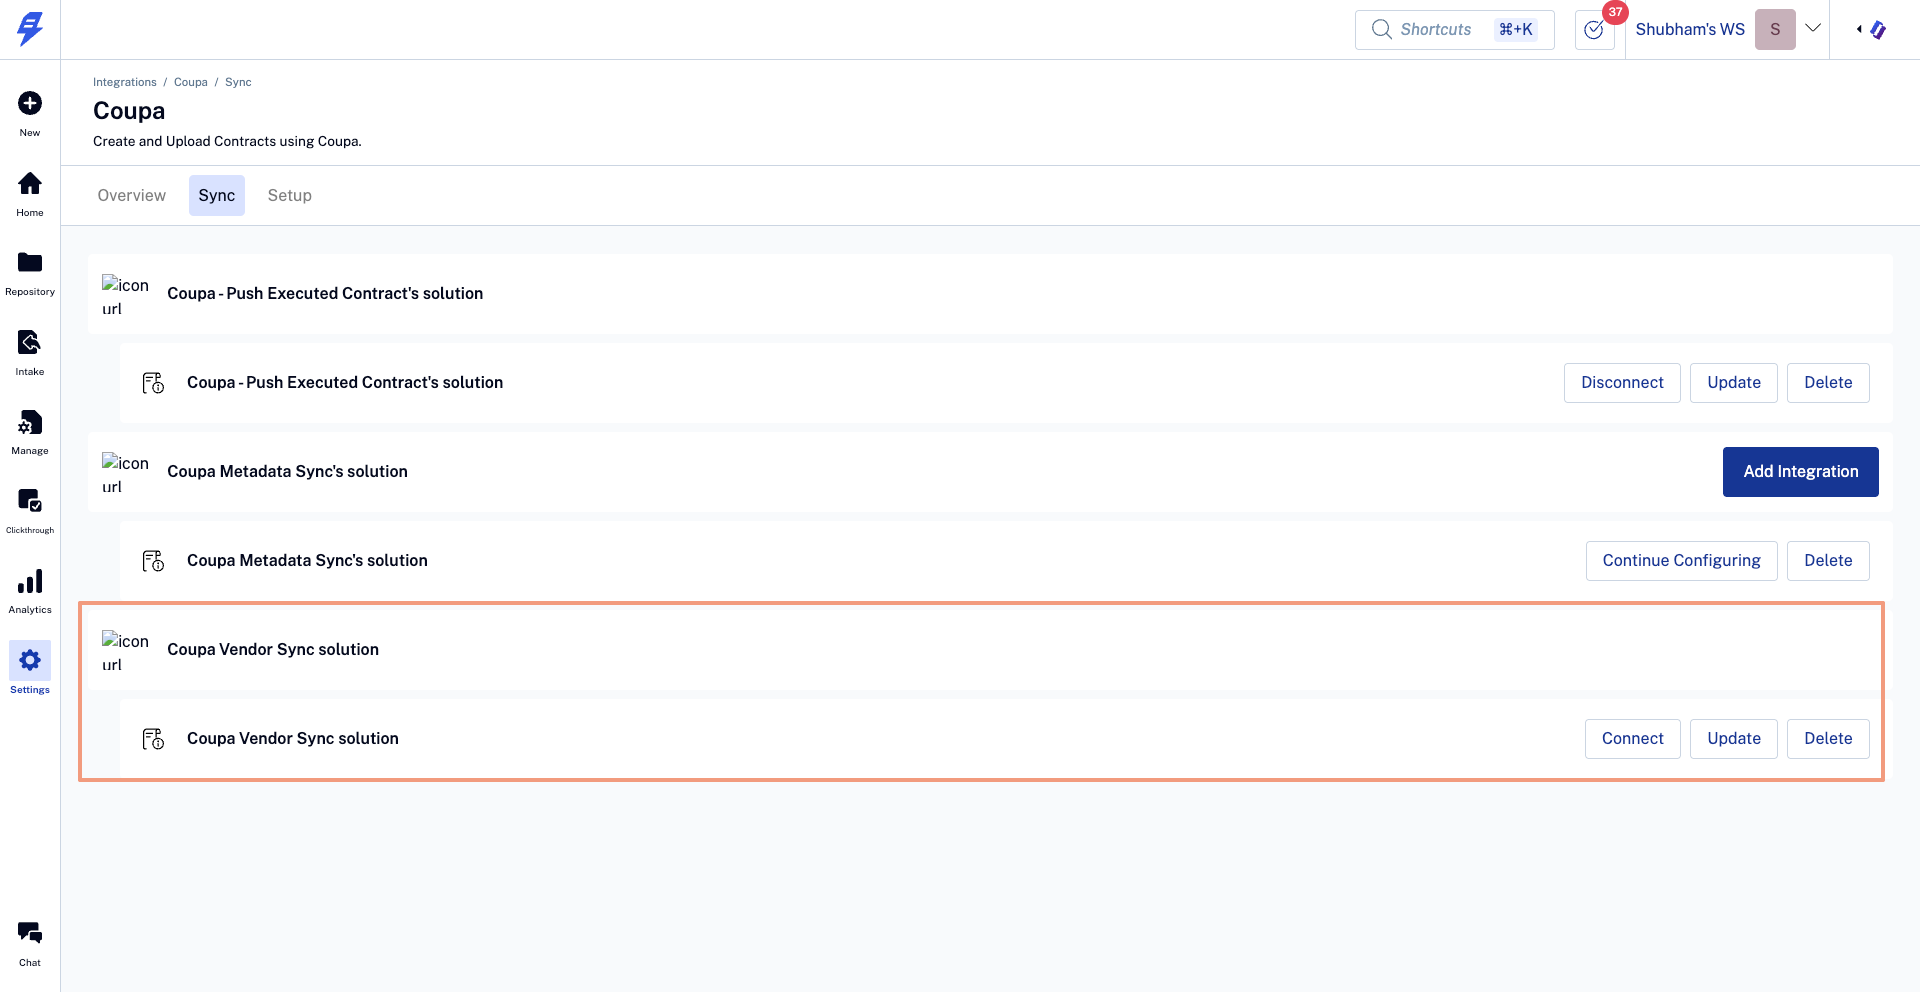
[Screenshot: SpotDraft — Settings > Integrations > Coupa > Sync tab]
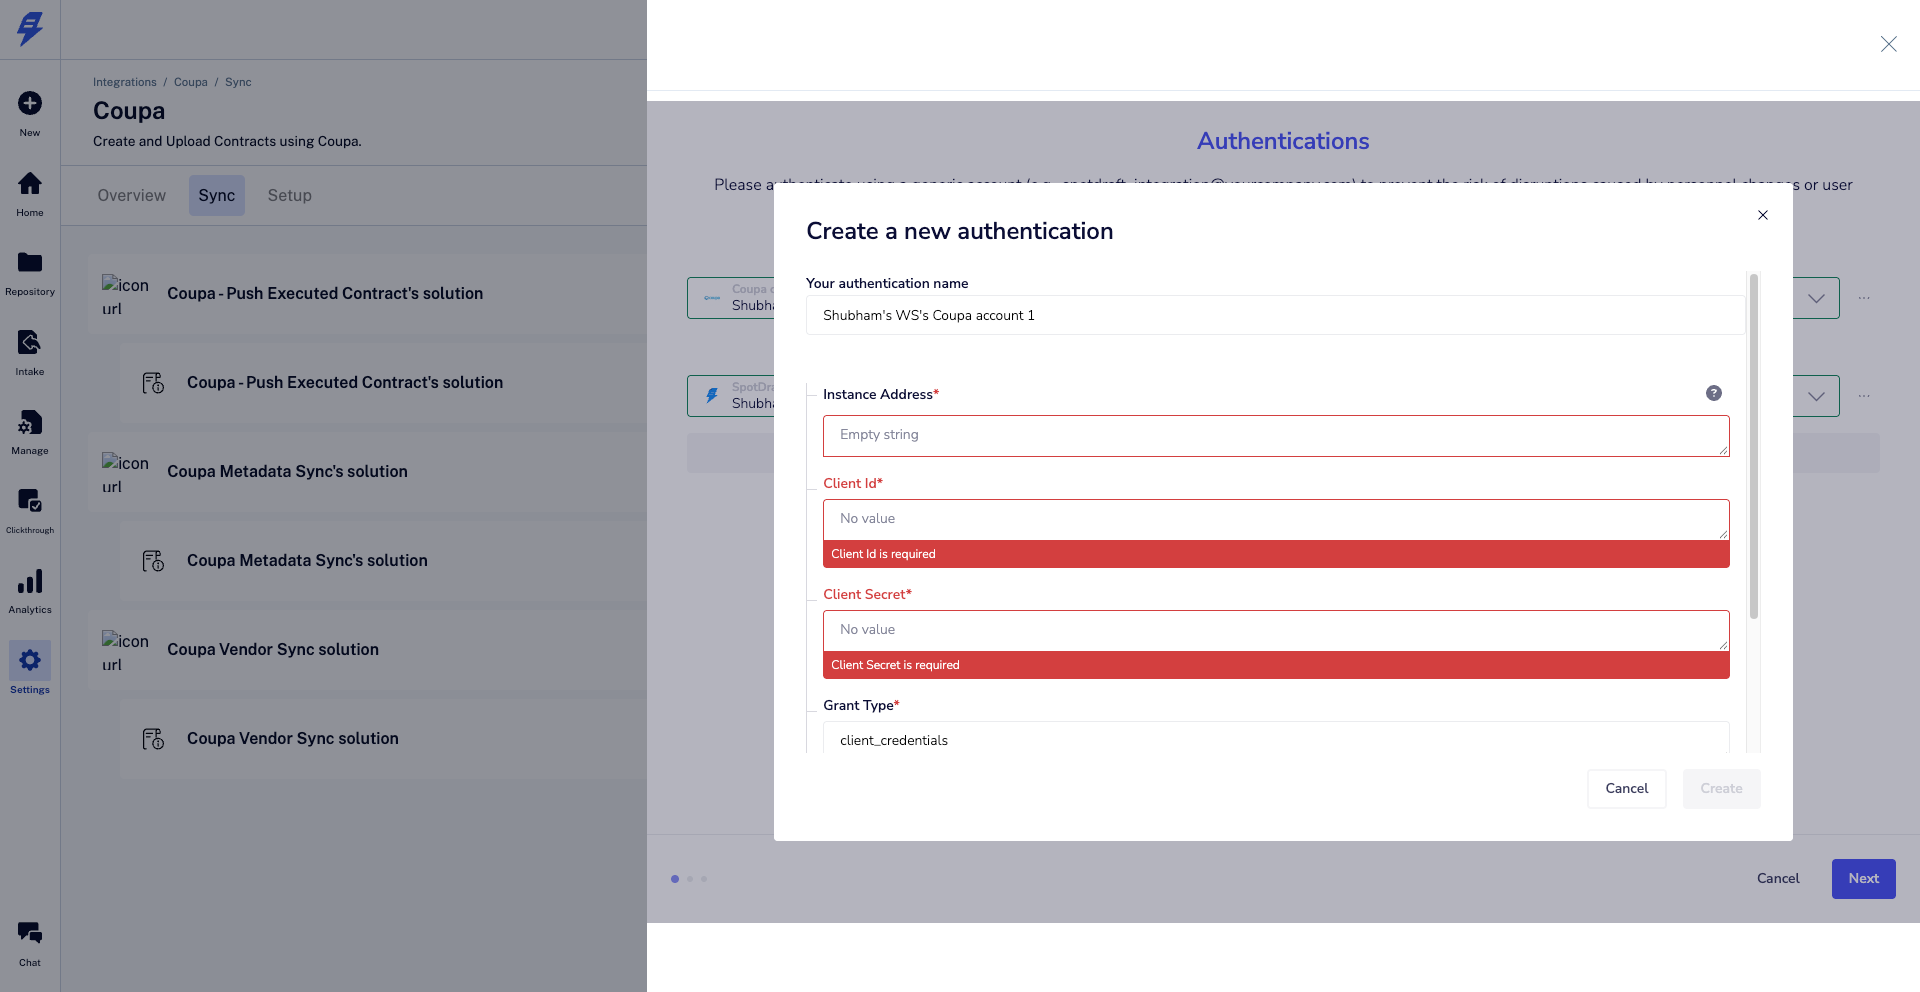
[Screenshot: SpotDraft — Add Coupa authentication with Client ID, Client Secret, and instance URL]
Add and enable the integration
Add the integration and select the authentication you created.
Click Connect.
Enable the integration from the 3-dot menu.
Map the fields
Open the Sync tab.
Select the Coupa Vendor Sync solution.
Map each Counter Party field (SpotDraft) to the matching Supplier Field (Coupa), as in the table below.
Click Next and save.
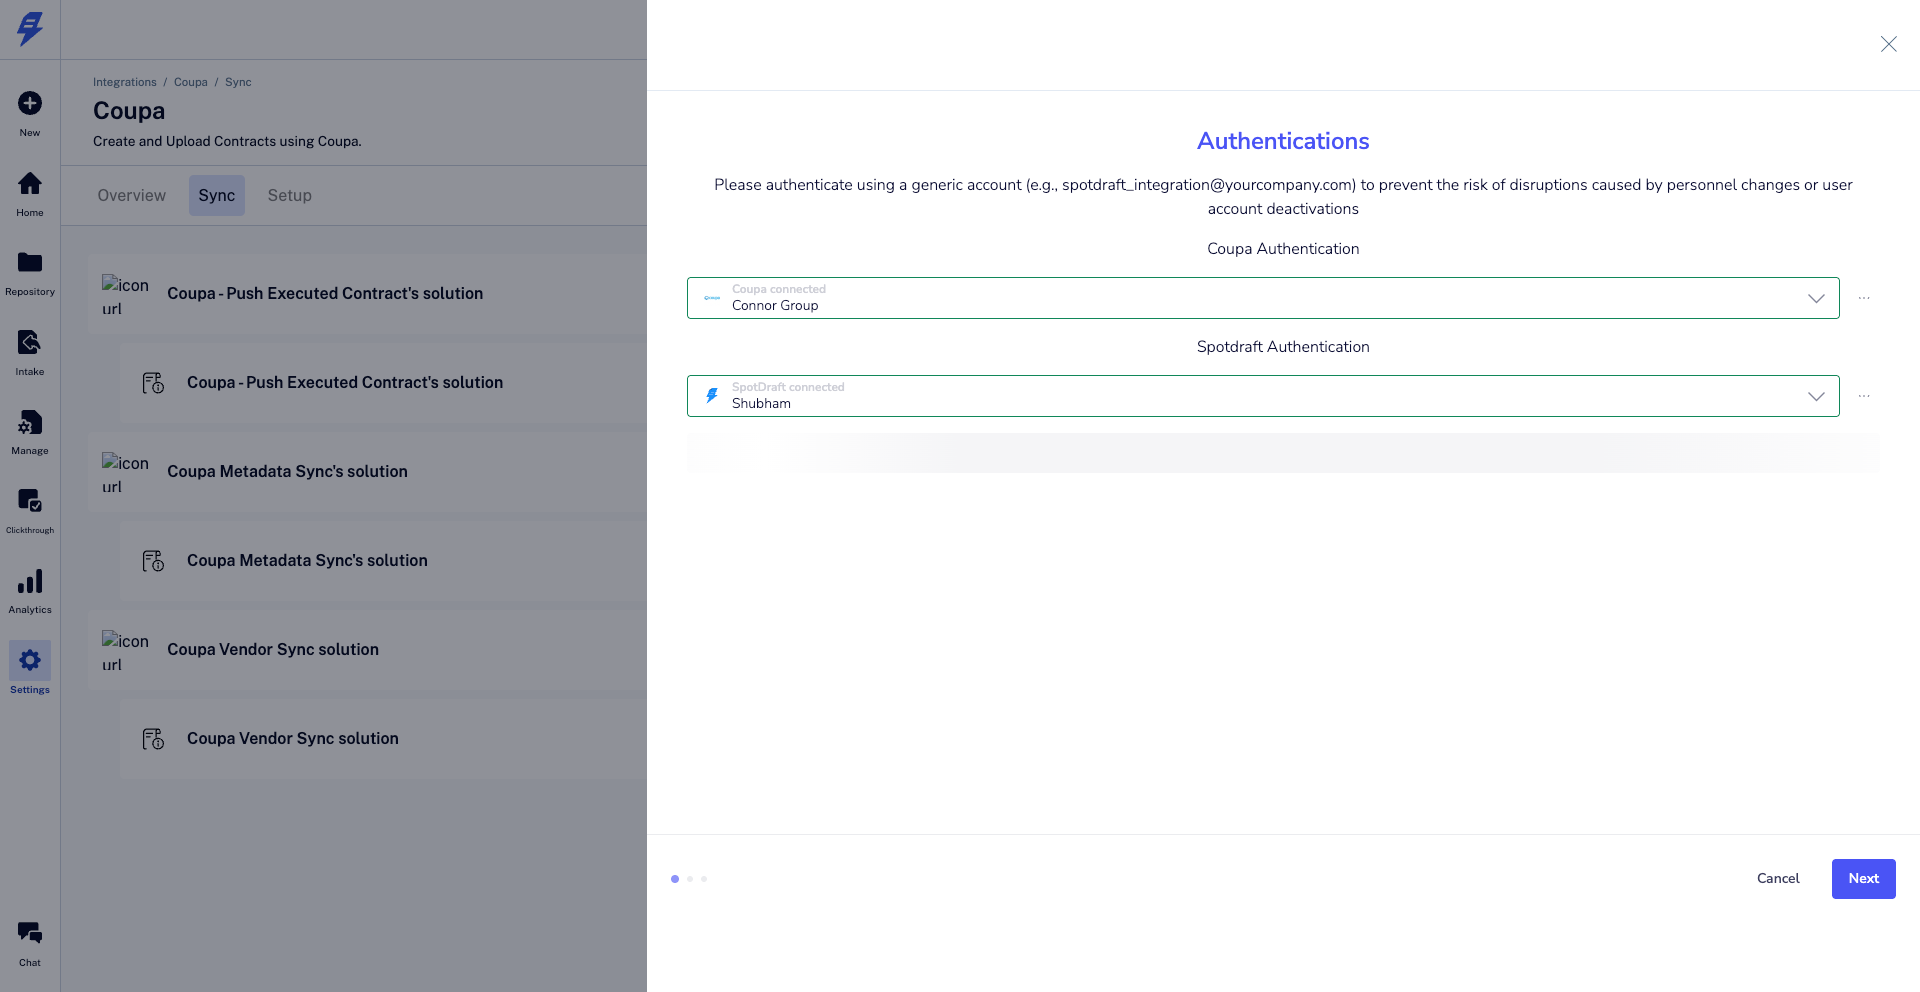
[Screenshot: SpotDraft — Coupa Sync tab with the Vendor Sync solution selected]
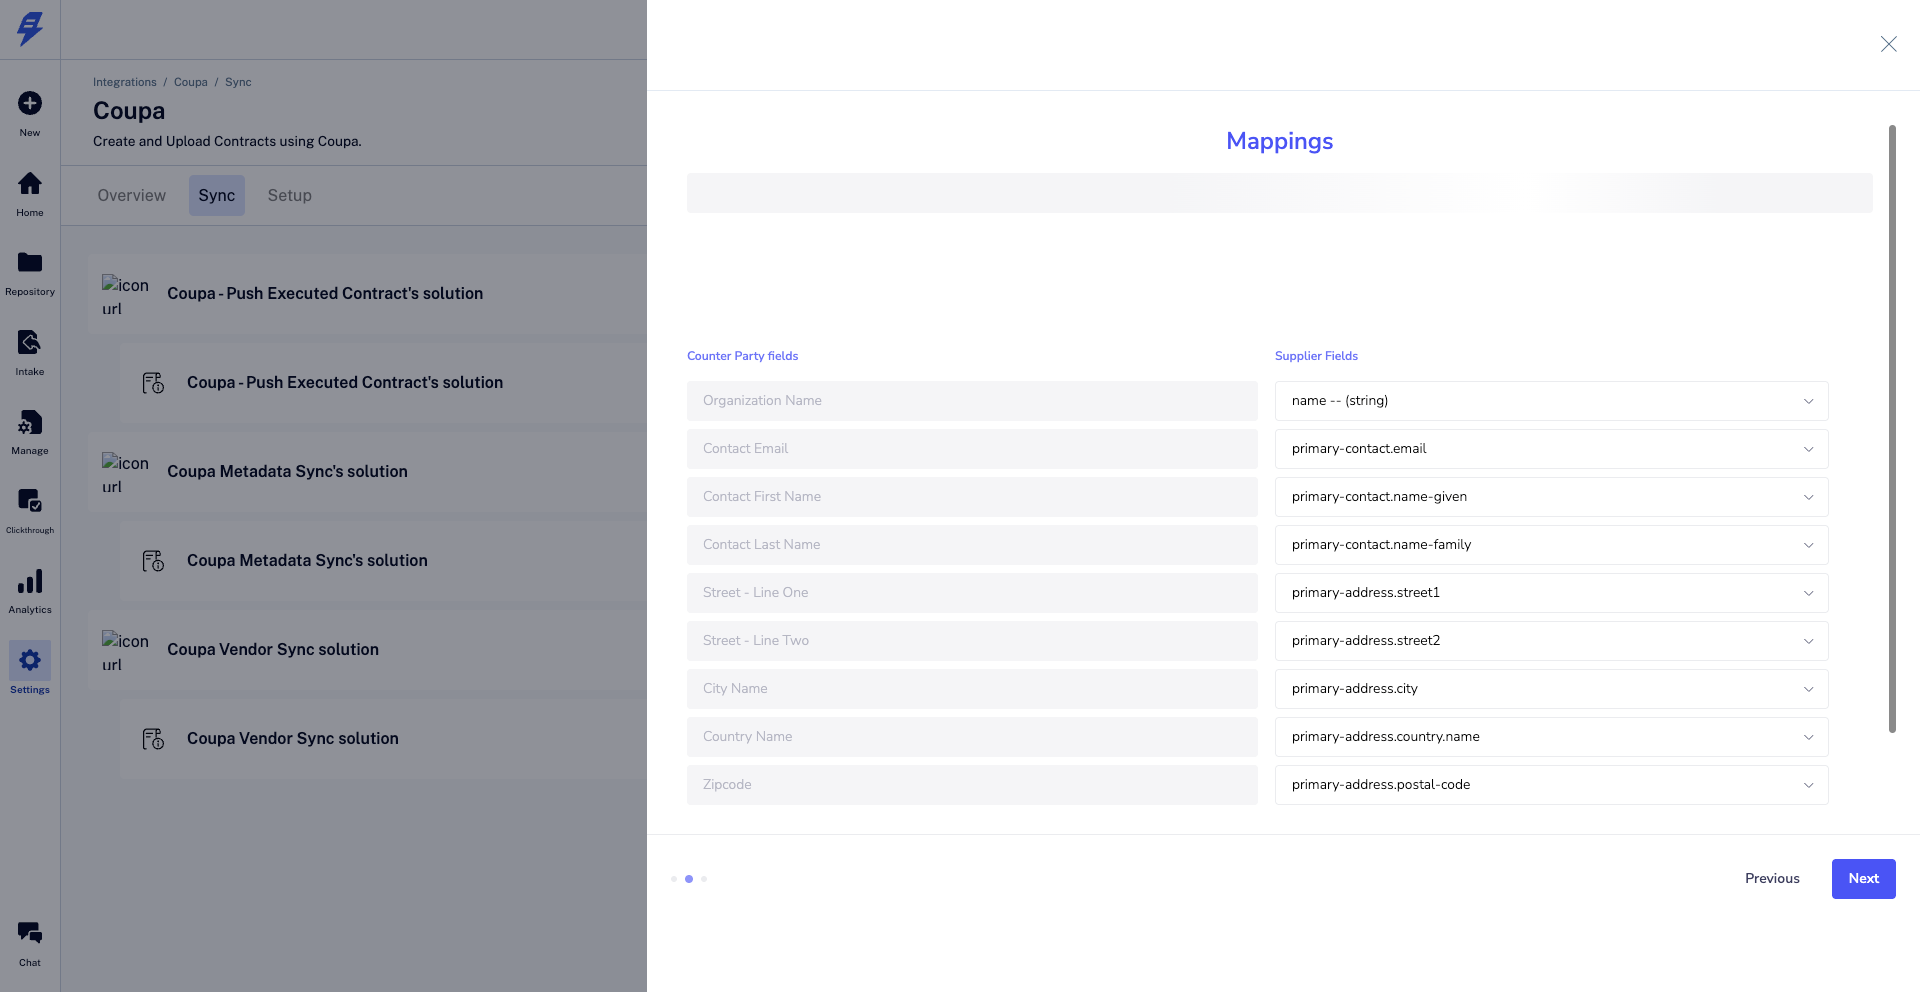
[Screenshot: SpotDraft — Coupa Vendor Sync field mapping (Counter Party fields and Supplier Fields)]
SpotDraft Counter Party field | Coupa Supplier field |
|---|---|
Organization Name | name (string) |
Contact Email | primary-contact.email |
Contact First Name | primary-contact.name-given |
Contact Last Name | primary-contact.name-family |
Street - Line One | primary-address.street1 |
Street - Line Two | primary-address.street2 |
City Name | primary-address.city |
Country Name | primary-address.country.name |
Zipcode | primary-address.postal-code |
custom_fields.supplier_id | id (integer) |
Note: The field custom_fields.supplier_id holds the Coupa supplier id. It links each SpotDraft counter party to its Coupa supplier and prevents duplicate records on later syncs.
Add Time to start Trigger as preferred time with interval as 24 hours (suggested).
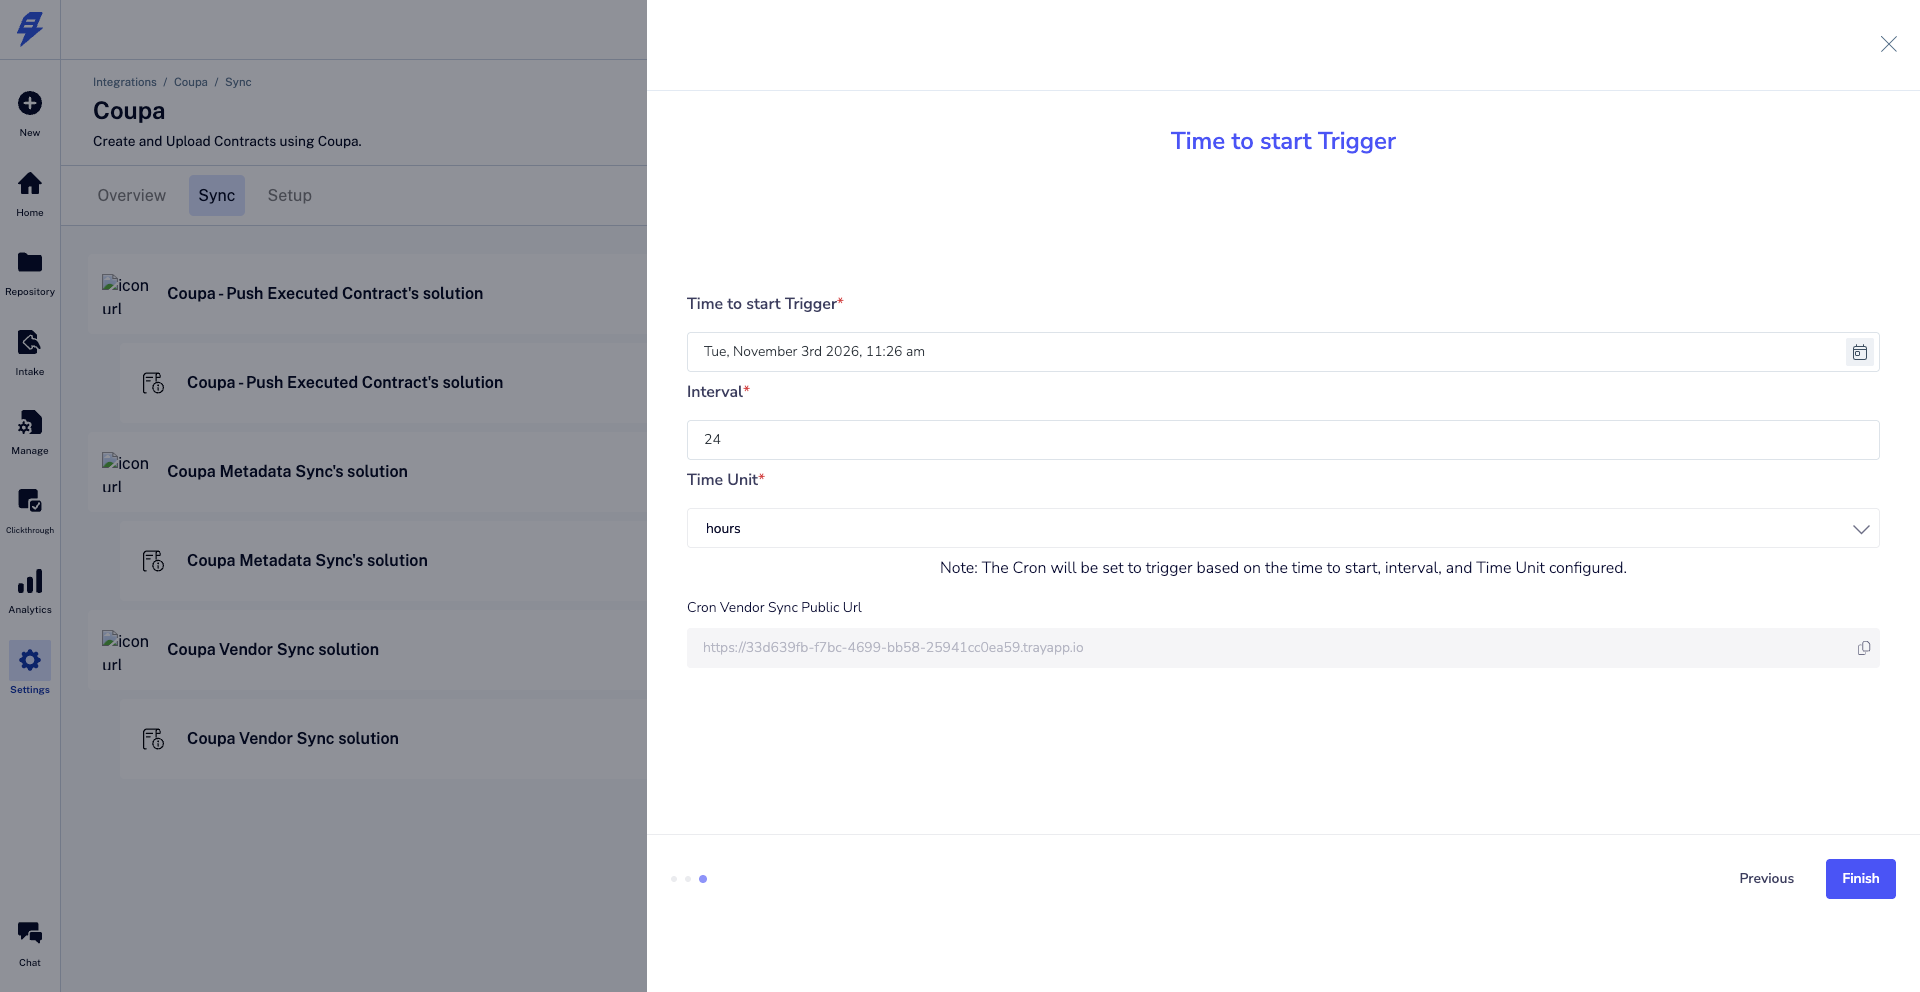
Once done, click on Finish and Connect the integration.
Part 3: Verify the integration is working
On scheduled time, the intgration will on its on to create and update Counterparty in SpotDraft.
In SpotDraft, open the Counterparties under Manage.
Confirm that a Coupa supplier appears as a counterparty.
Open the counterparty. Confirm the mapped fields are populated (name, contact, address).
FAQ
1. Which scopes does the Coupa API client need?
Add all the scopes listed in Part 1.
2. The authentication failed. What should I check?
Confirm the Client ID, Client Secret, and instance URL are correct. Confirm the OpenID Connect client uses the Client Credentials grant and includes all required scopes.
3. How does the sync avoid duplicate counter parties?
SpotDraft stores the Coupa supplier id in custom_fields.supplier_id. On later syncs, SpotDraft uses this id to match and update the existing counter party instead of creating a new one.
Additional Resources
For all integration articles, visit the Integrations collection.