Adding Recipients to Your Contract in SpotDraft
Last updated: March 27, 2026
This article will guide you on how to add recipients to your contract from the Contract Summary page in SpotDraft.
Understanding Recipient Types
Before we dive into the process, let's clarify the different recipient types you can add to your contract:
Signatories: These are the individuals who will digitally sign the contract. They are legally bound by the contract once they sign it. You can add multiple signatories from within an organization, but for individual parties, you can't add or modify signatories. However, counterparty signatories (excluding individual-type counterparties) can reassign themselves during the signing process.
Approvers: Approvers are responsible for reviewing and approving the contract's terms. You can add approvers at preset intervals throughout the contract signing stage.
Important: A contract must have at least one signatory for an approver to be added. It's not possible to have a contract with only an approver as a recipient.
Receivers: These are stakeholders who will receive a PDF copy of the executed contract, even if they are not signing or approving it. Receivers can be internal or external to your organization. Note that workspace administrators may also restrict the ability to add receivers through security settings. If you encounter restrictions even with proper permissions, consider adding the person as a counterparty instead.
Adding Recipients
Follow these steps to add recipients to your contract from the Contract Summary page:
Note: To add or manage recipients, your team must have "Manage counterparties" permission enabled. If you cannot access the "Add Recipients" button or modify recipient details, contact your Admin team to request this permission for your team.
Navigate to the Contract: Open the contract record you want to edit or add recipients to from the contract grid.
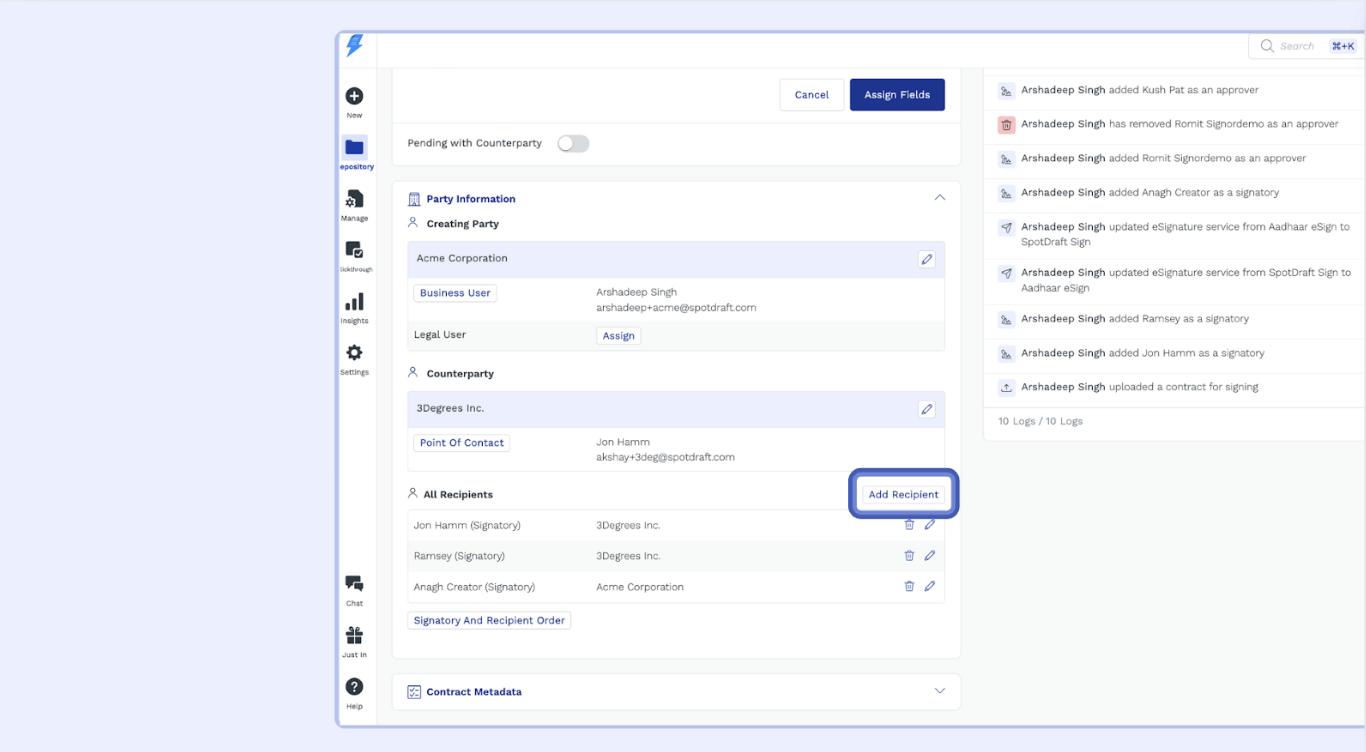
Find the Party Information Section: Scroll down to the 'Party Information' card.
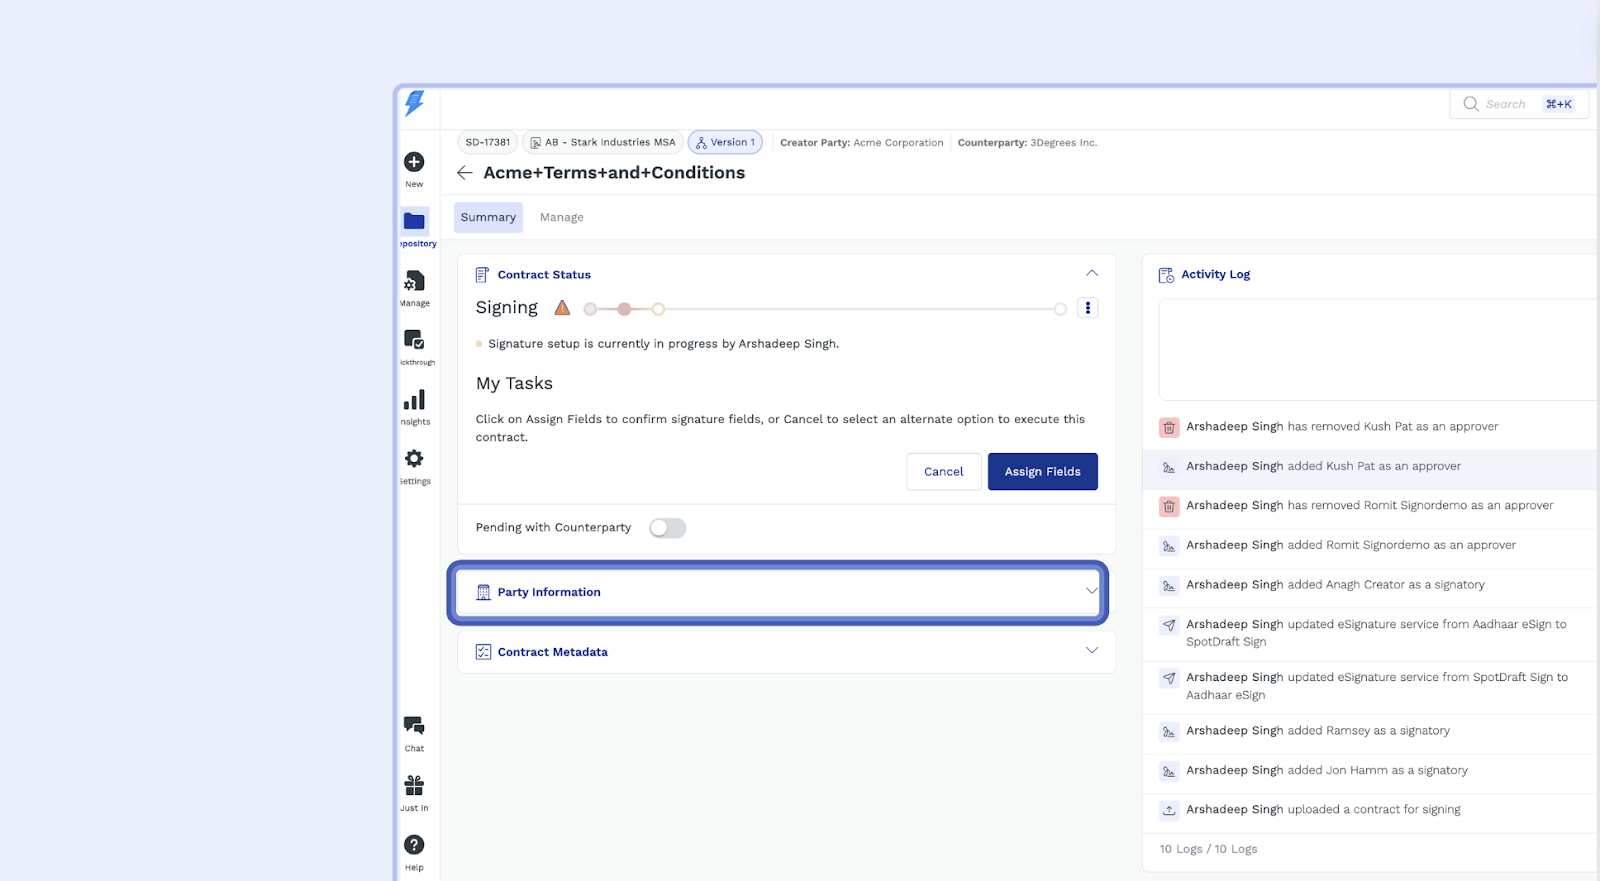
Click "Add Recipients": Within the 'Party Information' section, you will see a button labeled "Add Recipients." Click on it.
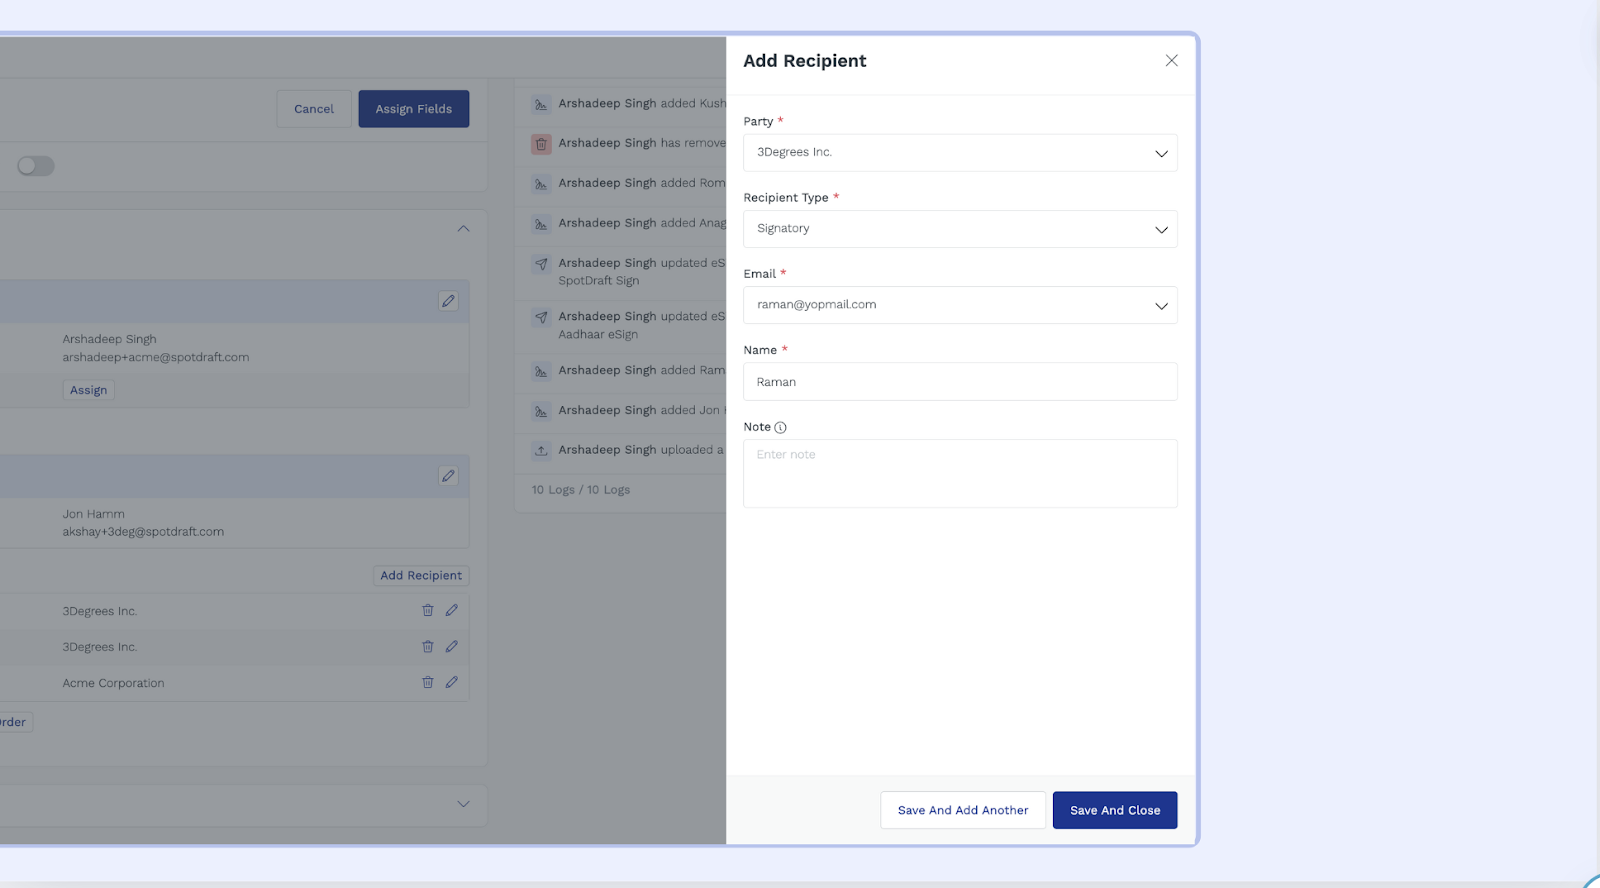
Add Recipient Details:
Party: Select the party from the drop-down list in the Party column.
Recipient Type: Choose the recipient's role from the "Recipient Type" column: Approver, Recipient, or Viewer.
Signatories: Individuals who need to sign the contract
Approvers: Individuals who need to review and approve the contract.
Receivers/Viewers: Individuals who can just view the contract.
Name and Email: Enter the recipient's name and email address.
Save: Click "Save and Add Another" to add more recipients or "Save and Close" to confirm the details.
Important Note:
Edits After Actions: Once a recipient has taken any action (like signing or approving), you can no longer edit the recipients list.
Contract Stage: You can only add new recipients before the contract is sent for signature in the “Signing” stage.
Counterparty Signatory Reassignment
Counterparty signatories can reassign themselves to a different person during the signing process by following these steps:
Open the signature link and proceed to the signing screen
Click on the kebab icon (⋮) in the top-left corner
Select "Reassign Signatory"
Enter the details of the new signatory in the modal that appears and confirm
Note: This self-service reassignment option is not available for individual-type counterparties.
Troubleshooting Individual Counterparty Configuration Issues
If you cannot add an individual counterparty to your contract, the workflow may be configured to allow only organization-type counterparties. This is a common configuration issue that can be resolved by updating your workflow settings.
Enabling Individual Counterparties in Workflow Settings
Go to Manage → Workflow Manager
Select the relevant workflow
Click on "Set Up Document & Questionnaire"
In the Counterparty section, click on the settings (⚙) icon
Enable the option for Individual counterparties
Publish the workflow
Note: You will need appropriate permissions to modify workflow settings. If you don’t have access to these settings, contact your workspace administrator to request the necessary permissions or to make this change on your behalf.
When This Issue Occurs
This configuration limitation typically affects users when:
The workflow was initially set up to handle only business-to-business contracts
Security policies require restricting individual counterparties for certain contract types
The workflow template was copied from another setup that had this restriction
Once enabled, you’ll be able to add individual counterparties as signatories, approvers, or receivers following the standard recipient addition process.