OneLogin Setup
Last updated: January 30, 2026
Adding the SpotDraft App in OneLogin
Step 1:
Login to your OneLogin account.
Step 2:
Go to the ‘Administration’ section
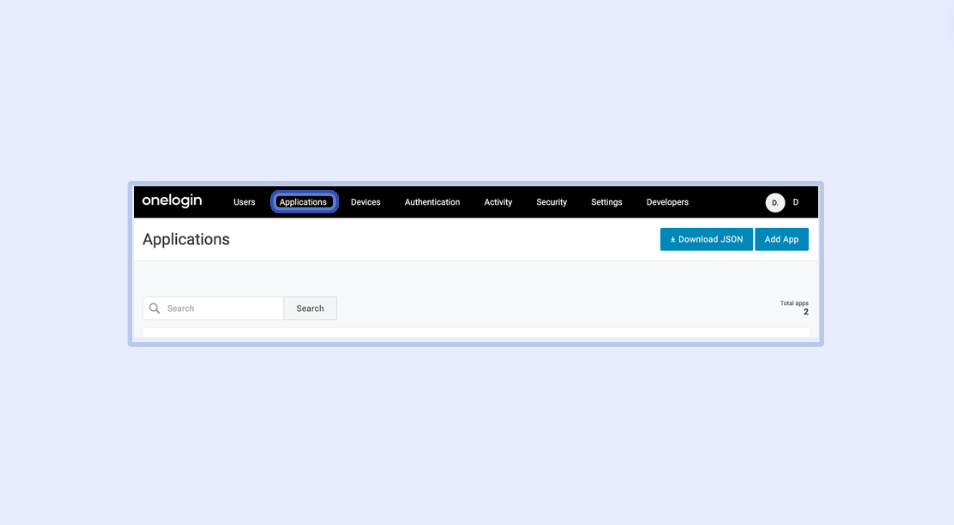
Step 3:
Click on ’Applications’ from the top bar.
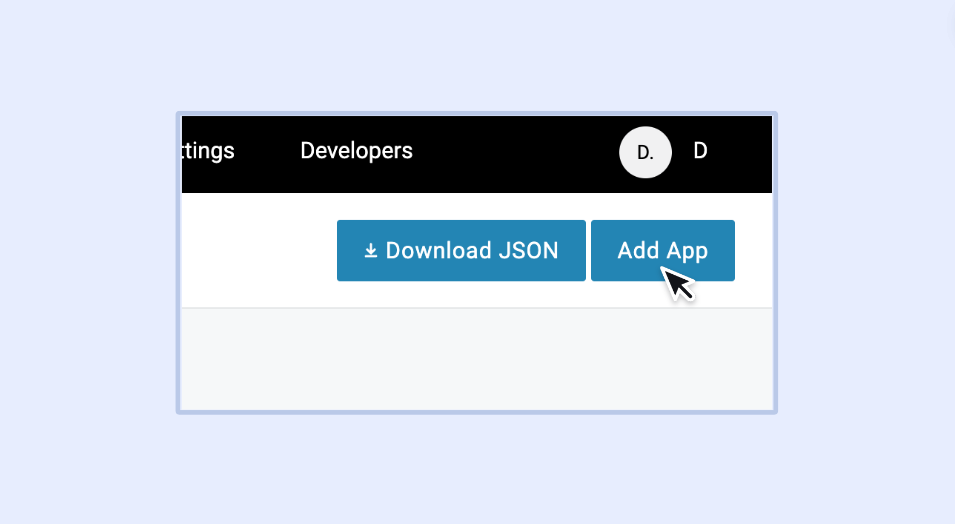
Step 4:
Click on ‘Add App’.
Step 5:
Search for SCIM and add SCIM Provisioner with SAML (SCIM v2 Core).

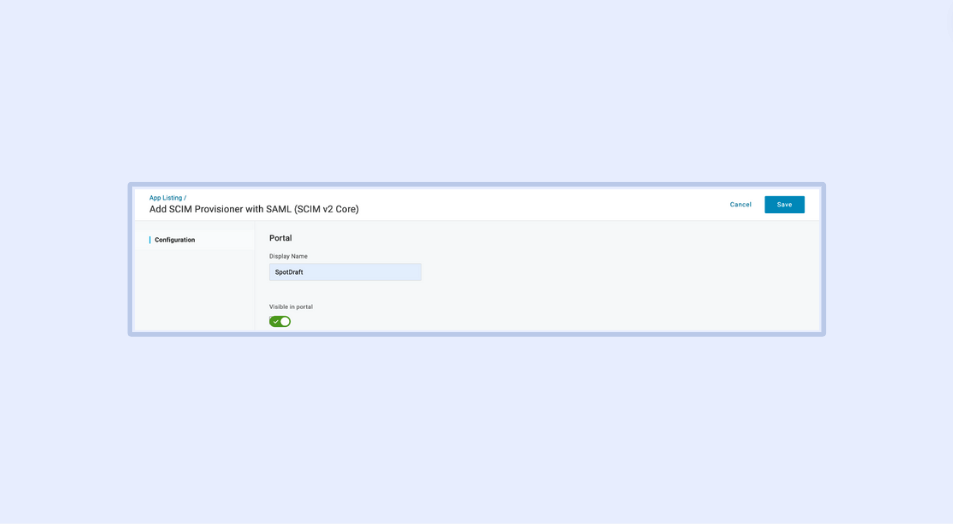
Step 6:
Update the name as “SpotDraft” and click on ‘Save’.
Step 7:
Click on ‘Configuration’ on the sidebar.

Step 8:
Update the SCIM Base URL and SCIM Bearer Token with the values generated on the Security and Identity section on SpotDraft.
Step 9:
Update the SCIM JSON Template with the following:
{
  "schemas": [

    "urn:ietf:params:scim:schemas:core:2.0:User"

  ],

  "userName": "{$user.email}",

  "externalId": "{$user.email}",

  "title": "{$user.title}",

  "name": {

    "givenName": "{$user.firstname}",

    "familyName": "{$user.lastname}"

  }

}
Step 11:
Click on ‘Enable’.
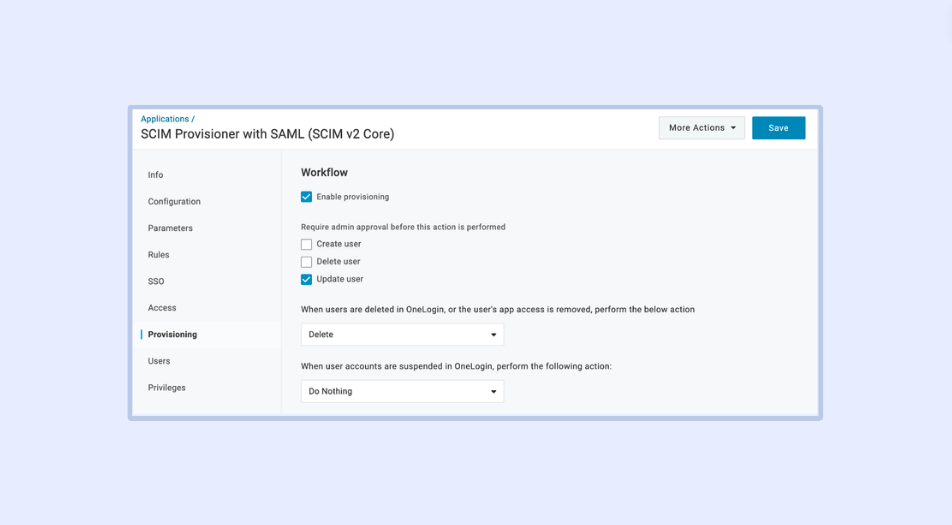
Step 12:
From the ‘Provisioning’ tab, enable provisioning and set approvals according to requirements:
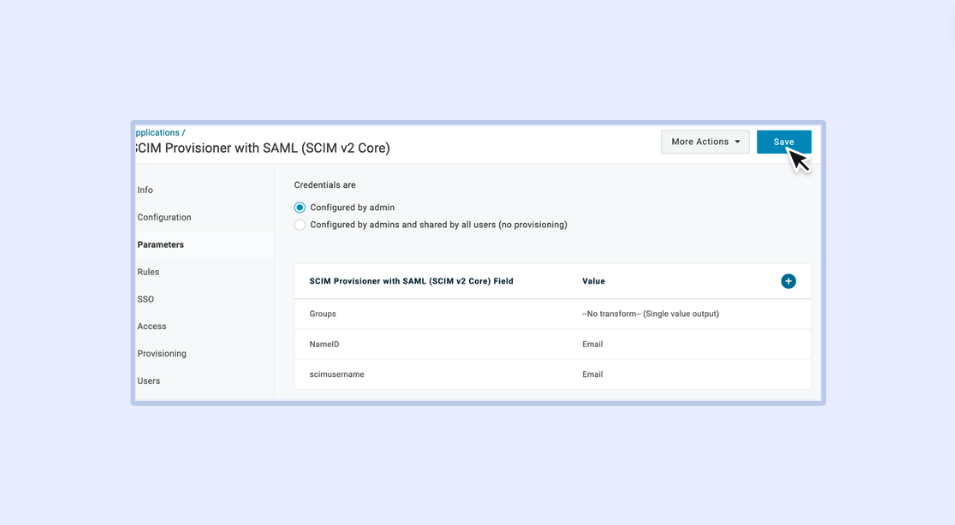
Step 13:
Update Parameters as shown and click on ‘Save’.
Provisioning users through roles
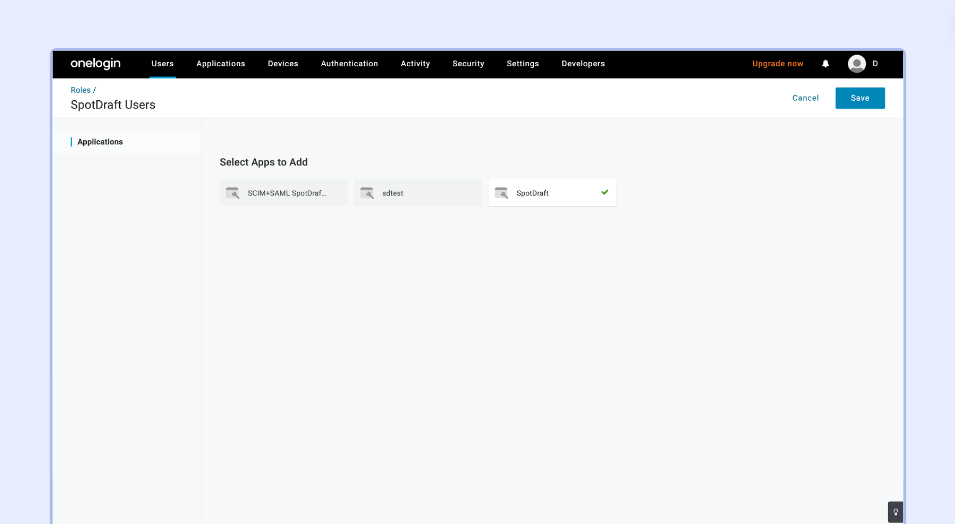
Step 1:
Use the ‘Roles’ feature in OneLogin to create a new Role called SpotDraft Users. Add the SpotDraft application previously created here and click on ‘Save’.
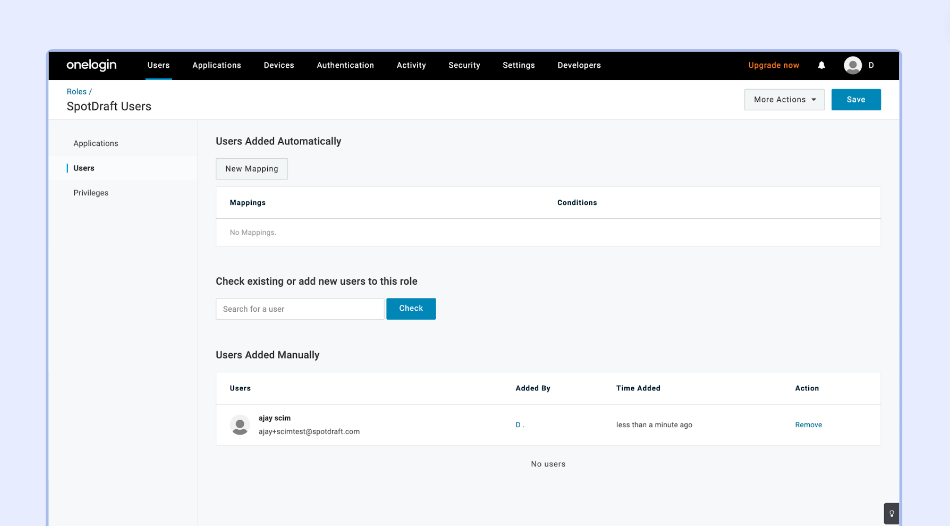
Step 2:
Provision all the required SpotDraft users through this feature.
Setting up SAML SSO
To set up SAML SSO, follow the steps listed in this article.