Azure Setup
Last updated: July 27, 2026
Setting up SCIM based user provisioning
STEP 1:
Obtain the SCIM base URL and Bearer Token from the ‘Security and Identity’ section on SpotDraft.
STEP 2:
Log in to [portal.azure.com]
STEP 3:
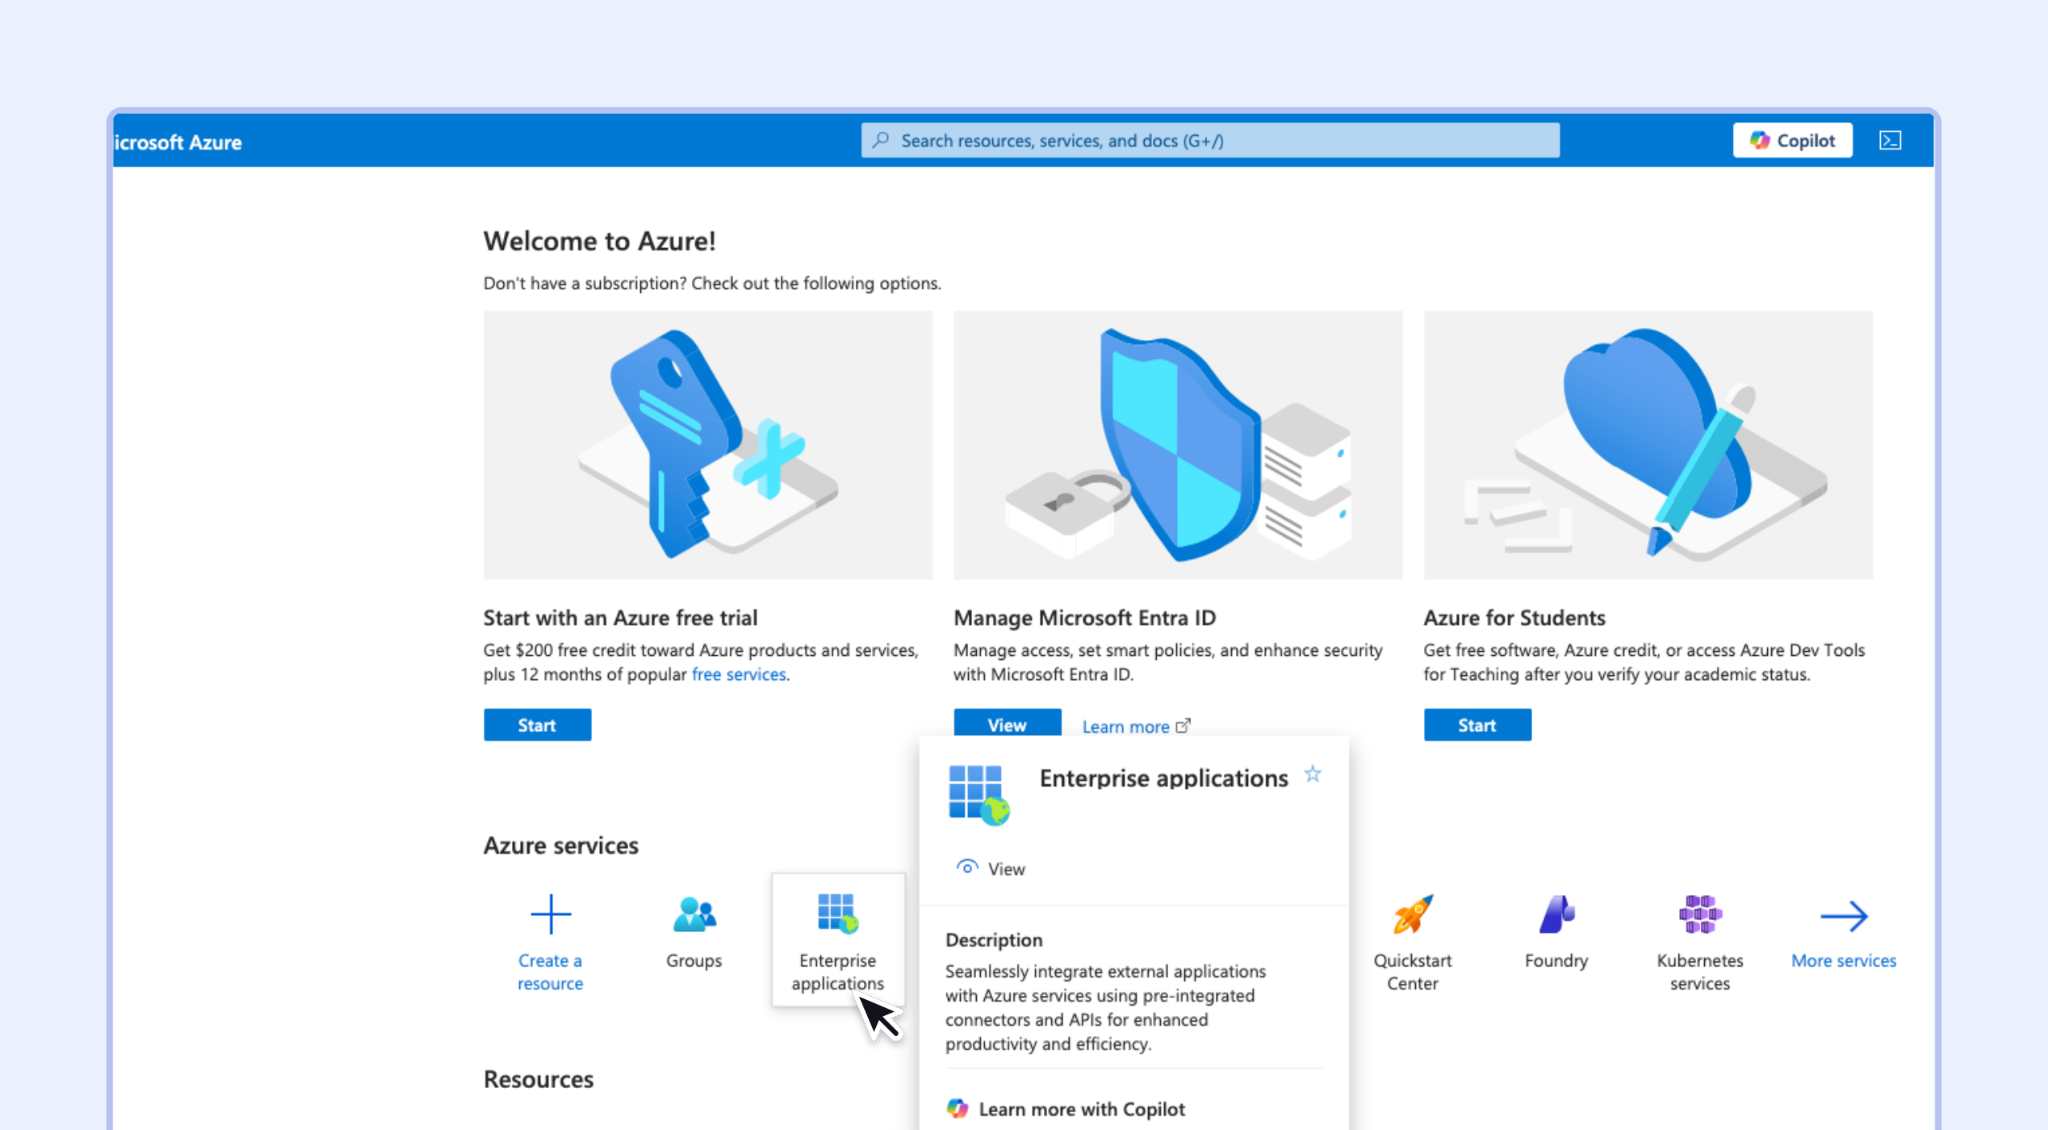
Navigate to "Enterprise Applications" from the home page.
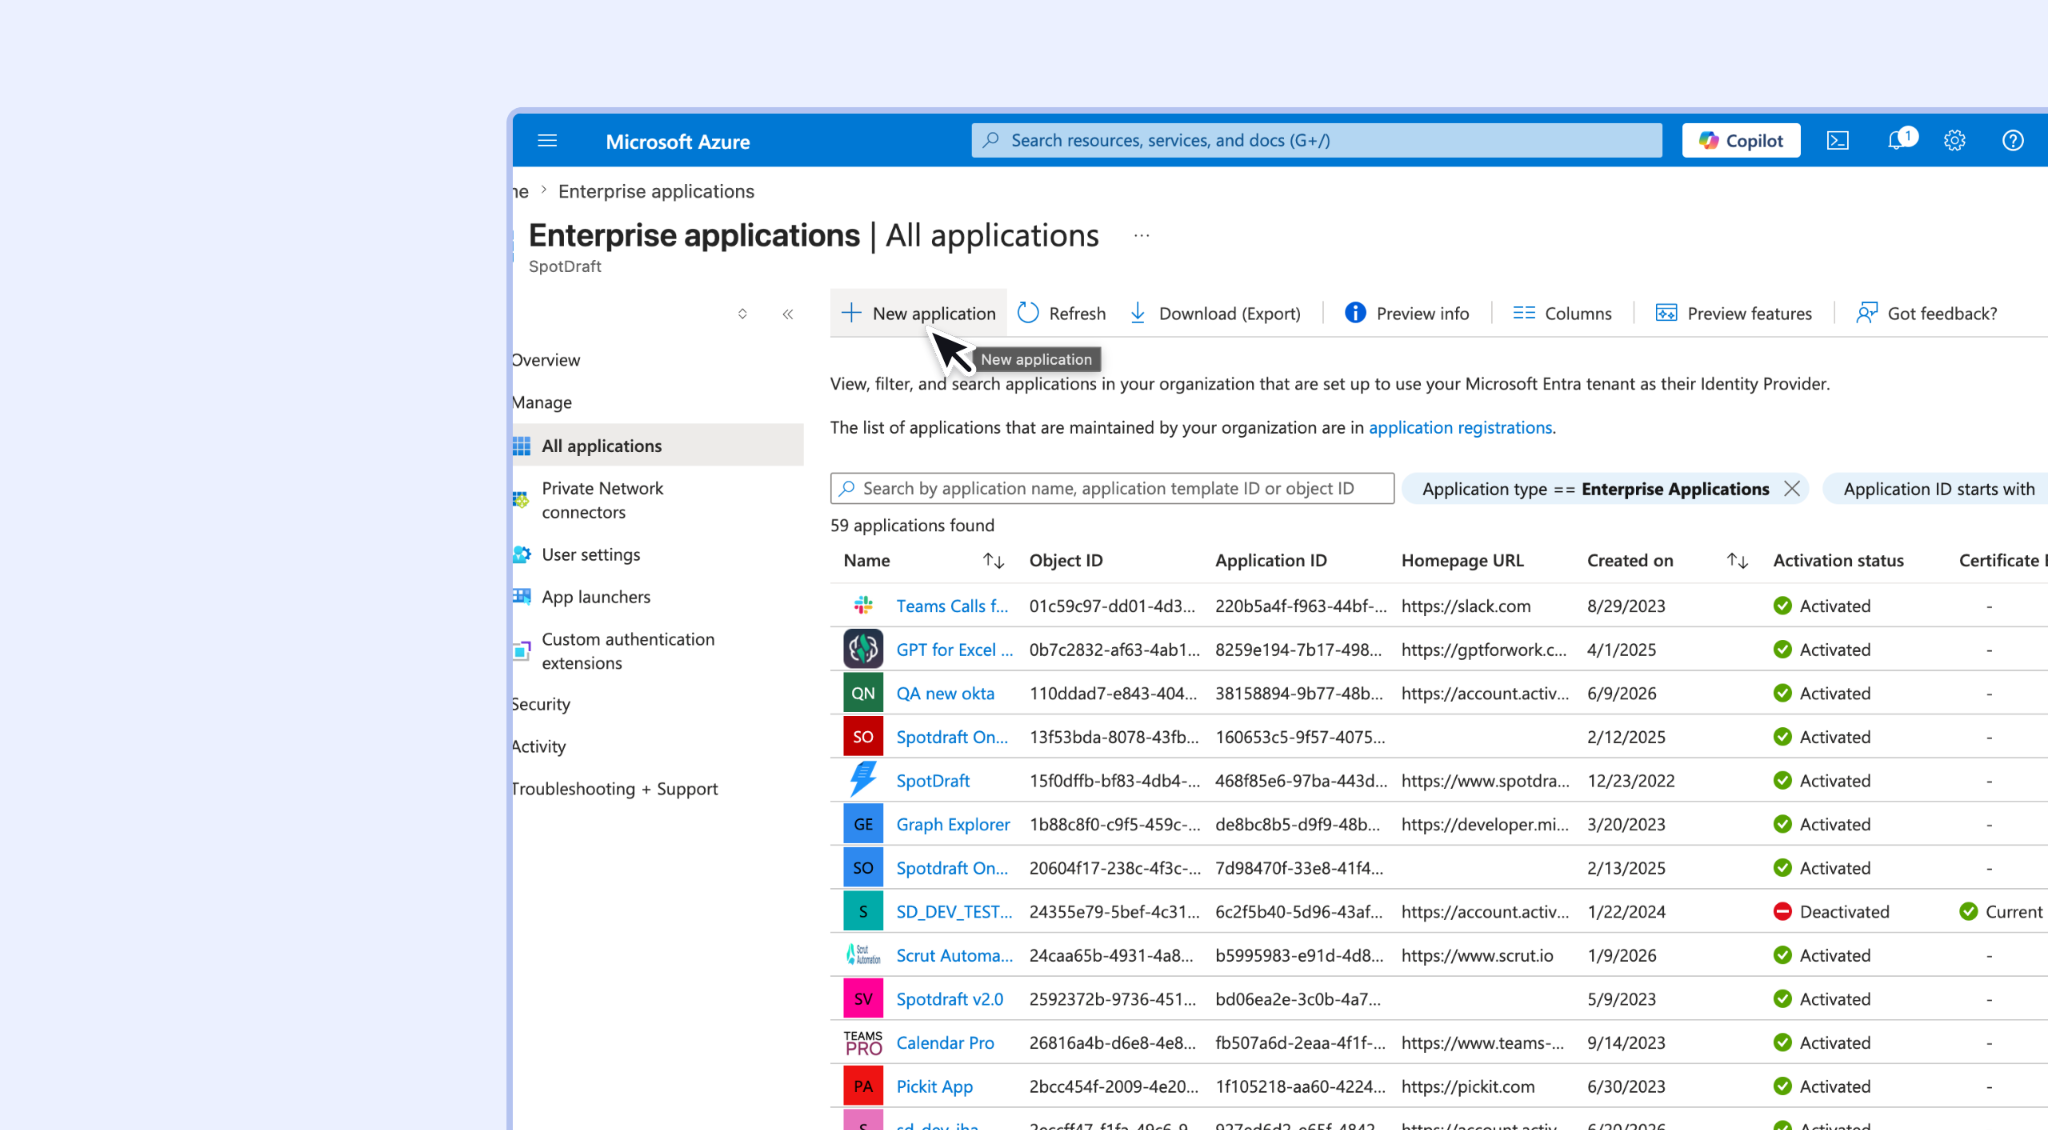
Click on "New Application".
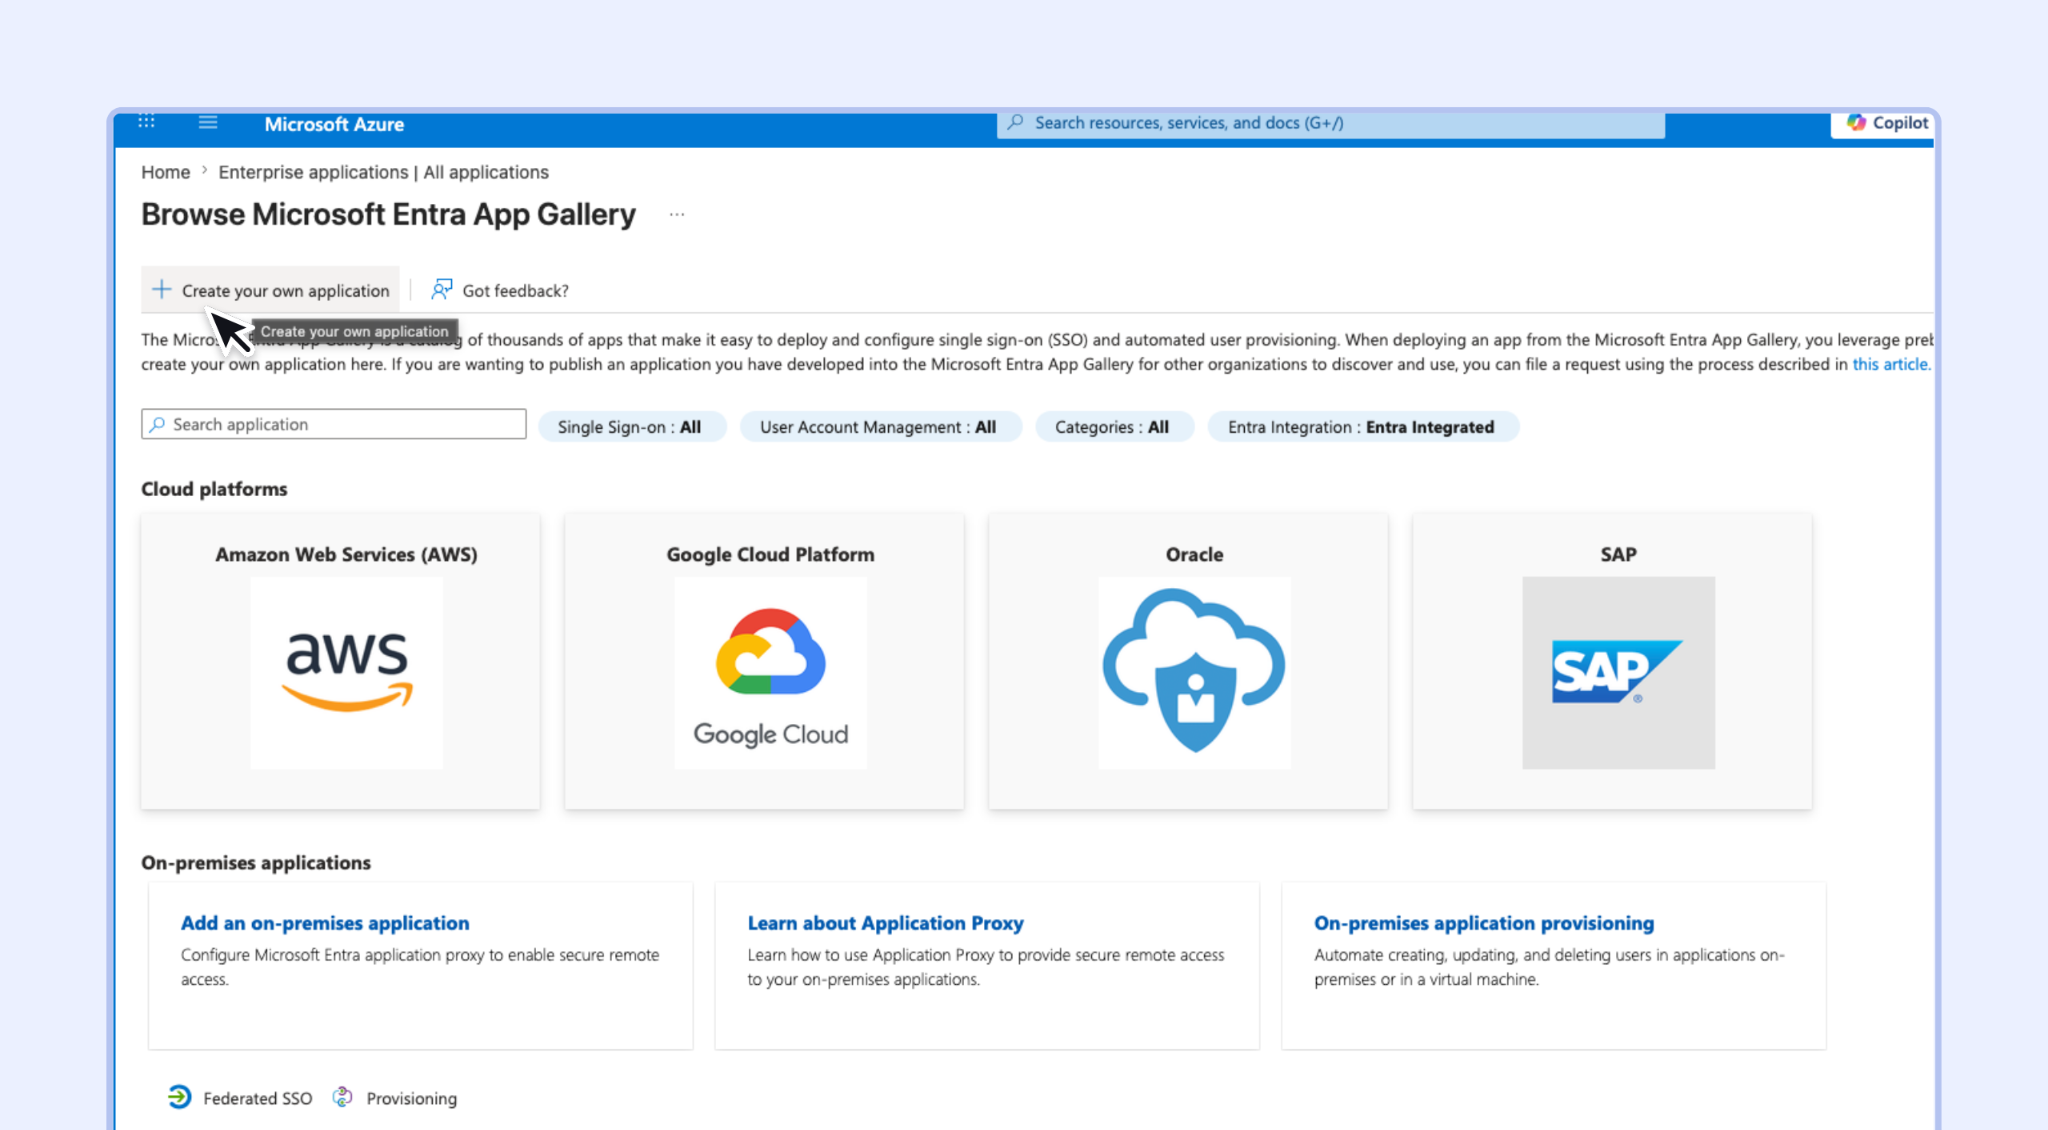
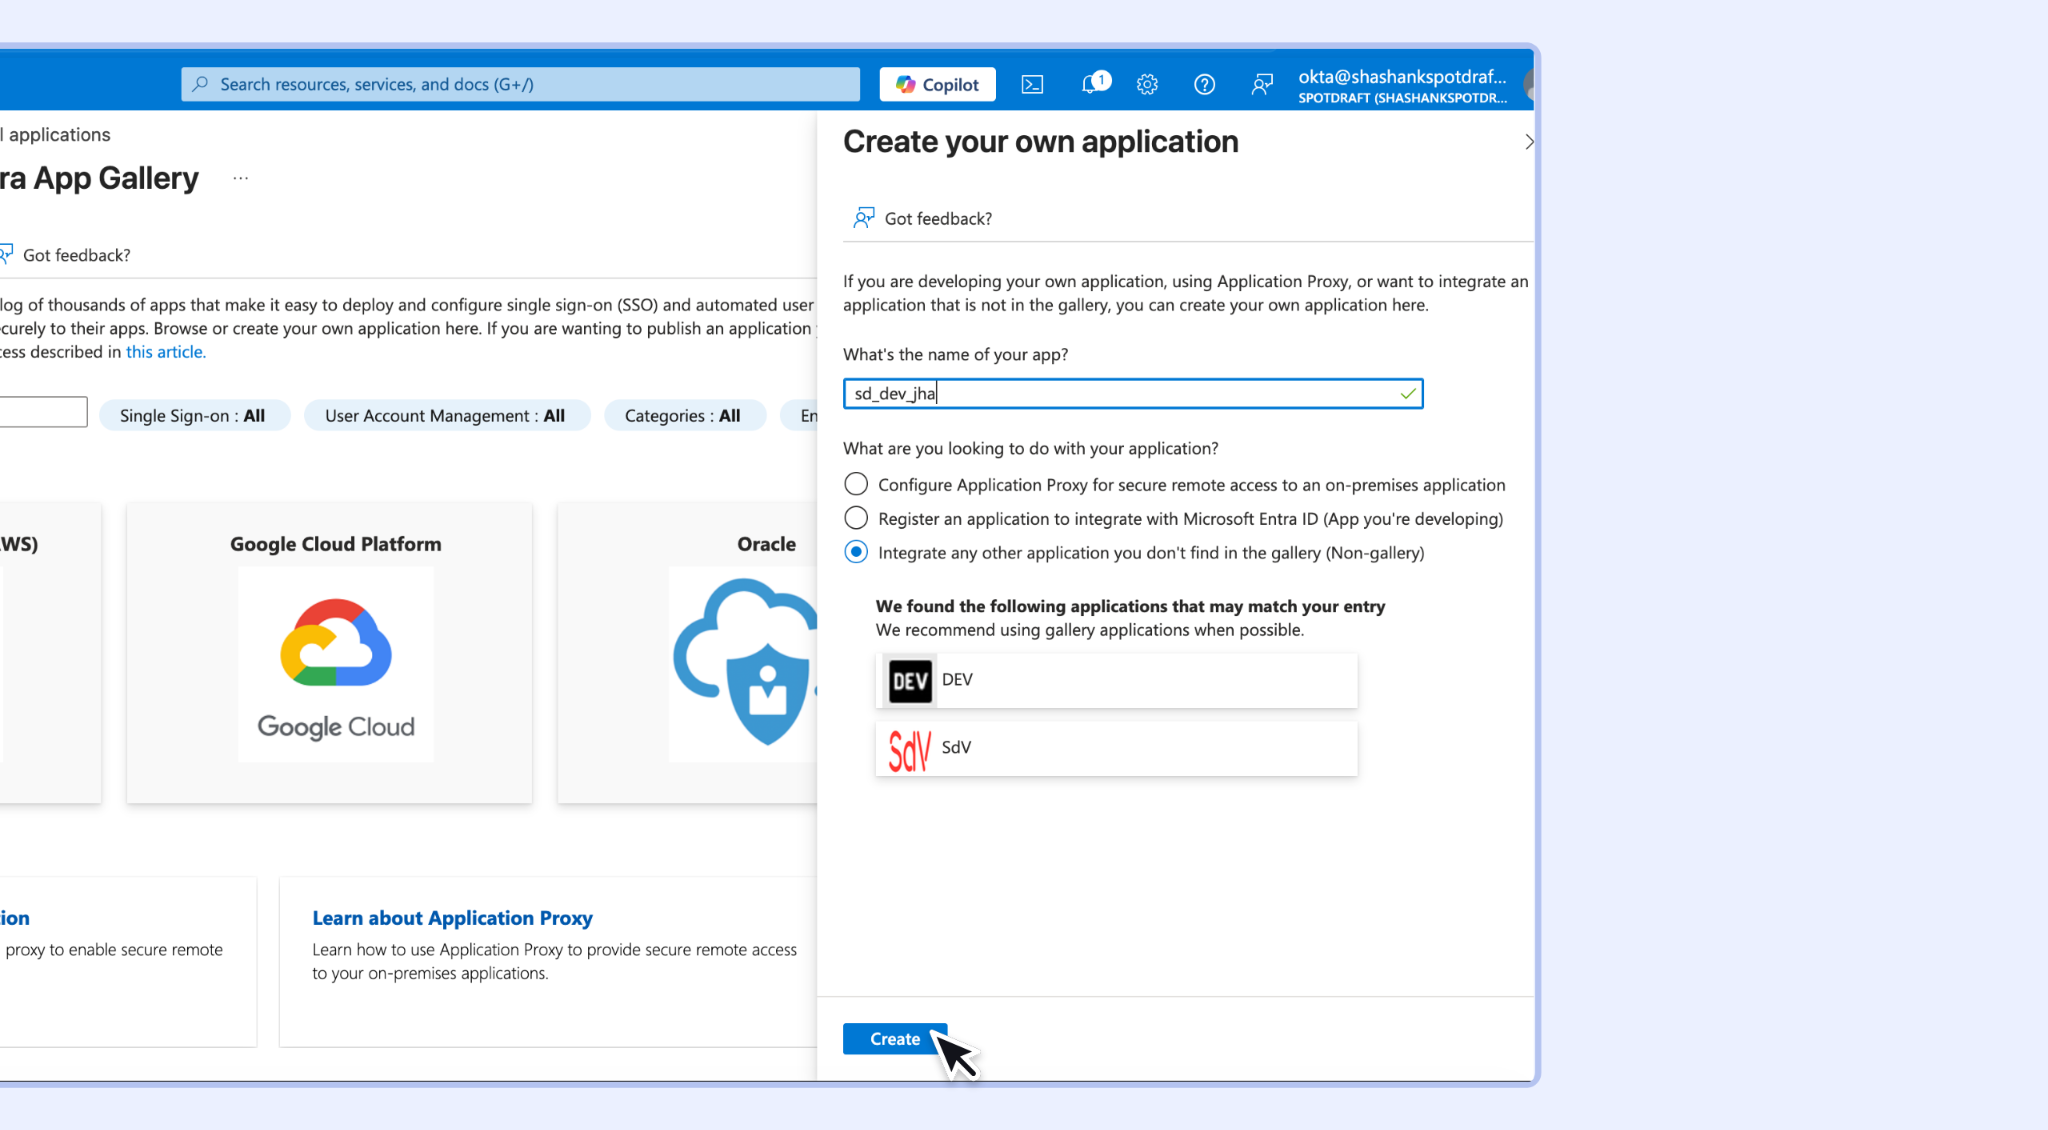
Click on "Create your own application".
Provide a name for your app and click on "Create".
STEP 4:
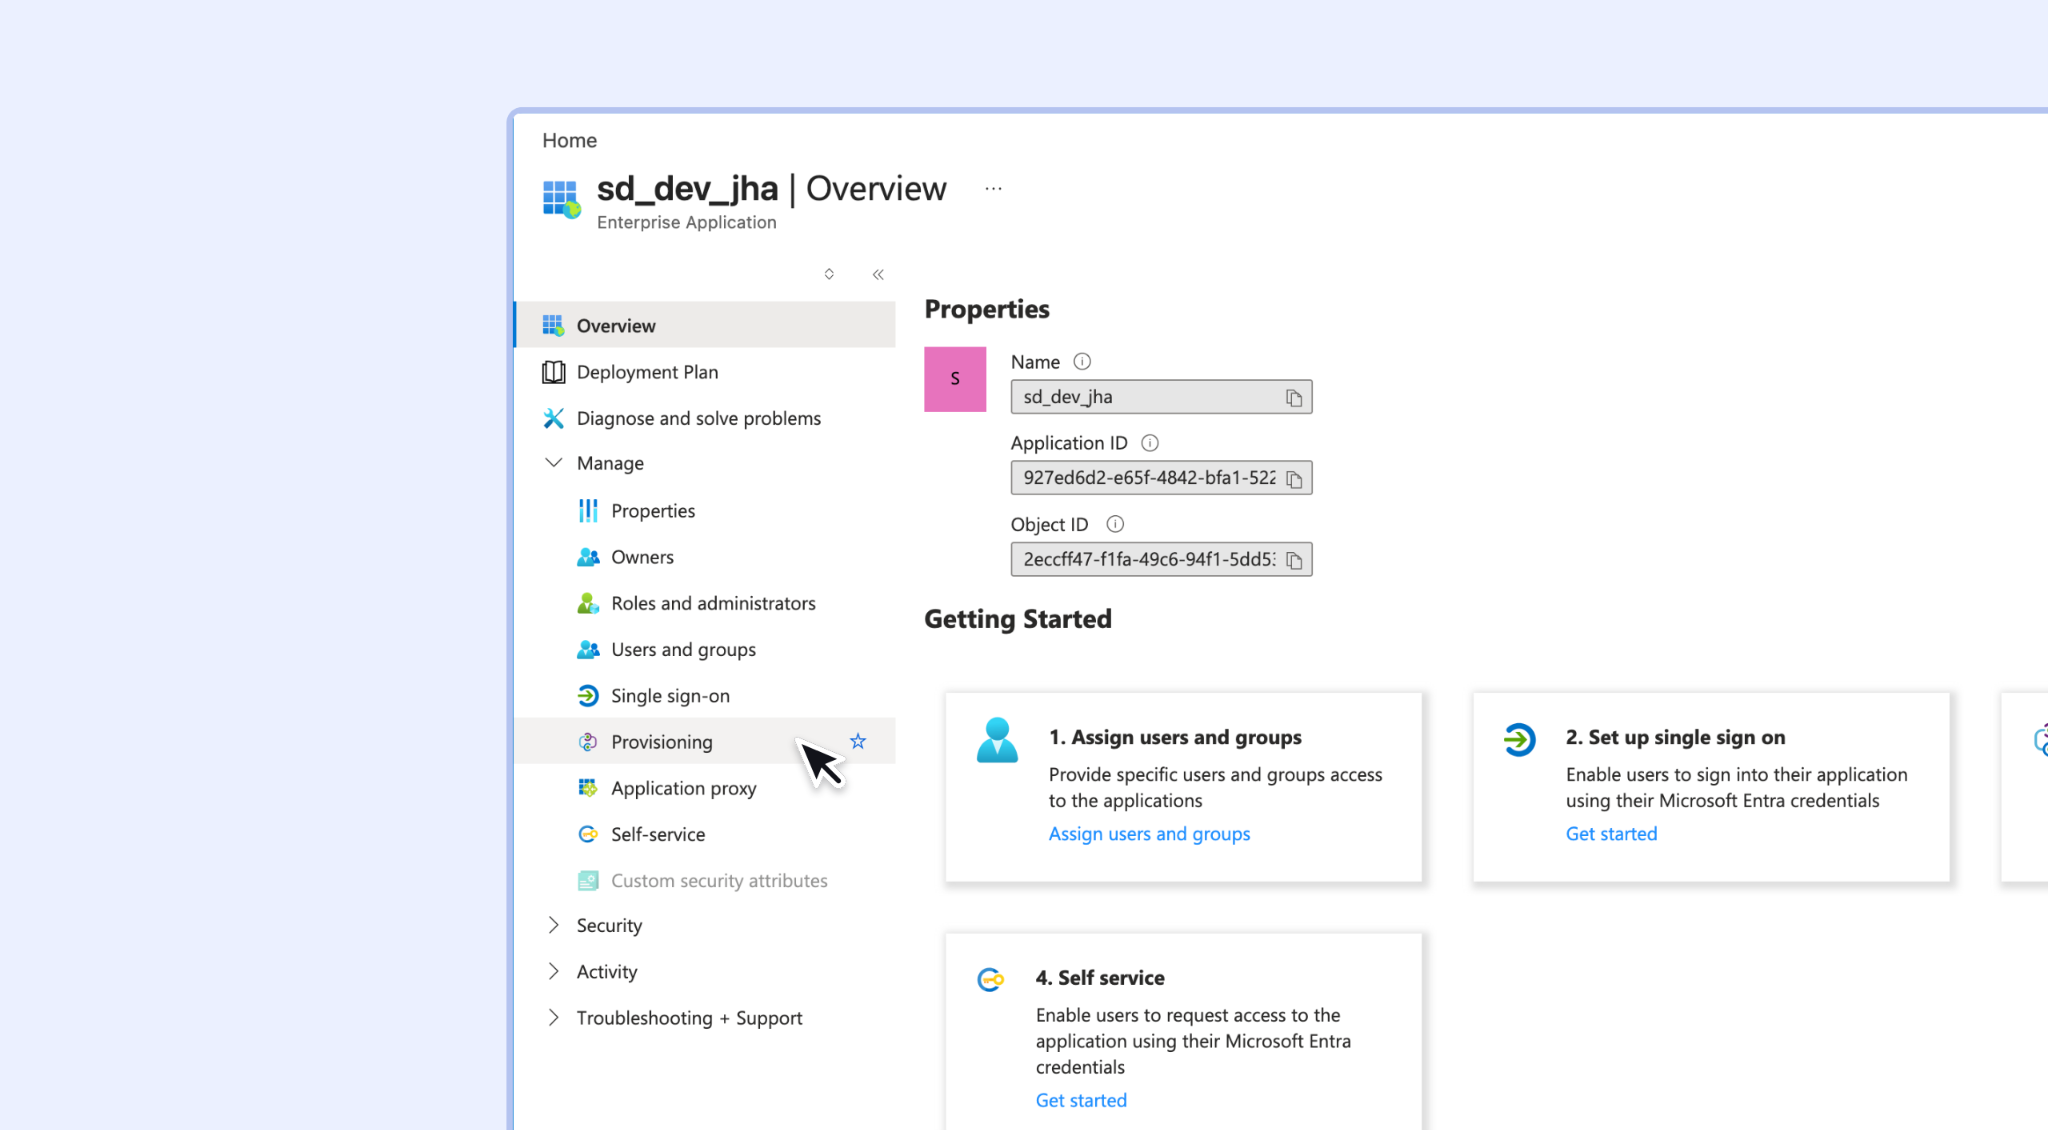
In the sidebar, click "Provisioning" to access the application provisioning page.
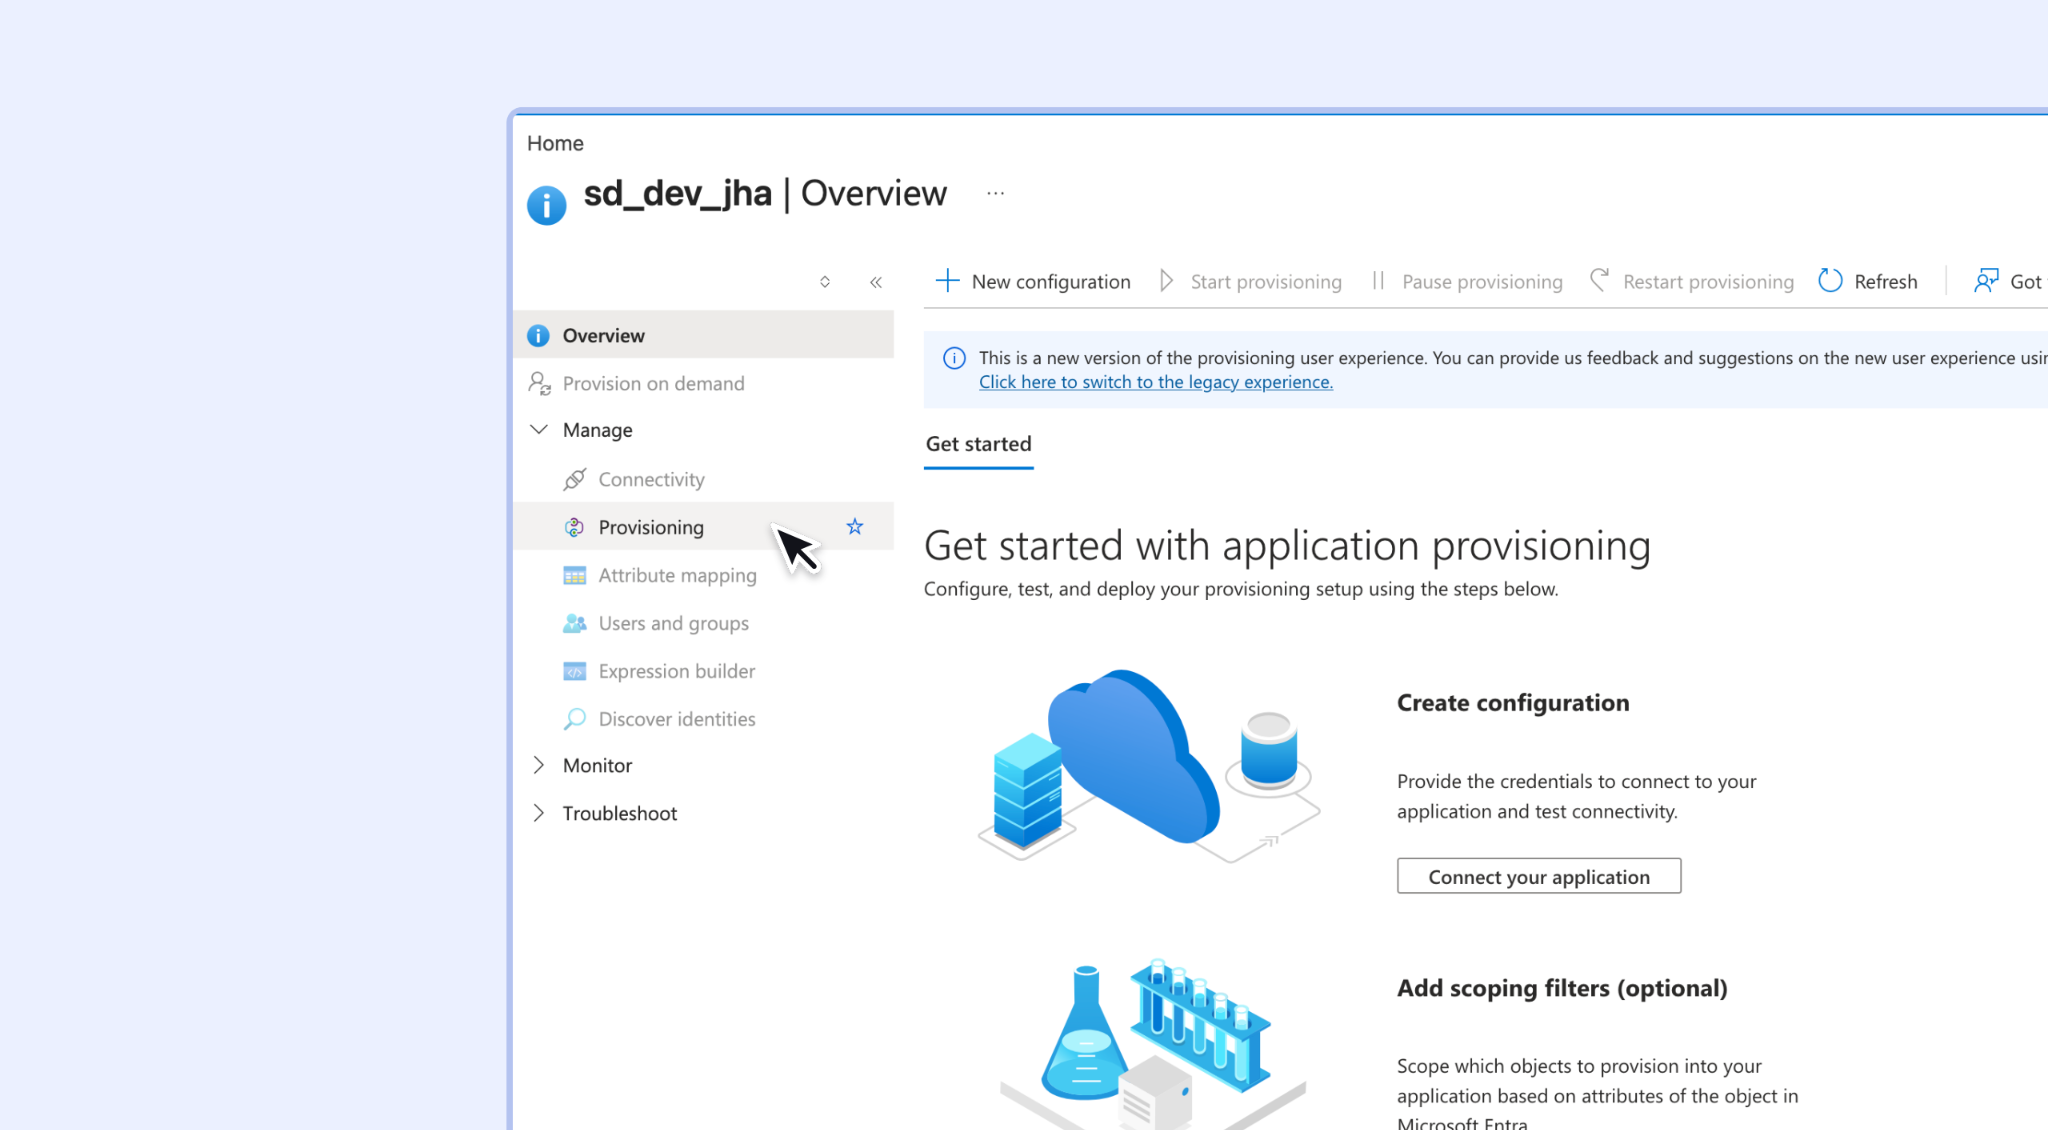
You will be on the application provisioning page, click "Provisioning" on the sidebar again.
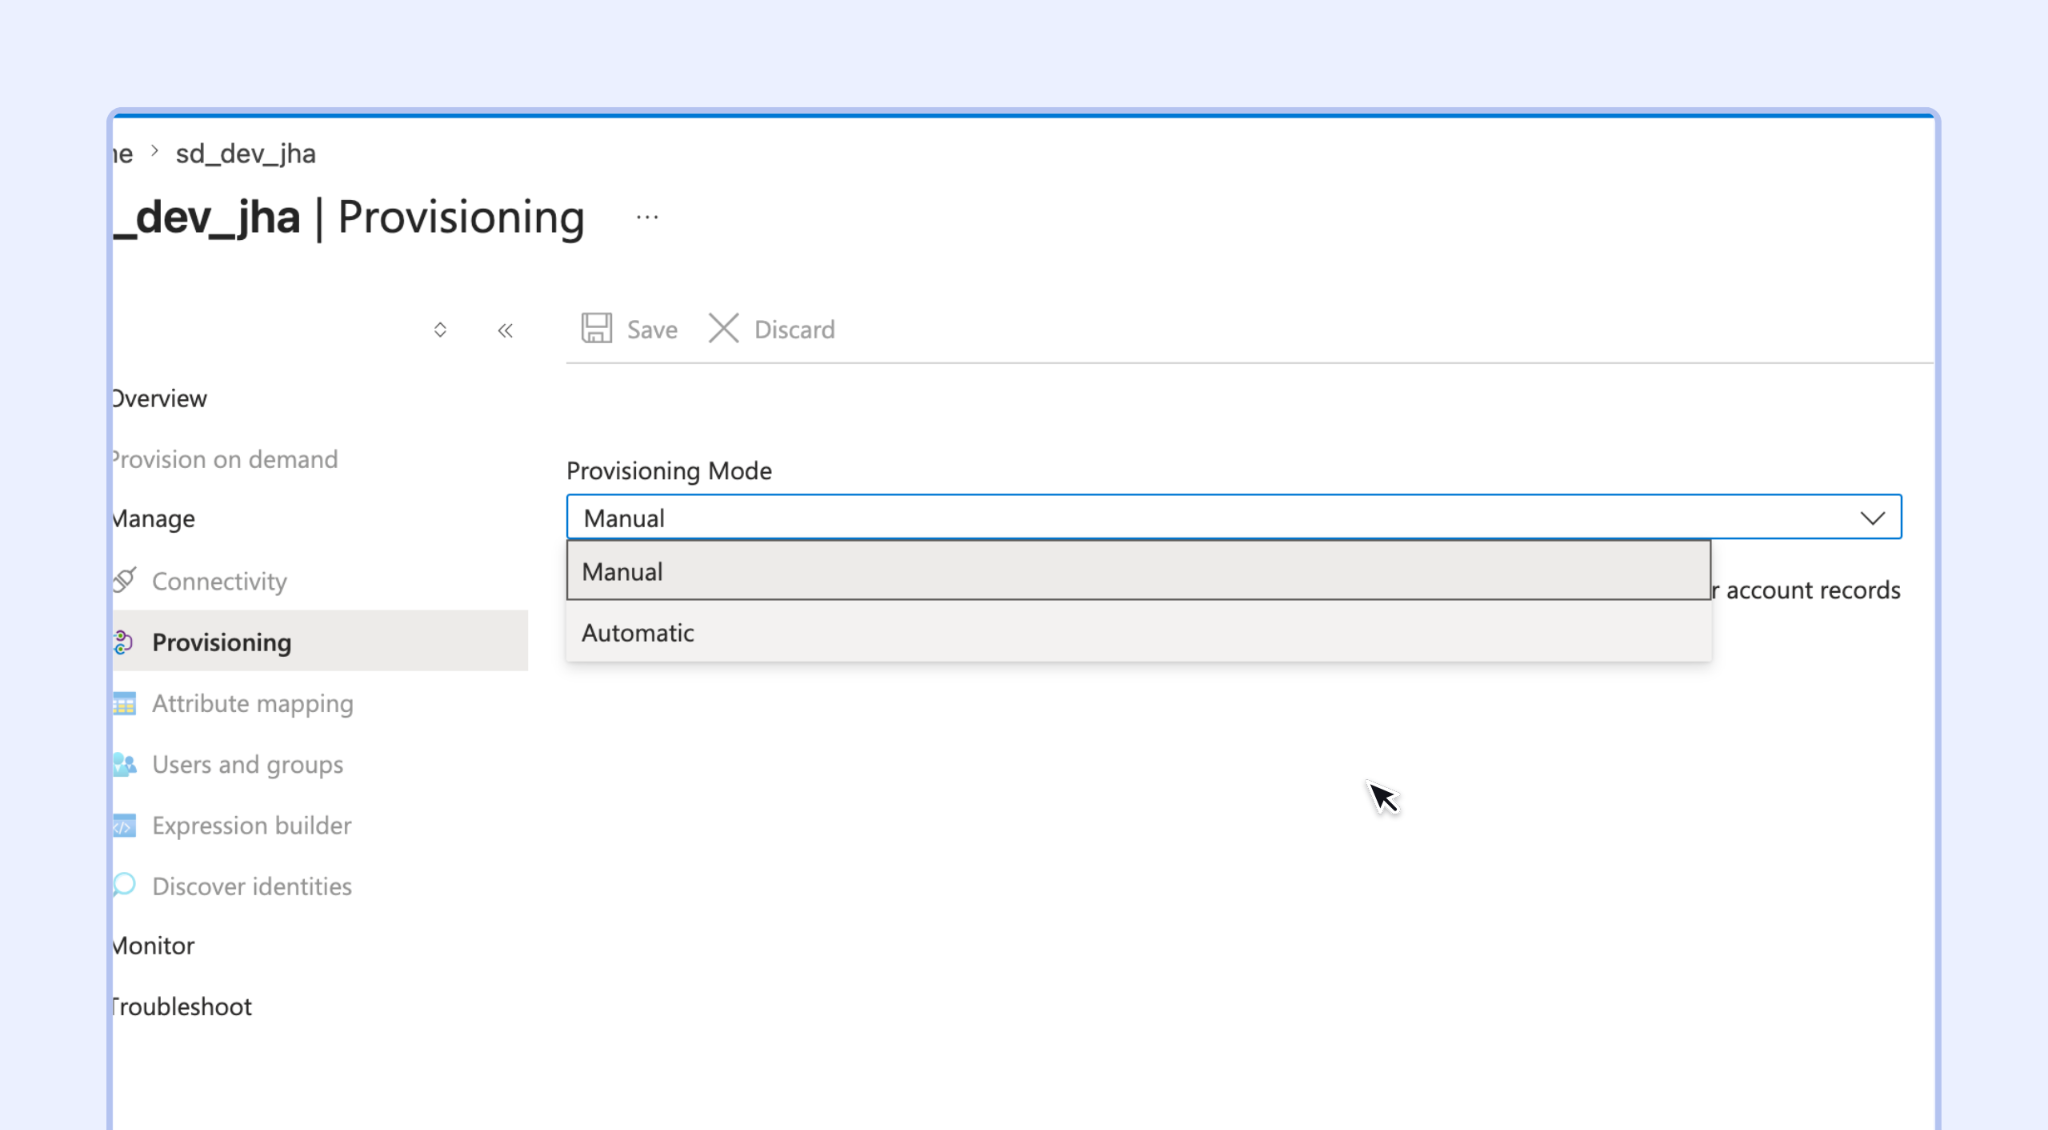
Change the provisioning mode from "Manual" to "Automatic".
Update the "Tenant URL" and "Secret Token" in "Admin Credentials" with the values generated in Step 1 and click Save.
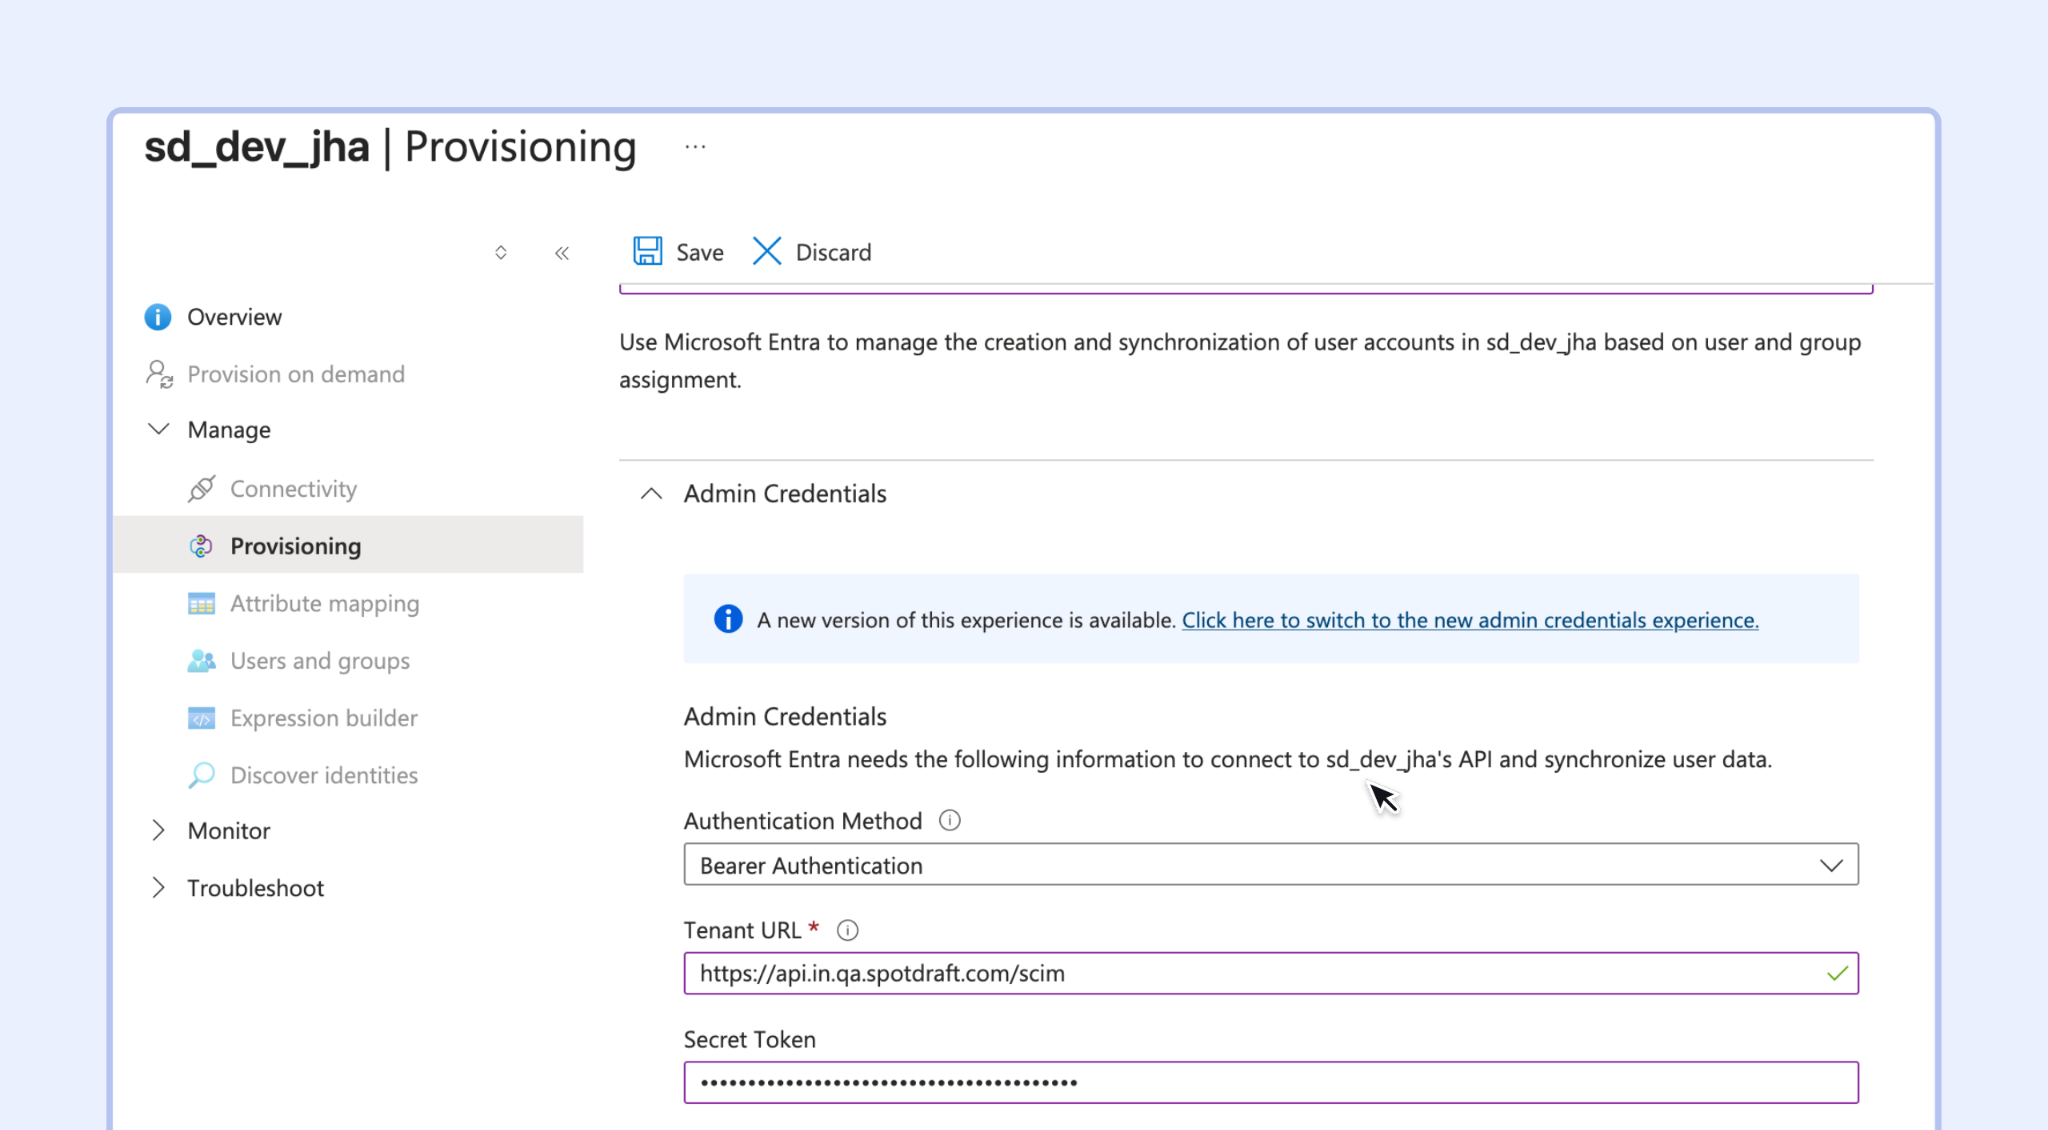
Provision users and groups
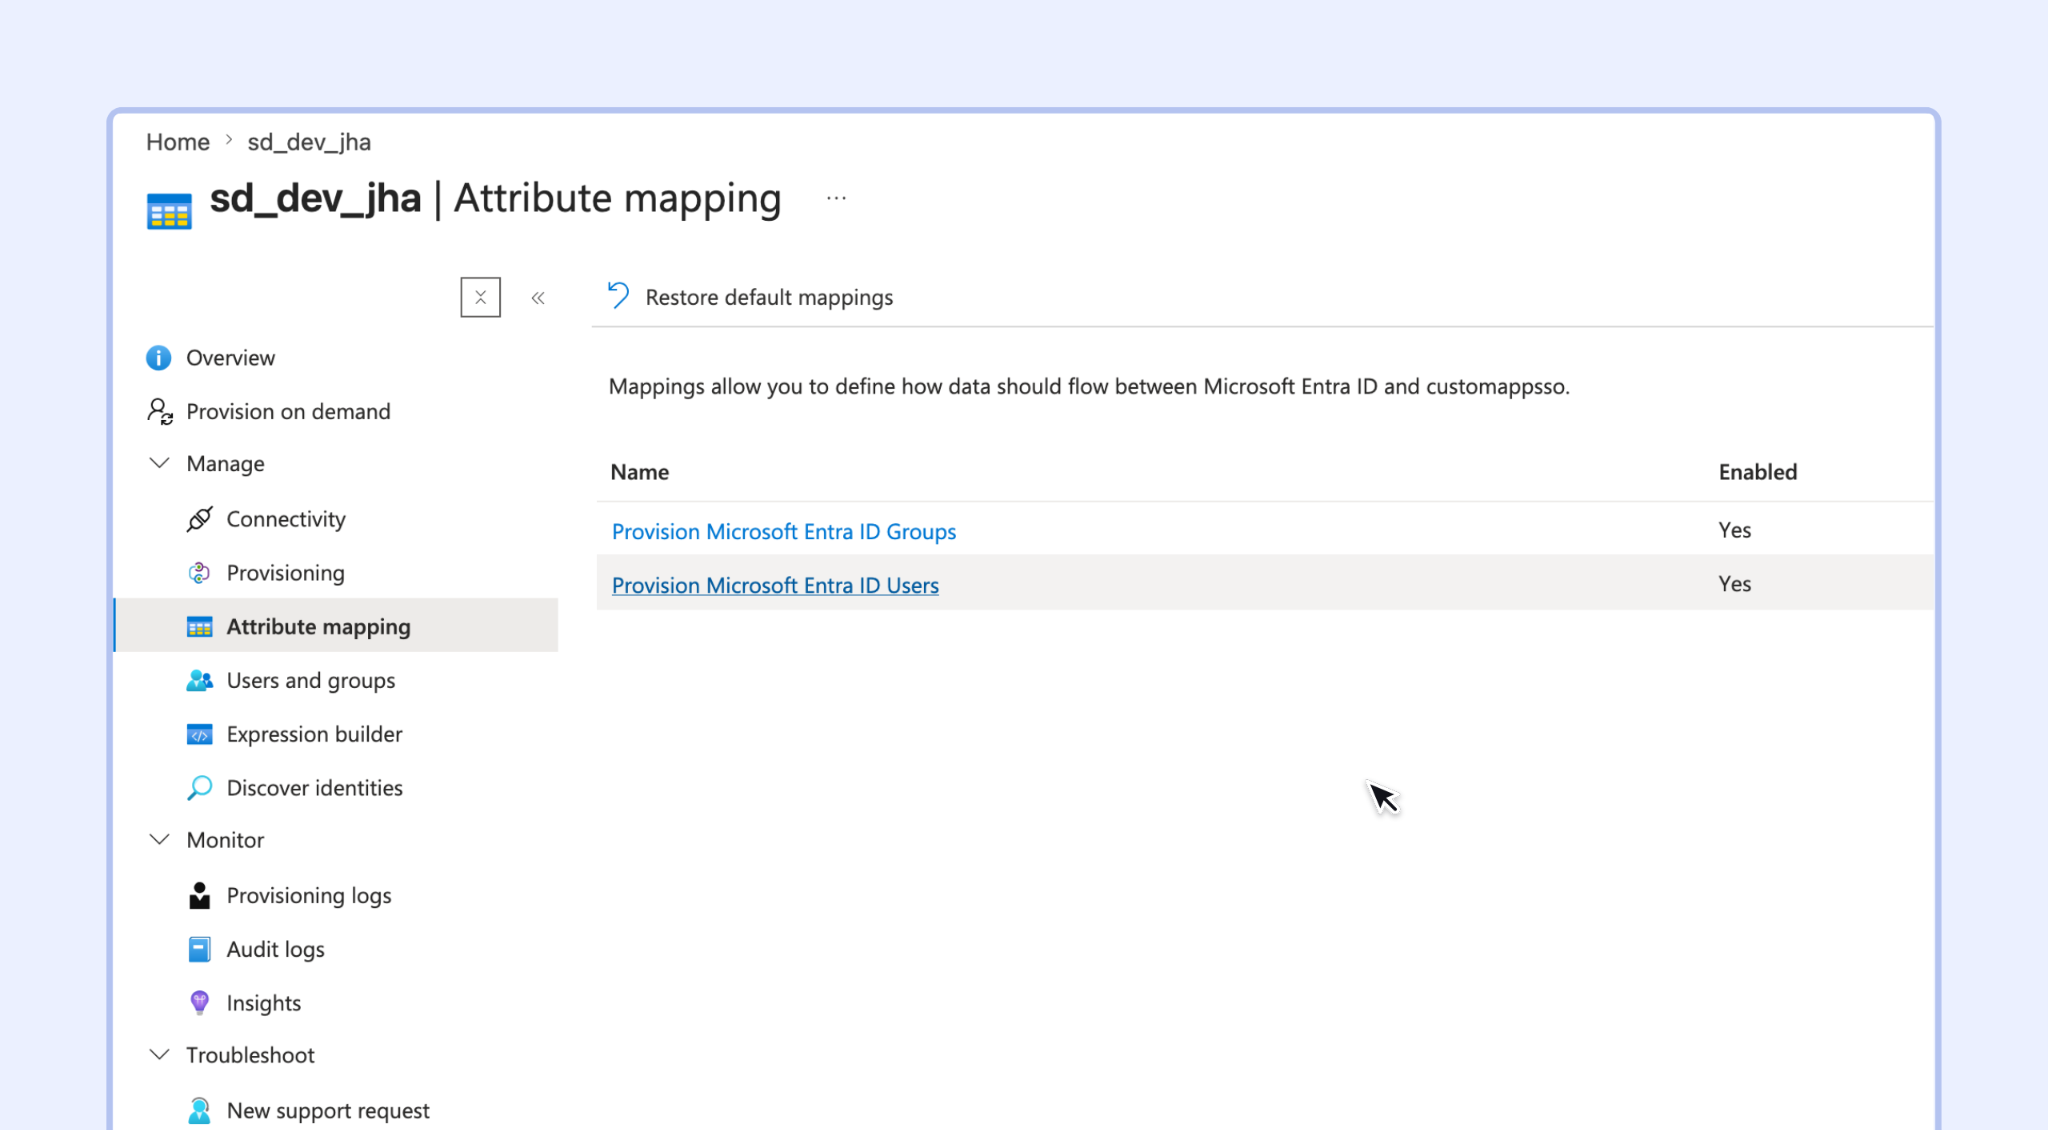
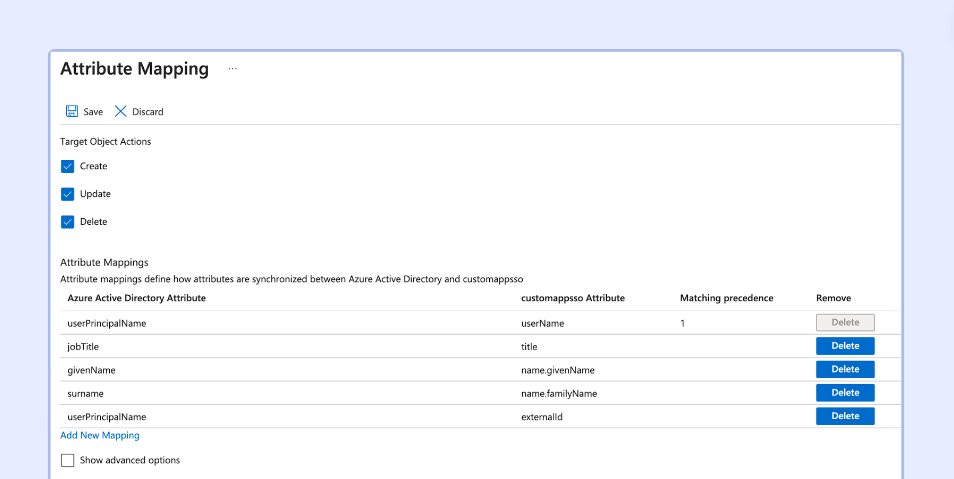
Click on "Attribute mapping" in the sidebar and click "Provision Microsoft Entra ID Users" and scroll down to the attribute mappings.
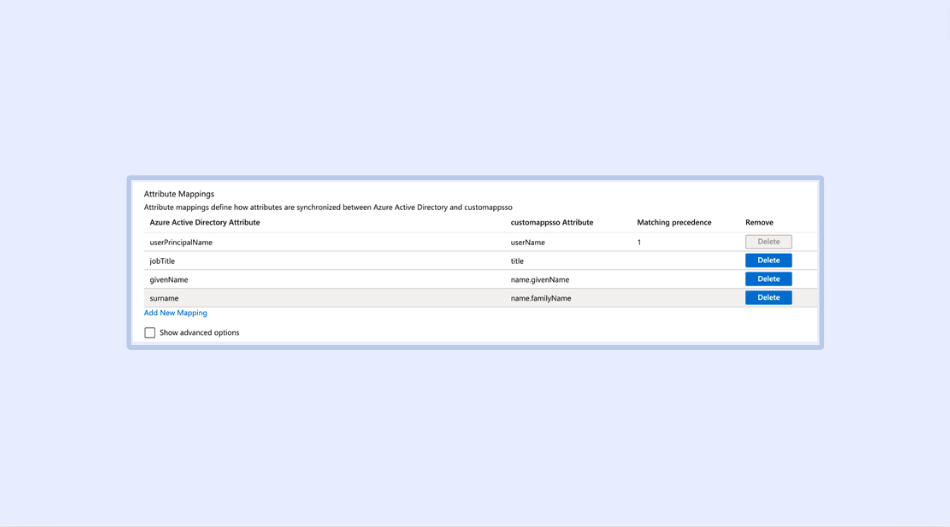
Remove unsupported attribute mappings except for "userName", "name.givenName", "name.familyName", and "title".
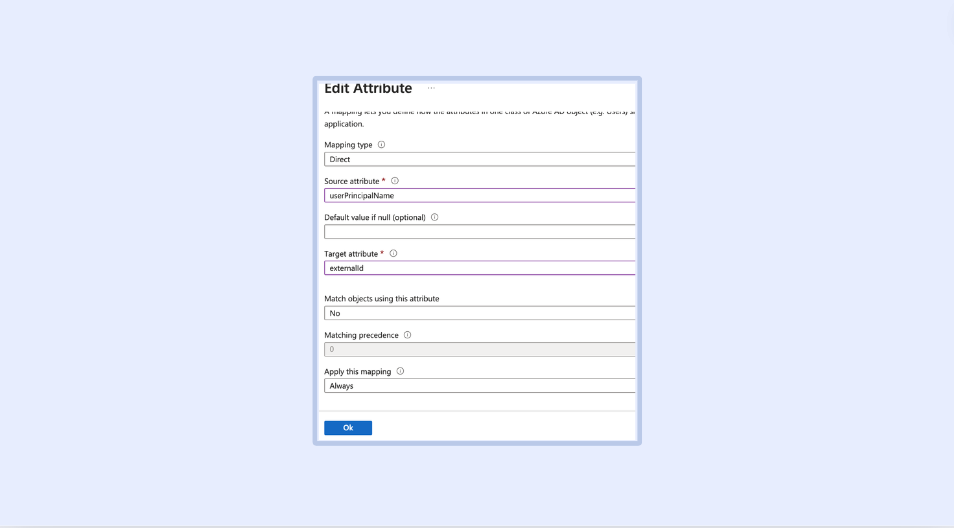
Add a new mapping called "externalId" and click "Save" after updating the mappings.
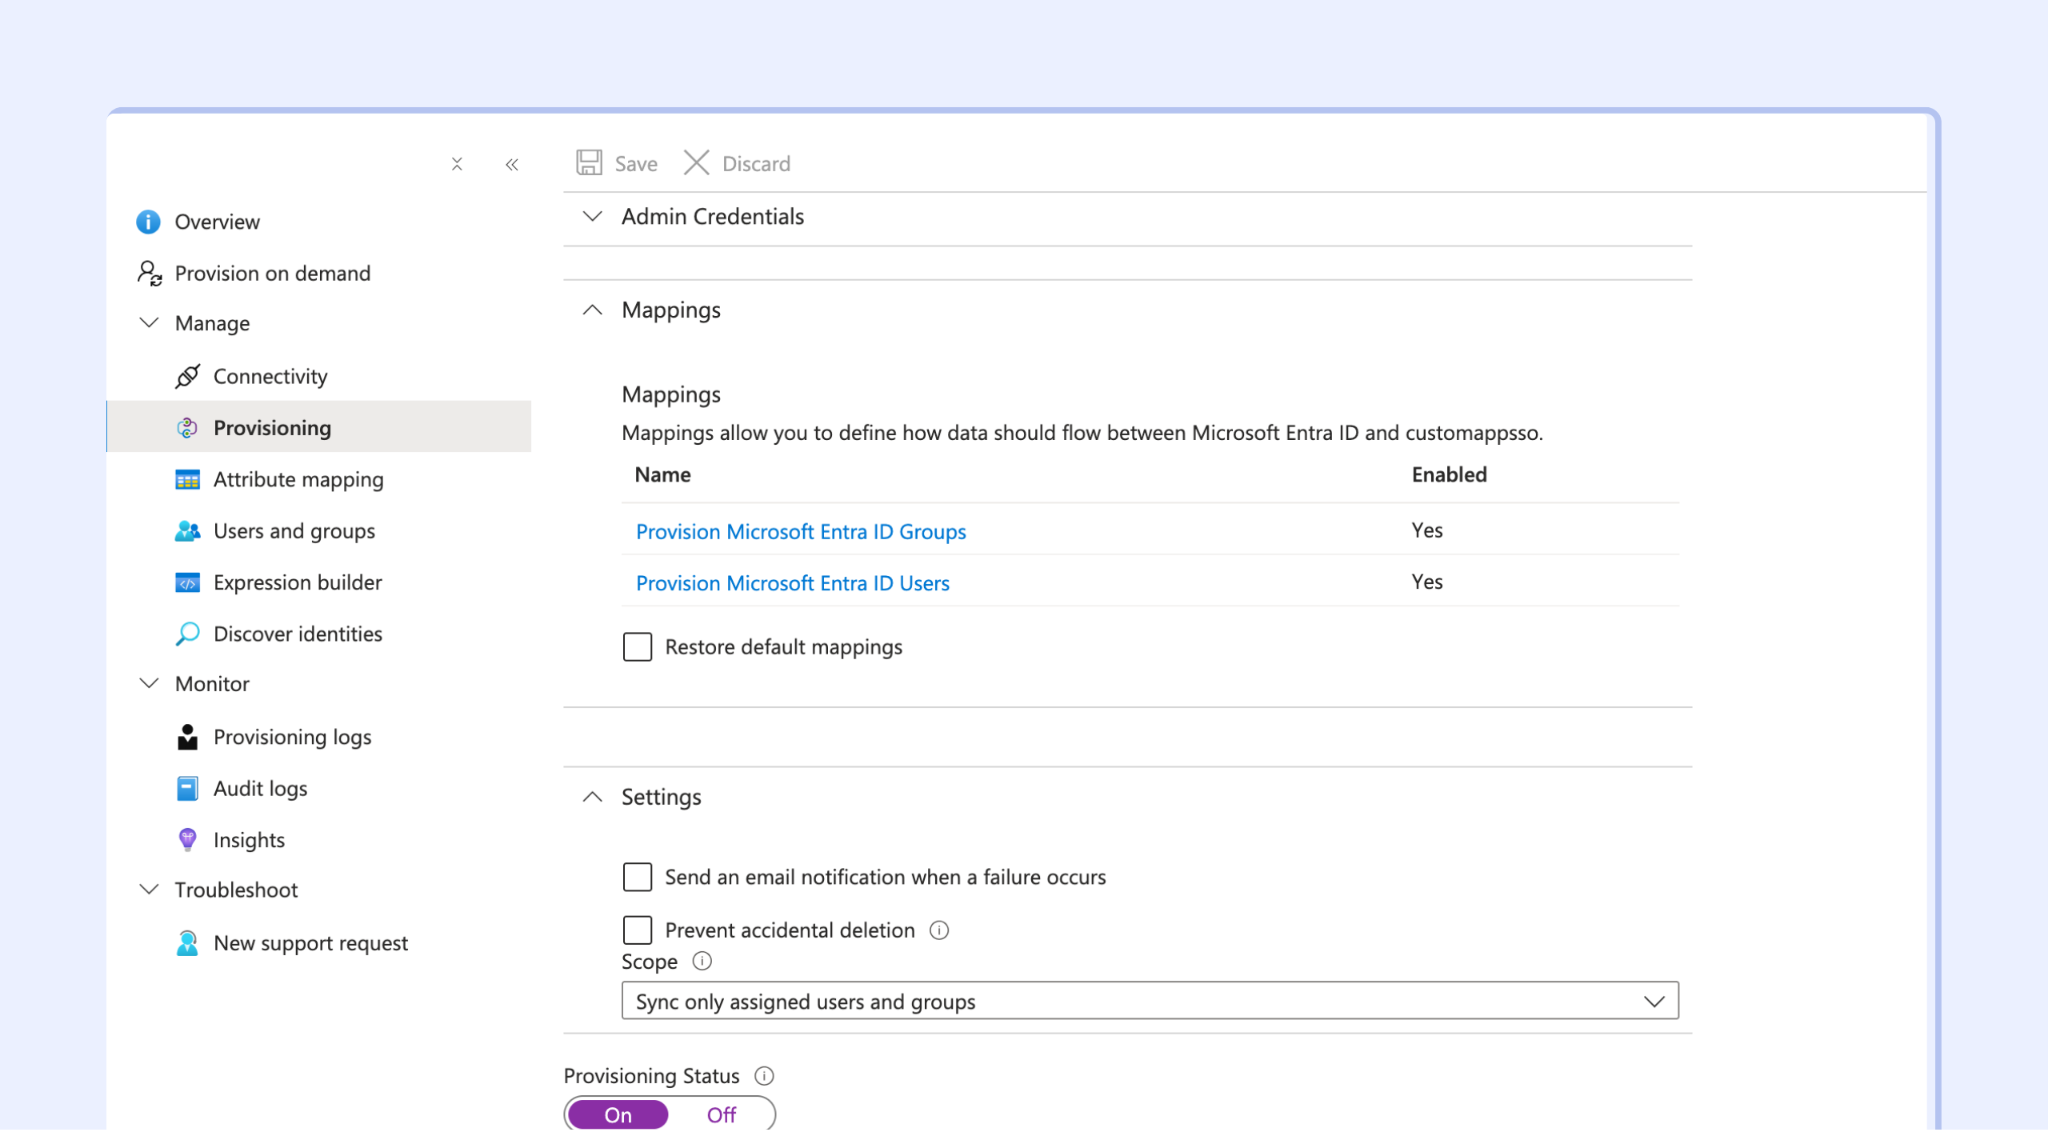
Go back to the "Provisioning" tab from the sidebar. Customize other options in "Settings" according to your requirements and click "Save". Ensure that the provisioning status is turned on, and that both Groups and Users are enabled under "Mappings".
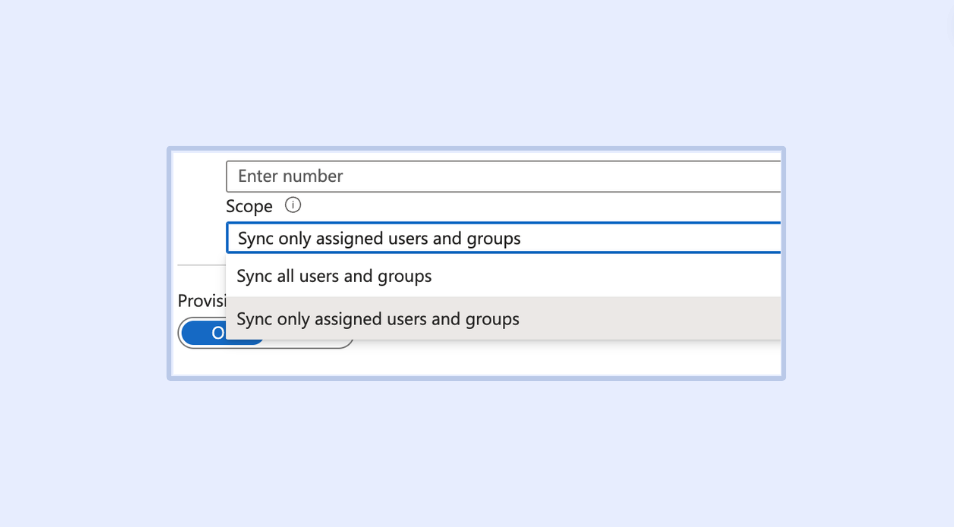
In the "Scope" dropdown, select the option "Sync only assigned users and groups", as it will provision only those users and groups that are added to the app, while Sync all users and groups will create accounts for everyone present in the Azure Directory.
Before you start: Confirm with your SpotDraft point of contact that group provisioning is enabled for your workspace and that your Azure groups are mapped to the correct SpotDraft teams. Groups that are not mapped to a SpotDraft team will be ignored. SpotDraft syncs to existing teams only and does not create new teams from Azure groups.
STEP 5:
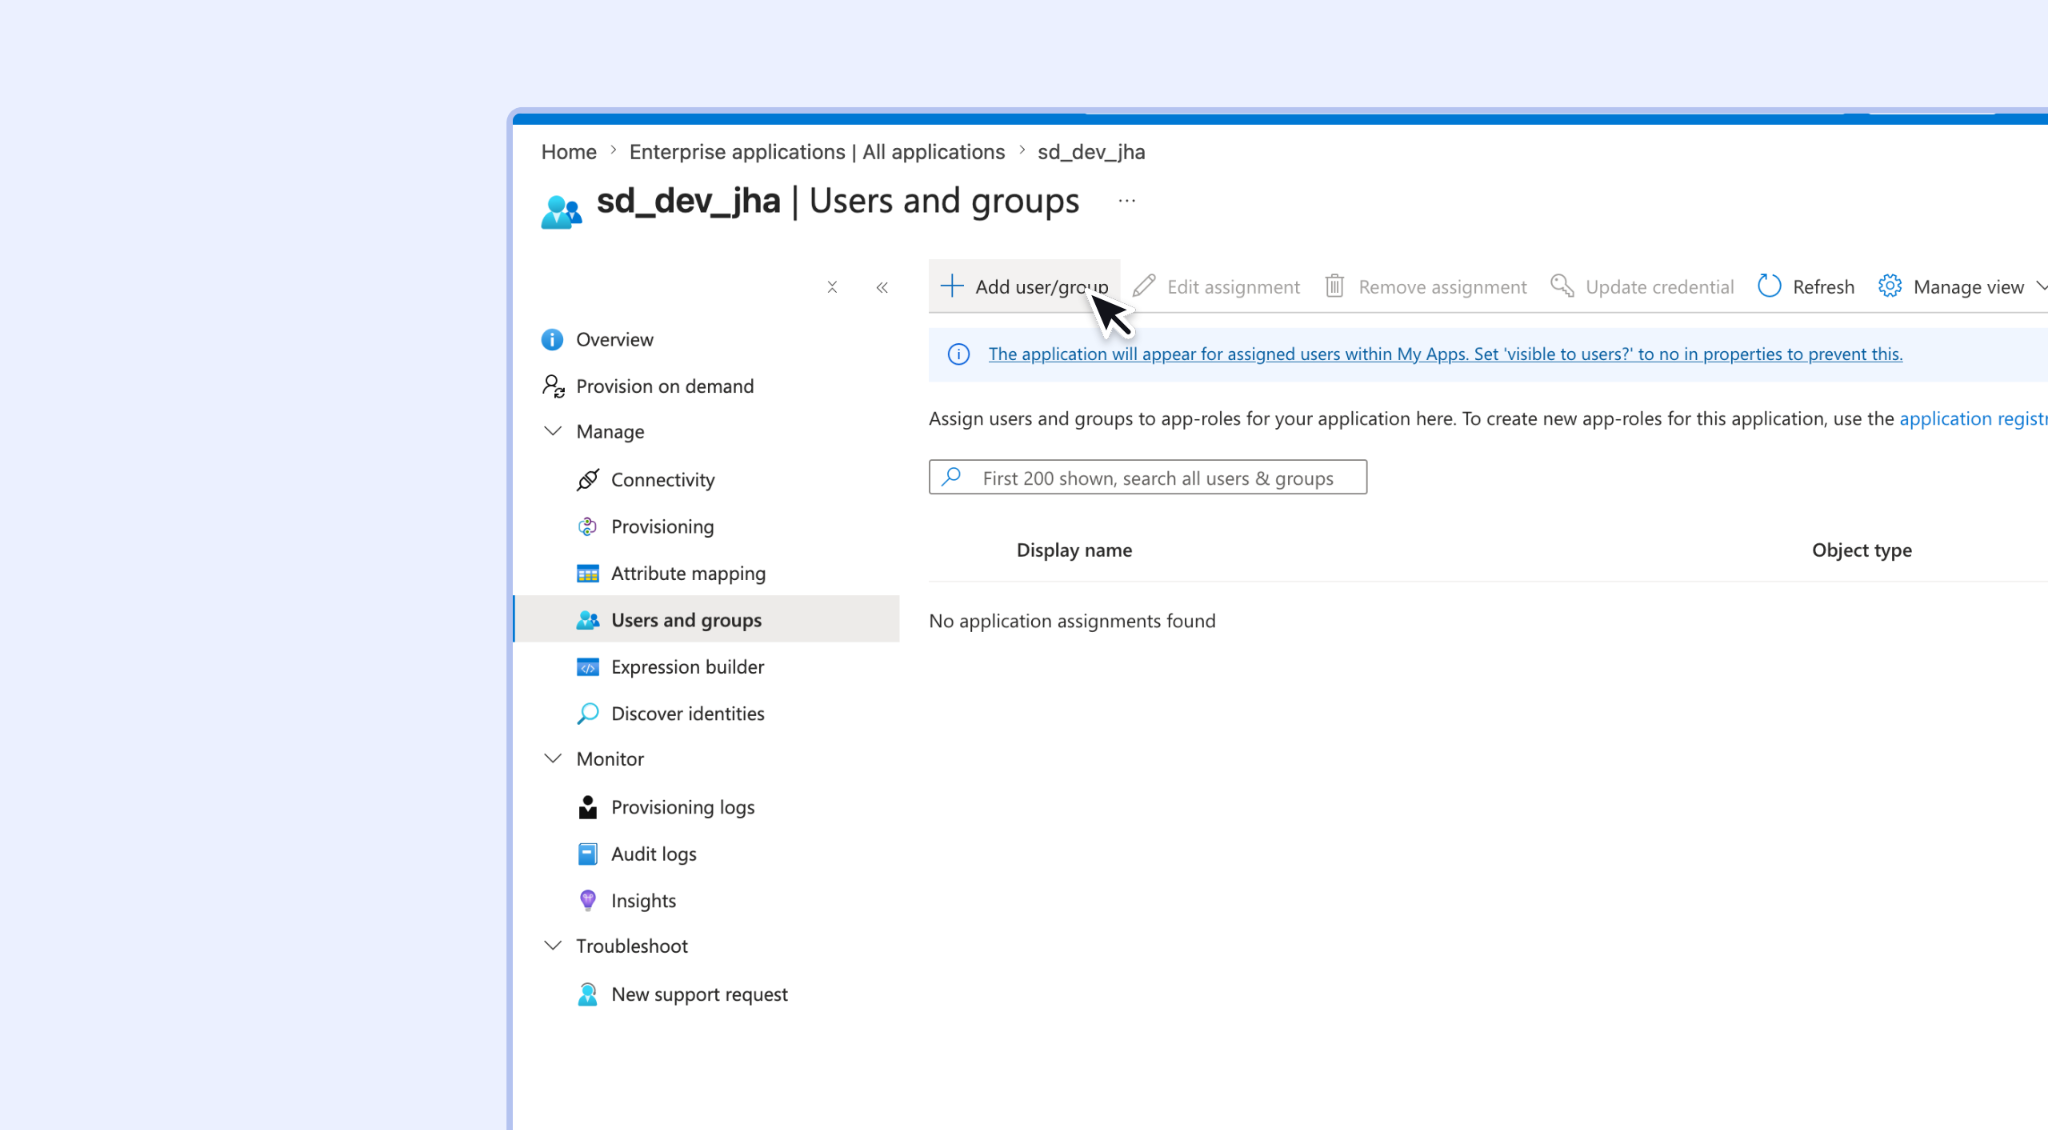
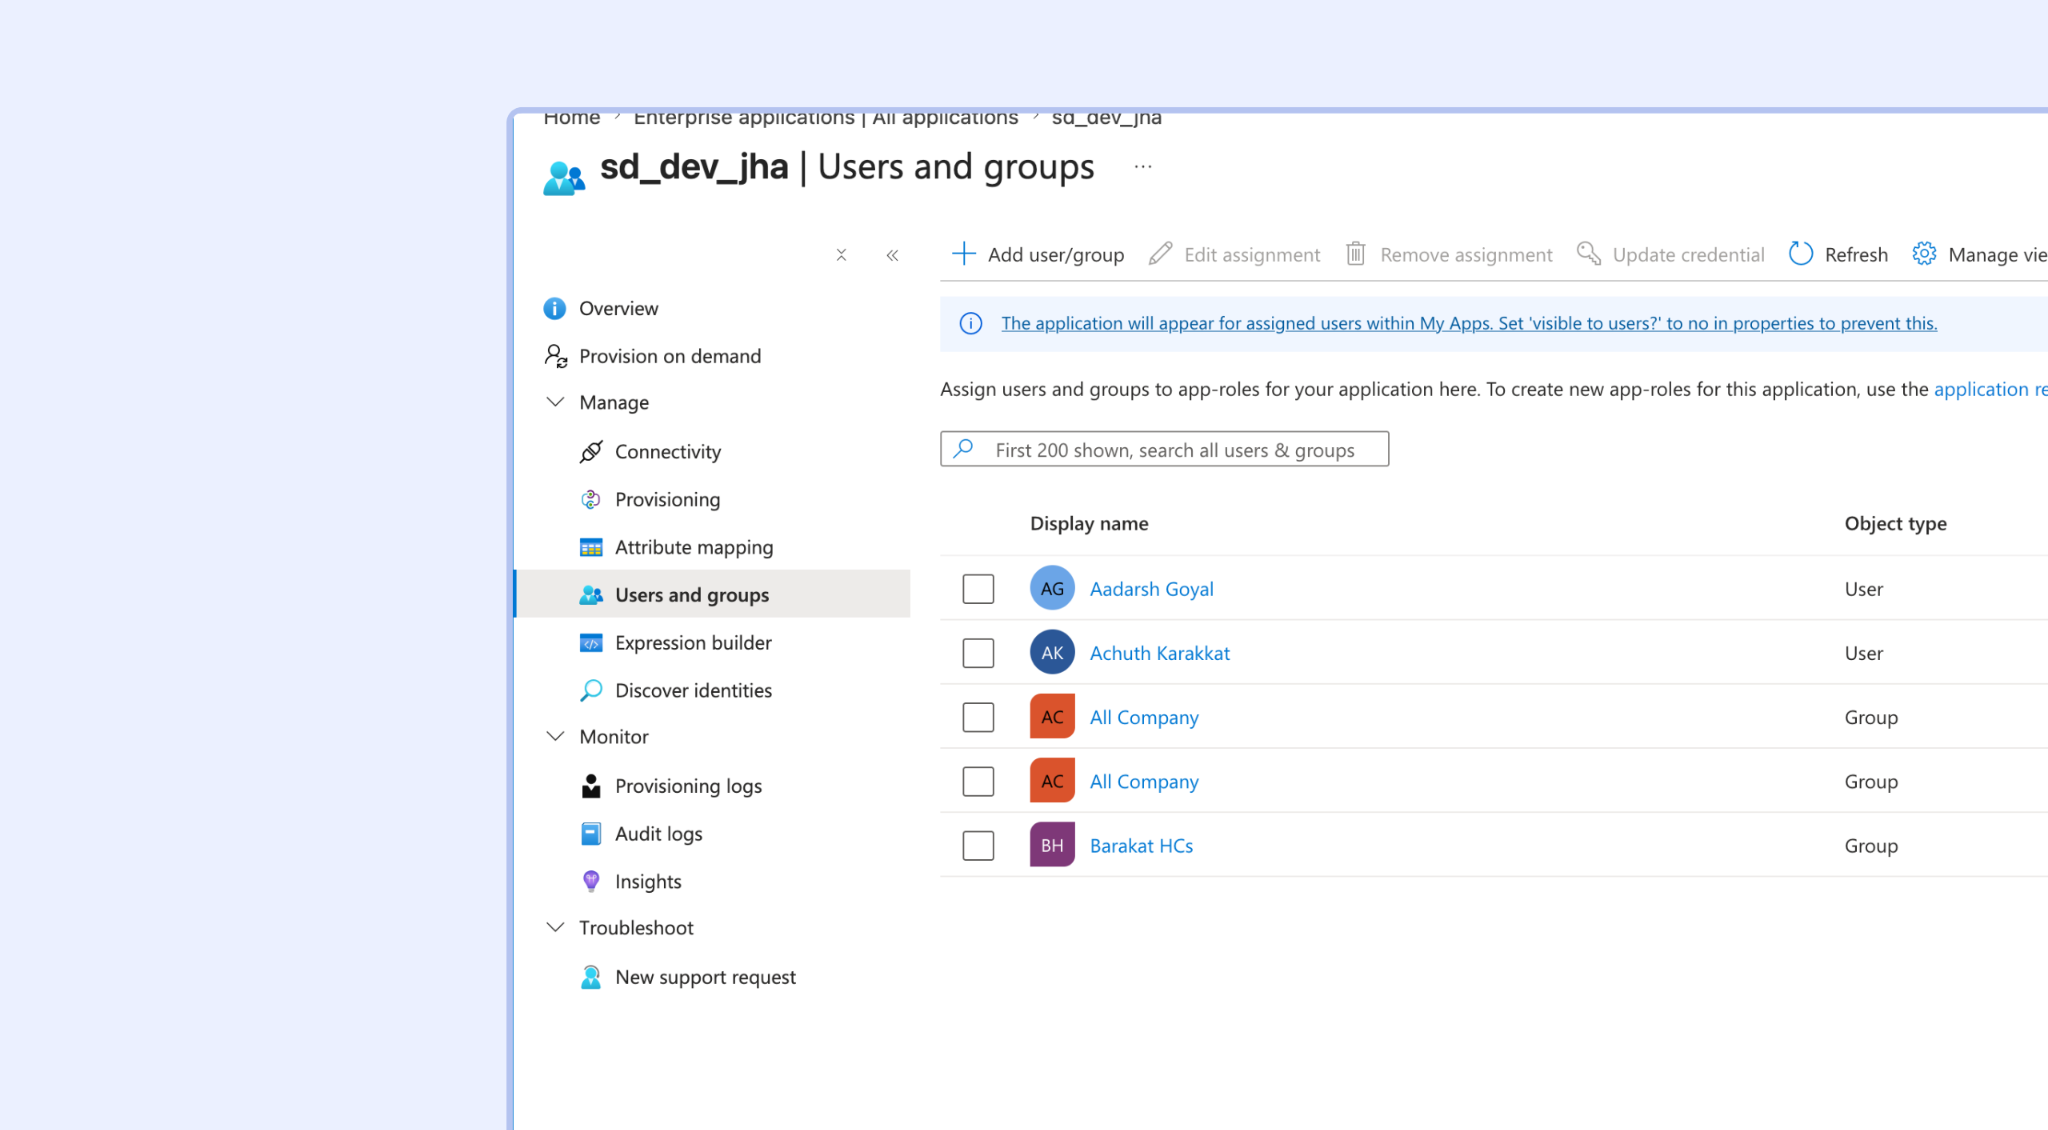
In the sidebar, click "Users and groups" and then click on "Add user/group" at the top.
Click "None Selected".
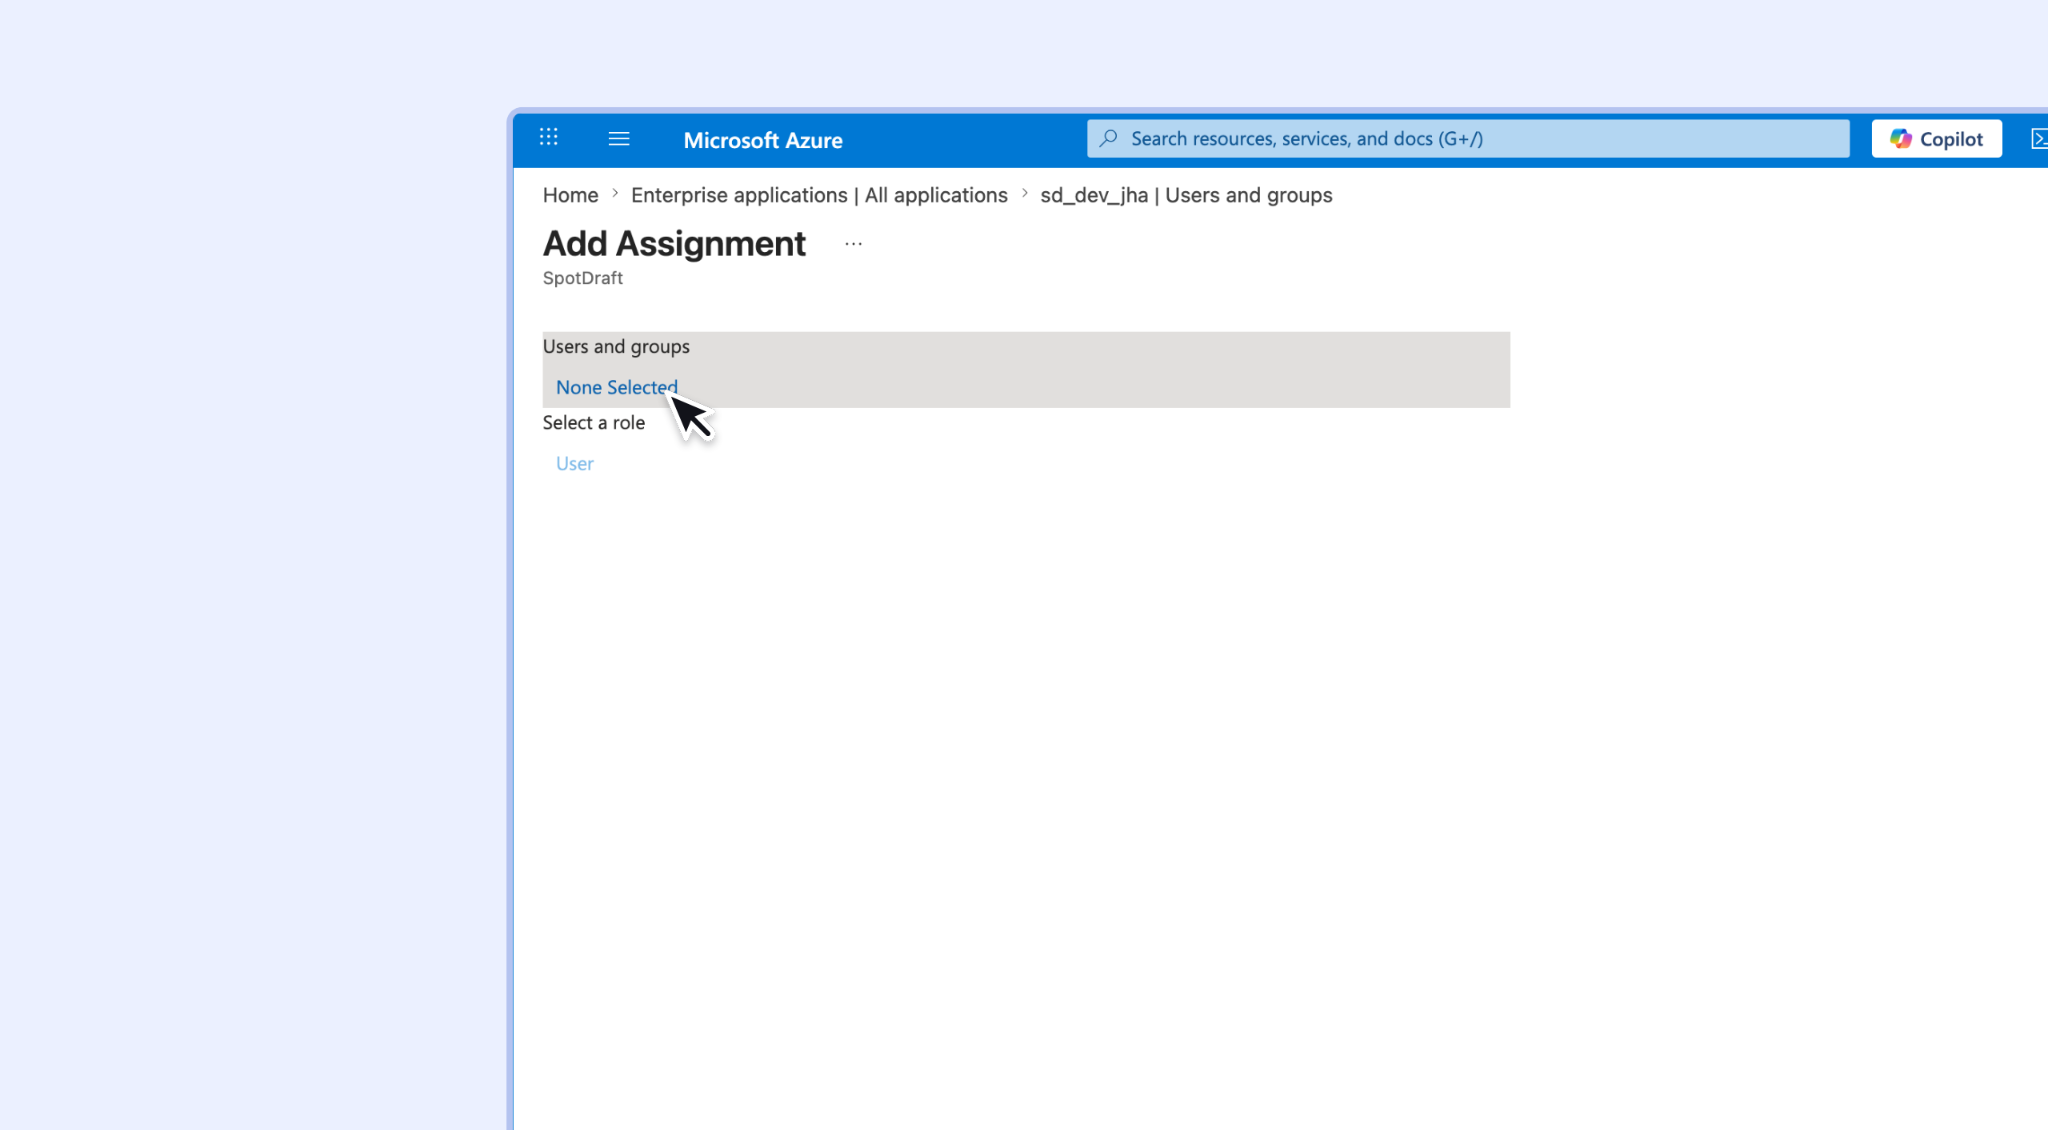
Add the desired users and groups to the application and click "Select". Add the groups that map to your SpotDraft teams here so their members are provisioned to the correct teams.
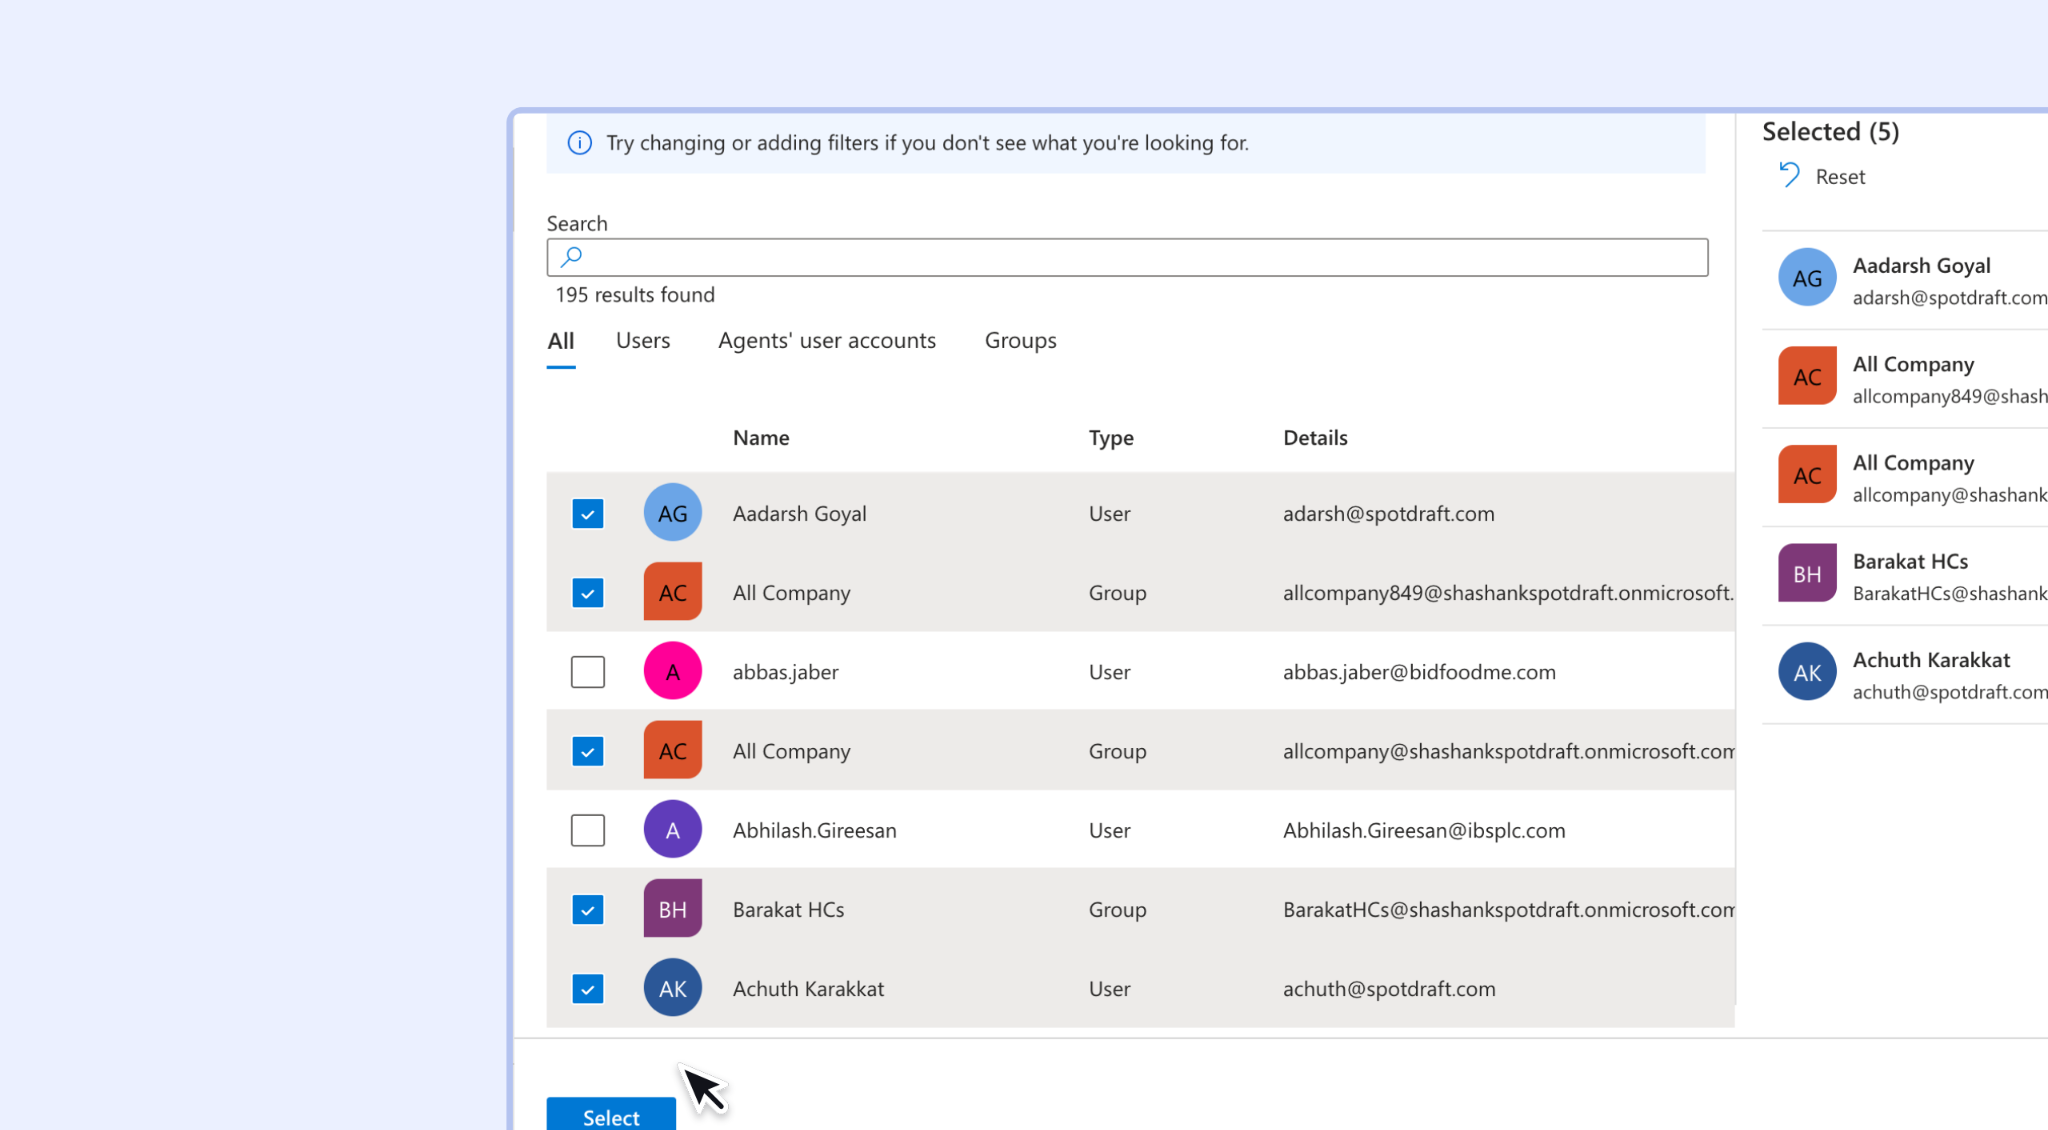
Click "Assign". The Users and groups page will be updated.
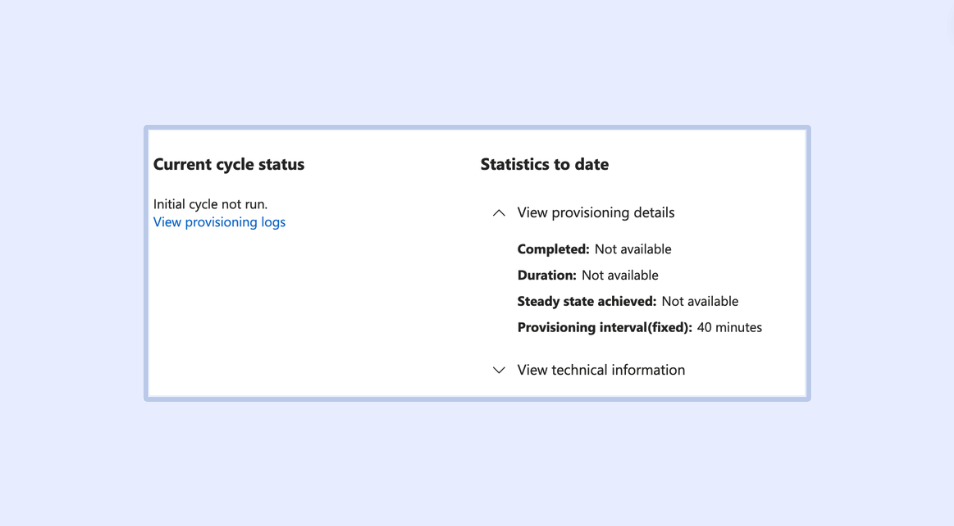
Go to "Overview" and use the following options as needed:
Click "Start Provisioning" to sync selected users and groups. Please note that provisioning may take some time, so check the provisioning interval.
Click "Stop Provisioning" to halt the process.
Click "Restart Provisioning" to restart the process if any issues occur.
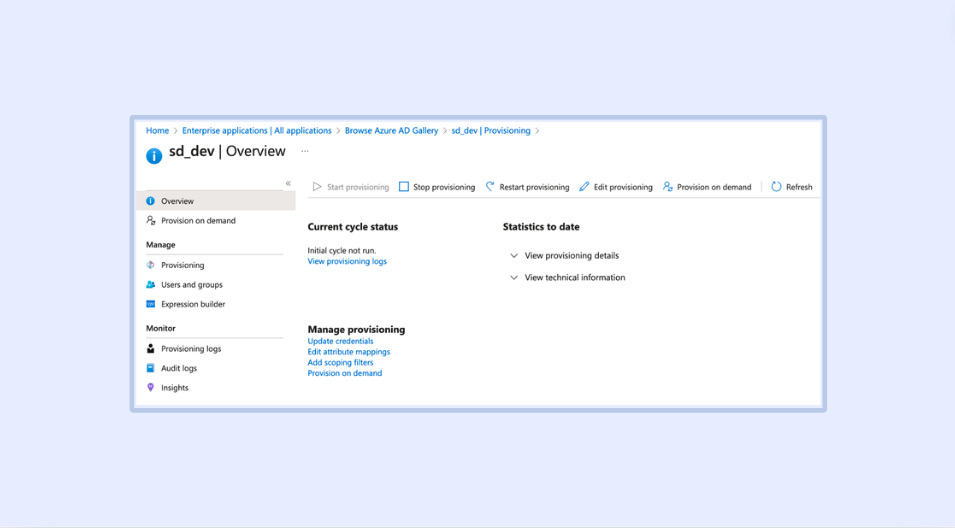
💡 You can also use the provisioning on-demand option if we want to create a user right away.
STEP 6 (optional):
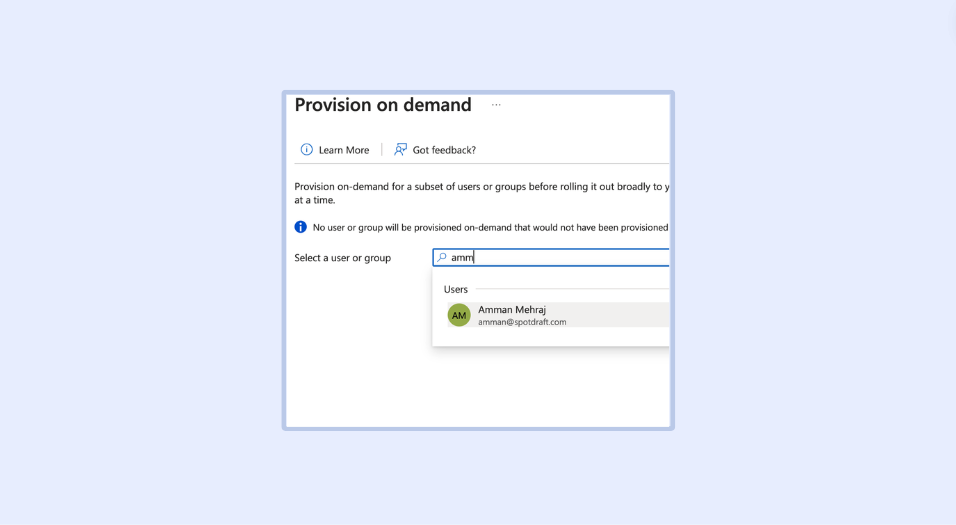
Click on "Provisioning on demand".
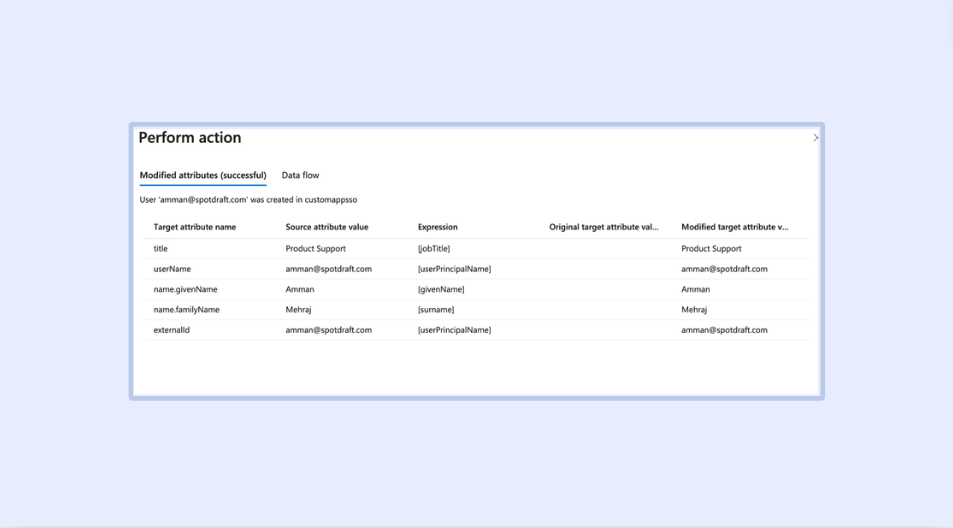
Provision the specific user if needed. Note that the user must be added on the users and groups page or the option to sync all users should be selected in the provisioning settings.
A success message will be displayed once the user is created.
How group changes sync
Adding a user to an assigned group in Entra adds the user to the mapped SpotDraft team on the next sync.
Removing a user from an assigned group removes the user from the mapped SpotDraft team on the next sync. If the user belongs to another assigned group mapped to the same team, they remain on the team.
Removing a pushed group clears the mapped SpotDraft team along with its permissions, and returns it to being a non-Entra managed team within your workspace. You can re-assign members and permissions within SpotDraft, or you can map the team to another group in Entra.
Renaming a group in Entra does not break the mapping or change the SpotDraft team name.
Group membership changes generally sync to SpotDraft within 40 minutes of the change being made in Entra, in line with Azure's standard provisioning interval.
Managing Azure-synced teams in SpotDraft
Teams that are synced from Entra are managed through Azure. To keep SpotDraft and Entra consistent:
Team membership for these teams are managed in Azure. Team names are locked post syncing to ensure the mapping remains consistent.
Permissions for teams synced from Entra continue to be managed by admins in SpotDraft, exactly as they are for other teams. Being synced from Entra does not change how you assign permissions.
Users provisioned through Entra cannot be deleted or deactivated directly in SpotDraft. Make these changes in Entra, and they will be reflected in SpotDraft.
Setting up SAML SSO
Step 1:
Get the SAML Metadata XML file from the ‘Security and Identity’ section on SpotDraft.
Step 2:
Go to Single sign-on and click on Upload metadata file. Use the metadata file you generated in Step 1 and click on ‘Save’.
Step 3:
Click on Download for the Federation Metadata XML.
Step 4:
Open SpotDraft and navigate to Settings → Security and Identity → SAML
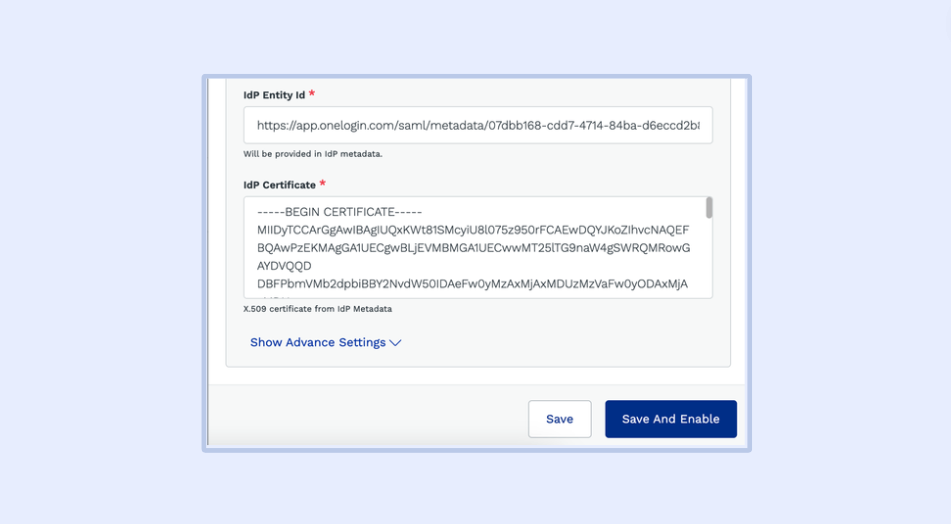
Paste the values from ‘Step 3’ into the IdP Certificate section at the bottom.
Click on ‘Save And Enable’.