Connecting SpotDraft's MCP Server to Microsoft Copilot Studio
Last updated: August 6, 2026
OAuth setup via the MCP onboarding wizard
Note: this article uses mcp.us.spotdraft.com as a reference. Depending on the region your workspace is located in, you will be required to use one of the follow region-specific MCP URLs:
If you're unsure which region your workspace belongs to, please contact SpotDraft Support or reach out to your CSM.
Before you start: use dynamic discovery, not manual
Copilot Studio's MCP onboarding wizard offers three OAuth 2.0 modes: Dynamic discovery, Dynamic, and Manual.
Use Dynamic discovery. This is the only mode that will work.
SpotDraft's MCP server requires clients to use PKCE (Proof Key for Code Exchange) as part of the OAuth flow, for security reasons. Microsoft Copilot Studio's Manual and Dynamic modes rely on a static client ID and secret exchanged without a PKCE challenge, so connections attempted through them will fail authentication against SpotDraft's authorization server. Dynamic discovery is the only mode where Copilot Studio negotiates the full OAuth flow (including PKCE) on its own, using the discovery metadata SpotDraft's server publishes.
If you've previously set up this connection manually (client ID/secret pasted into the wizard), that connection needs to be recreated using Dynamic discovery; it won't be fixed by updating credentials.
Step 1: Add the MCP server as a tool
Create a new blank Agent and call it the SpotDraft Agent (or something else that you'd prefer)
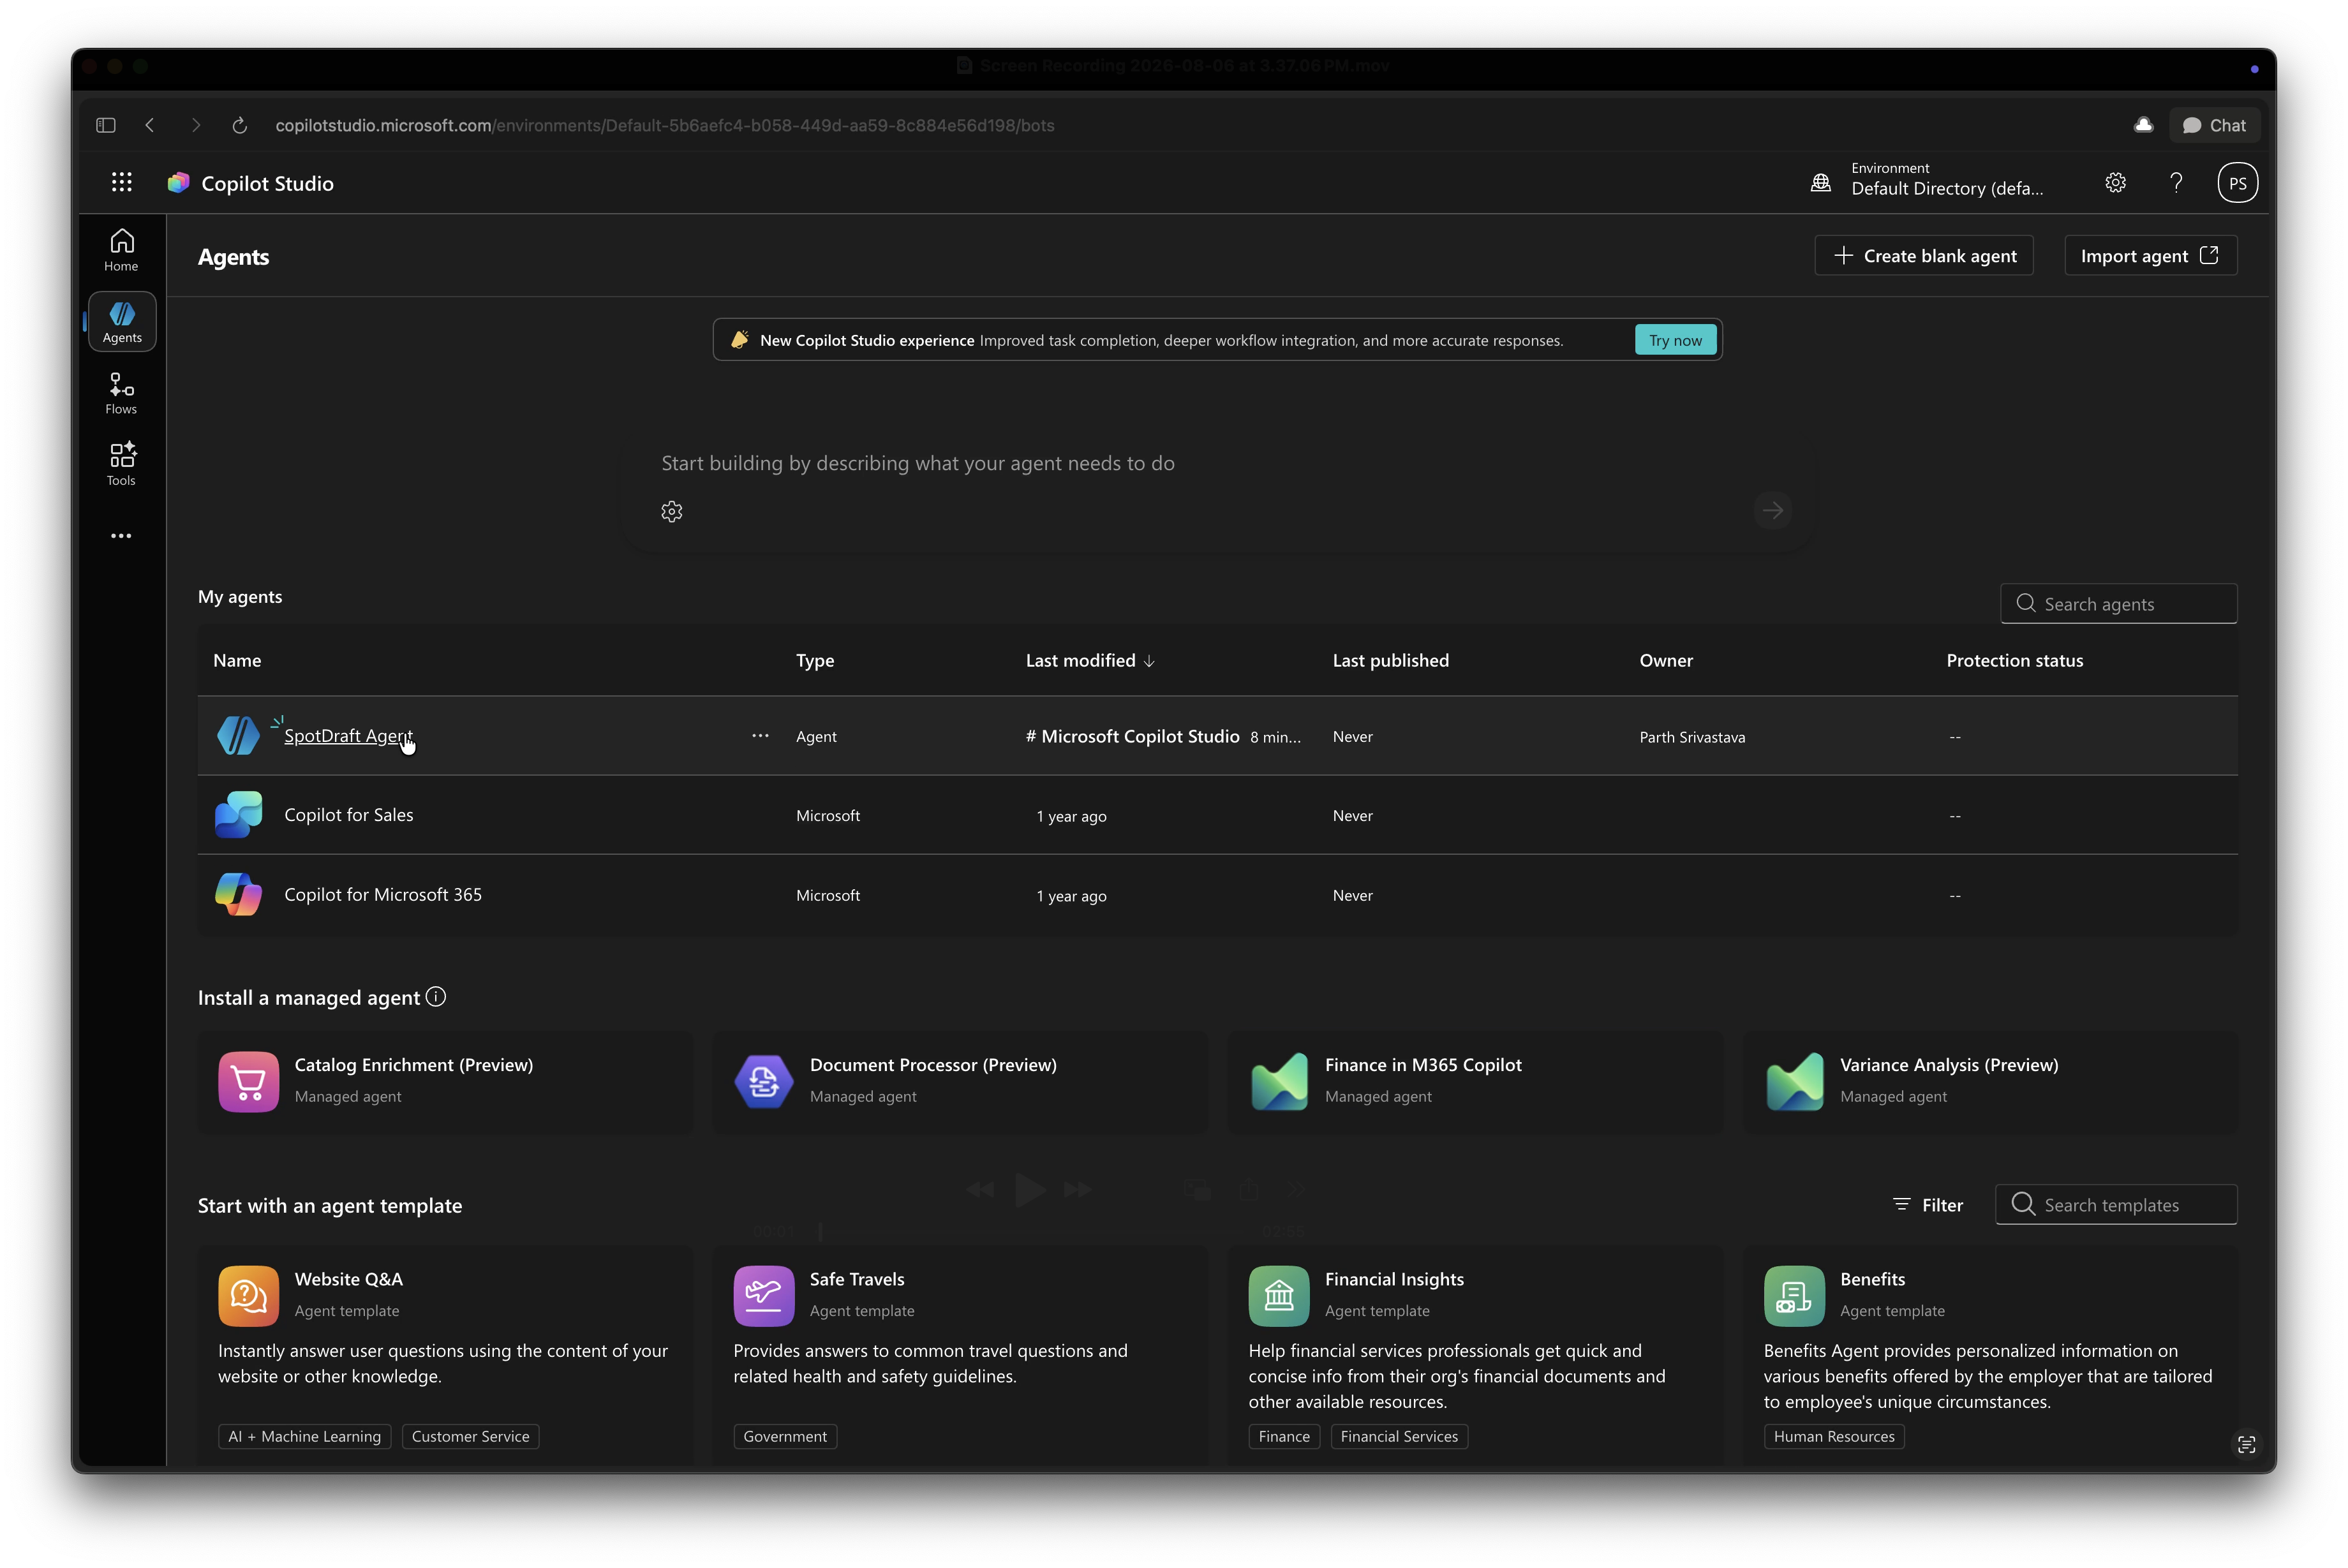
Open your agent in Copilot Studio and go to the Tools tab.
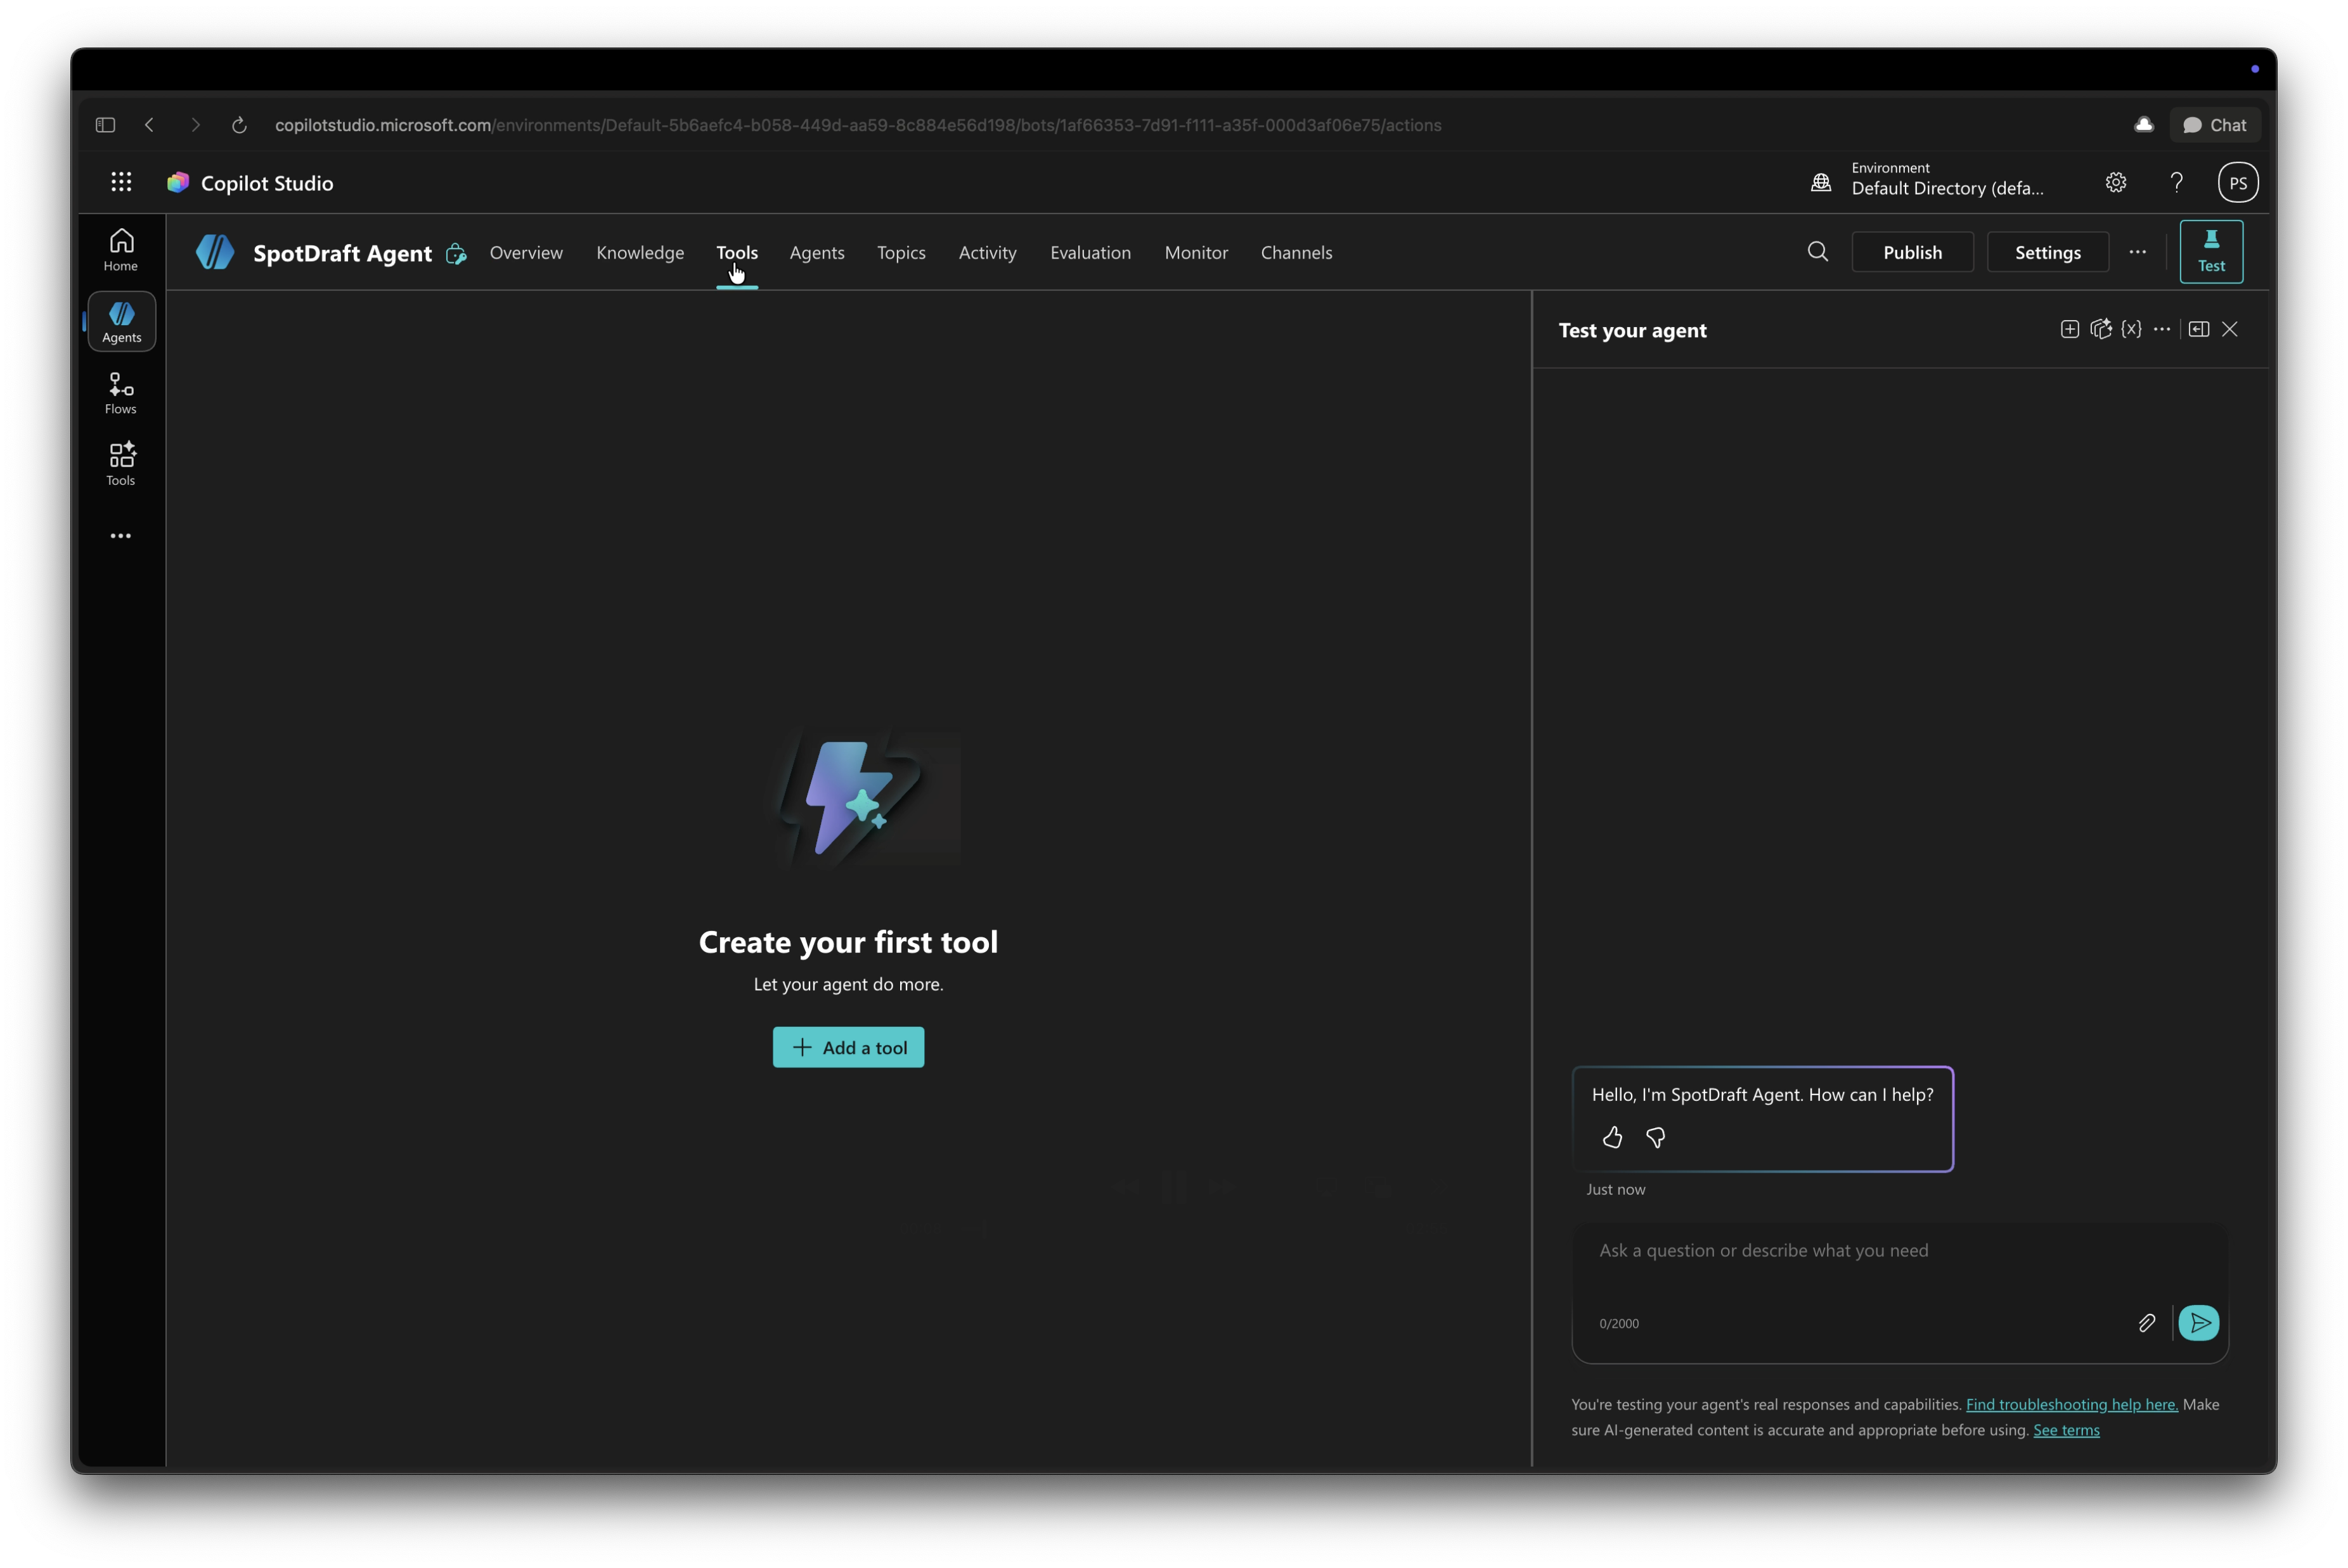
Select Add a tool. The Add tool dialog opens with a search bar and a "Create new" section (Agent flow, Prompt, Model Context Protocol, Computer use).
Select the Model Context Protocol tile.
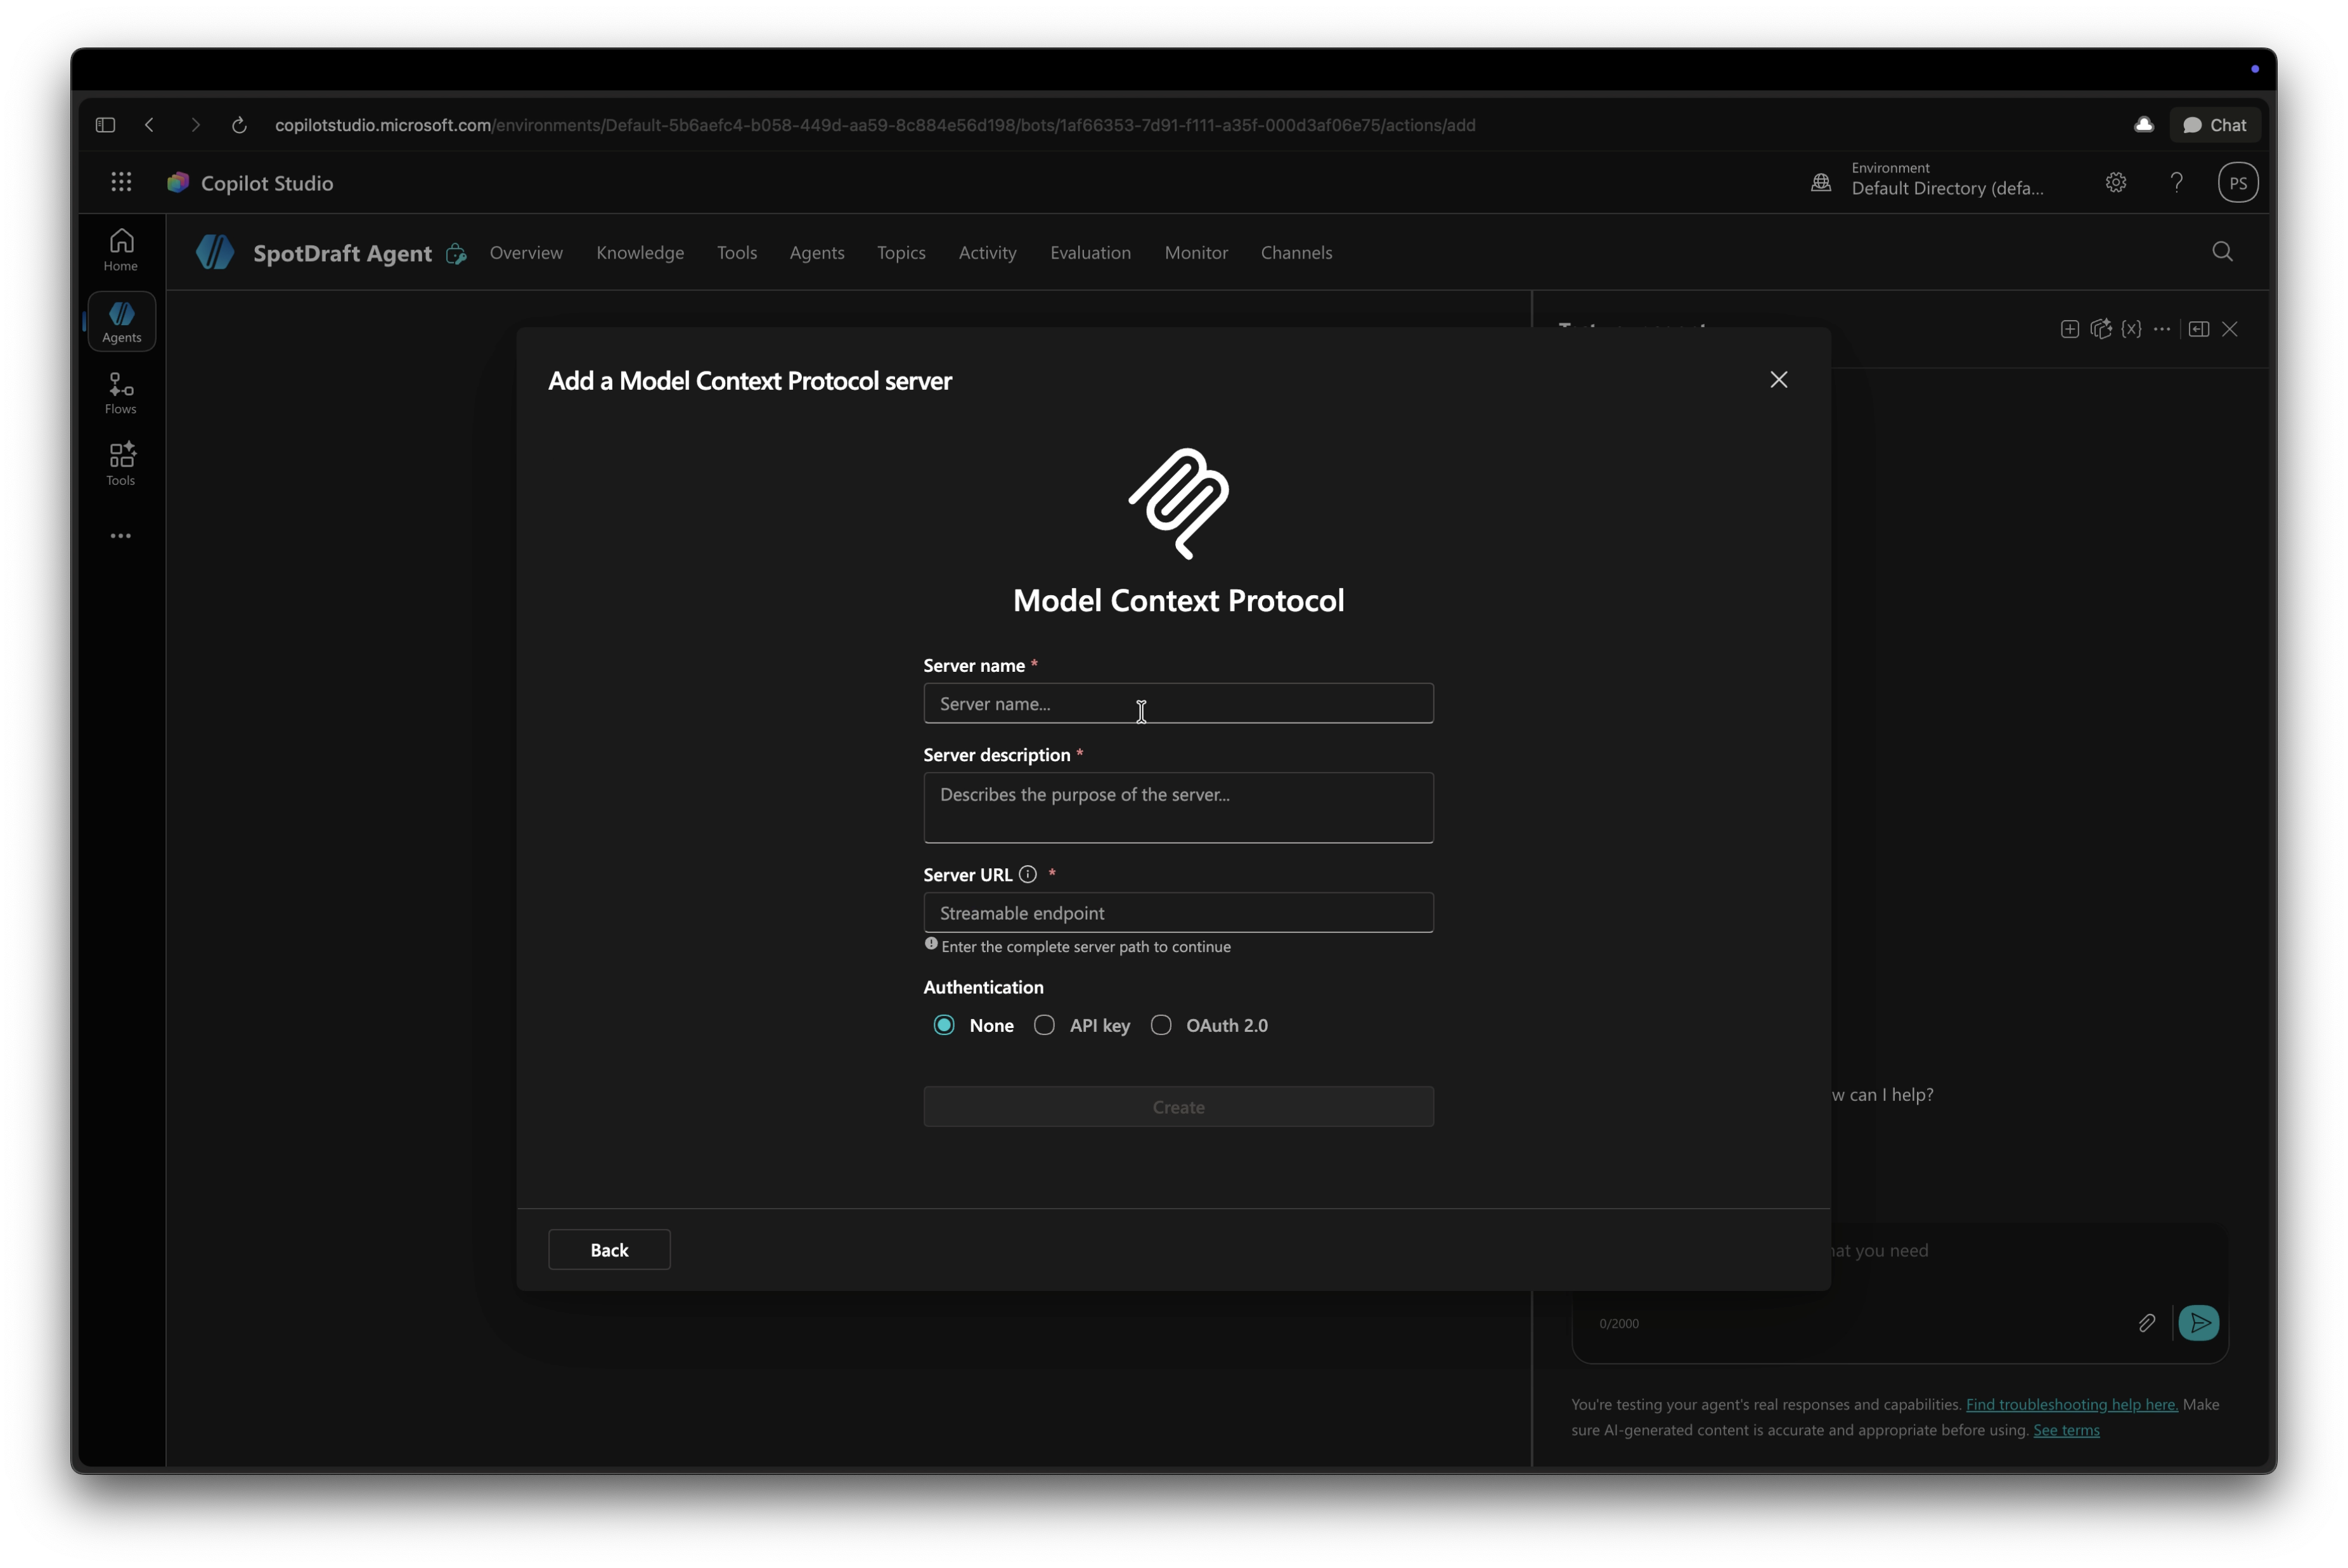
Fill in the server details:
Server name: a short label, for example
SpotDraftServer description: what this server does (this shows up later in the tool picker, so make it descriptive)
Server URL:
https://mcp.us.spotdraft.com/mcp(swap in your region's URL)
Under Authentication, select OAuth 2.0.
Under Type, select Dynamic discovery. Copilot Studio will show a note confirming that this requires the MCP server to support OAuth 2.0 Dynamic Client Registration (DCR); SpotDraft's server does.
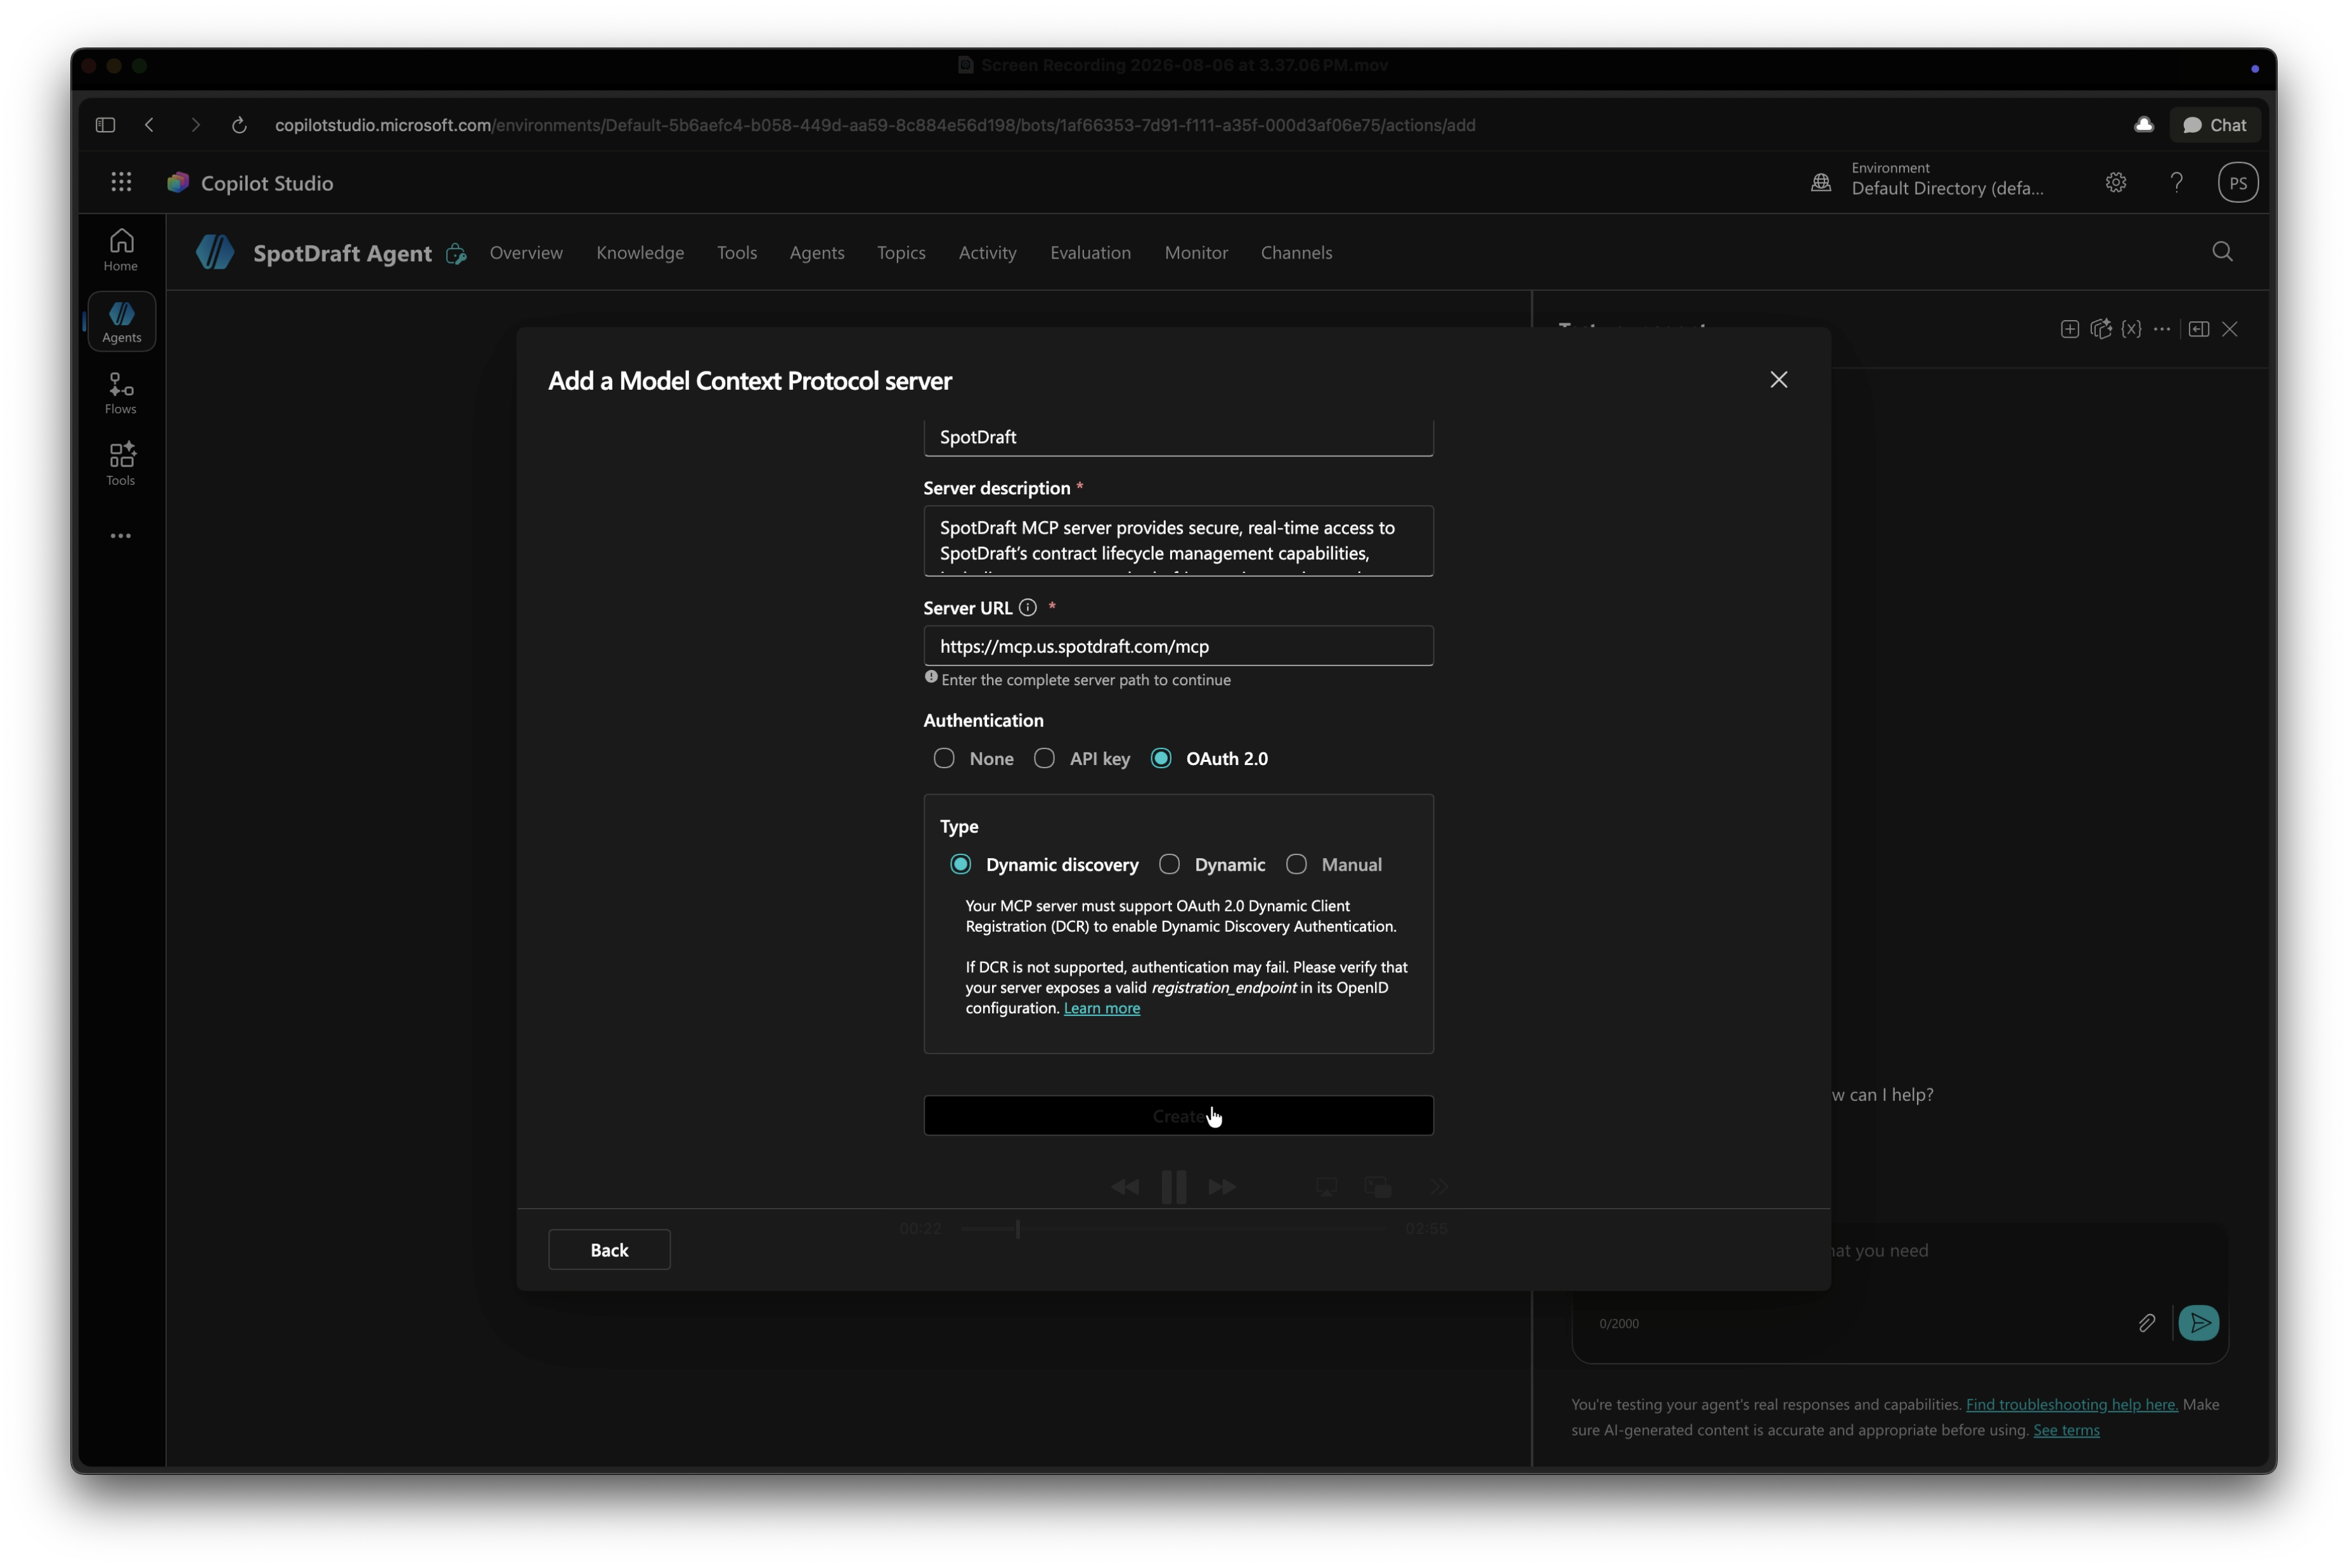
Select Create.
Step 2: Connect and authenticate
After creating the server, Copilot Studio confirms the custom connector was created and asks you to set up a connection.
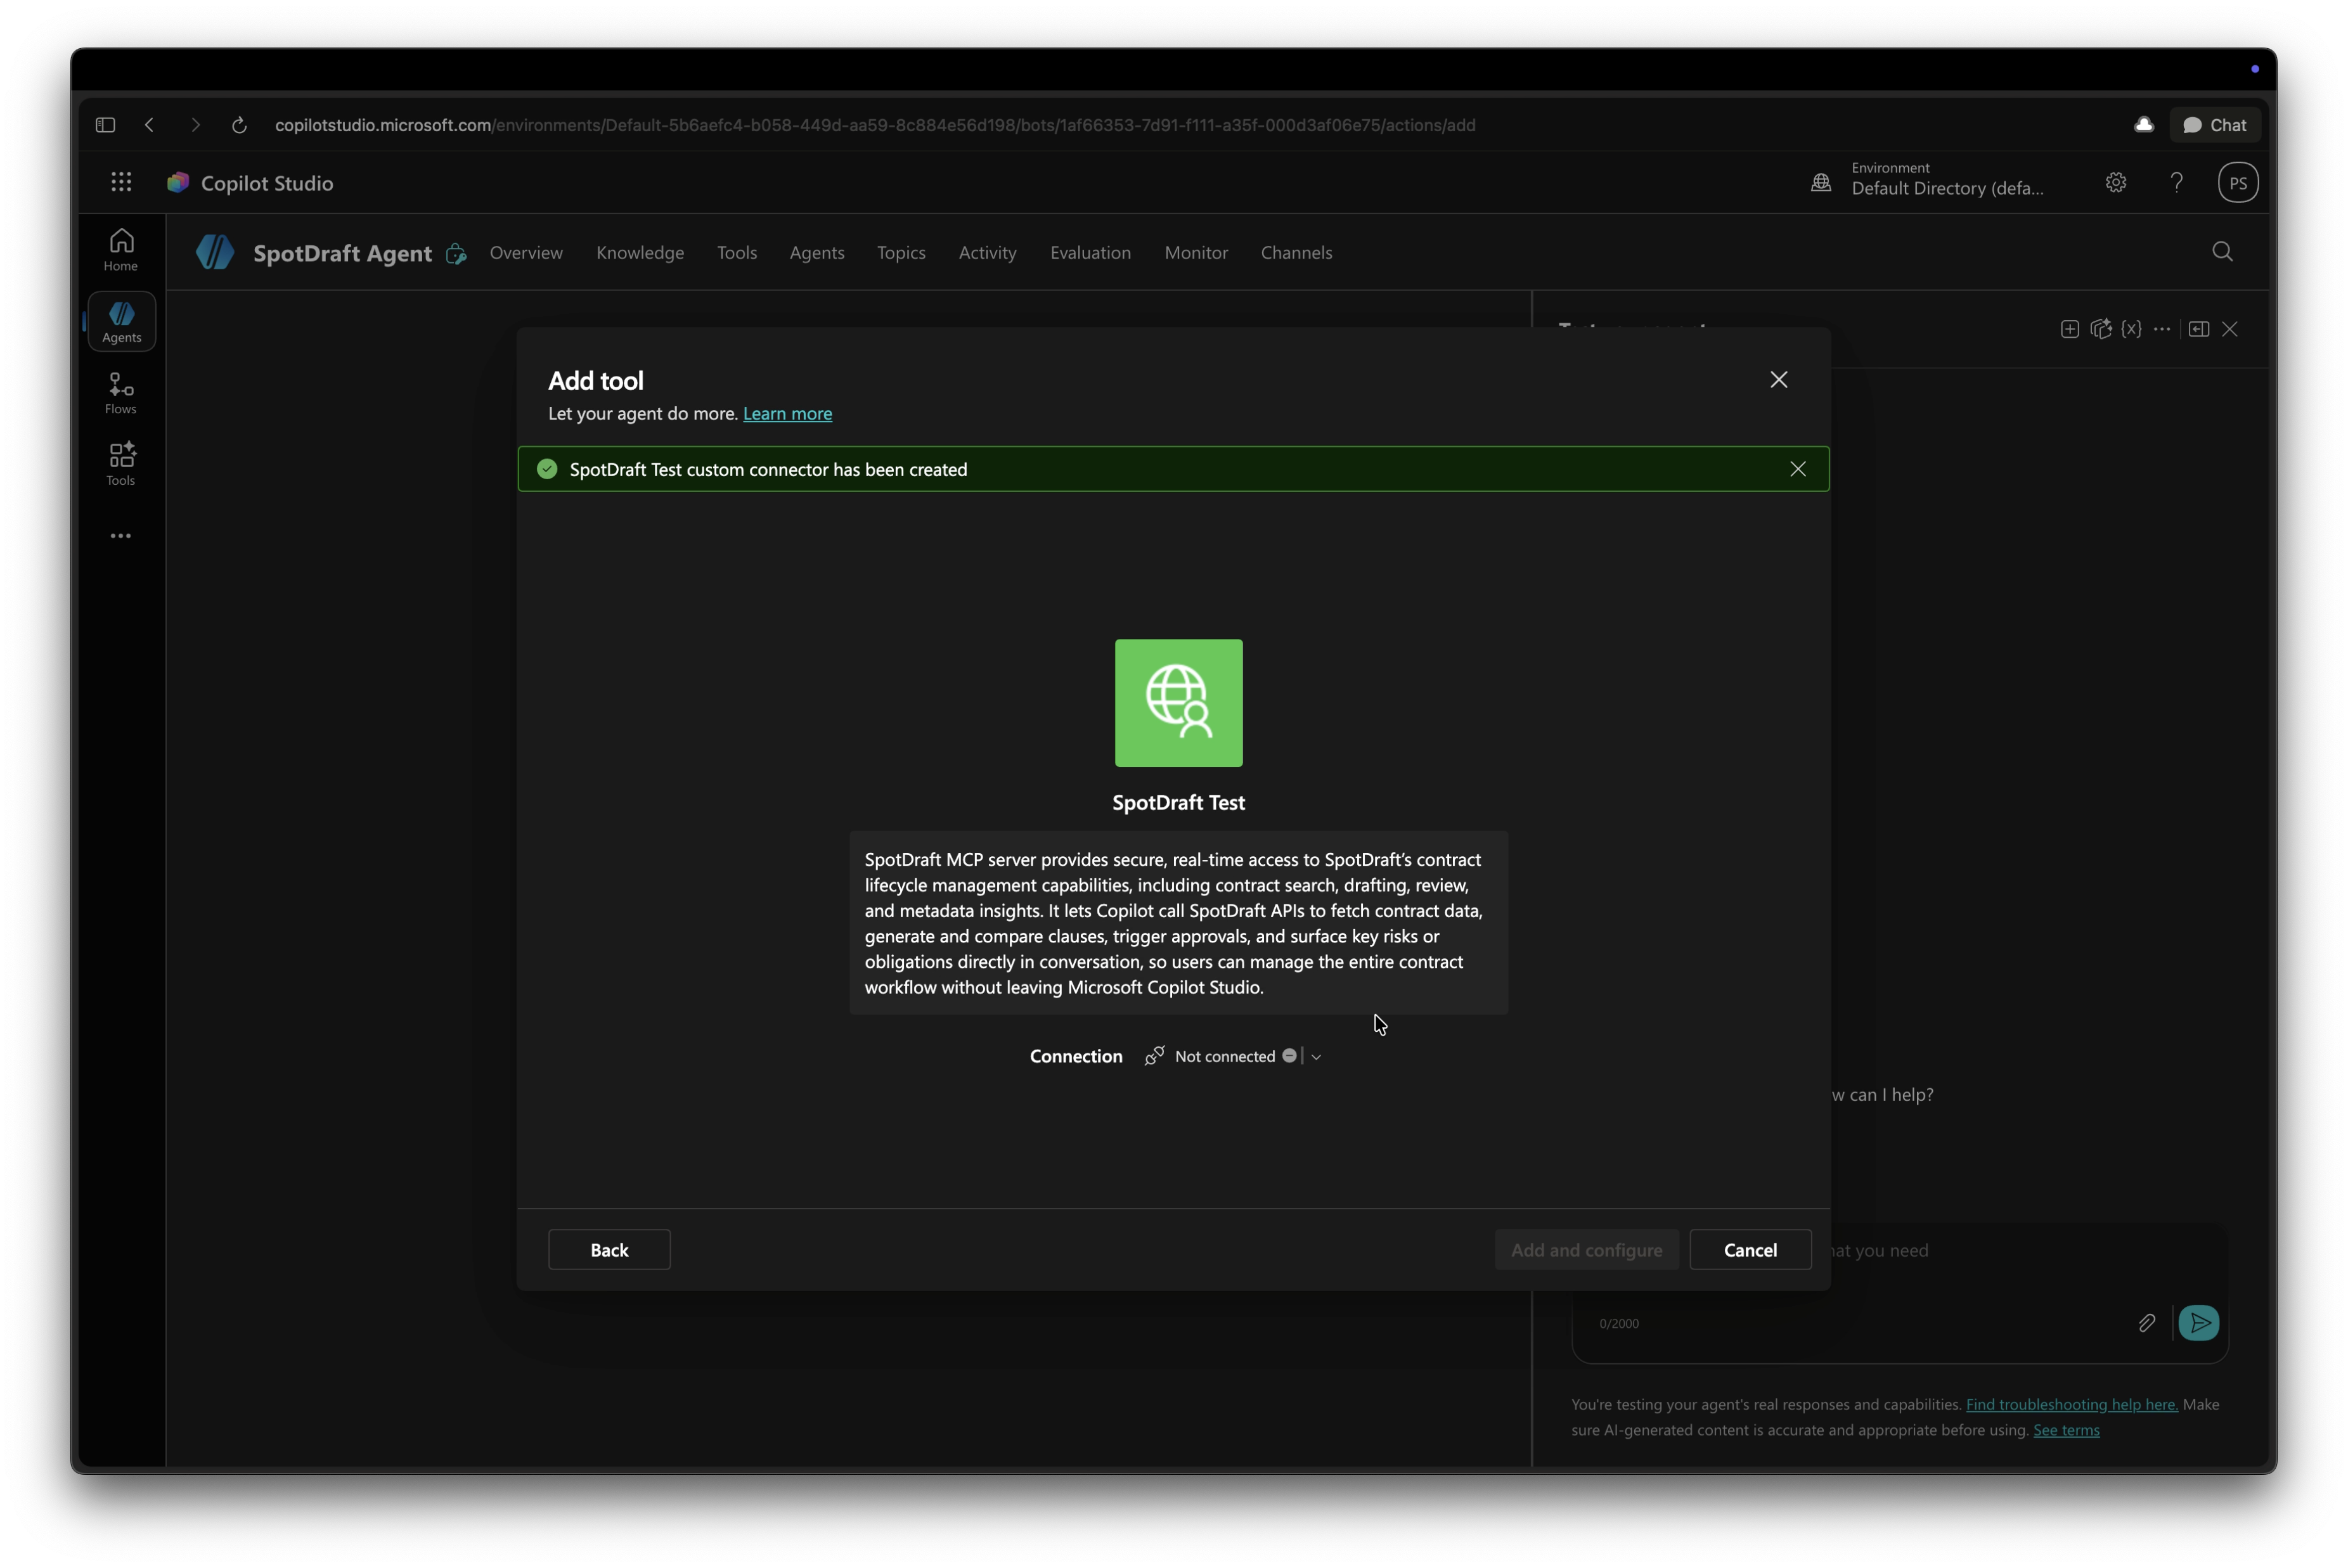
Click "Not Connected" and select Create new connection. A dialog opens asking for a display name for the connection (optional, defaults to your server name).
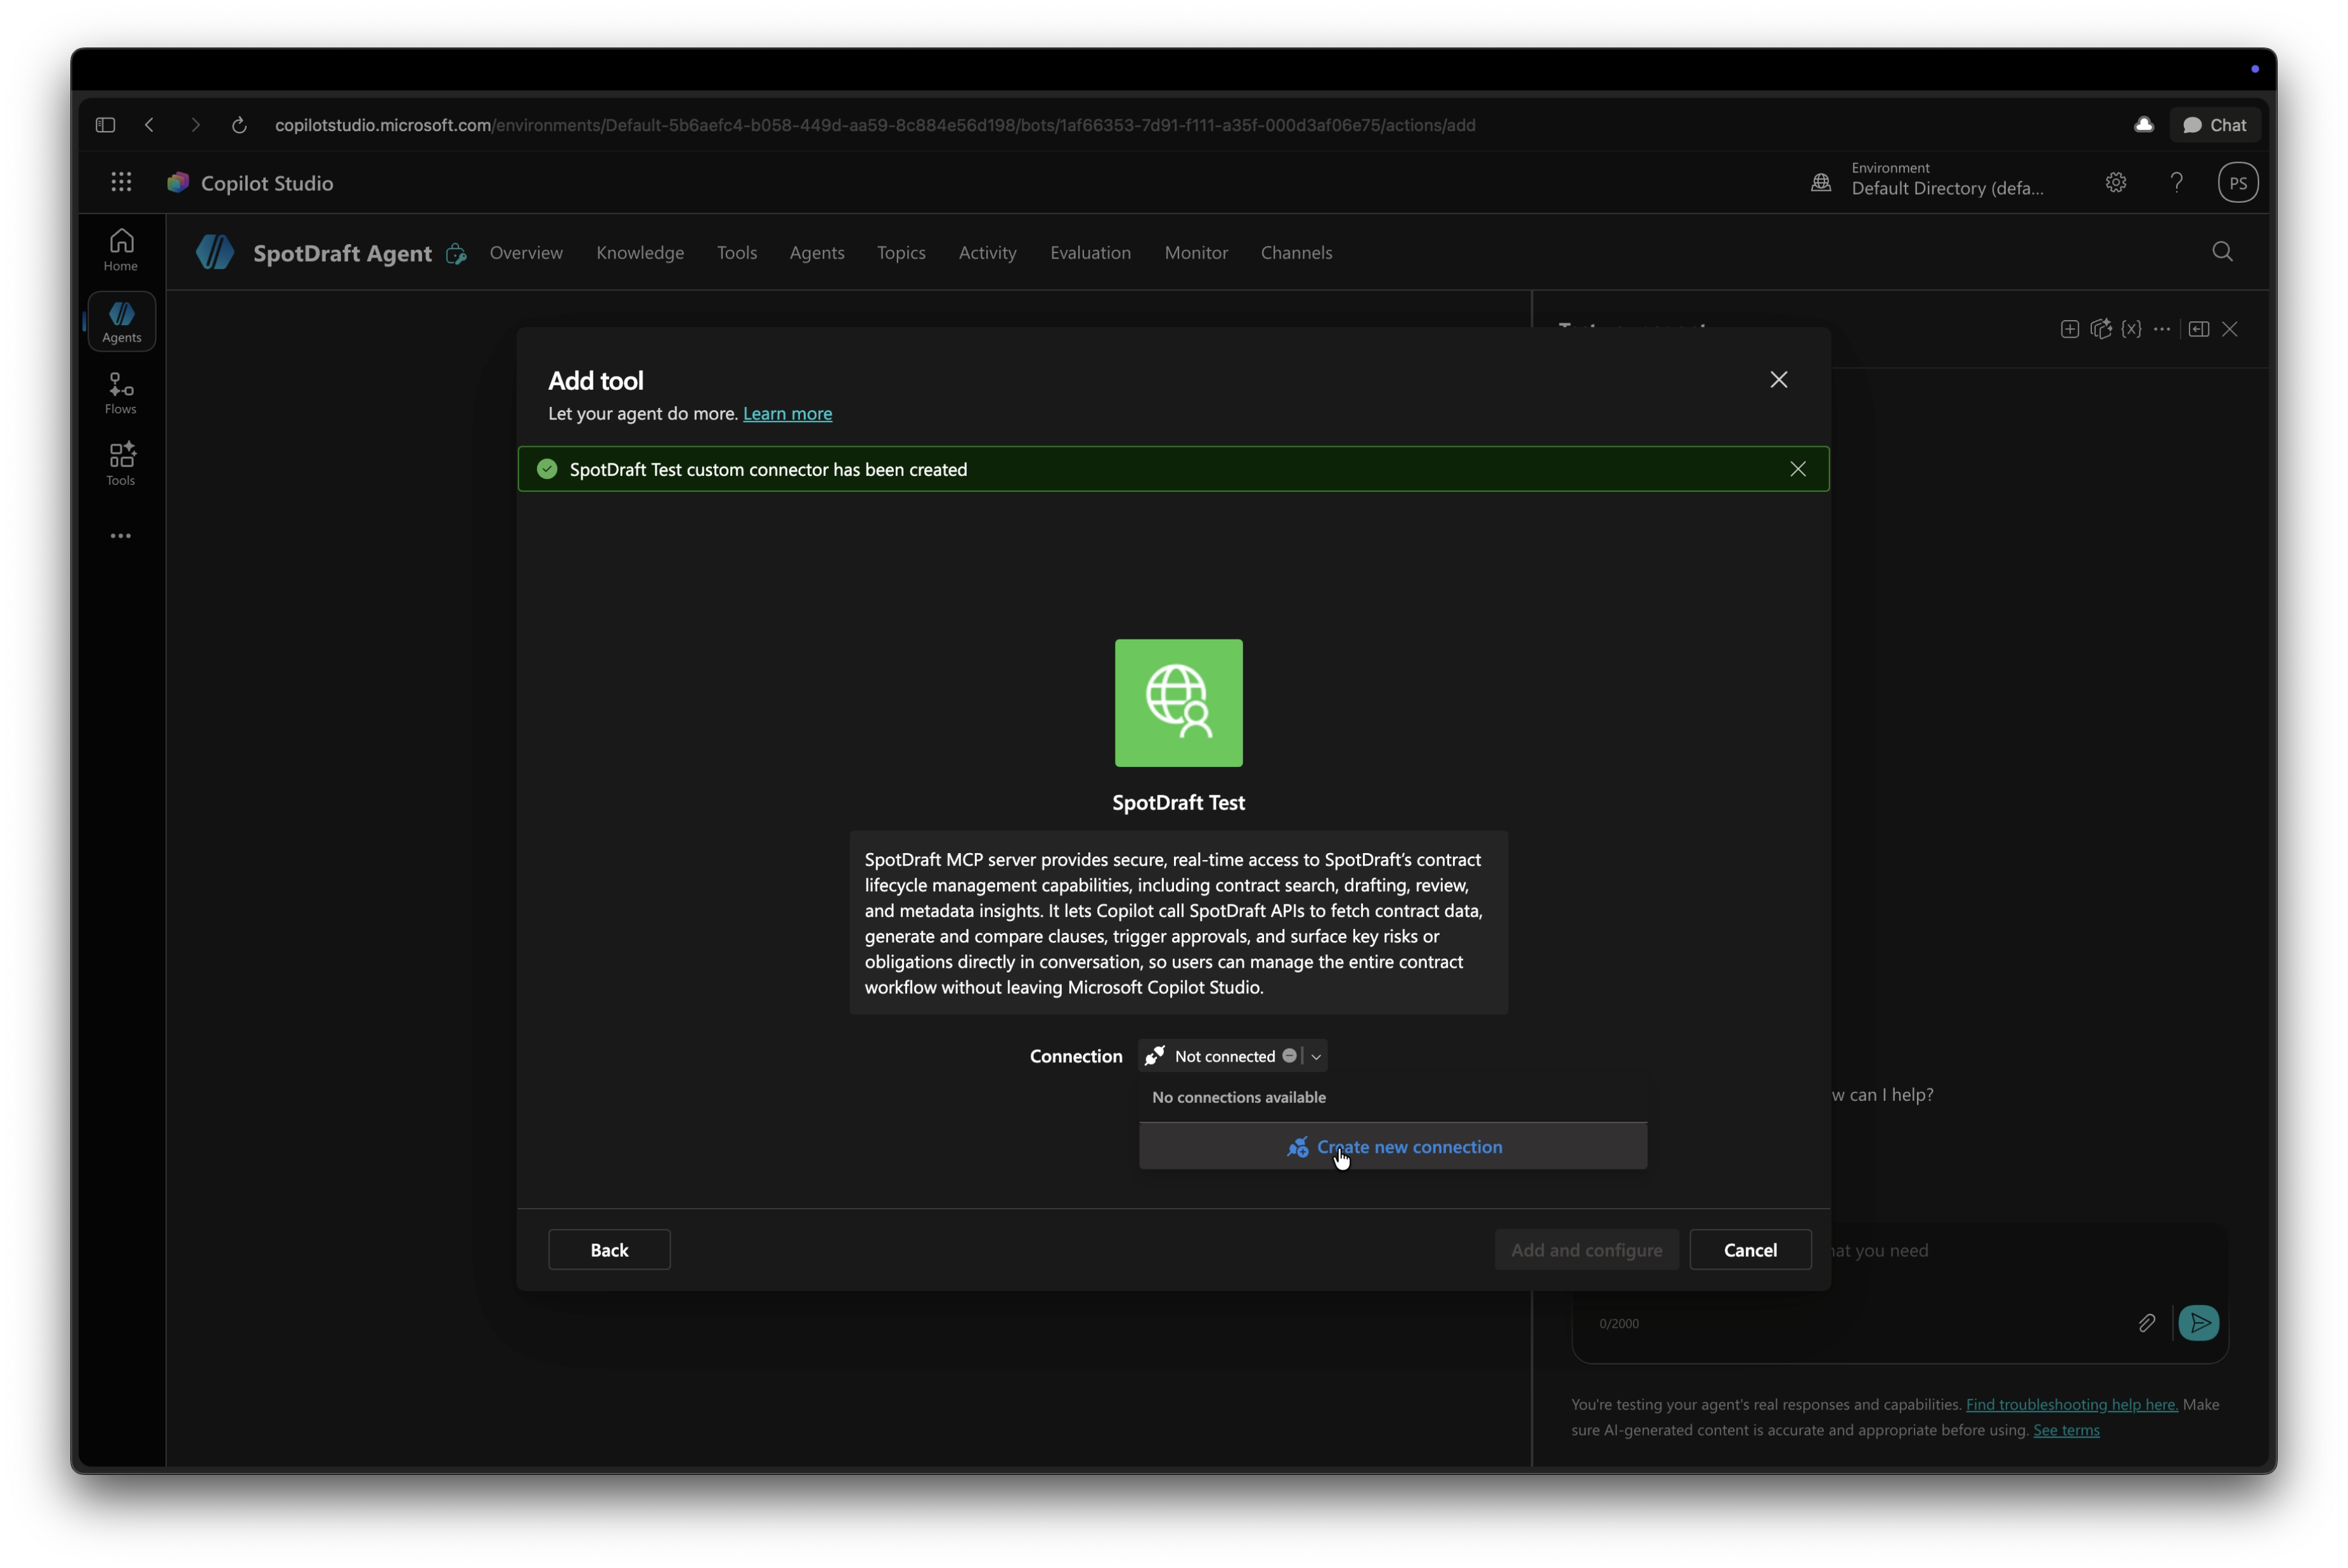
Select Create. You'll be redirected to SpotDraft's sign-in page.
You may be asked to confirm your password and sign in. You'll then see a consent screen asking you to authorize the connection to access your SpotDraft workspace (contracts, analytics, profile info).
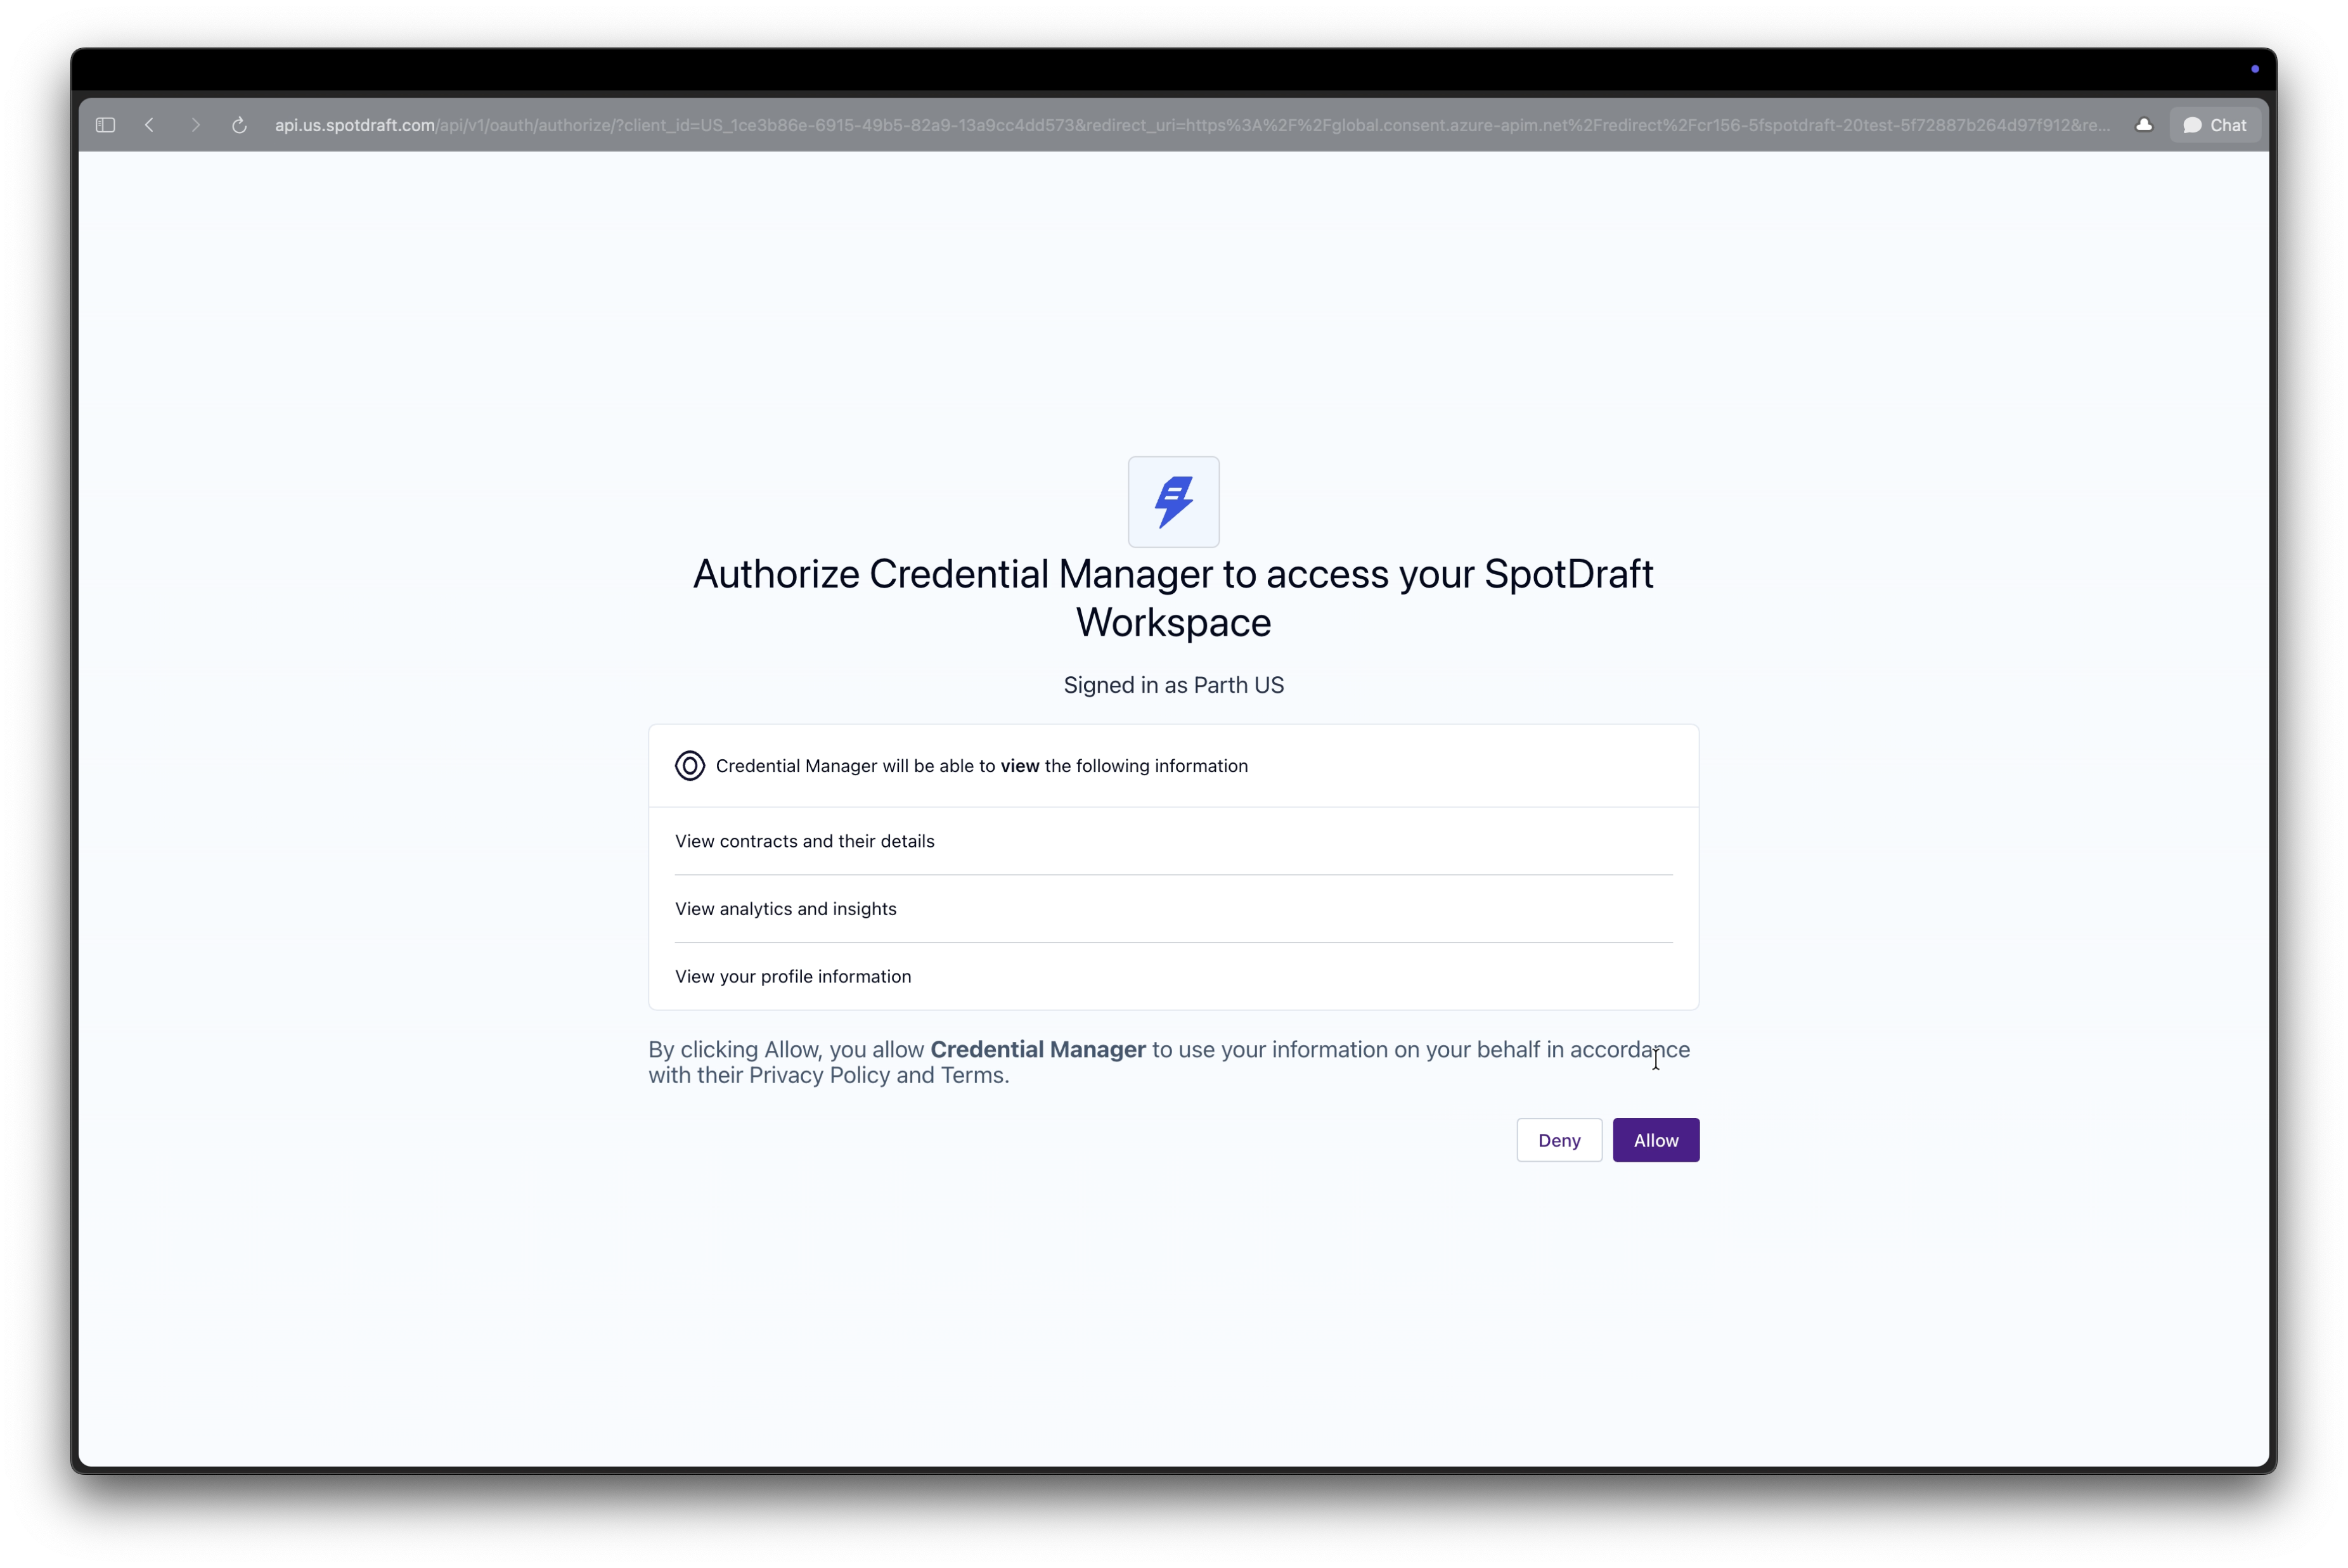
Select Allow. You'll be routed back to Copilot Studio, and the Connection field in the Add tool dialog should now show your connection with a green checkmark.
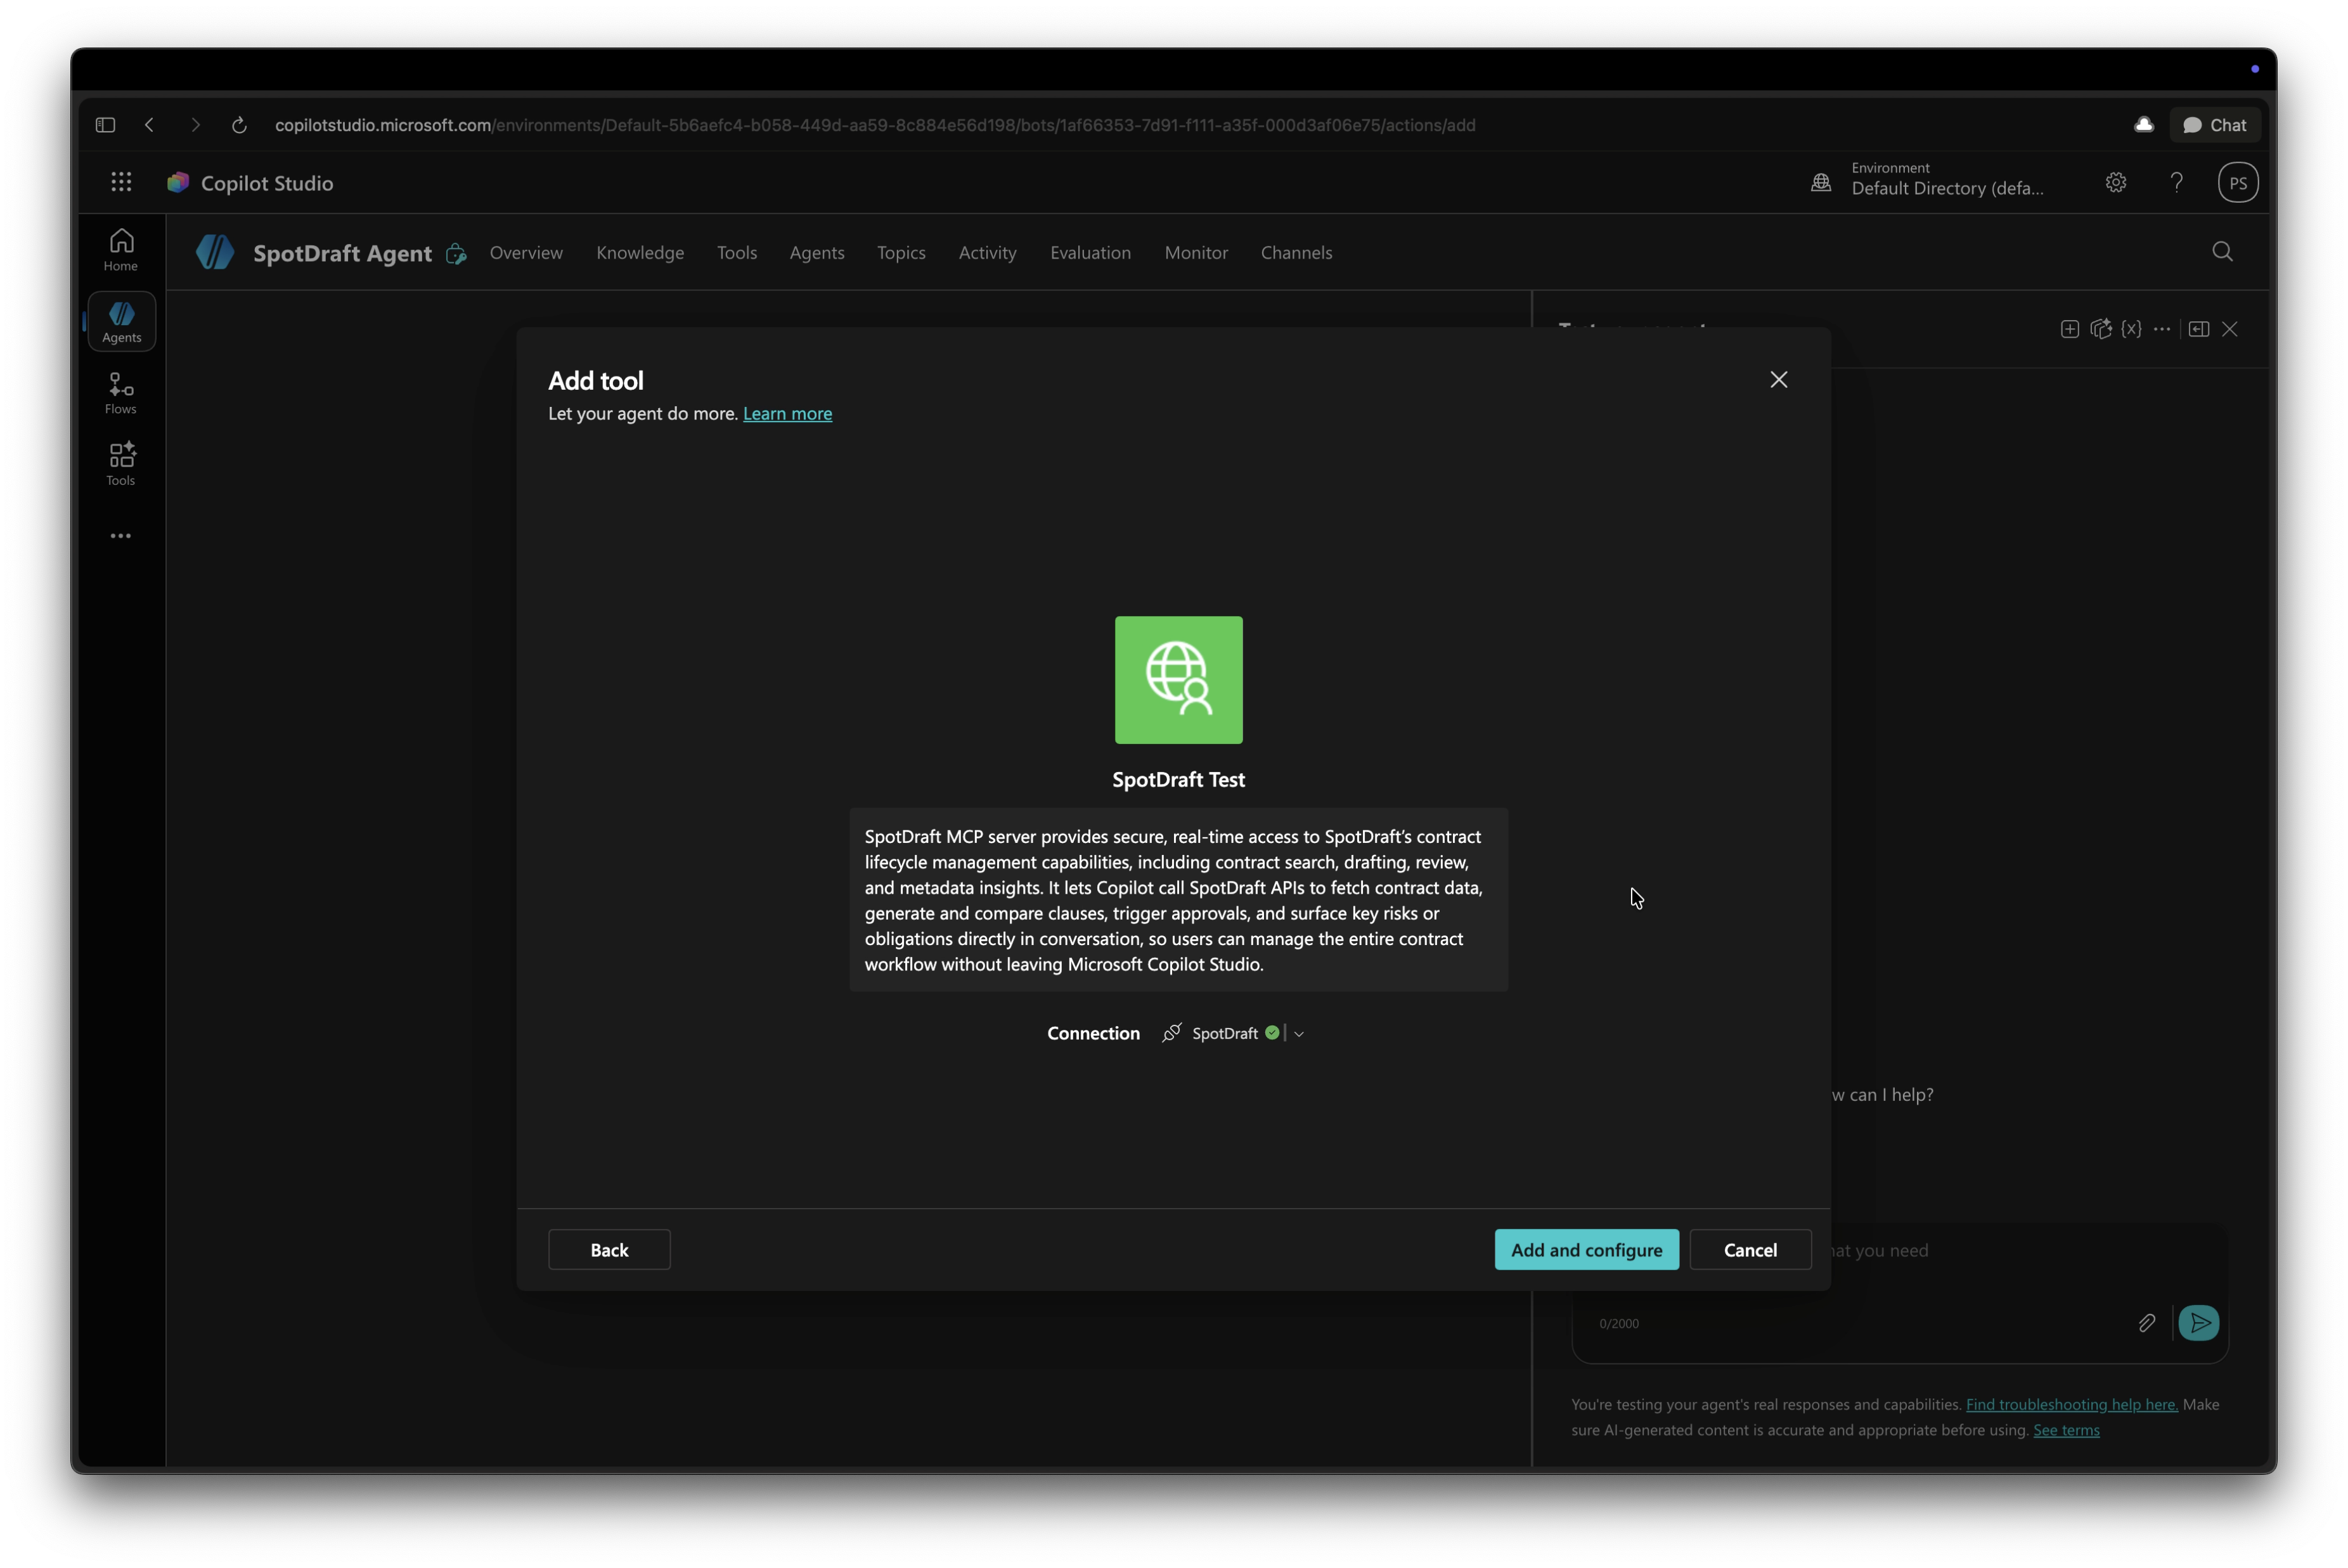
Select Add and configure.
Step 3: Configure and enable tools
Once the tool is added, Copilot Studio takes you to its Details page and loads the list of tools the MCP server exposes.
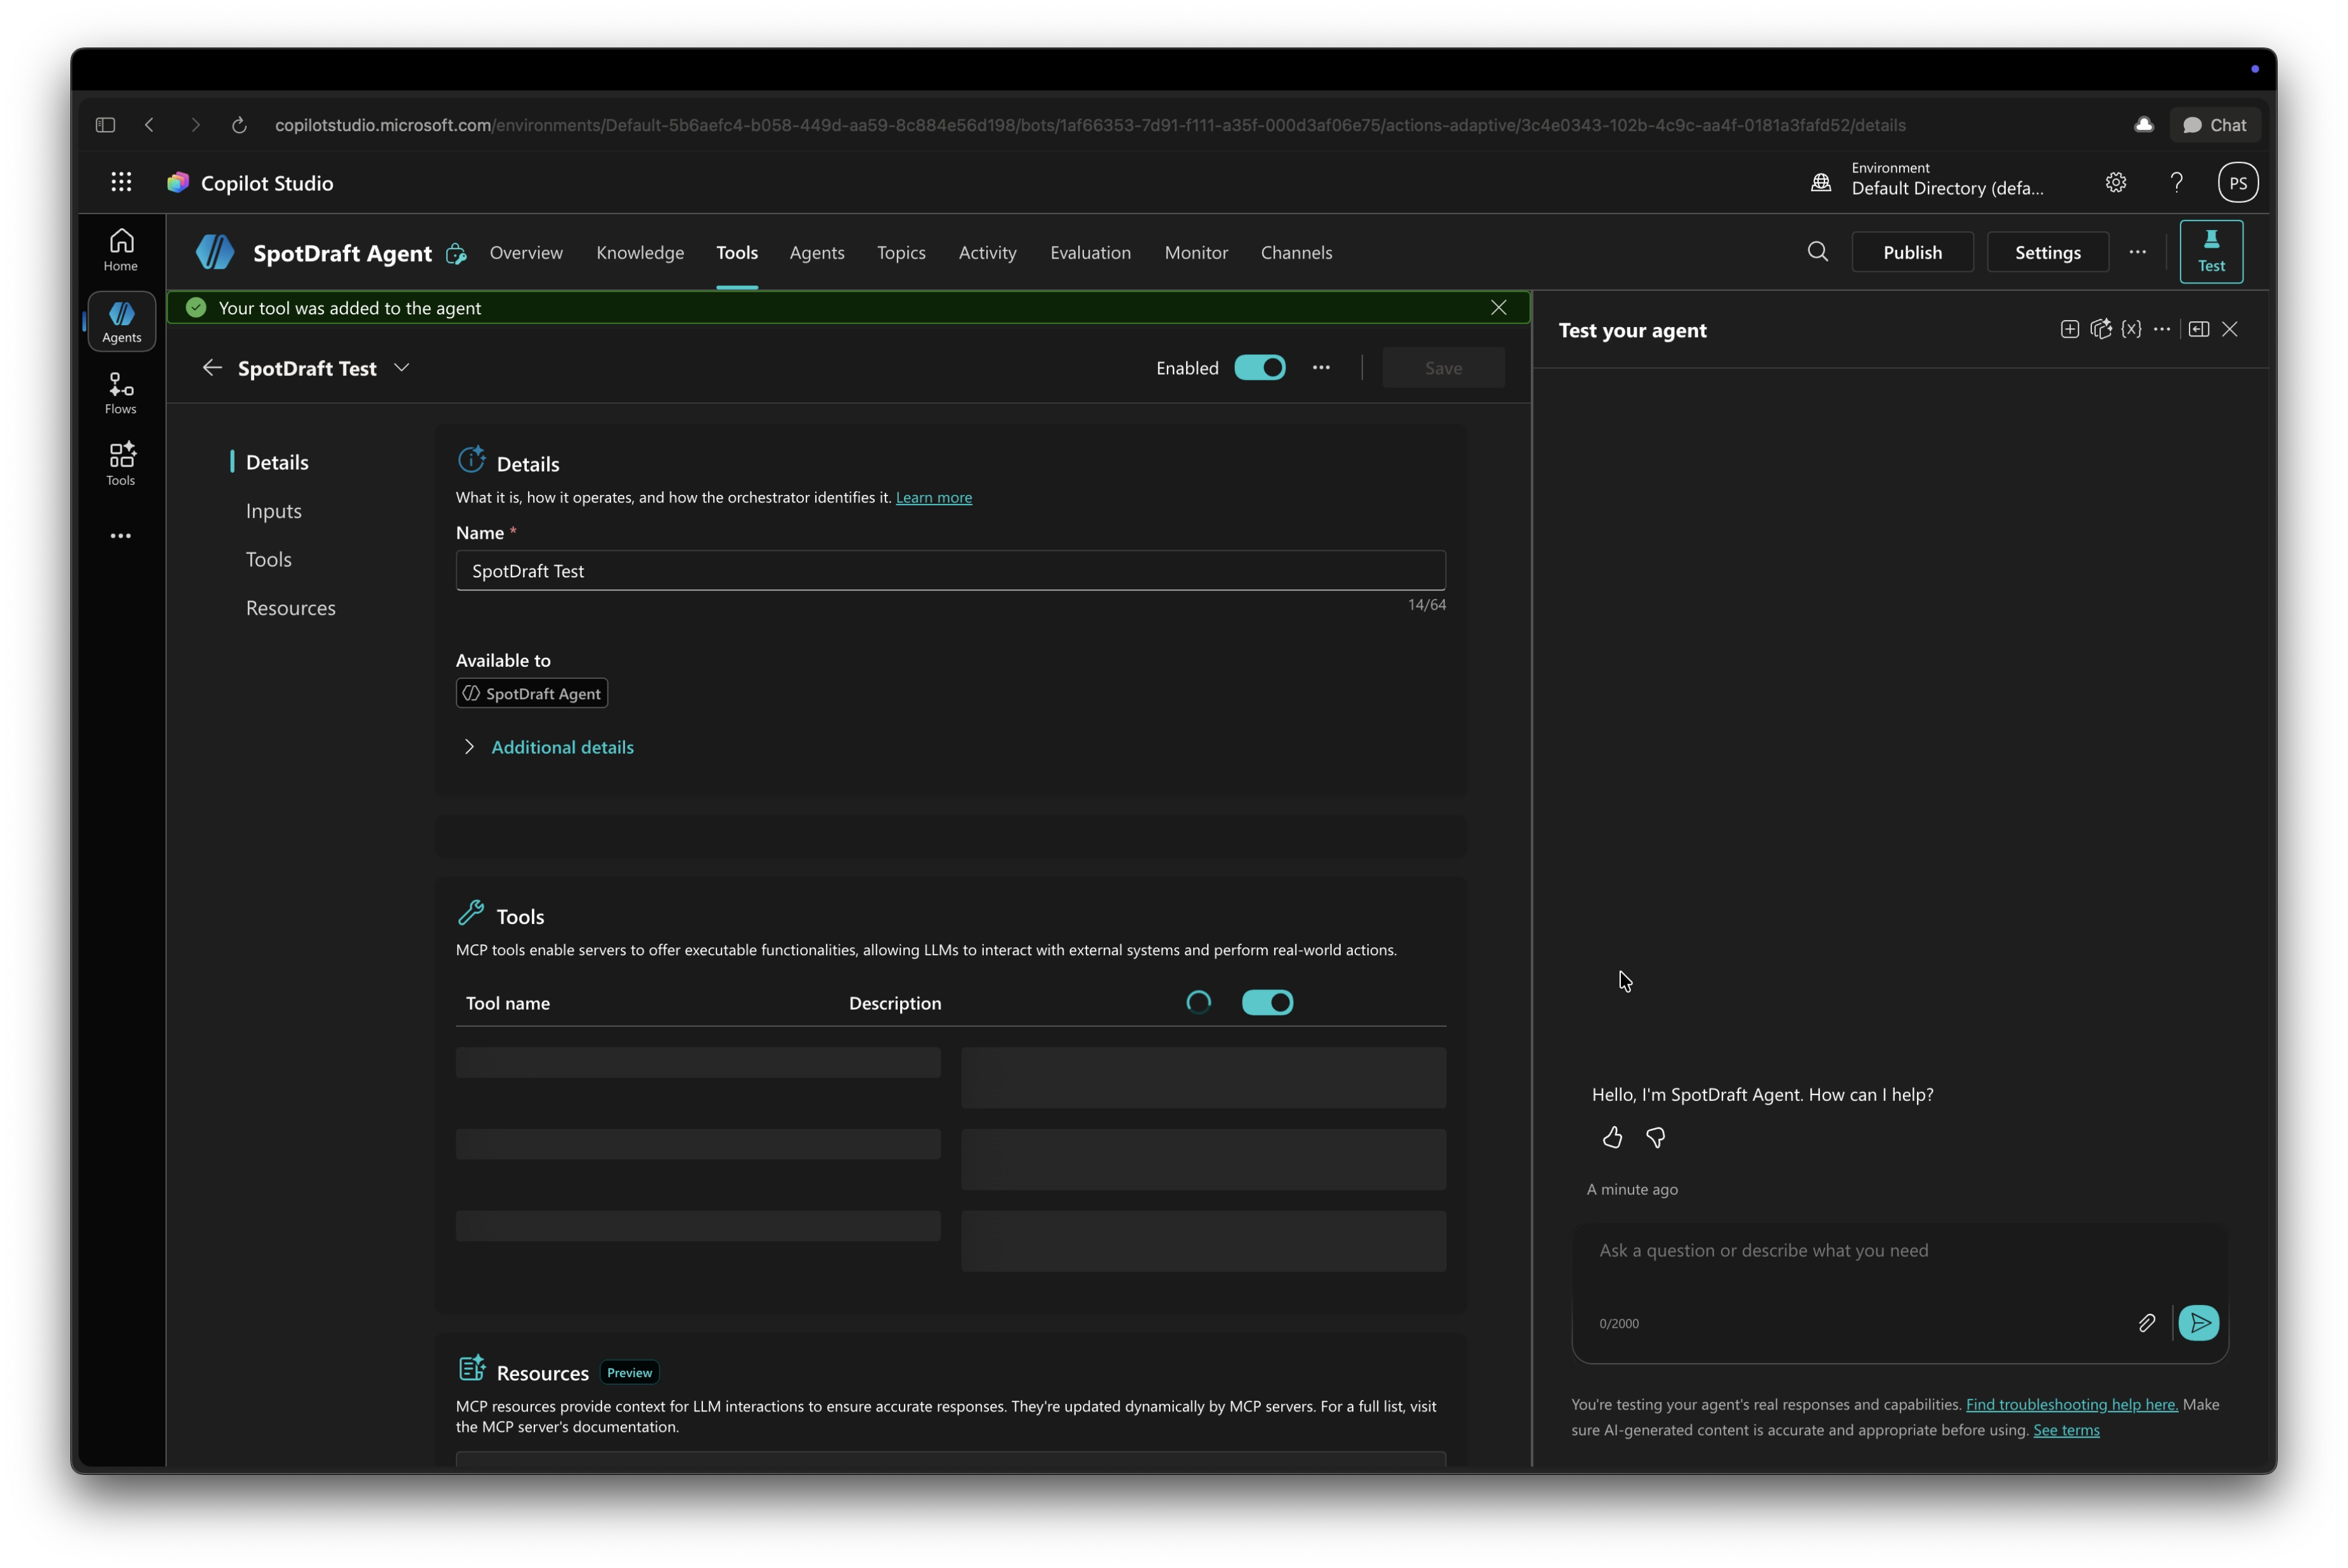
Go to the Tools subtab within the connector's settings. You'll see the full list of tools SpotDraft's MCP server offers (get_contract_list, get_contract_download_link, get_contract_status, get_contract_details, get_related_contracts, get_contract_content, and others), each with a toggle.
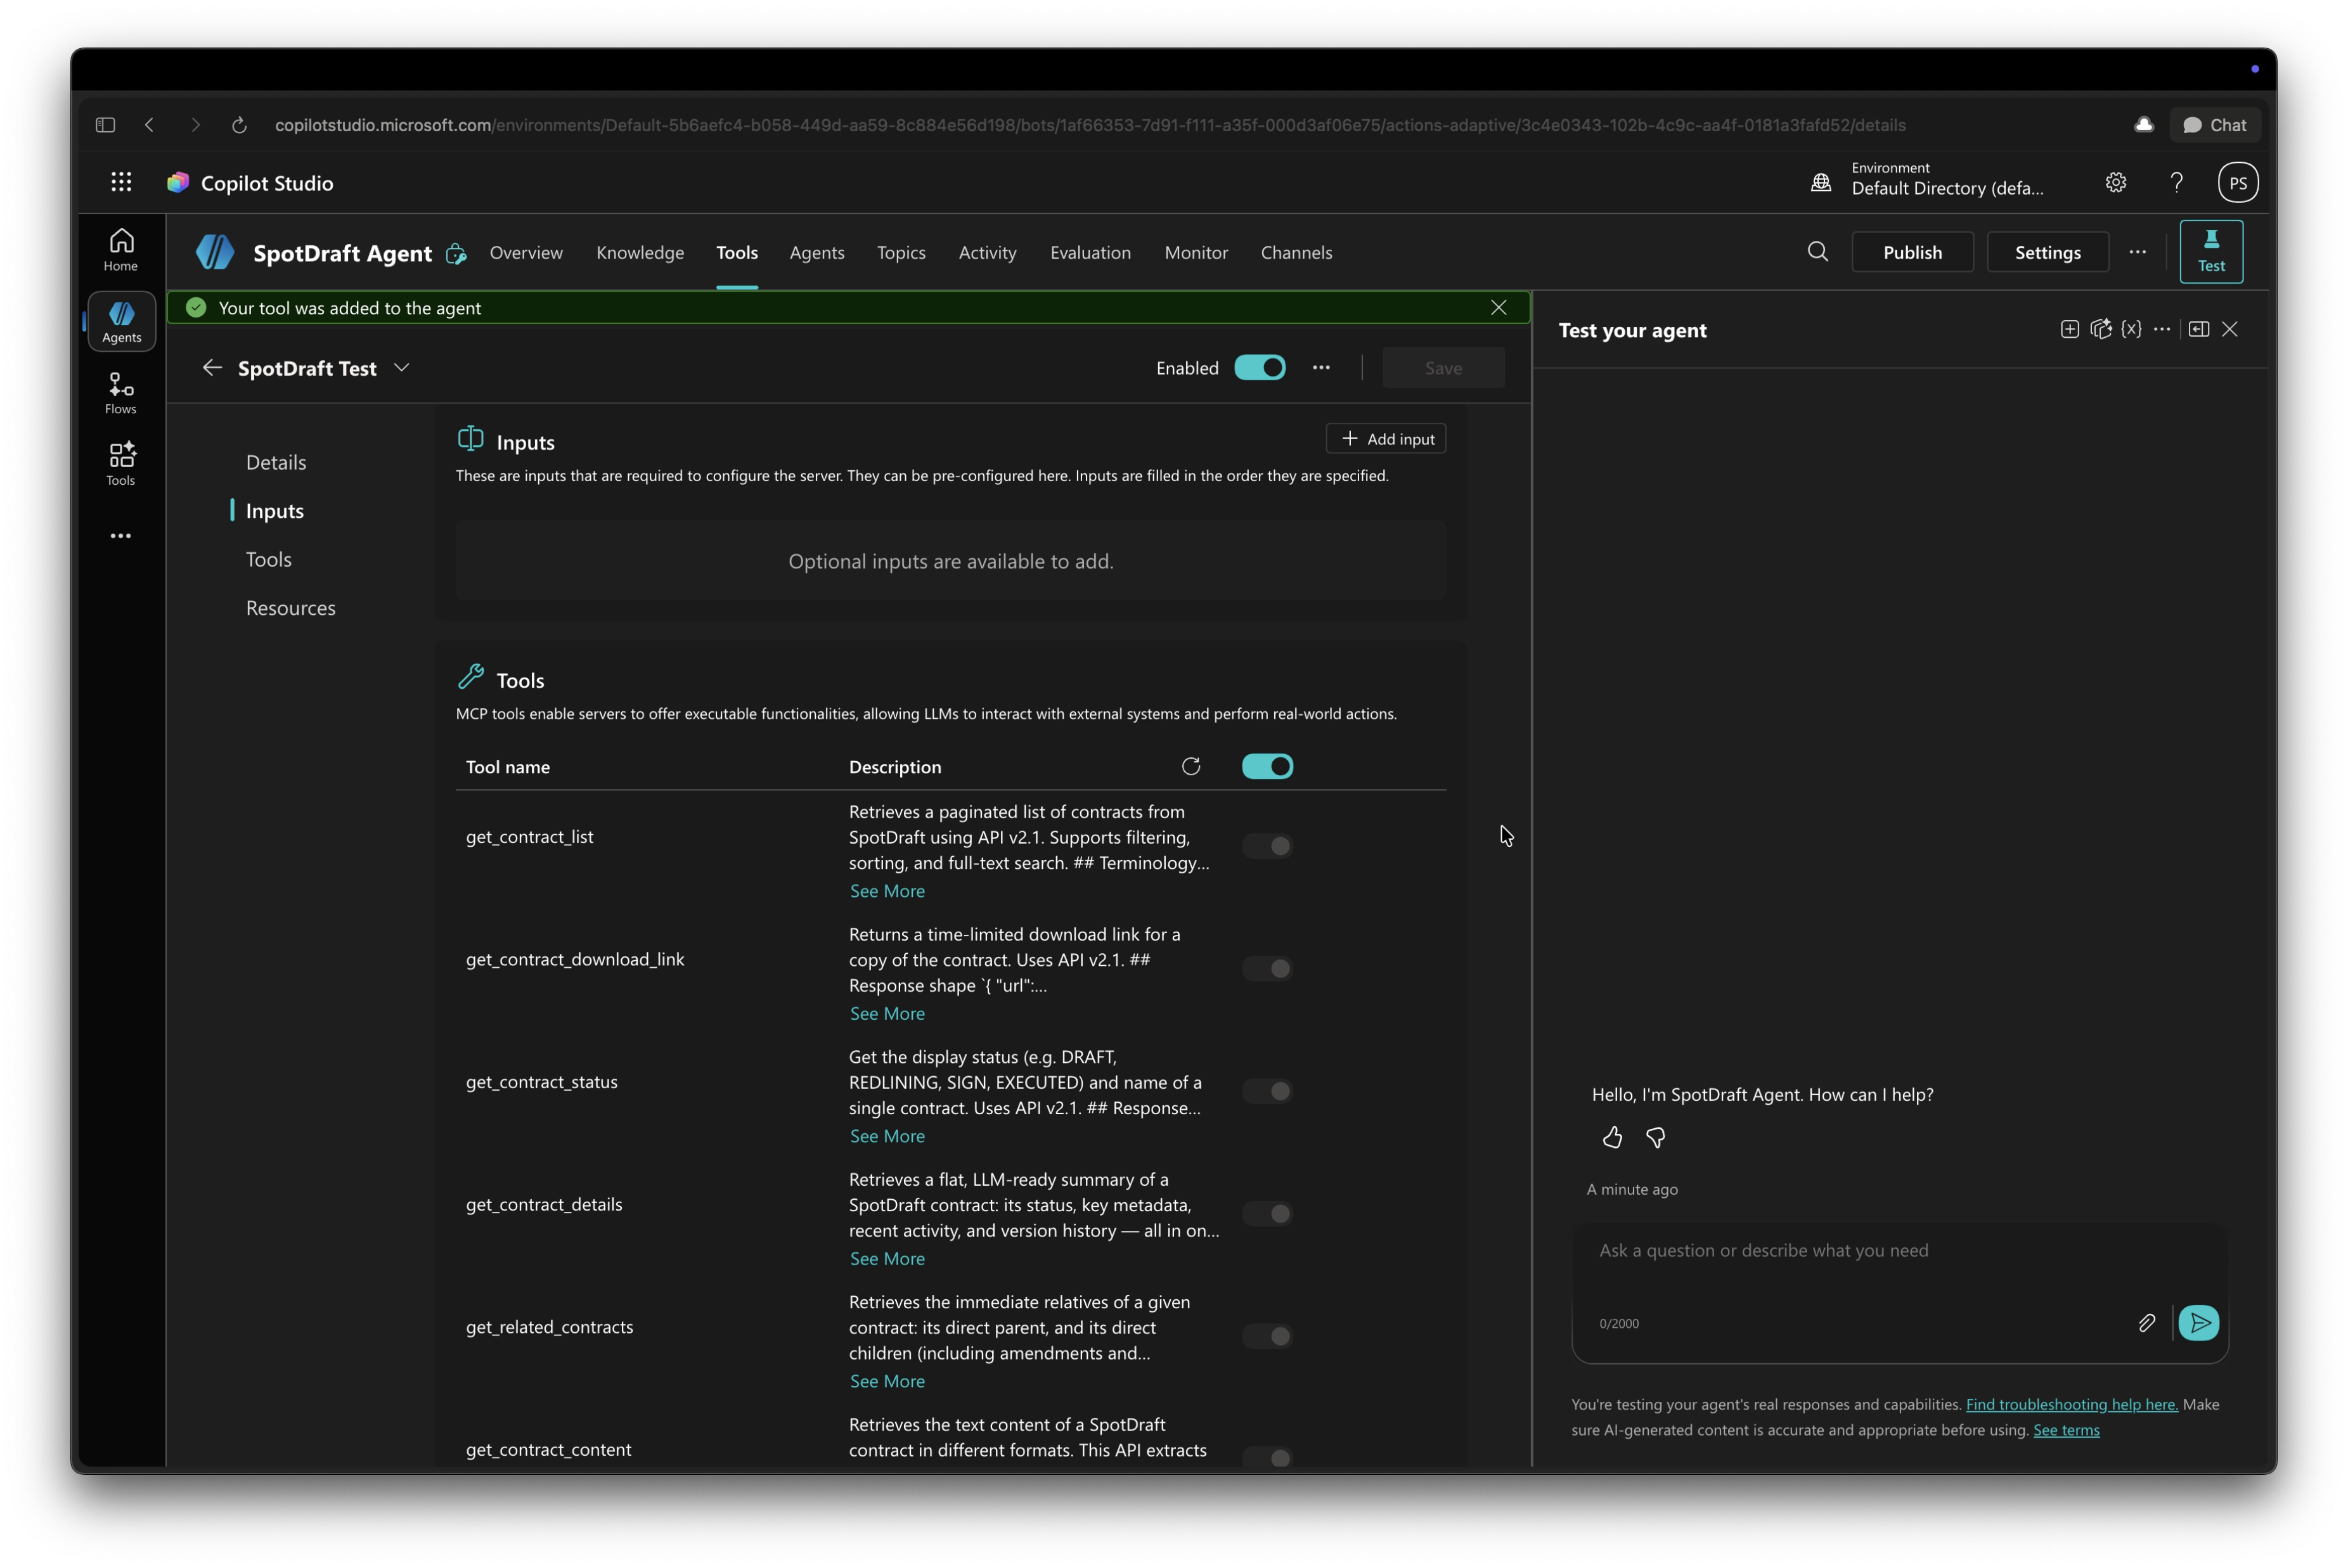
Enable whichever tools your agent should have access to, then select Save.
Step 4: Test the agent
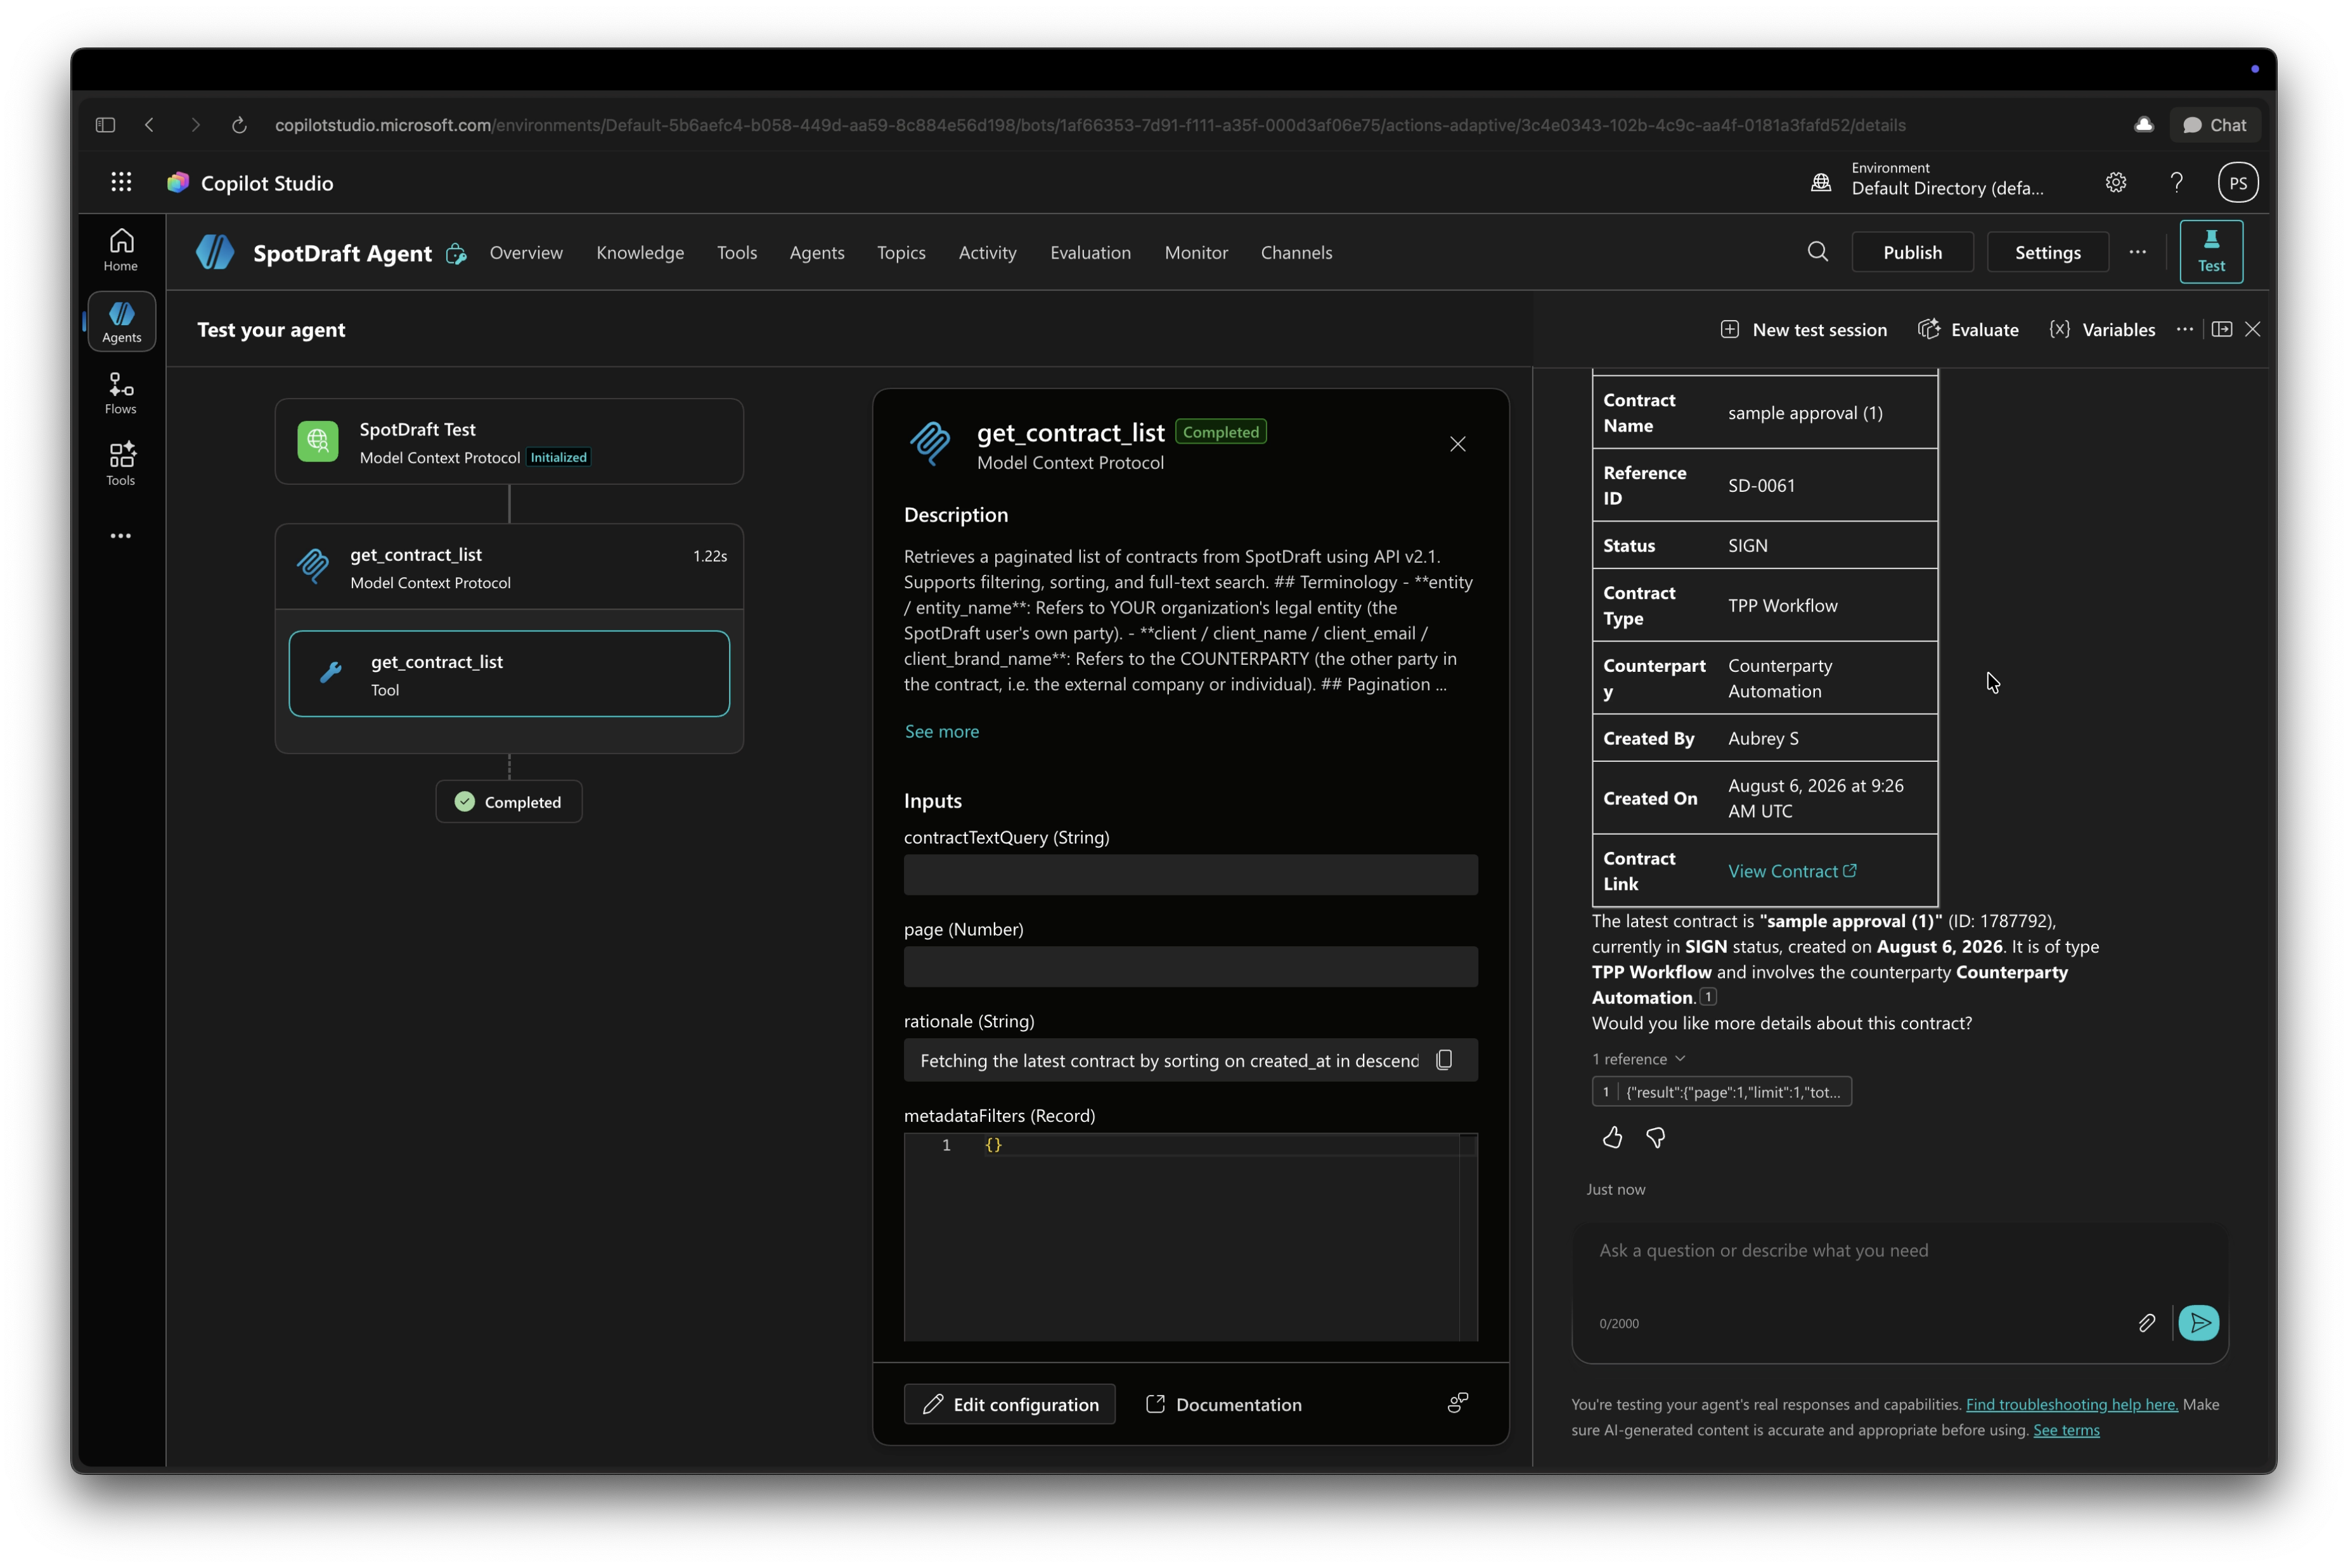
Open the test pane and try a prompt that should trigger one of the enabled tools, for example: "pull the latest contract from SpotDraft MCP."
If everything's connected correctly, the agent will call the tool and return a result.
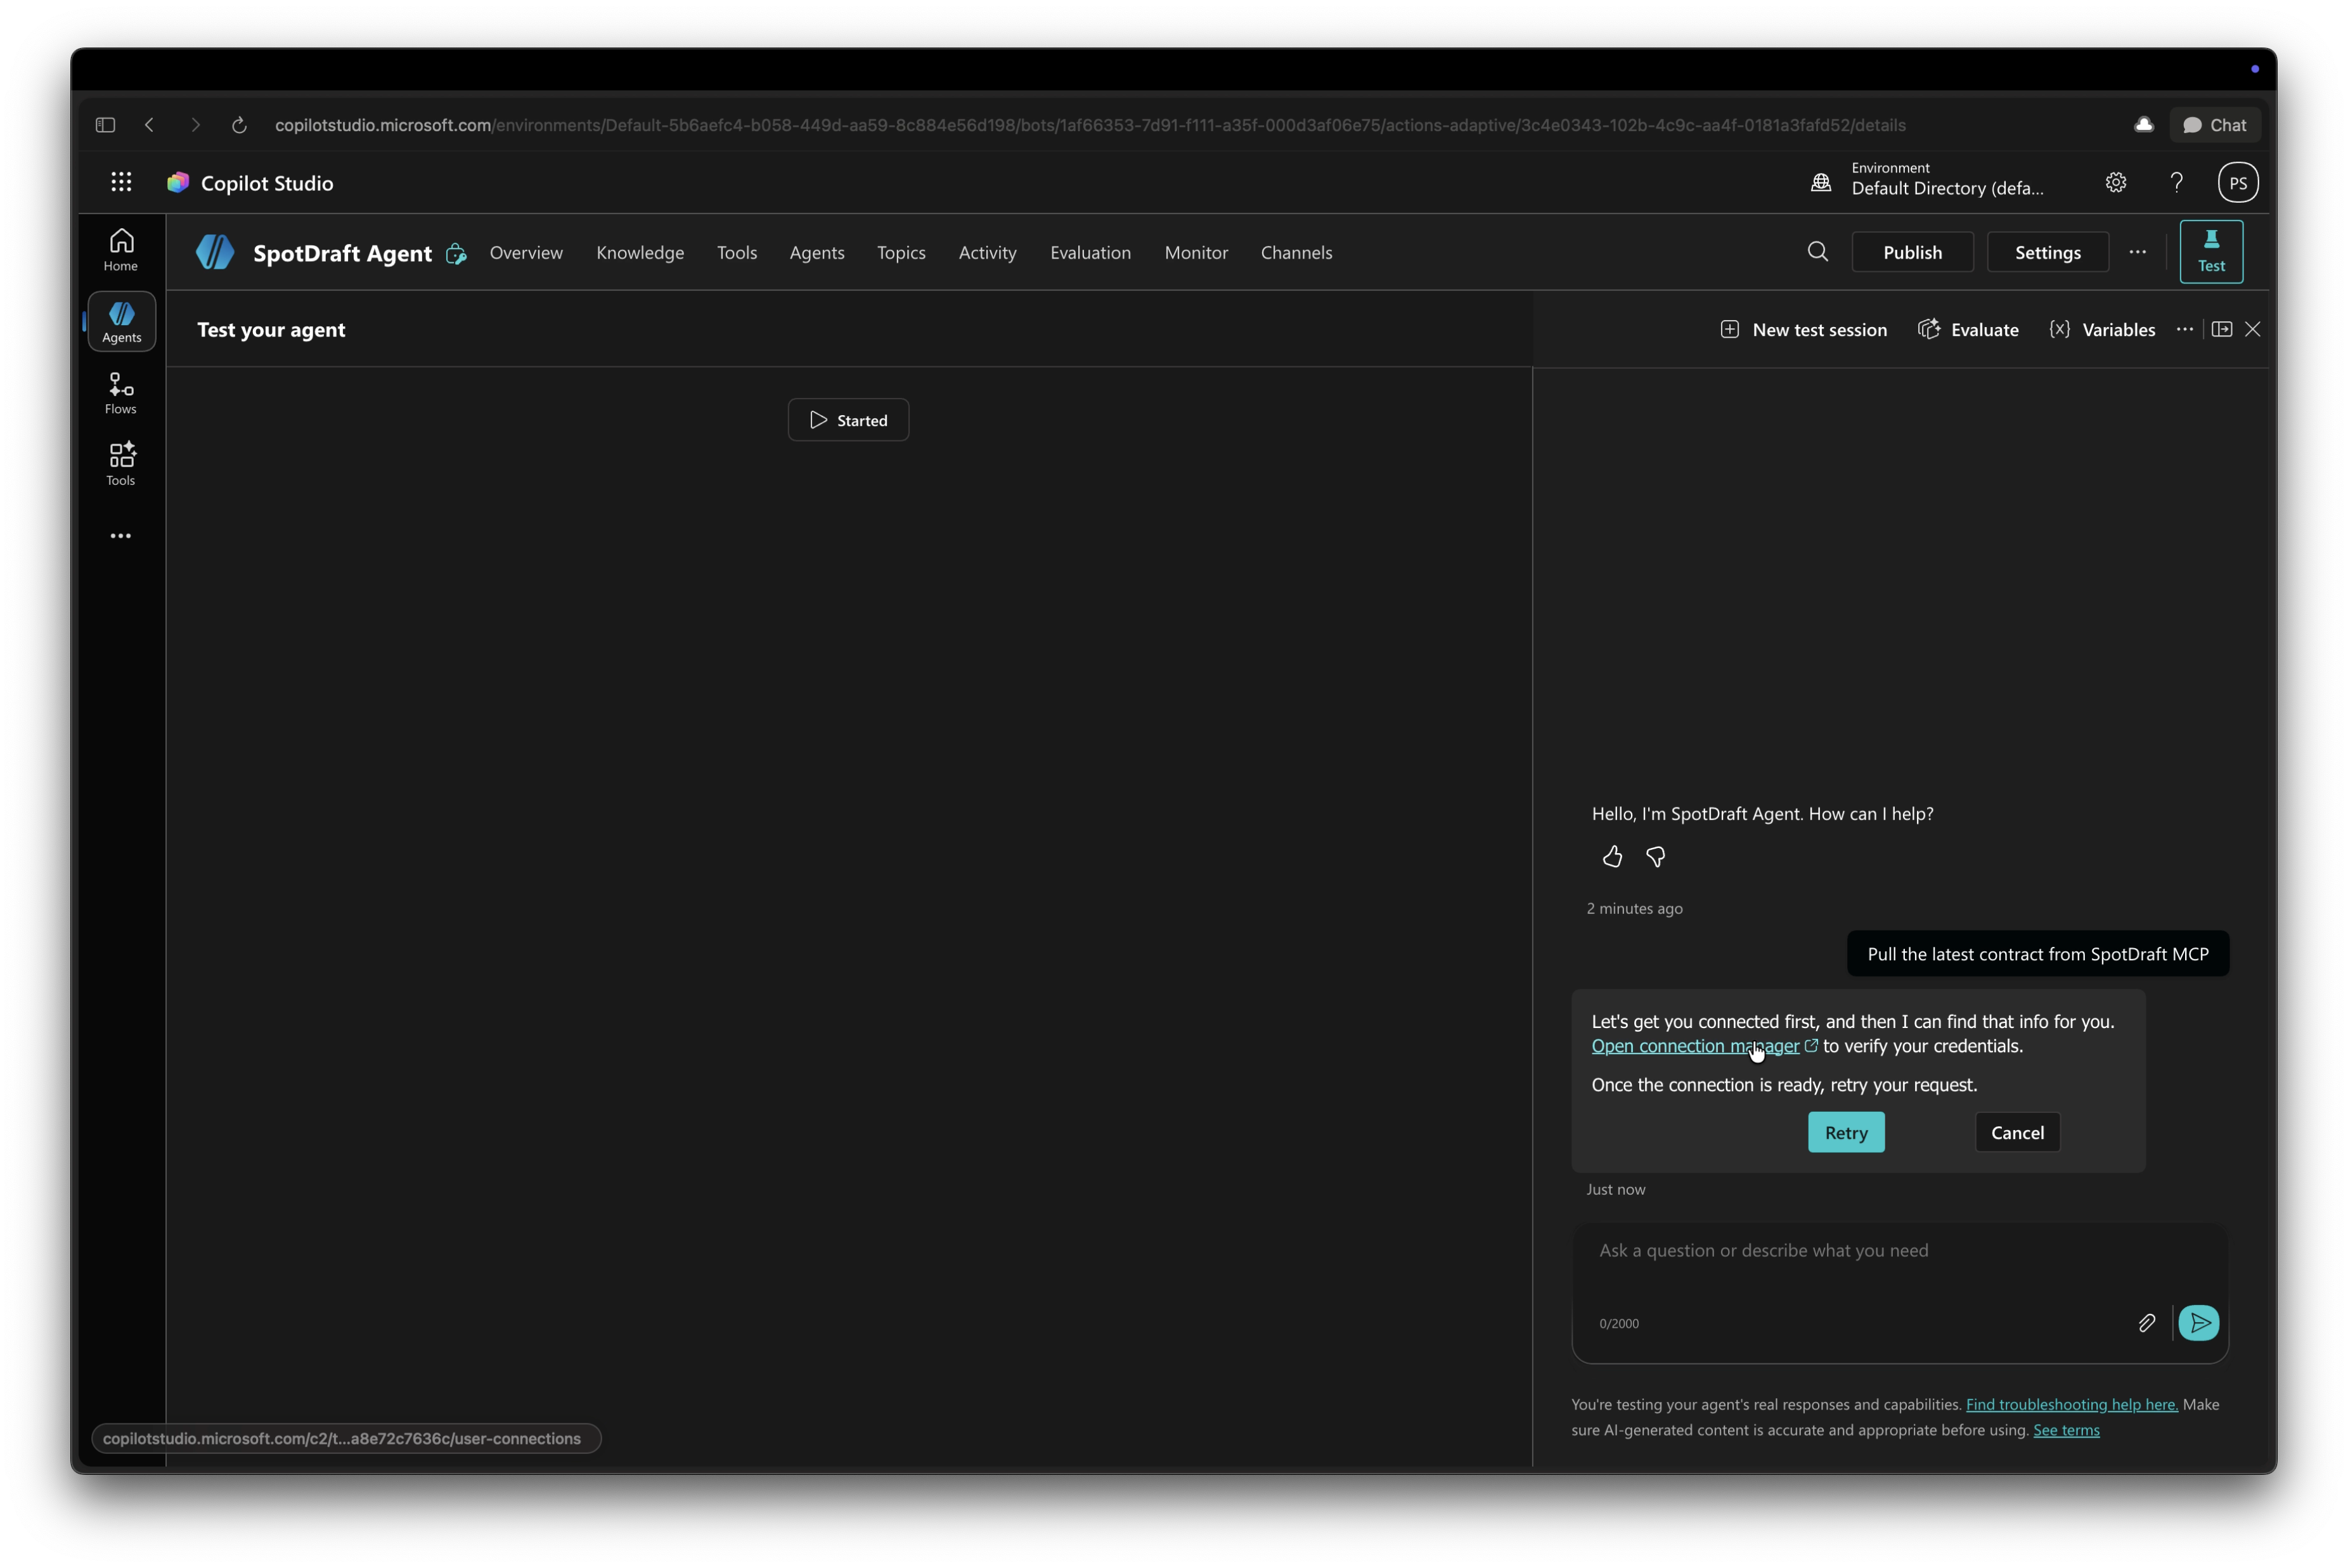
Troubleshooting: "let's get you connected first"
If you test the agent and get a message like "let's get you connected first, open connection manager to verify your credentials," the connection didn't get established during setup (or has since dropped). This can happen if you clicked through the wizard faster than the OAuth redirect completed.
To fix it:
Select Open connection manager. This opens a "Manage your connections" page listing your MCP connector with a status of Not Connected.
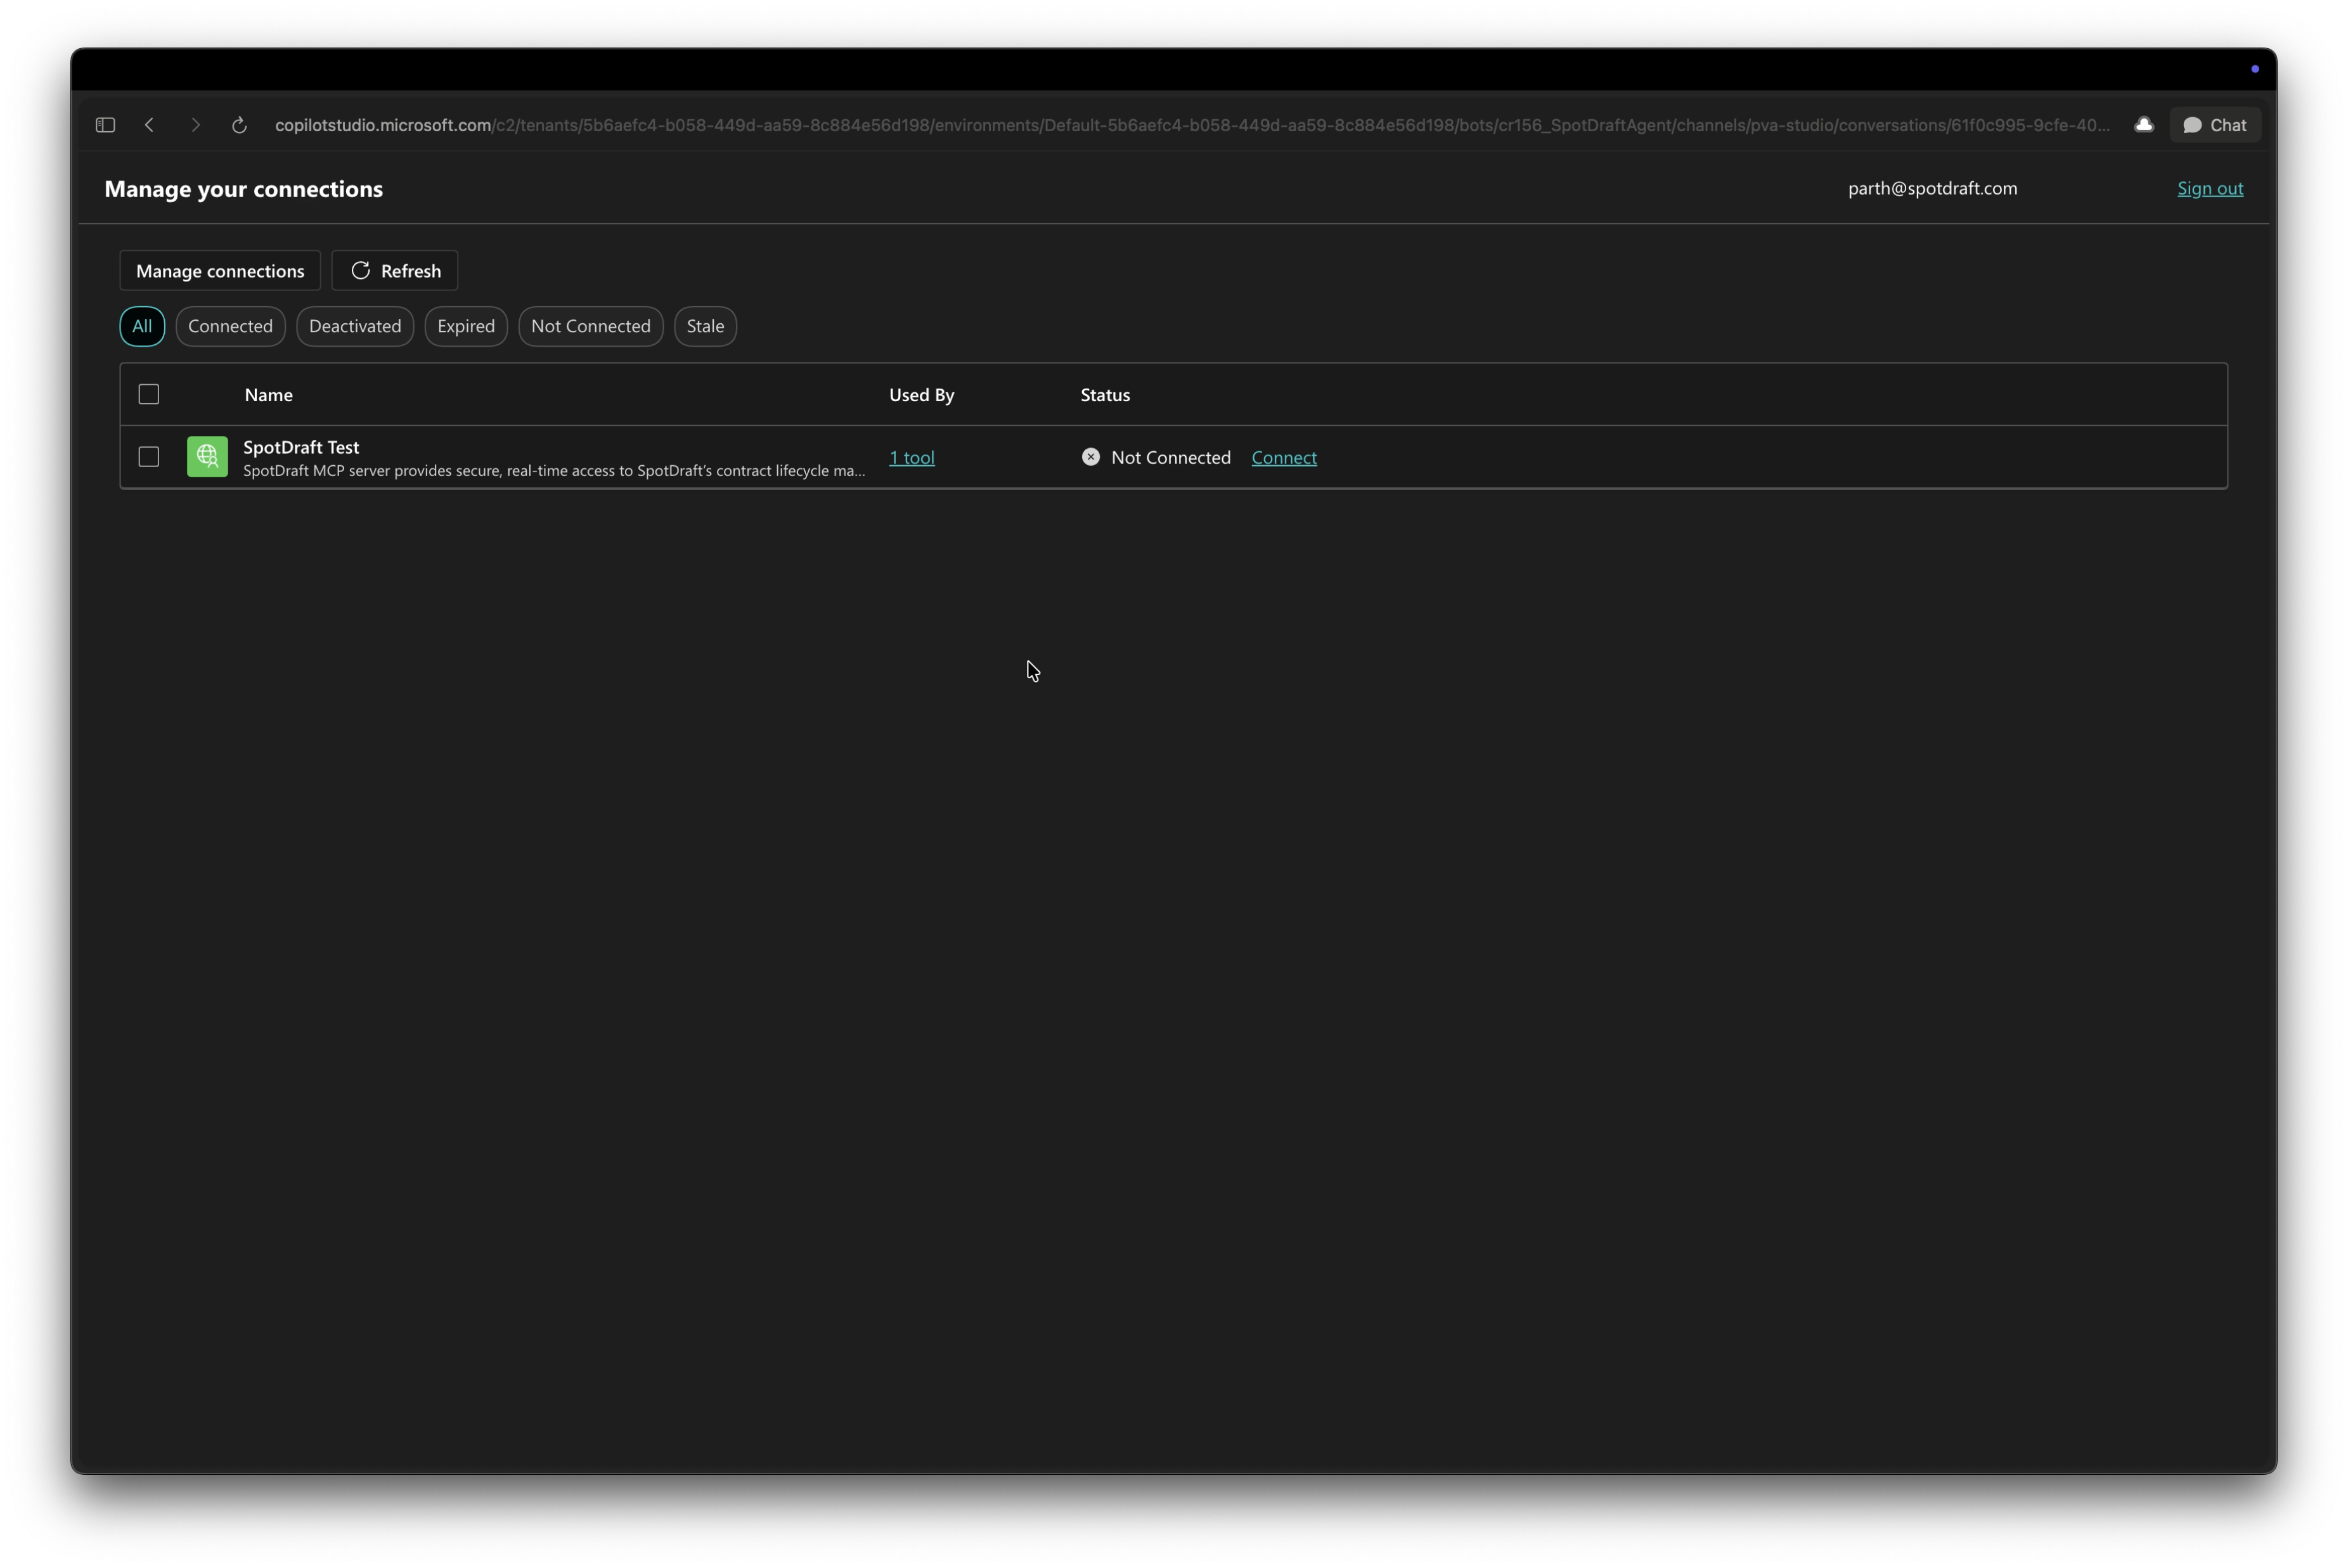
Select Connect. A "Create or pick a connection" dialog appears with your connection listed.
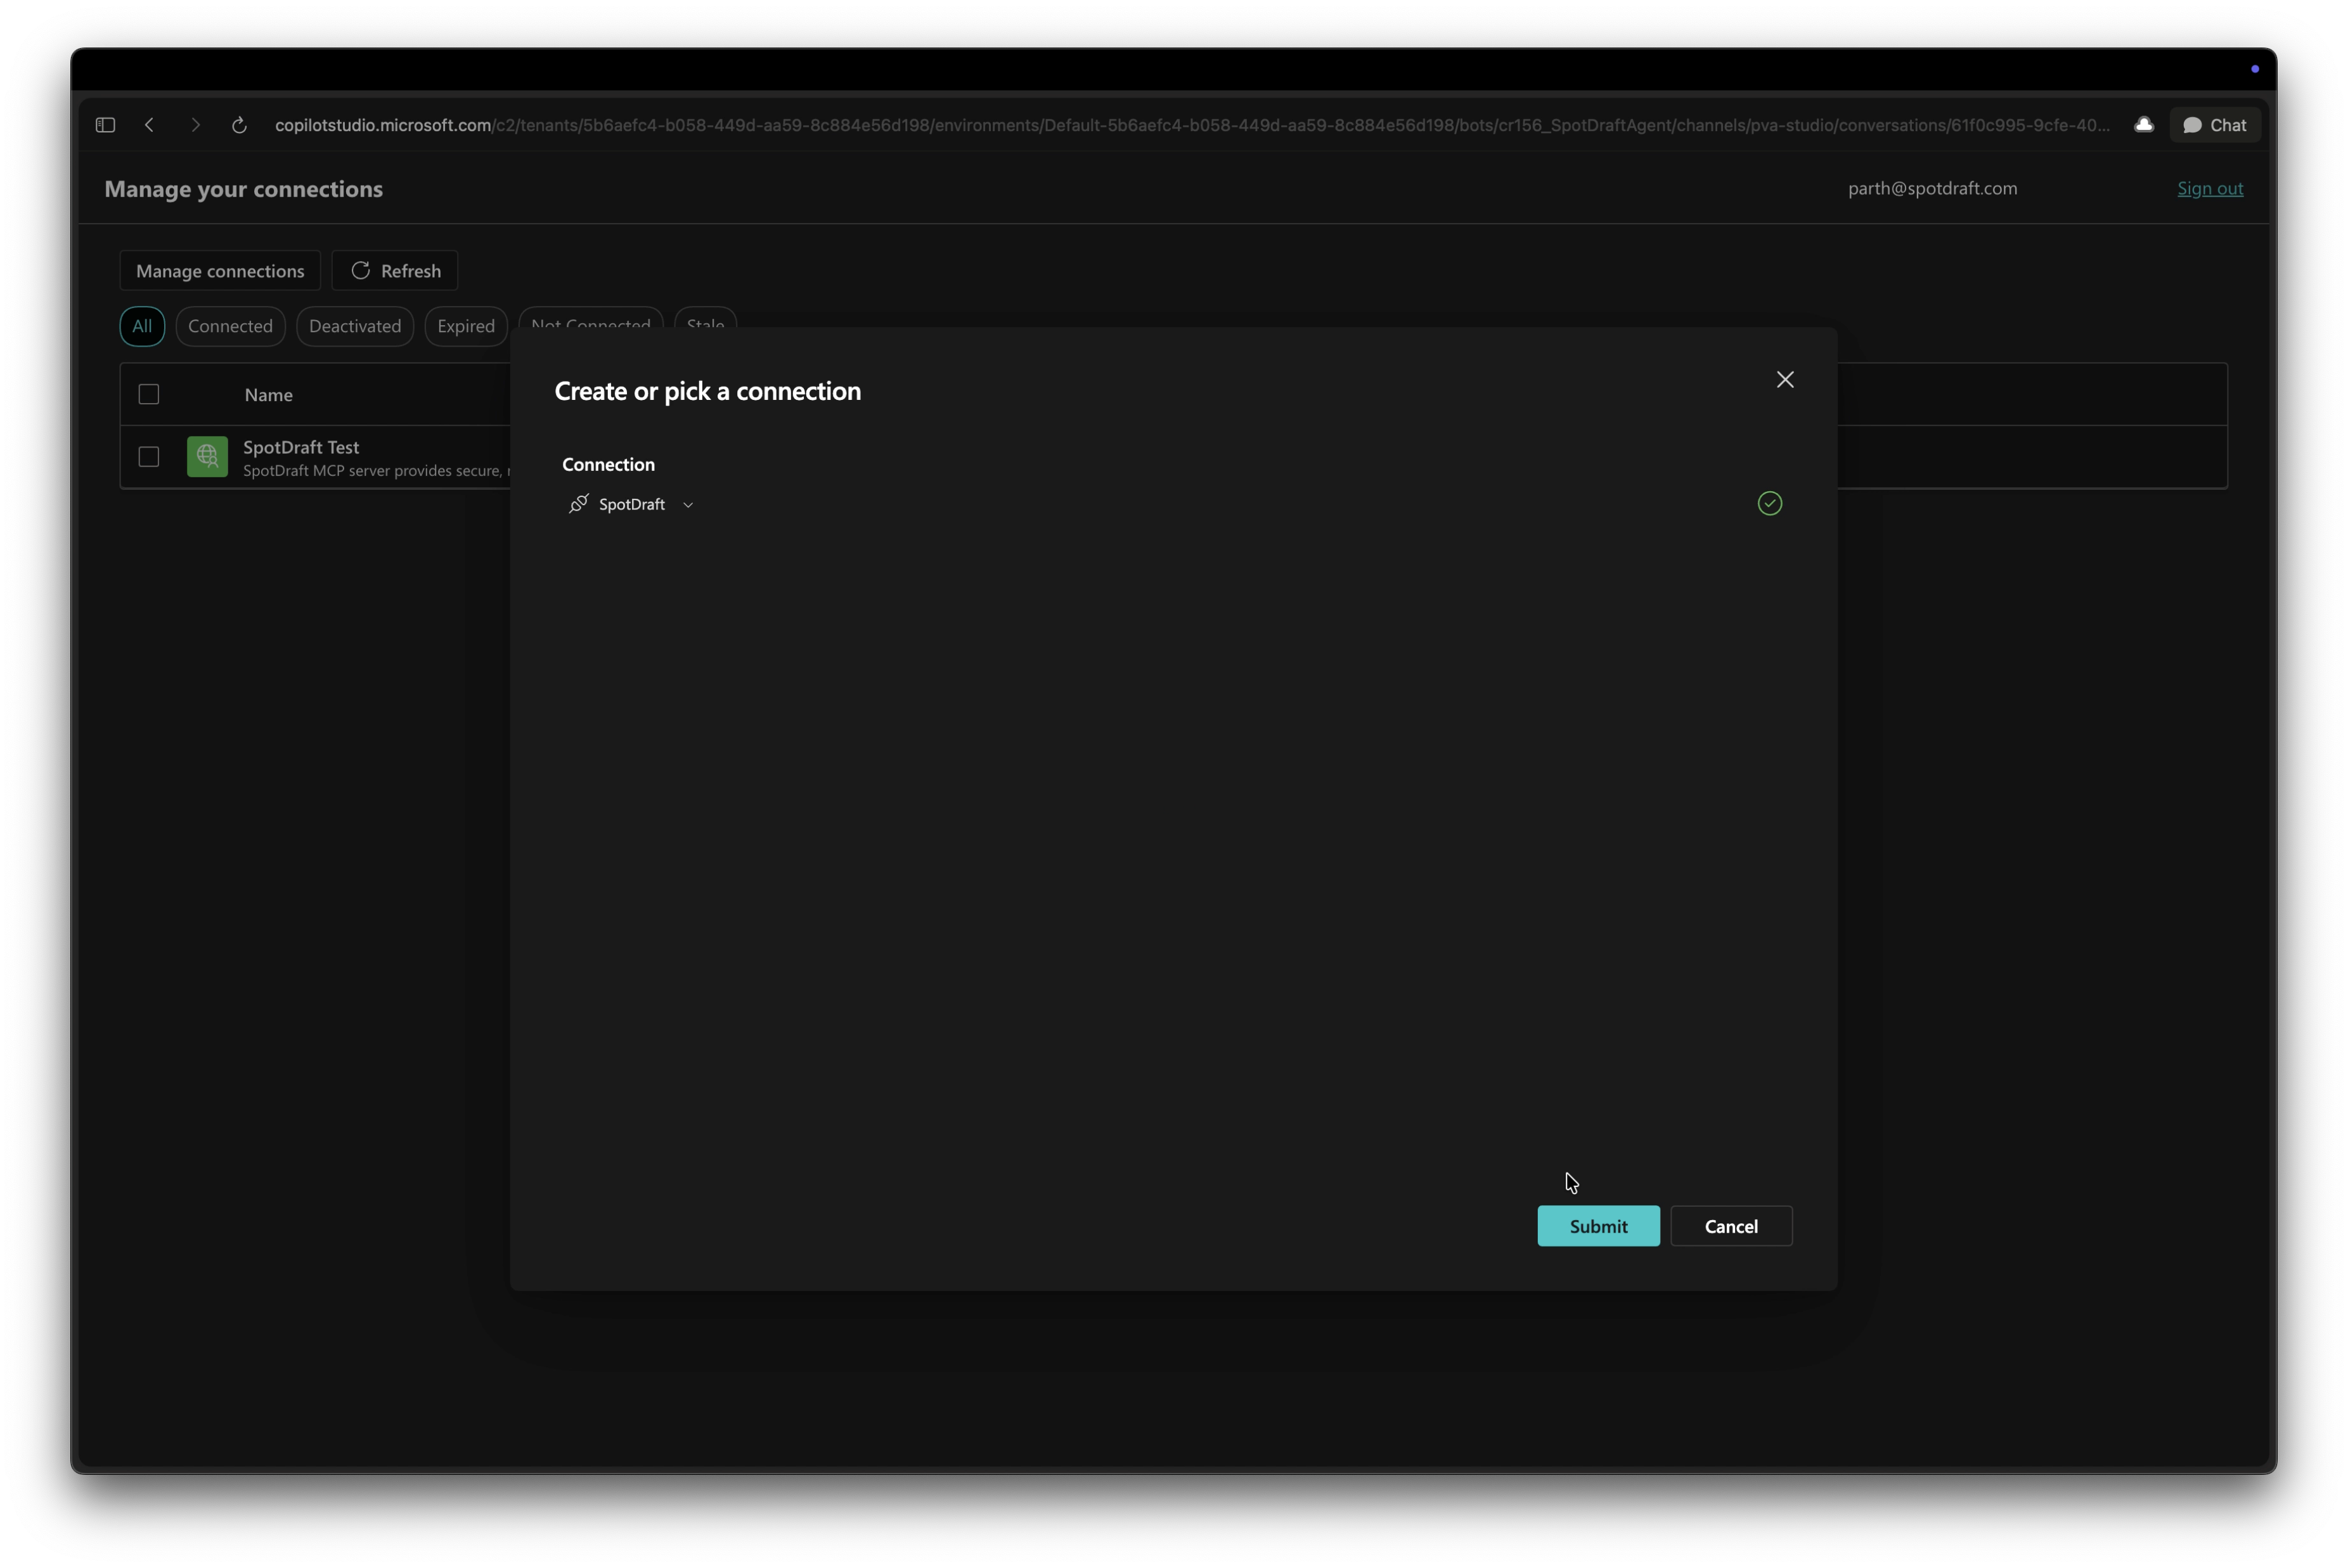
Select Submit, complete the sign-in and consent steps again if prompted, then go back to the test pane and select Retry.
The tool call should now complete successfully.
Quick reference
Dynamic discovery | Dynamic / Manual | |
|---|---|---|
PKCE support | Yes (handled automatically) | No |
Works with SpotDraft's MCP server | Yes | No, will fail auth |
Fields to fill in the wizard | Server name, description, URL only | Client ID, secret, endpoints, scopes |
Recommended and Supported | Yes | No |
If you run into an authentication error that isn't the "not connected" state described above, it's worth double-checking that OAuth 2.0 + Dynamic discovery was selected when the server was first added; a server created under Manual or Dynamic mode needs to be deleted and re-added rather than edited in place.