Connect SpotDraft's MCP Server to Notion
Last updated: September 2, 2026
Once connected, Notion AI and Notion agents can pull SpotDraft contract data directly, like contract status, counterparties, activity logs, and approvals, without leaving Notion. This is set up once per workspace by a workspace admin, then available to anyone building agents or using Notion AI in that workspace.
Note: this article uses mcp.us.spotdraft.com as a reference. Depending on the region your workspace is located in, you will be required to use one of the follow region-specific MCP URLs:
If you're unsure which region your workspace belongs to, please contact SpotDraft Support or reach out to your CSM.
Before you begin
You will need:
Workspace admin access in Notion
Your organization's SpotDraft region URL, for example
https://mcp.us.spotdraft.com/mcp(use the URL for your region: US, IN, EU, or ME)A SpotDraft account to sign in with when prompted
Step 1: Open Connections
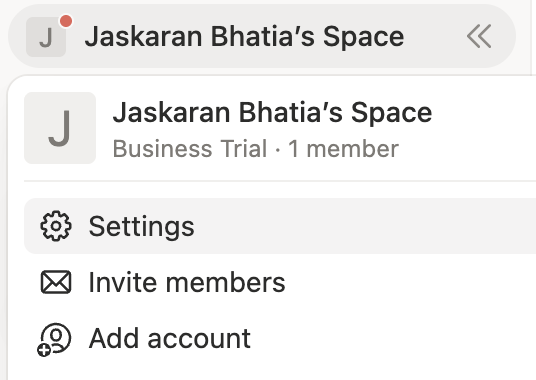
Click your workspace name in the top left, then select Settings.
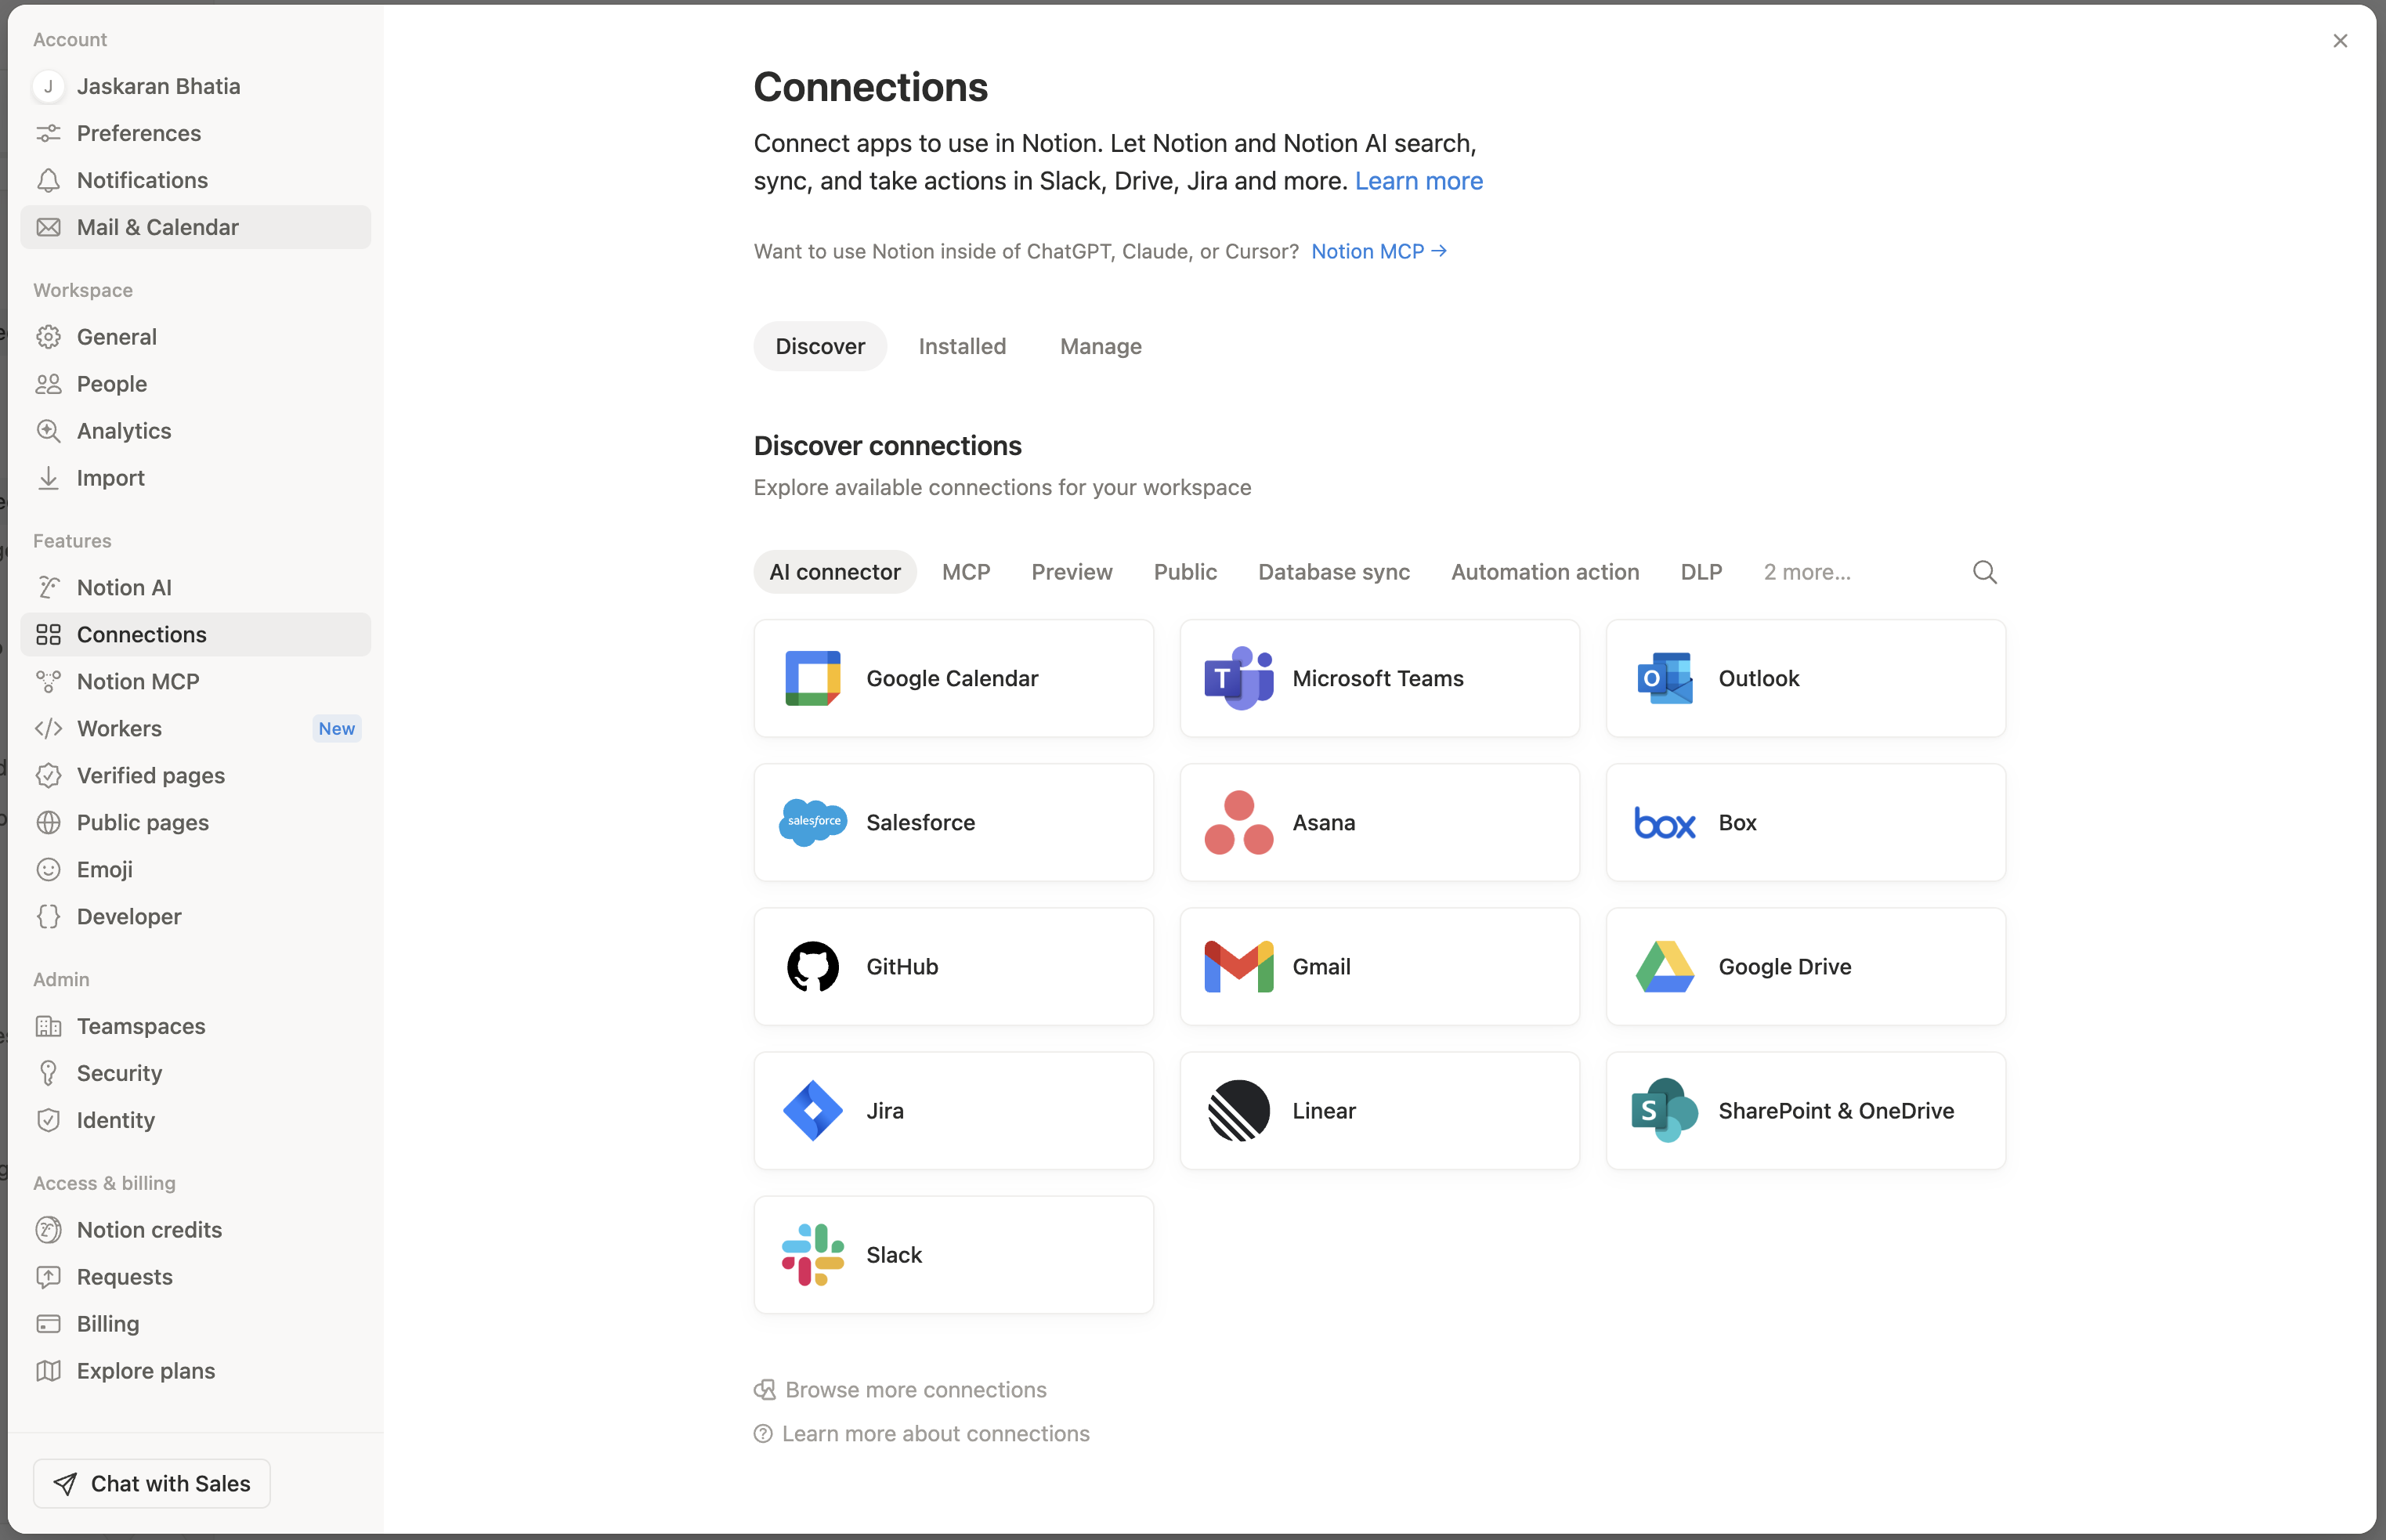
In the left sidebar, under Features, select Connections.
Step 2: Add SpotDraft as a custom MCP server
On the Discover tab, filter by MCP.
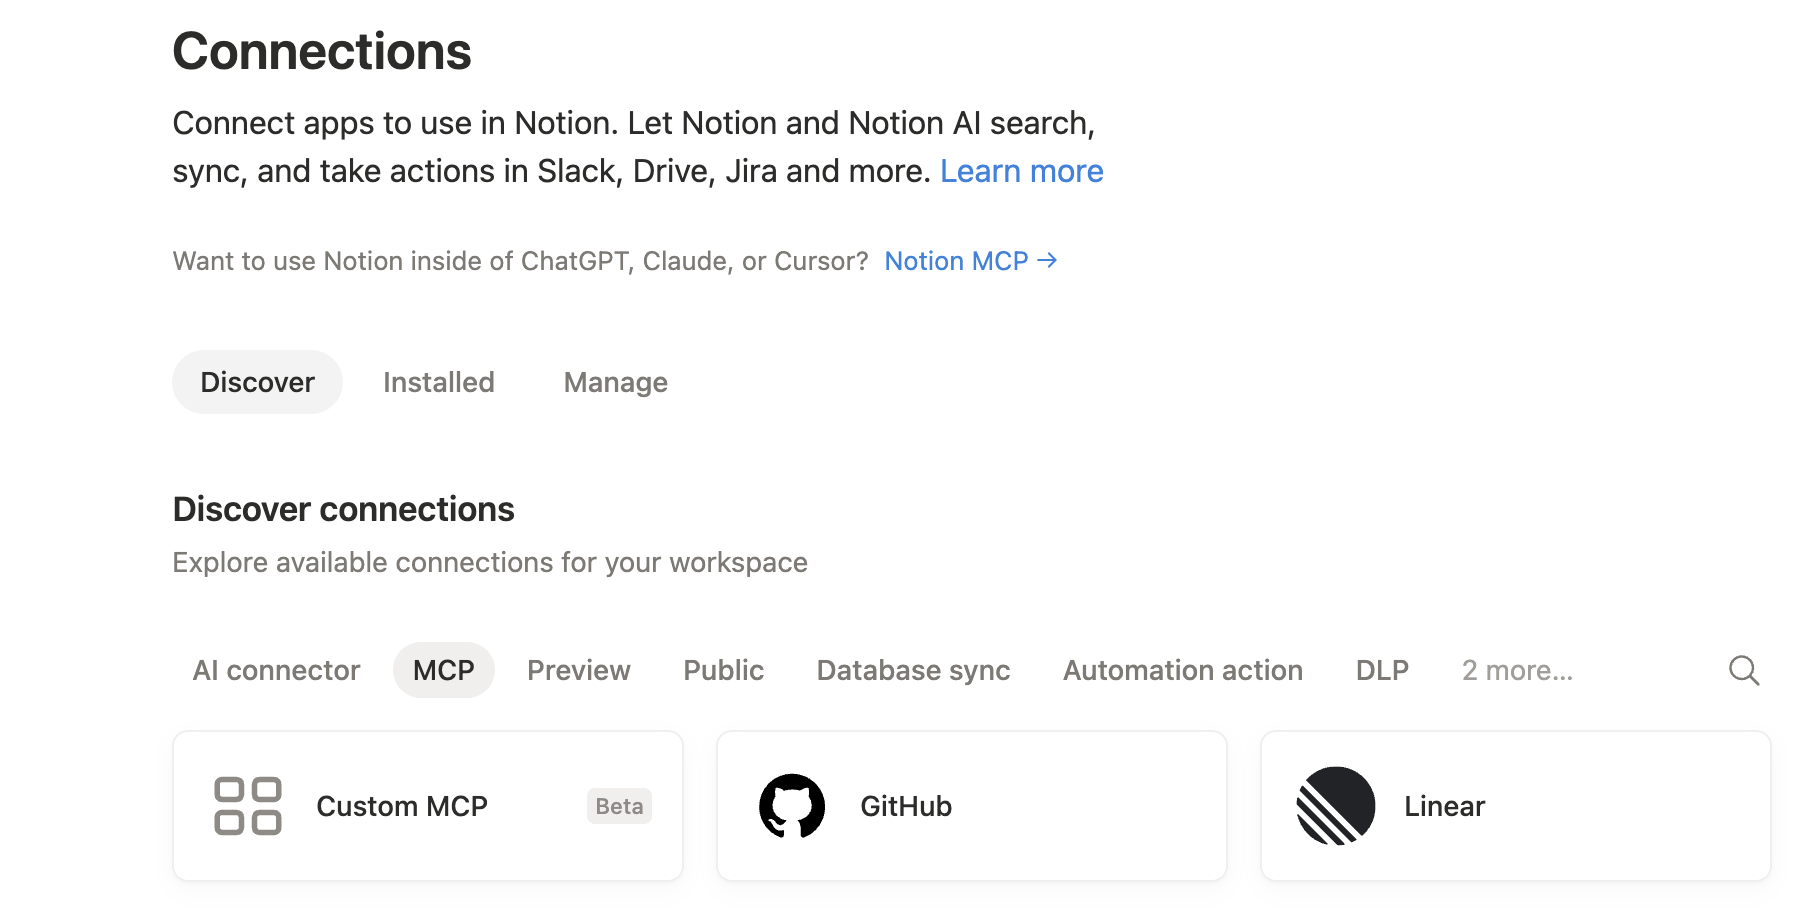
Select Custom MCP (marked Beta).
In the Custom MCP server dialog, enter the SpotDraft MCP server URL:
https://mcp.<region>.spotdraft.com/mcp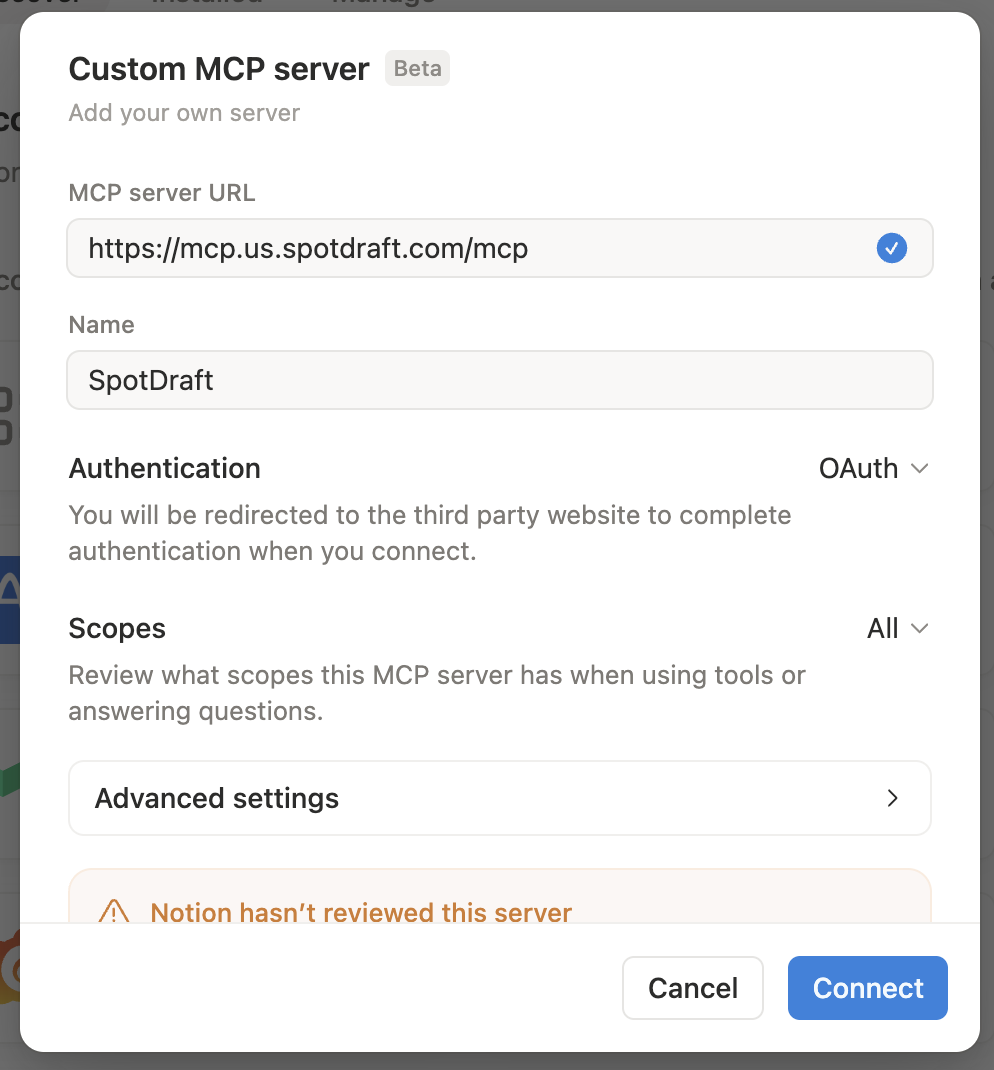
Notion auto-detects the server and fills in the Name field (SpotDraft). Edit it if you'd like a different display name.
Under Authentication, leave it set to OAuth. Notion shows a note that you'll be redirected to SpotDraft to complete authentication.
Under Scopes, leave it set to All, or expand Advanced settings to restrict which SpotDraft scopes the connector can use.
Notion displays a notice that it hasn't reviewed this server, since it's a custom connector. This is expected for direct integrations.
Click Connect.
Step 3: Authorize the connection
Notion shows a Processing authentication screen and opens a popup window.
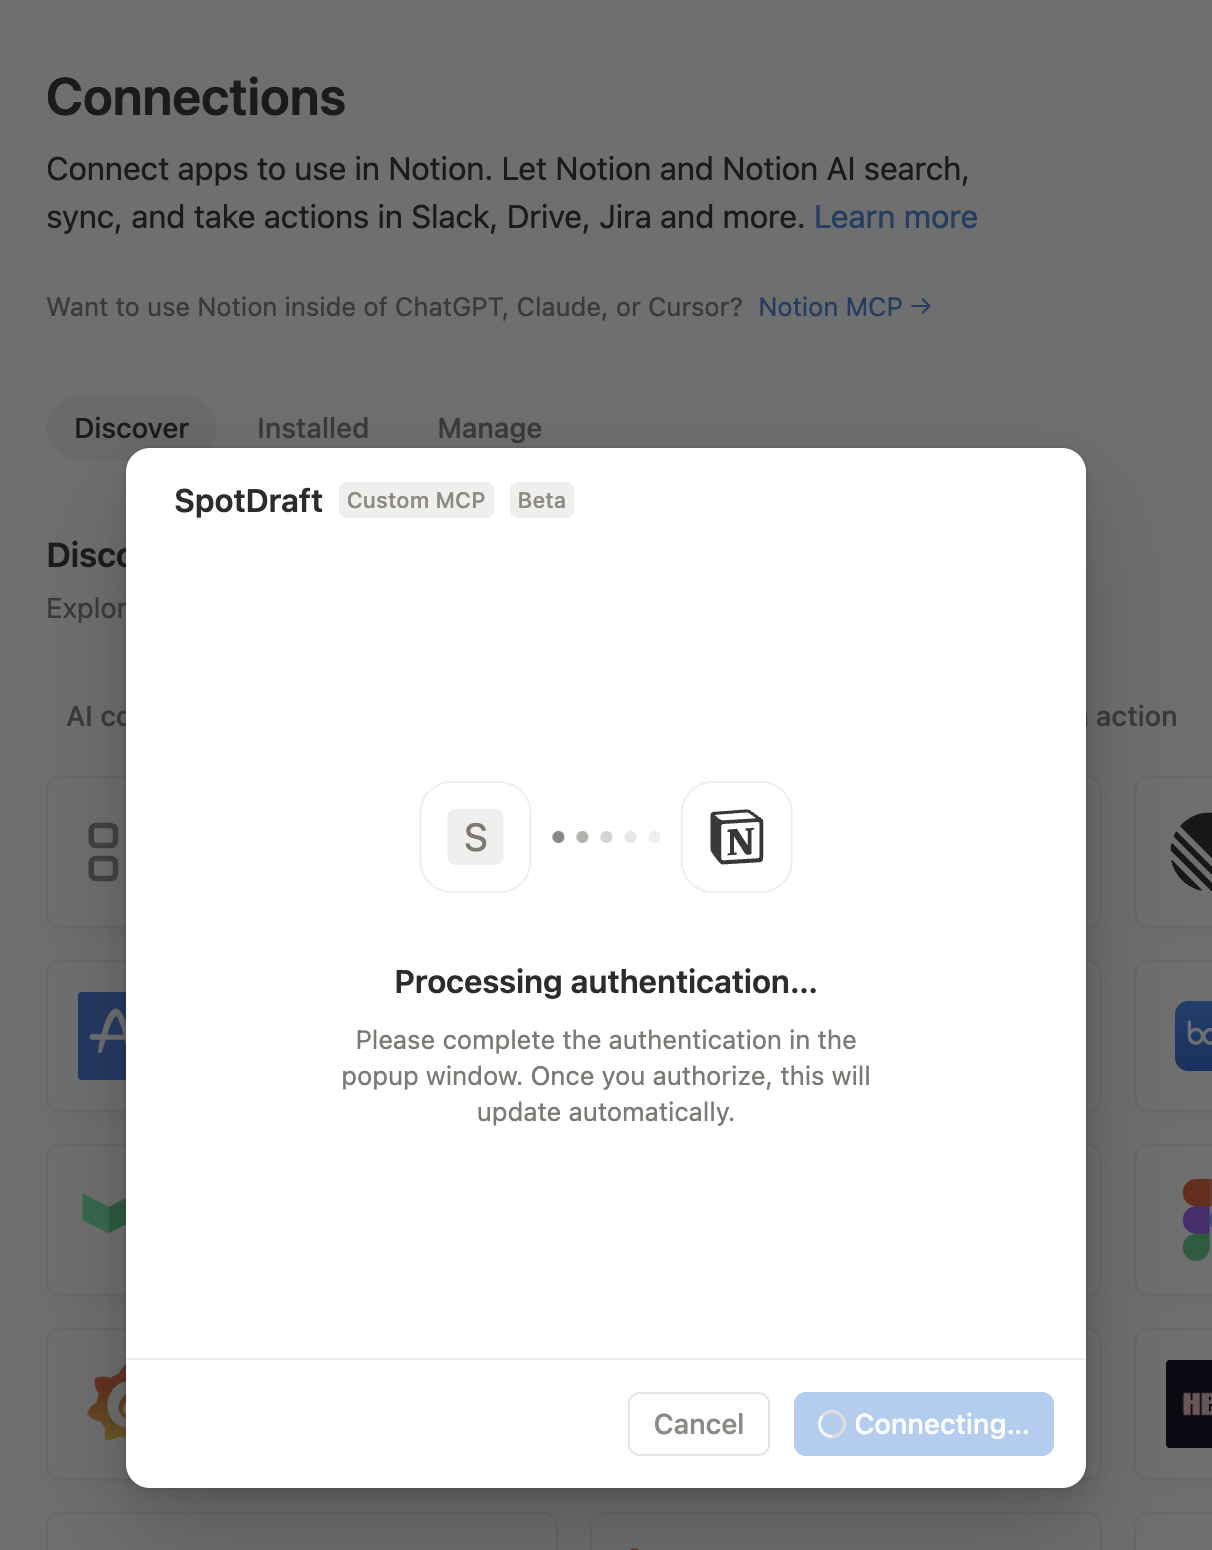
In the popup, you'll land on an Authorize Notion to access your SpotDraft Workspace screen, showing what Notion will be able to view (contracts and their details, analytics and insights, profile information). Note: If you're not already signed in to SpotDraft, you'll be prompted to log in first.
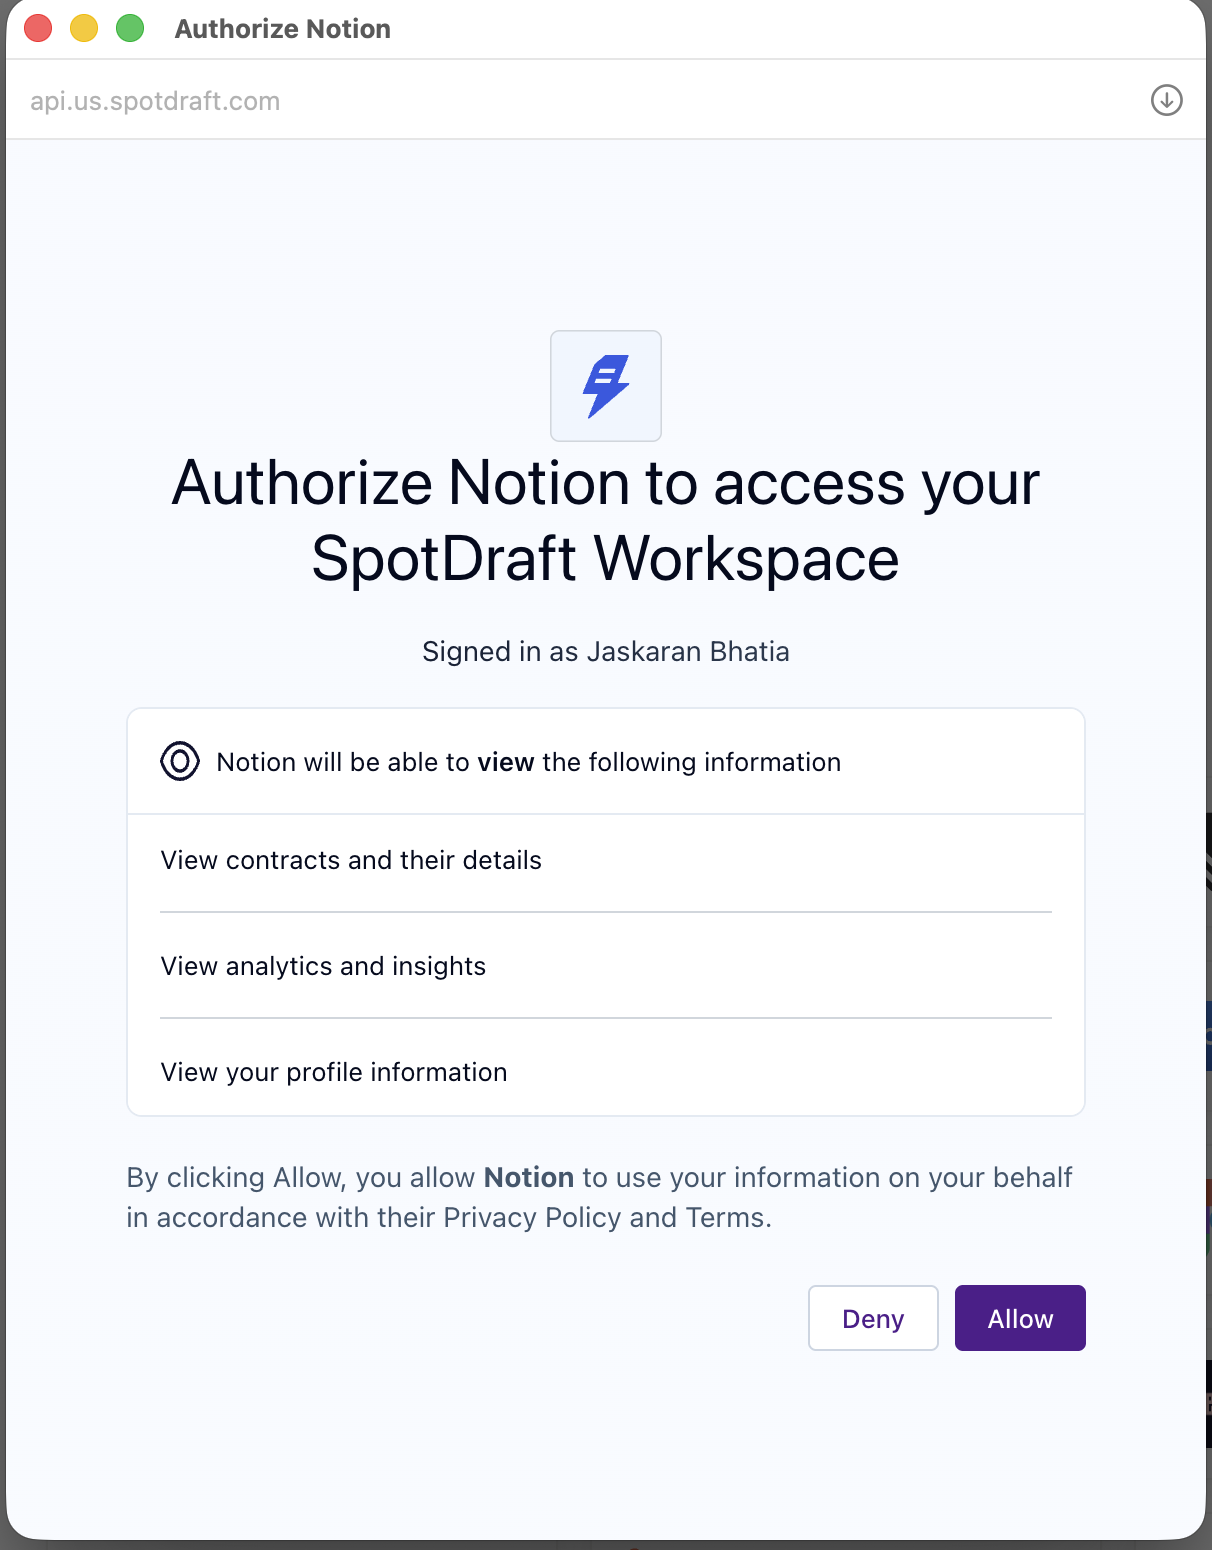
Click Allow.
The popup closes automatically and the connection completes.
Step 4: Choose which tools are available
Once connected, you can control exactly which SpotDraft actions Notion agents can use.
Go back to Settings → Connections, and open the SpotDraft connection.
Under the relevant agent tab, you'll see All tools with a count of how many are enabled (for example, "29 of 29 enabled").
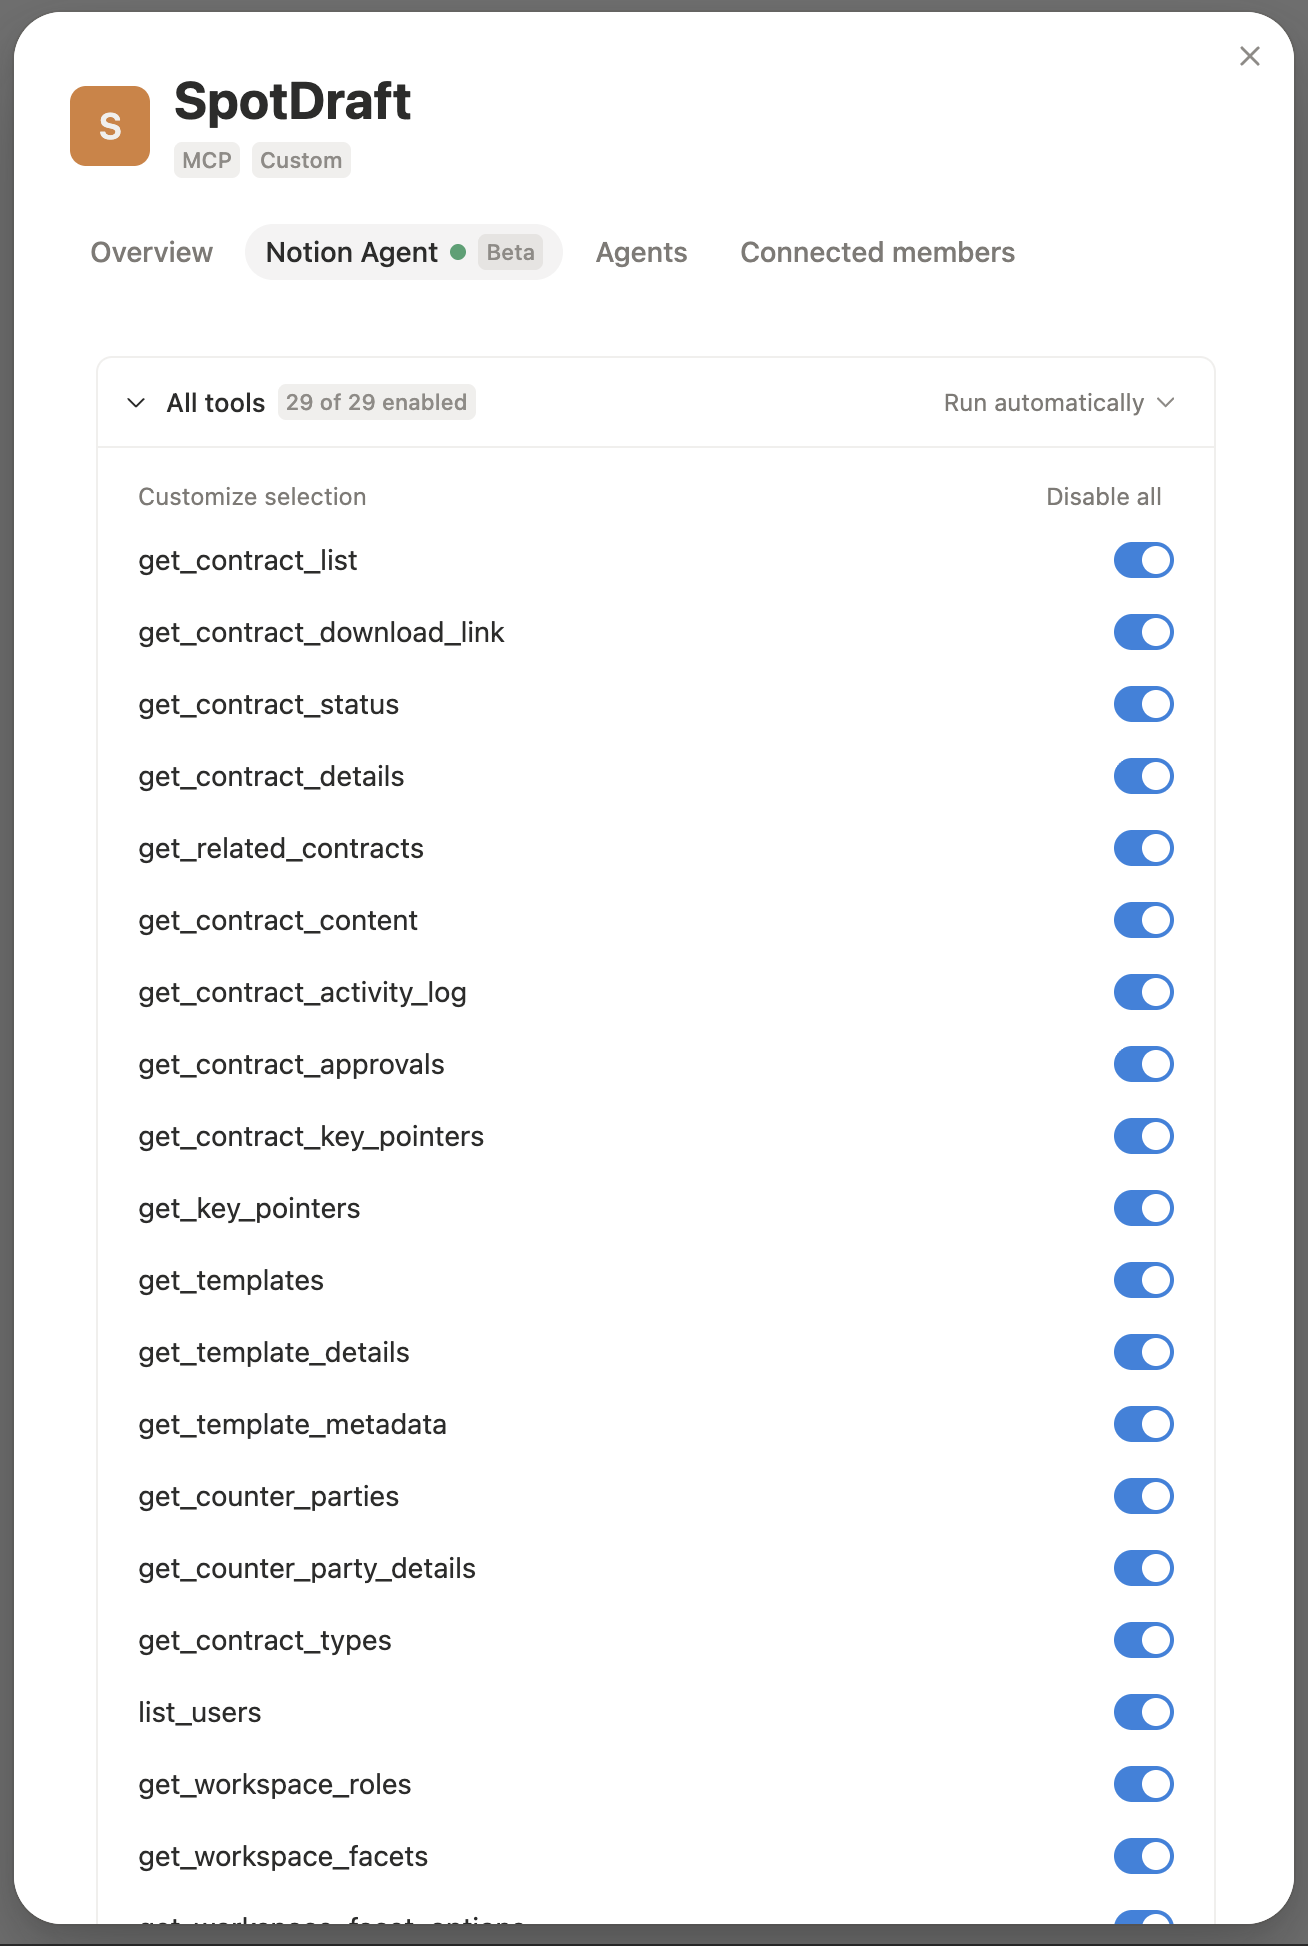
Toggle individual tools on or off as needed.
Use Disable all if you'd rather start from a clean slate and enable only specific tools.
Step 5: Use it in a Notion agent
Once connected, add SpotDraft under Tools and access when building or editing a Custom Notion agent:
Open the agent's Settings.
Under Tools and access, find SpotDraft in your list of connections (or click Add connection if it's not shown yet).
Save the agent.
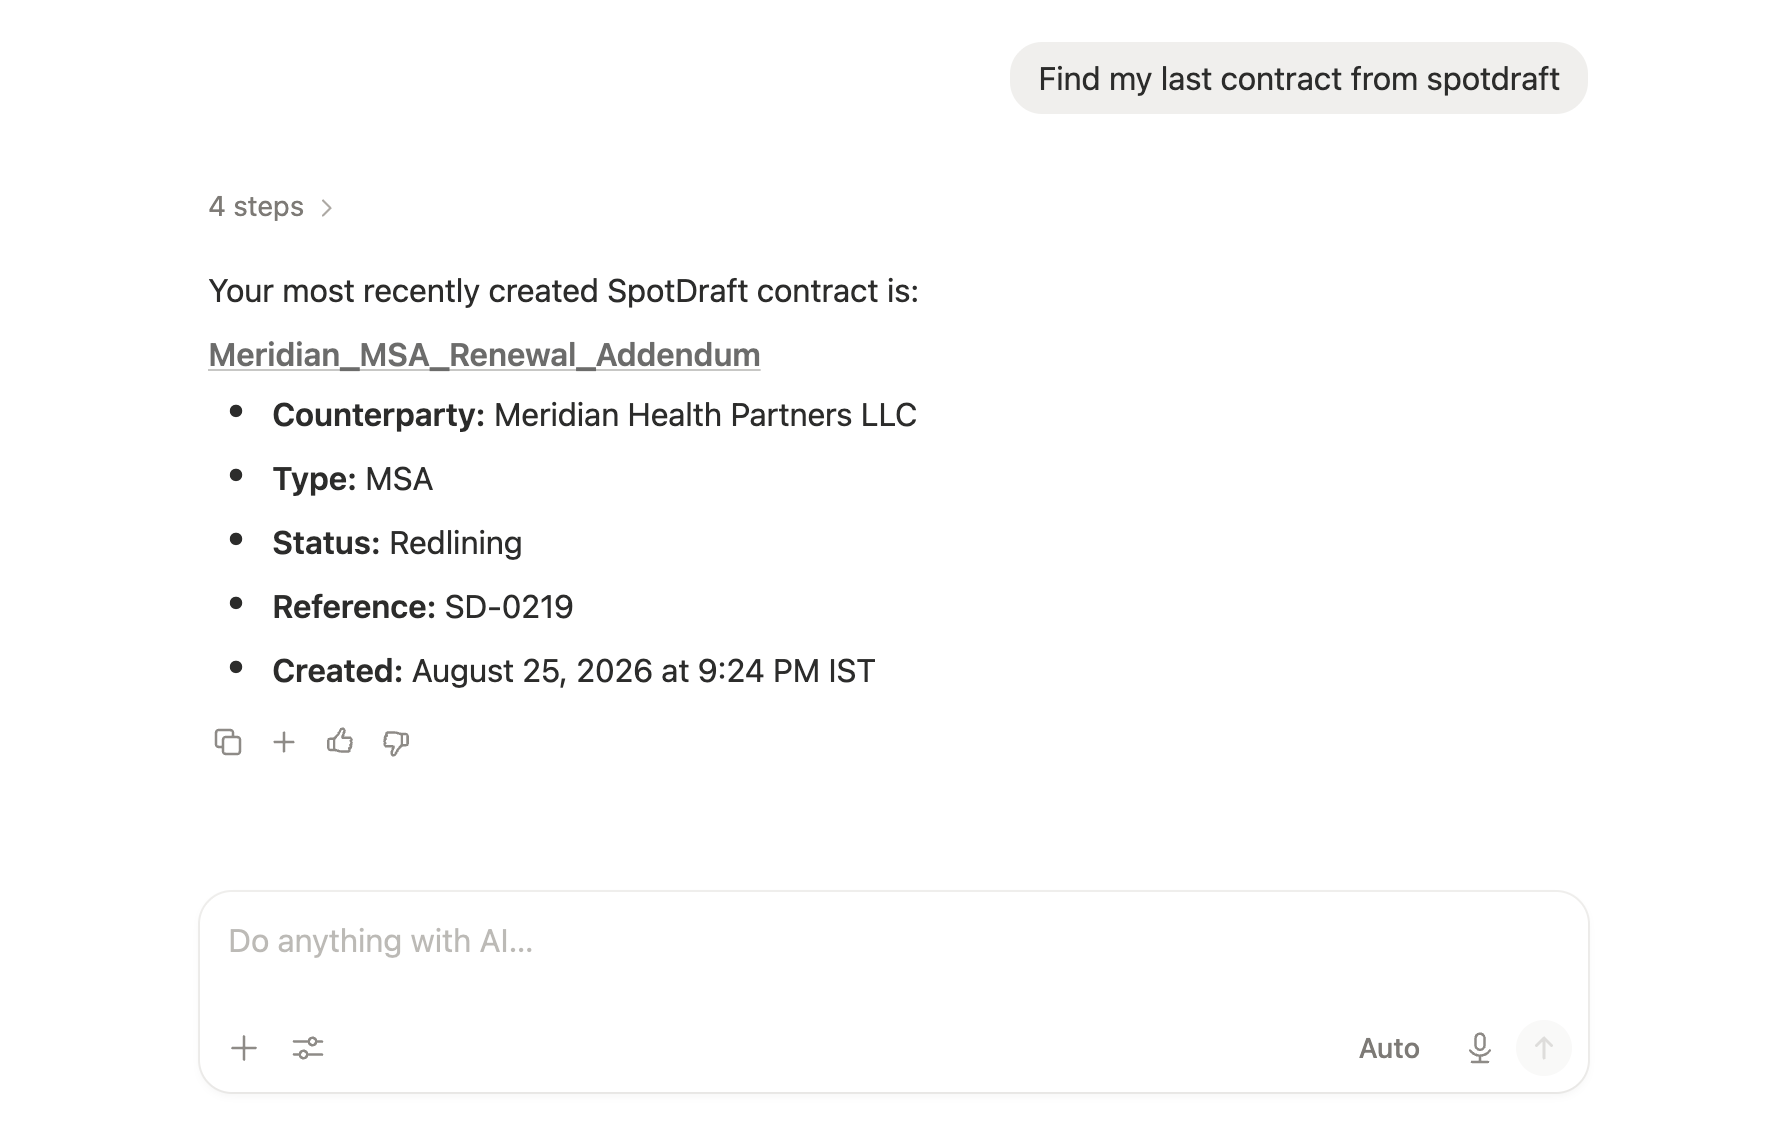
The agent can now call SpotDraft tools as part of its workflow, for example, looking up a contract's status or pulling approval history when triggered. You can do a dry run with a simple query like "Find my last SpotDraft contract" and confirm the connector is working.
Need help?
If the connection fails or tools don't return data, check that:
You're using the correct region URL for your SpotDraft instance
Your SpotDraft account has permissions for the data you're querying
The connection still shows as active under Settings → Connections → Installed
For further help, contact support@spotdraft.com or your SpotDraft Customer Success Manager.