Reverse Sync - Push data to Salesforce
Last updated: May 12, 2026
Introduction
Salesforce Reverse Sync allows you to push data from SpotDraft to Salesforce in a seamless and highly customizable manner. This integration empowers your team to keep your Salesforce records updated with the latest contract-related information without manual intervention.
With our new Salesforce Reverse Sync, you can configure how data flows from SpotDraft to Salesforce, define triggers for sync events, and map fields across objects — unlocking greater flexibility and efficiency than ever before.
What's new?
The legacy integration supported only basic data push functionality with limited triggers and object access. The new Salesforce Reverse Sync resolves these limitations and offers enhanced capabilities such as:
Data can be pushed to any object: Previously, data could only be pushed to the Salesforce record from which the contract was created. Now, you can update any object or related record as long as it can be programmatically identified through a search criterion.
Customizable triggers: Earlier, sync events were hard-coded, and you had no control over when data was pushed. The new integration allows you to define which events in SpotDraft should trigger a data sync to Salesforce.
Nested record updates: Updates were previously restricted to fields in the direct record. For example, pushing contract data to an associated Account record wasn’t possible. Now, you can update deeply nested related records, including Account details, Opportunities, and more.
Record creation across objects: In the legacy system, new records could only be created in two custom objects – SpotDraft Contracts and SpotDraft Signatories. The new integration allows record creation in any Salesforce object available on the connected account.
Expanded data fields: Only a limited set of fields could be pushed before, such as contract metadata and basic details like contract title or ID. The new integration supports additional fields like business user data, external metadata, contract files, and more.
Step-by-step installation guide
This guide will walk you through the simple steps to set up the integration.
Step 1: Authentication
Navigate to Settings > Integrations > CRM > Salesforce and go to the Sync To Salesforce tab.
Click on the View Salesforce Authentications button. A sidesheet will open.
Click on the Add New Authentication button.
Fill in the following information:
Authentication Name: A unique identifier for the authentication (Eg, Acme Production)
Environment: Select if it is a Sandbox or a Production Salesforce account.
A new window will open with the Salesforce login page. Log in using your Salesforce credentials to authorize SpotDraft to access your Salesforce account.
Note:
For reverse sync to work, contracts must be linked to a Salesforce record. Contracts created from Salesforce are automatically linked to the originating record. Contracts initiated directly in SpotDraft must be manually linked using the + Link External Record option under Record Details in the contract, even if Salesforce metadata fields (such as “SFDC Record Link”) are populated. Without this linkage, the reverse sync will not occur.
If you are already logged in to Salesforce, SpotDraft will automatically pick up that account. To avoid confusion when managing multiple Salesforce accounts, it’s recommended to use an Incognito window for this step.
Ensure API access is enabled on the Salesforce Org.
Ensure the person authorizing the account has the necessary permissions to access the required Salesforce objects and fields (Preferably the System Administrator). This will prevent any issues during field configuration.
It is also recommended to use a generic account (Eg, spotdraft_integration@acme.com) for authentication, which is not tied to an individual. If the individual leaves the organization and their account is deactivated, the integration will stop functioning until reauthenticated.
The authentication expires if the integration remains unused for a long period or if your Salesforce admin makes some changes. In such cases, you can re-authenticate it from the UI.
Step 2: Adding an integration and enabling it
Click on the Add Integration button. A sidesheet will open.
Fill in the following information:
Integration Name: A unique identifier for the integration (Eg, Production Account)
Integration Description: A brief description to identify what this is used for
Authentication: Select which authentication should be used for this integration
Click on the Connect button.

The integration remains disabled by default. Remember to enable the integration one created
Click on the 3-dot menu.
Click on the Enable option.
Click on the Enable button on the modal after carefully reading the message.

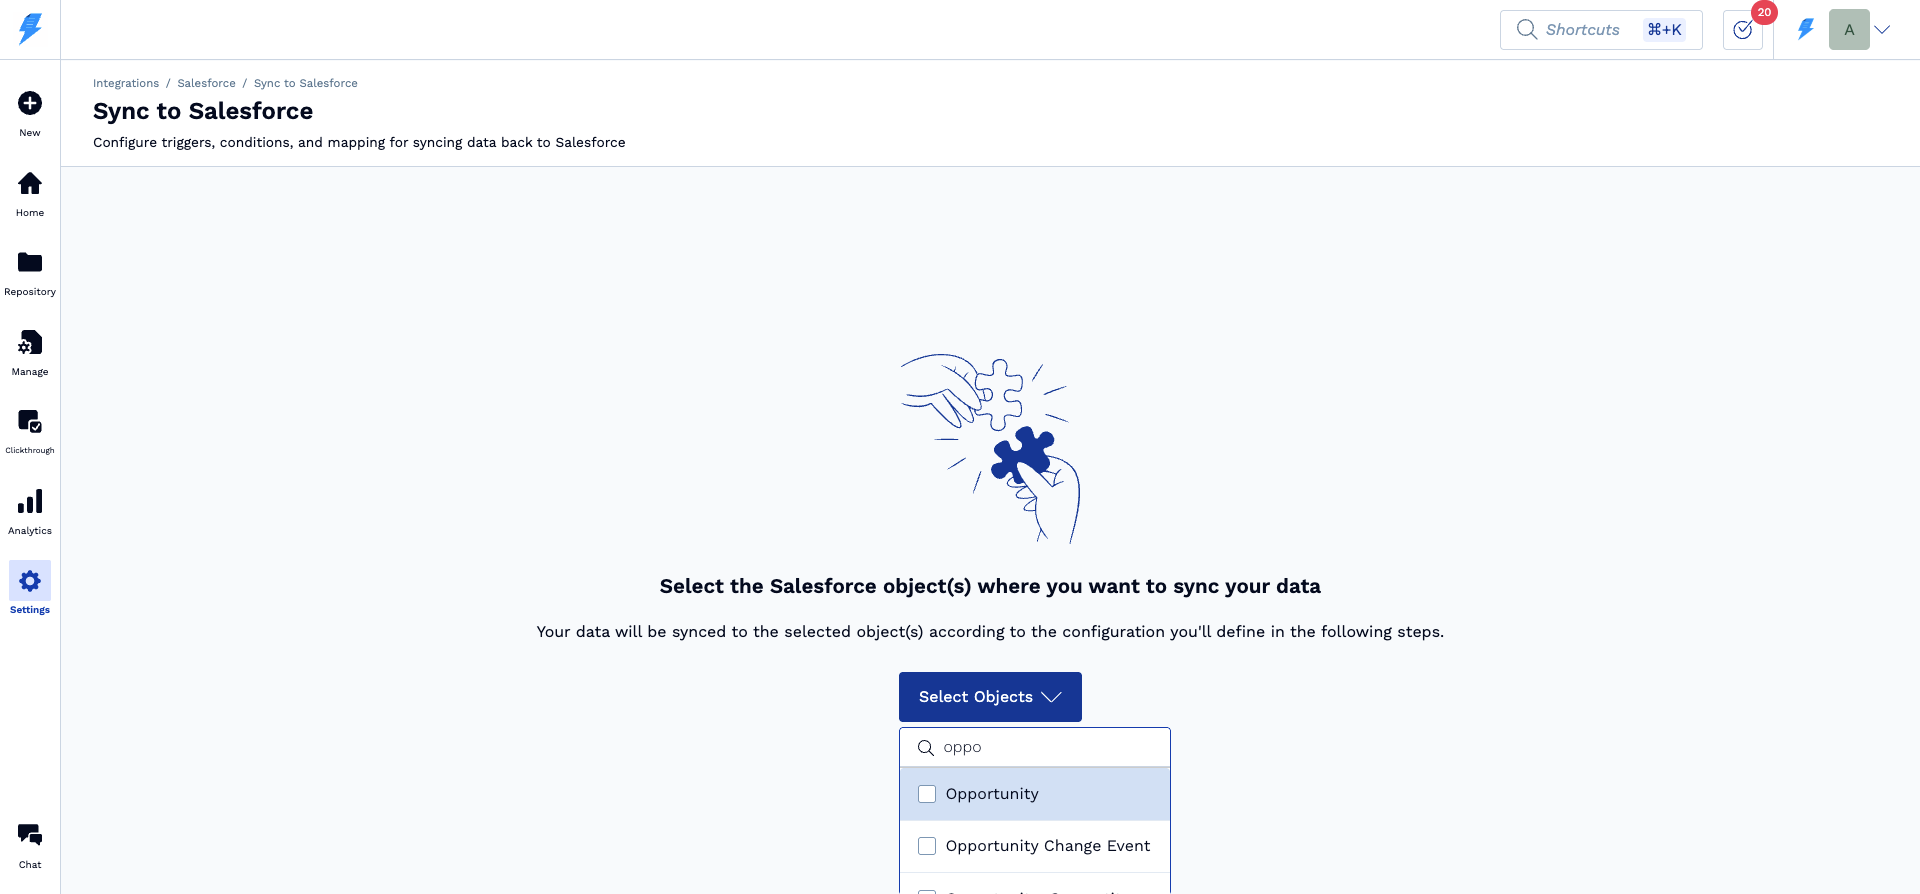
Step 3: Selecting the Salesforce object to push data to
Click on Continue Configuring: This will take you to a screen to select the object to push the data to.
Select the object: This will take you to the landing page to set up automations.
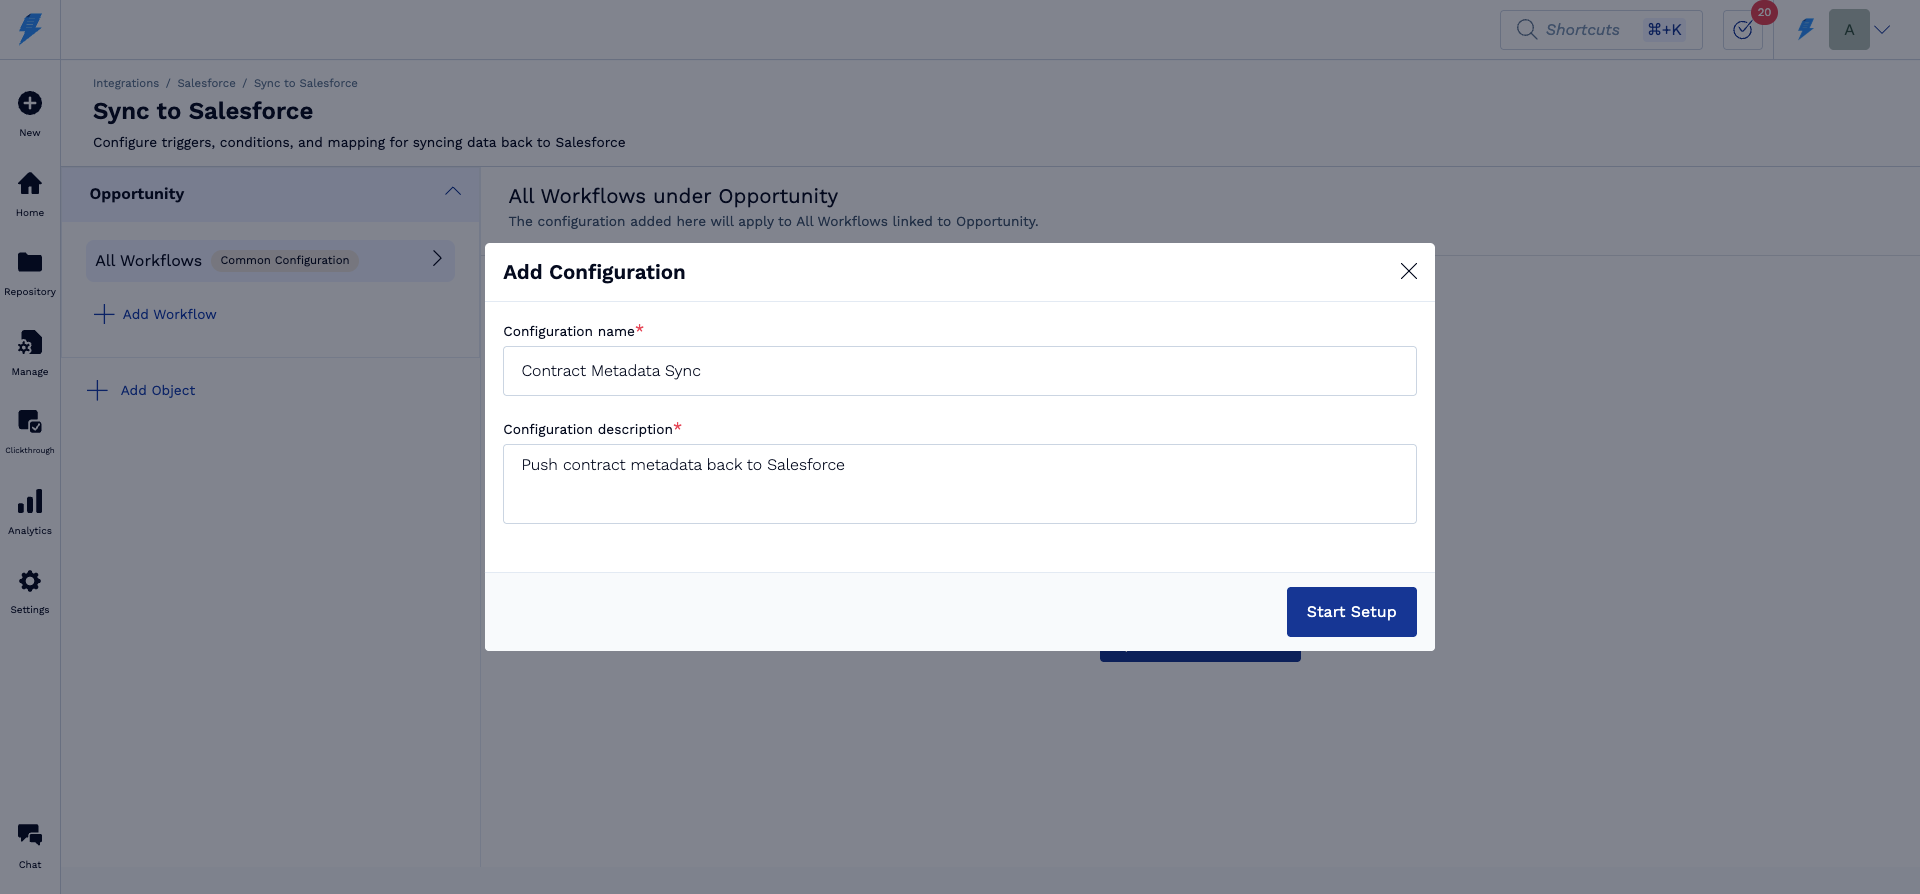
Step 4: Add a configuration/automation
You can now add configuration for All Workflows or individual workflows
All workflows: There are cases where you have to do the same operation for all the workflows. For example, you want to mark the opportunity as closed/won or push the signed contract PDF to the Notes & Attachment section of the opportunity when any contract is executed. In such cases, it is easier to define the automation for All Workflows instead of replicating the same across each one of them.
Individual workflows: There are cases where you would want to push contract-specific metadata to the linked record, such as the opportunity. The trigger points, conditions, metadata, etc, could vary from contract to contract. In such cases, select the required workflow and configure it accordingly.
Adding a configuration/automation: In either case, the automation setup is done the same way. You need to select the triggers, set the conditions, and map the fields. The steps are:
Click on Add Configuration: This will open a modal to enter basic information
Click on Start Setup: This will take you to the configuration page.
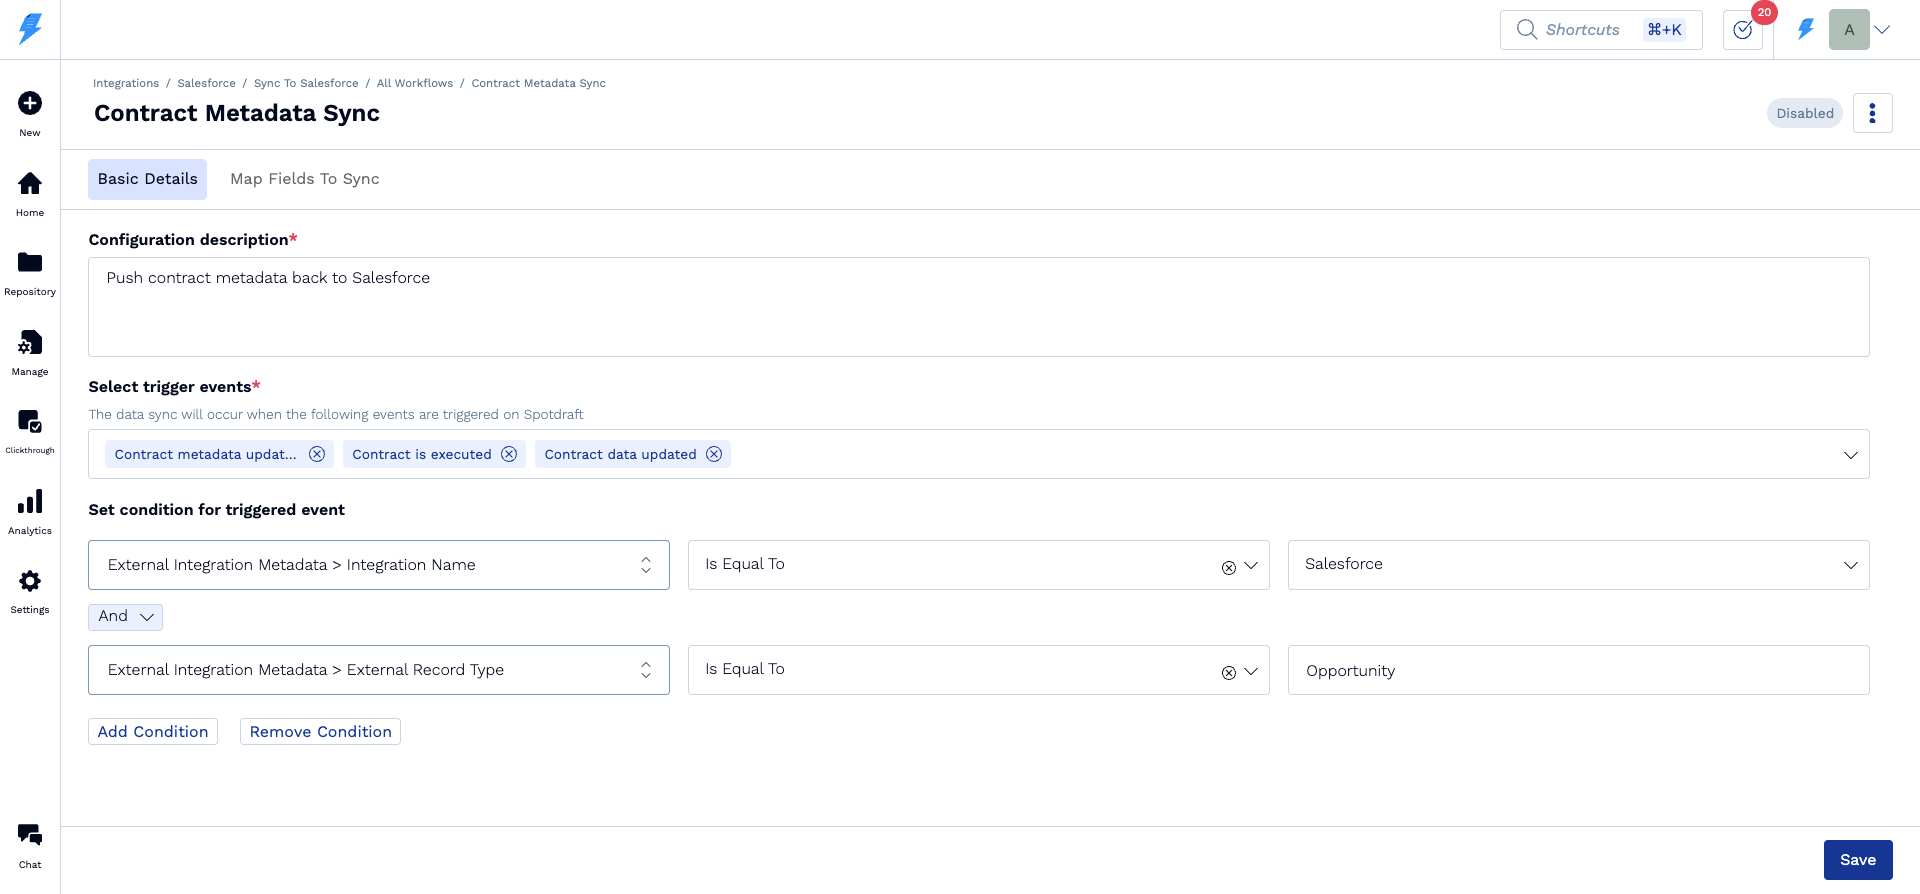
Step 5: Set triggers and conditions
Select the triggers: Select when the events on SpotDraft should push data to Salesforce
Set the condition: The events occur for all contracts that are on SpotDraft. The reverse sync is usually needed for the contracts that are created from Salesforce. In such cases, add the required conditions to identify the contracts created from Salesforce.
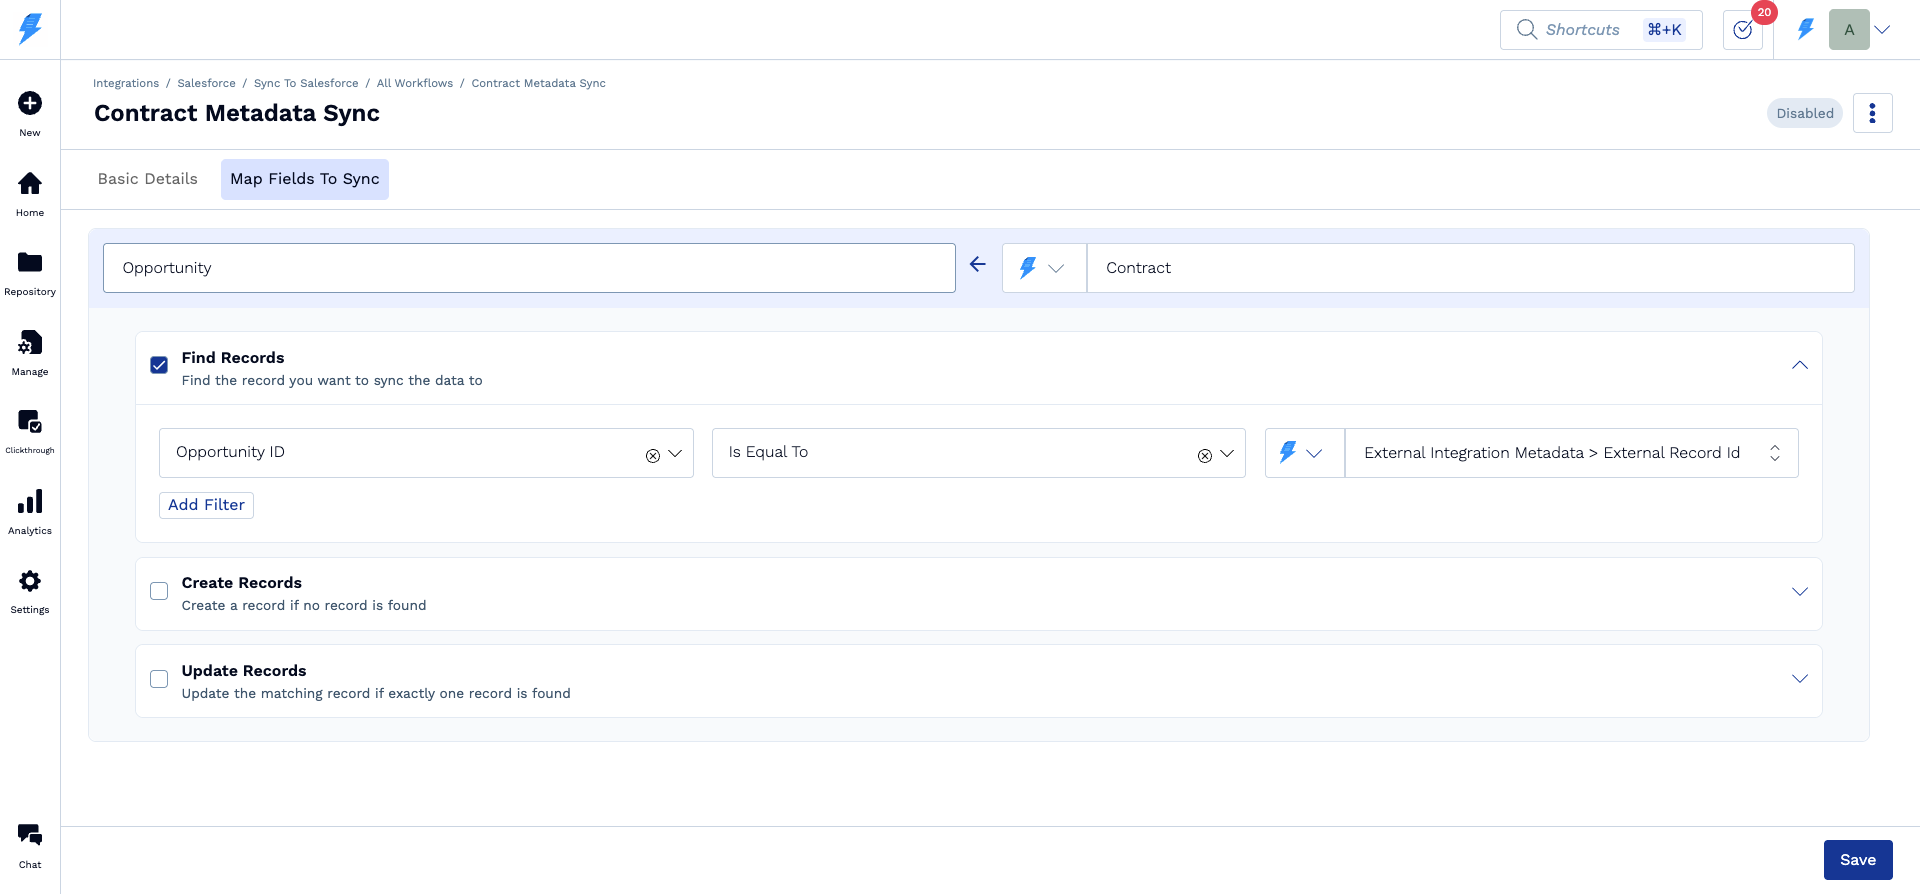
Step 6: Map Salesforce and SpotDraft fields
Find: Usually, the contract data will be pushed back to the linked Salesforce record, such as Opportunity, Account, etc., from which the contract was created. Find this record based on the required search criteria. A contract created from Salesforce will have the corresponding record ID stored as the External Record ID.
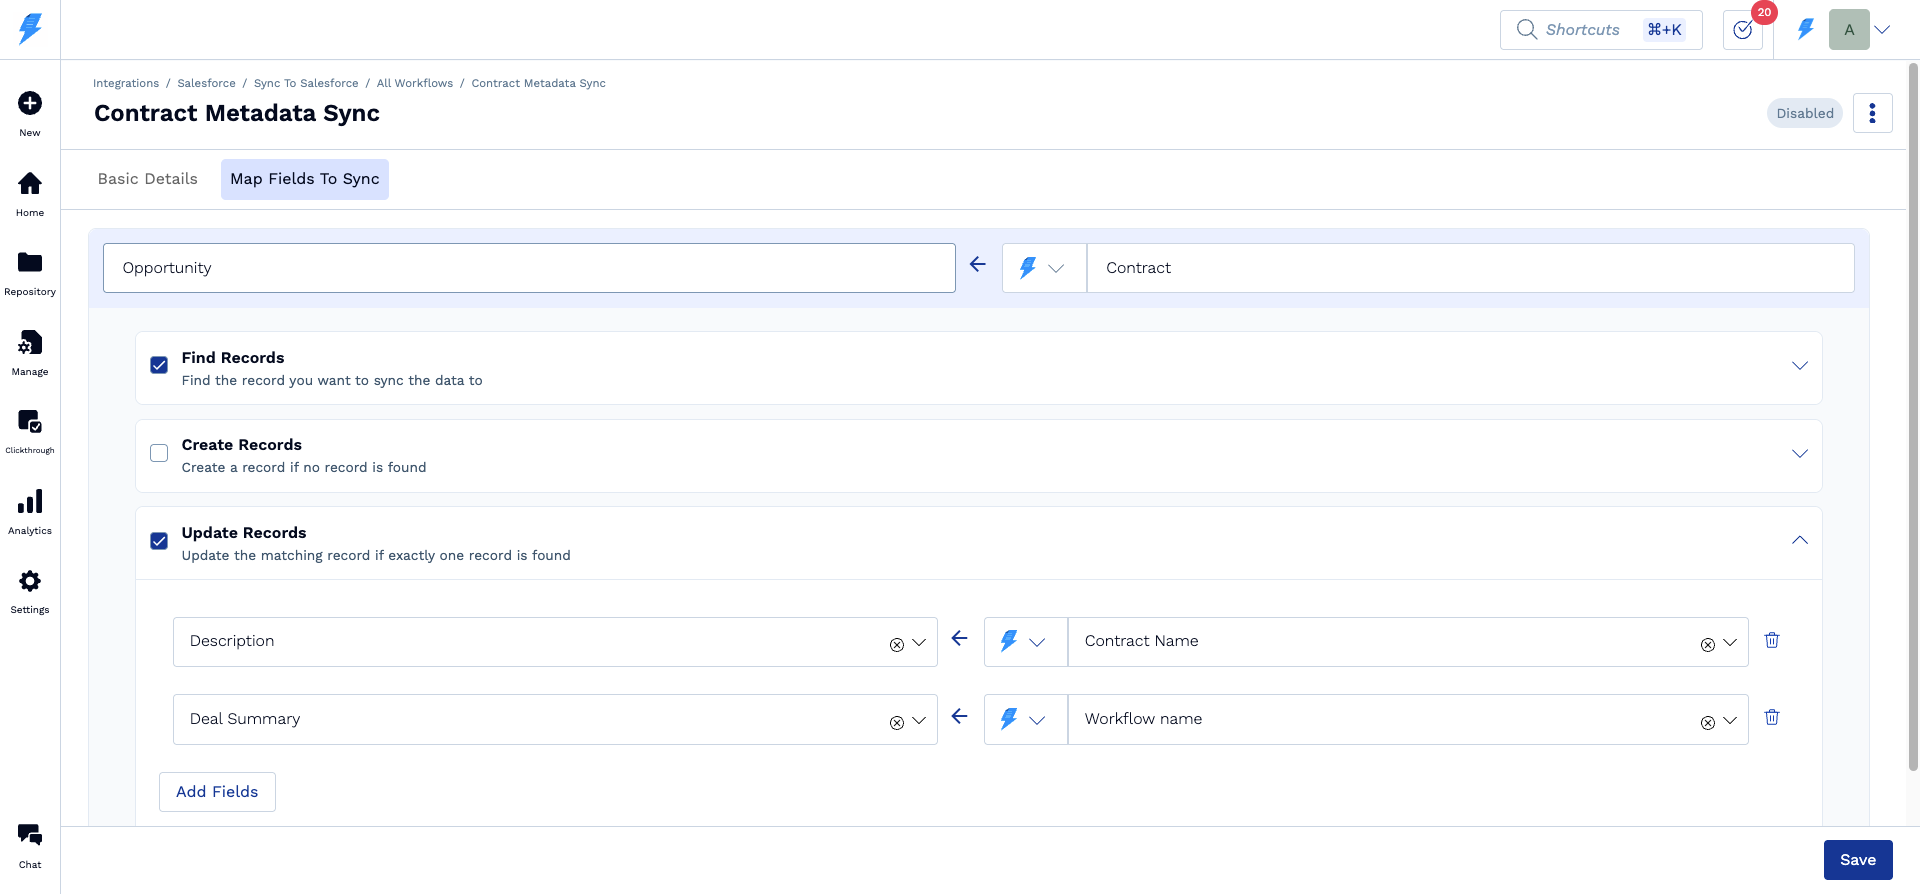
Create: If no record is found based on the search criteria, you can choose to create a new record. Select the Create option and map the fields that you need to auto-populate based on the contract data. Note: All mandatory fields should be mapped.
Update: The most common use case is to update some of the fields in the record that is linked/found. To do this, map the fields on Salesforce with the fields on SpotDraft.
Step 7: Save and enable
Once all the mapping is complete, Save and Enable it. Your reverse sync is now active!

Advanced options
1. Conditional Actions
You can now control when specific actions should run within an automation.
Example:
Create an Opportunity in Salesforce only if the contract status in SpotDraft is Draft, even if the automation is triggered for multiple events.
Step 1: Click on 'Trigger action conditionally'

Step 2: Set up the necessary logic and click on Save

Step 3: Verify the configuration. If successful, the CTA will change to 'Triggered Conditionally'.

2. Conditional Field Mapping
You can dynamically decide what value gets pushed to Salesforce based on conditions.
Example:
Map the Description field in Salesforce to Jurisdiction in SpotDraft
If Jurisdiction is empty → set Description to “Jurisdiction not mentioned”
Step 1: Click on the source selector and choose 'Map conditionally'

Step 2: Set up the necessary logic and click on Save

Step 3: Verify the configuration. If successful, the dropdown option shows 'Conditionally mapped'.

3. Support for Constant Values
In addition to mapping fields, you can directly assign static values to Salesforce fields during sync using 'Choose constant value' in the source selector.
Option 1: In top-level mapping

Option 2: In conditional mapping

Troubleshooting Common Salesforce Reverse Sync Issues
Authentication and Connection Problems
Missing Kebab Menu for Reauthentication
If you cannot see the kebab (⋮) menu icon next to your authentication in the Salesforce Authentication section:
Check authentication status: Look for status indicators like "Expired" or "Invalid" next to the authentication name
Refresh the page: Sometimes the UI needs to be refreshed to display the current state
Verify permissions: Ensure you have admin permissions to manage integrations in SpotDraft
Clear browser cache: Authentication state issues can sometimes be resolved by clearing your browser cache
Authentication Fails During Setup
Incognito window requirement: If you're logged into multiple Salesforce orgs, use an incognito window to avoid authentication conflicts
API access verification: Contact your Salesforce admin to confirm API access is enabled for your org
User permissions check: Verify the authenticating user has System Administrator privileges or equivalent permissions for all required objects
Generic account recommendation: Use a dedicated integration account (e.g., spotdraft_integration@company.com) rather than personal accounts to prevent disruption when team members leave
Bi-Directional Sync Option Appears Grayed Out
If the bi-directional sync option appears grayed out or unavailable when trying to add an integration:
Authentication prerequisite: The option remains disabled until Salesforce authentication is successfully completed. You must complete Step 1 (Authentication) before configuration options become available.
Field Mapping and Configuration Issues
Required Fields Not Appearing in Dropdown
Object permissions: Ensure the authenticated user has read/write access to all fields you need to map
Field-level security: Check that field-level security settings in Salesforce allow the integration user to access the fields
Custom field visibility: Verify custom fields are visible to the integration user's profile
Sync Failures Due to Validation Rules
Object permissions: Ensure the authenticated user has read/write access to all fields you need to map
Field-level security: Check that field-level security settings in Salesforce allow the integration user to access the fields
Custom field visibility: Verify custom fields are visible to the integration user's profile
Signed PDFs Not Syncing to Salesforce
If signed contract PDFs are not being sent to Salesforce, verify that required field mappings are present in your workflow configuration.
Required field mappings: For SpotDraft to successfully send signed PDFs to Salesforce, the SpotDraft workflow must include mappings for both the Salesforce Account ID and Opportunity ID fields. If these fields are missing from the workflow configuration, files will not save correctly to Salesforce.
Diagnostic steps:
Check if other contract types are syncing correctly to isolate whether it’s a template‑specific or system‑wide issue.
Verify that the SFDC Account ID and Opportunity ID fields are present in the SpotDraft workflow configuration.
Add any missing field mappings to the workflow.
Performance and Reliability
Sync Delays or Timeouts
Salesforce API limits: Monitor your org's daily API usage to ensure you're not hitting limits
Large file attachments: Consider file size limits when syncing contract PDFs to Salesforce
Bulk operations: For high-volume syncing, stagger trigger events to avoid overwhelming the system
Integration Suddenly Stops Working
Password changes: If the authenticated user's password is changed in Salesforce, reauthentication is required
Profile modifications: Changes to the user's profile or permission sets in Salesforce may break the integration
Org changes: Salesforce org maintenance or configuration changes can affect API access