Configure the integration - Field mapping and other settings
Last updated: May 12, 2026
Introduction
The Salesforce integration is designed to streamline your business processes, making it easier for teams to create contracts directly within Salesforce in just a few clicks—without the need to log into SpotDraft separately. With our dynamic mapping feature, the integration can be configured to automatically populate contract details from Salesforce, eliminating the need for manual data entry when the information is already available.
Important: Contracts created directly from Salesforce using the SpotDraft widget will automatically link to the associated Salesforce record. However, if a contract is initiated directly in SpotDraft, users must manually link it to a Salesforce record using the "Link External Record" option in the Record Details section for the contract to sync to Salesforce—even if Salesforce metadata fields (like SFDC Record Link) are populated. Without this manual linkage, the contract will not sync to Salesforce.
What's new?
The Salesforce integration with SpotDraft has become more powerful, stable, fast, and user-friendly with this release. The summary of the main changes is the following:
Create contracts from any object: In the previous version, contract creation was limited to specific Salesforce objects, such as Opportunity, Account, or Contract. This limitation has been removed with this version. You can now configure the integration to work with any Salesforce object—whether a default or custom object.
Important for Custom Objects: While SpotDraft automatically configures standard objects like Account and Opportunity, custom objects require manual configuration in Salesforce. You must add a Custom Metadata Type record for each custom object before the SpotDraft widget will function on that object. See the Prerequisites section below for detailed steps.
Pick values from deeply nested fields: This version also addresses the challenge of retrieving information from deeply nested lookup fields. Now, you can fetch data from relationships up to five levels deep, providing flexibility for handling more complex data structures in real‑world scenarios.
Self-serve setup: The setup process has been significantly simplified. Previously, it involved a highly technical and complex user interface. The process is now quicker, more intuitive and does not require technical expertise to configure or manage.
Multiple connections: You can now connect multiple accounts to the same workflow, allowing both Sandbox and Production accounts to co‑exist. In the previous version, only one account could be active at a time. Now, both accounts can work in parallel, streamlining your workflow management across environments.
Better error handling: The previous version would fail completely if any field mapping encountered an issue. For instance, if you had 25 mapped fields and just one had incorrect mapping or data type problems, all 25 fields would fail to auto‑populate. With the new integration, the system intelligently proceeds with 24 successful fields while only the problematic field remains empty, ensuring continuity in your workflow. Note that this improved error handling applies to field mapping during contract creation from Salesforce; contracts created directly in SpotDraft still require manual linking to Salesforce records to enable syncing.
Enhanced error reporting: The new version provides clear visibility into the relationship between Salesforce fields and SpotDraft fields. When errors occur, users receive targeted notifications with descriptive icons indicating the specific issue—whether it's a missing value, unsupported data type, or incompatible value format. This transparency eliminates guesswork and accelerates troubleshooting.
Significantly improved speed: By eliminating the dependency on external services that previously mediated the Salesforce‑SpotDraft connection, the new version delivers substantially faster performance. This architectural improvement not only makes the application more responsive but also enables our team to identify and resolve potential issues with greater efficiency and precision.
Pre-requisite
Ensure that you have installed the SpotDraft app from the Salesforce AppExchange and completed the instructions mentioned in this article before proceeding. Failing to do so could result in errors during setup.
For Custom Objects Only: If you plan to use the SpotDraft widget on custom Salesforce objects (not Account or Opportunity), you must configure Custom Metadata Types in Salesforce before proceeding with the integration setup:
In Salesforce, go to Setup > Custom Metadata Types
Click Manage Records (for Installed Package Name: SpotDraft)
Click New and add the following configuration:
Label: API Name of your custom object
Object Mapping Name: API Name of your custom object
Fields: Id
Object API Name: API Name of your custom object
Repeat these steps for each custom object where you want to use the SpotDraft widget
Failing to complete this configuration will result in errors when users attempt to initiate contracts from the custom object in Salesforce.
Step-by-step installation guide
This guide will walk you through the simple steps to set up the integration.
Step 1: Authentication
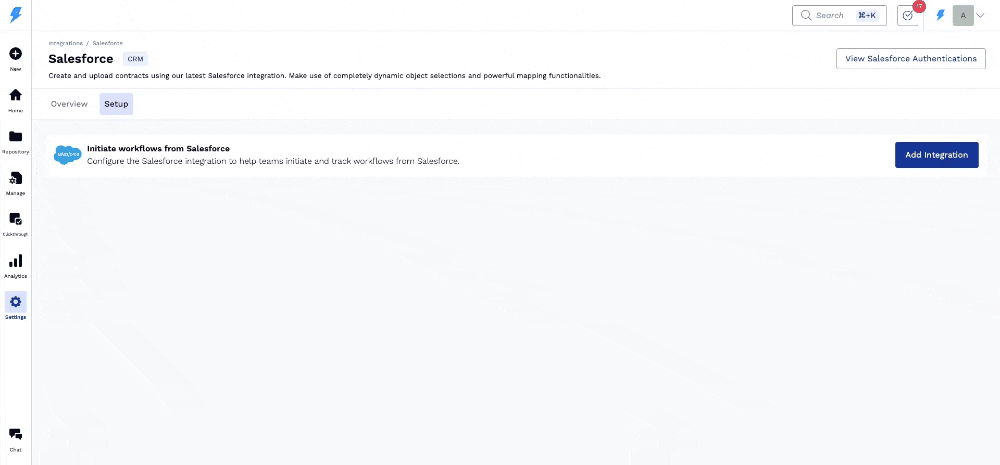
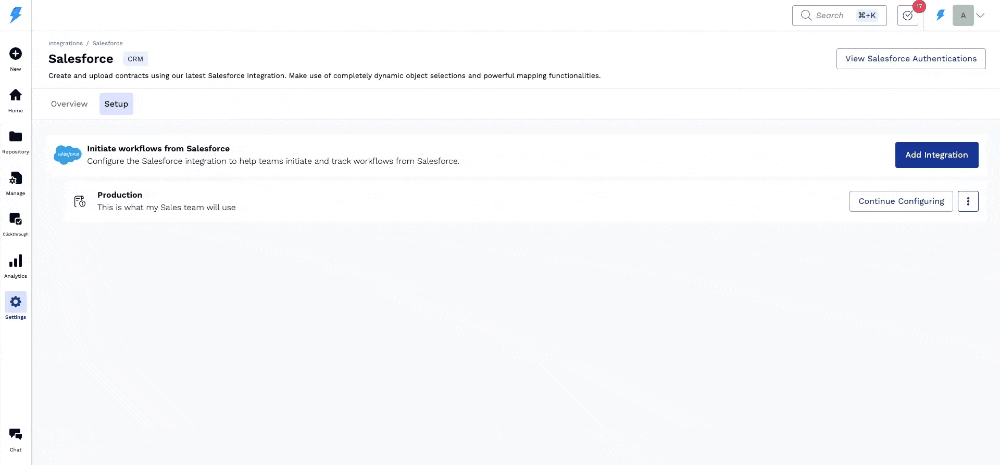
Navigate to Settings > Integrations > CRM > Salesforce and go to the Setup tab.
Click on the View Salesforce Authentications button. A sidesheet will open.
Click on the Add New Authentication button.
Fill in the following information:
Authentication Name: A unique identifier for the authentication (Eg: Acme Production)
Environment: Select if it is a Sandbox or a Production Salesforce account.
A new window will open with the Salesforce login page. Log in using your Salesforce credentials to authorize SpotDraft to access your Salesforce account.

Note:
If you are already logged in to Salesforce, SpotDraft will automatically pick up that account. To avoid confusion when managing multiple Salesforce accounts, it’s recommended to use an Incognito window for this step.
Ensure API access is enabled on the Salesforce Org.
Ensure the person authorizing the account has the necessary permissions to access the required Salesforce objects and fields (Preferably the System Administrator). This will prevent any issues during field configuration.
It is also recommended to use a generic account (eg: spotdraft_integration@acme.com) for authentication which is not tied to an individual. If the individual leaves the organization and their account is deactivated, the integration will stop functioning until reauthenticated.
The authentication expires if the integration remains unused for a long period or if your Salesforce admin makes some changes. In such cases, you can re-authenticate it from the UI.
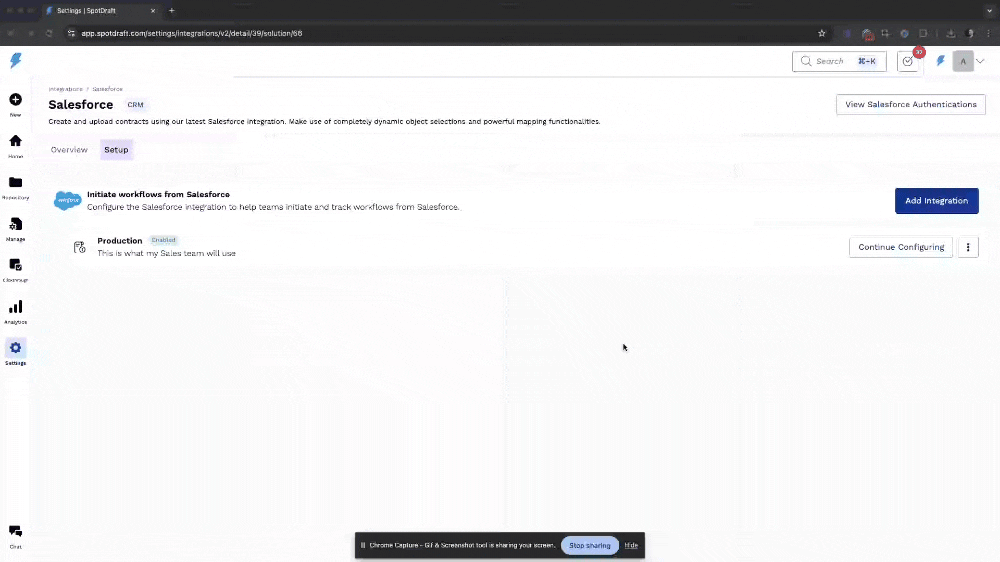
Step 2: Adding an integration and enabling it
Click on the Add Integration button. A sidesheet will open.
Fill in the following information:
Integration Name: A unique identifier for the integration (Eg: Production Account)
Integration Description: A brief description to identify what this is used for
Authentication: Select which authentication should be used for this integration
Click on the Connect button.
Important: Each authentication (Sandbox or Production) requires its own independent field mapping configuration. When you create a new authentication, field mappings do not automatically copy or mirror from existing authentications. You must manually configure field mappings for each authentication in Step 5, even if your Sandbox mirrors your Production data structure.
The integration remains disabled by default. Remember to enable the integration one created
Click on the 3-dot menu.
Click on the Enable option.
Click on the Enable button on the modal after carefully reading the message.
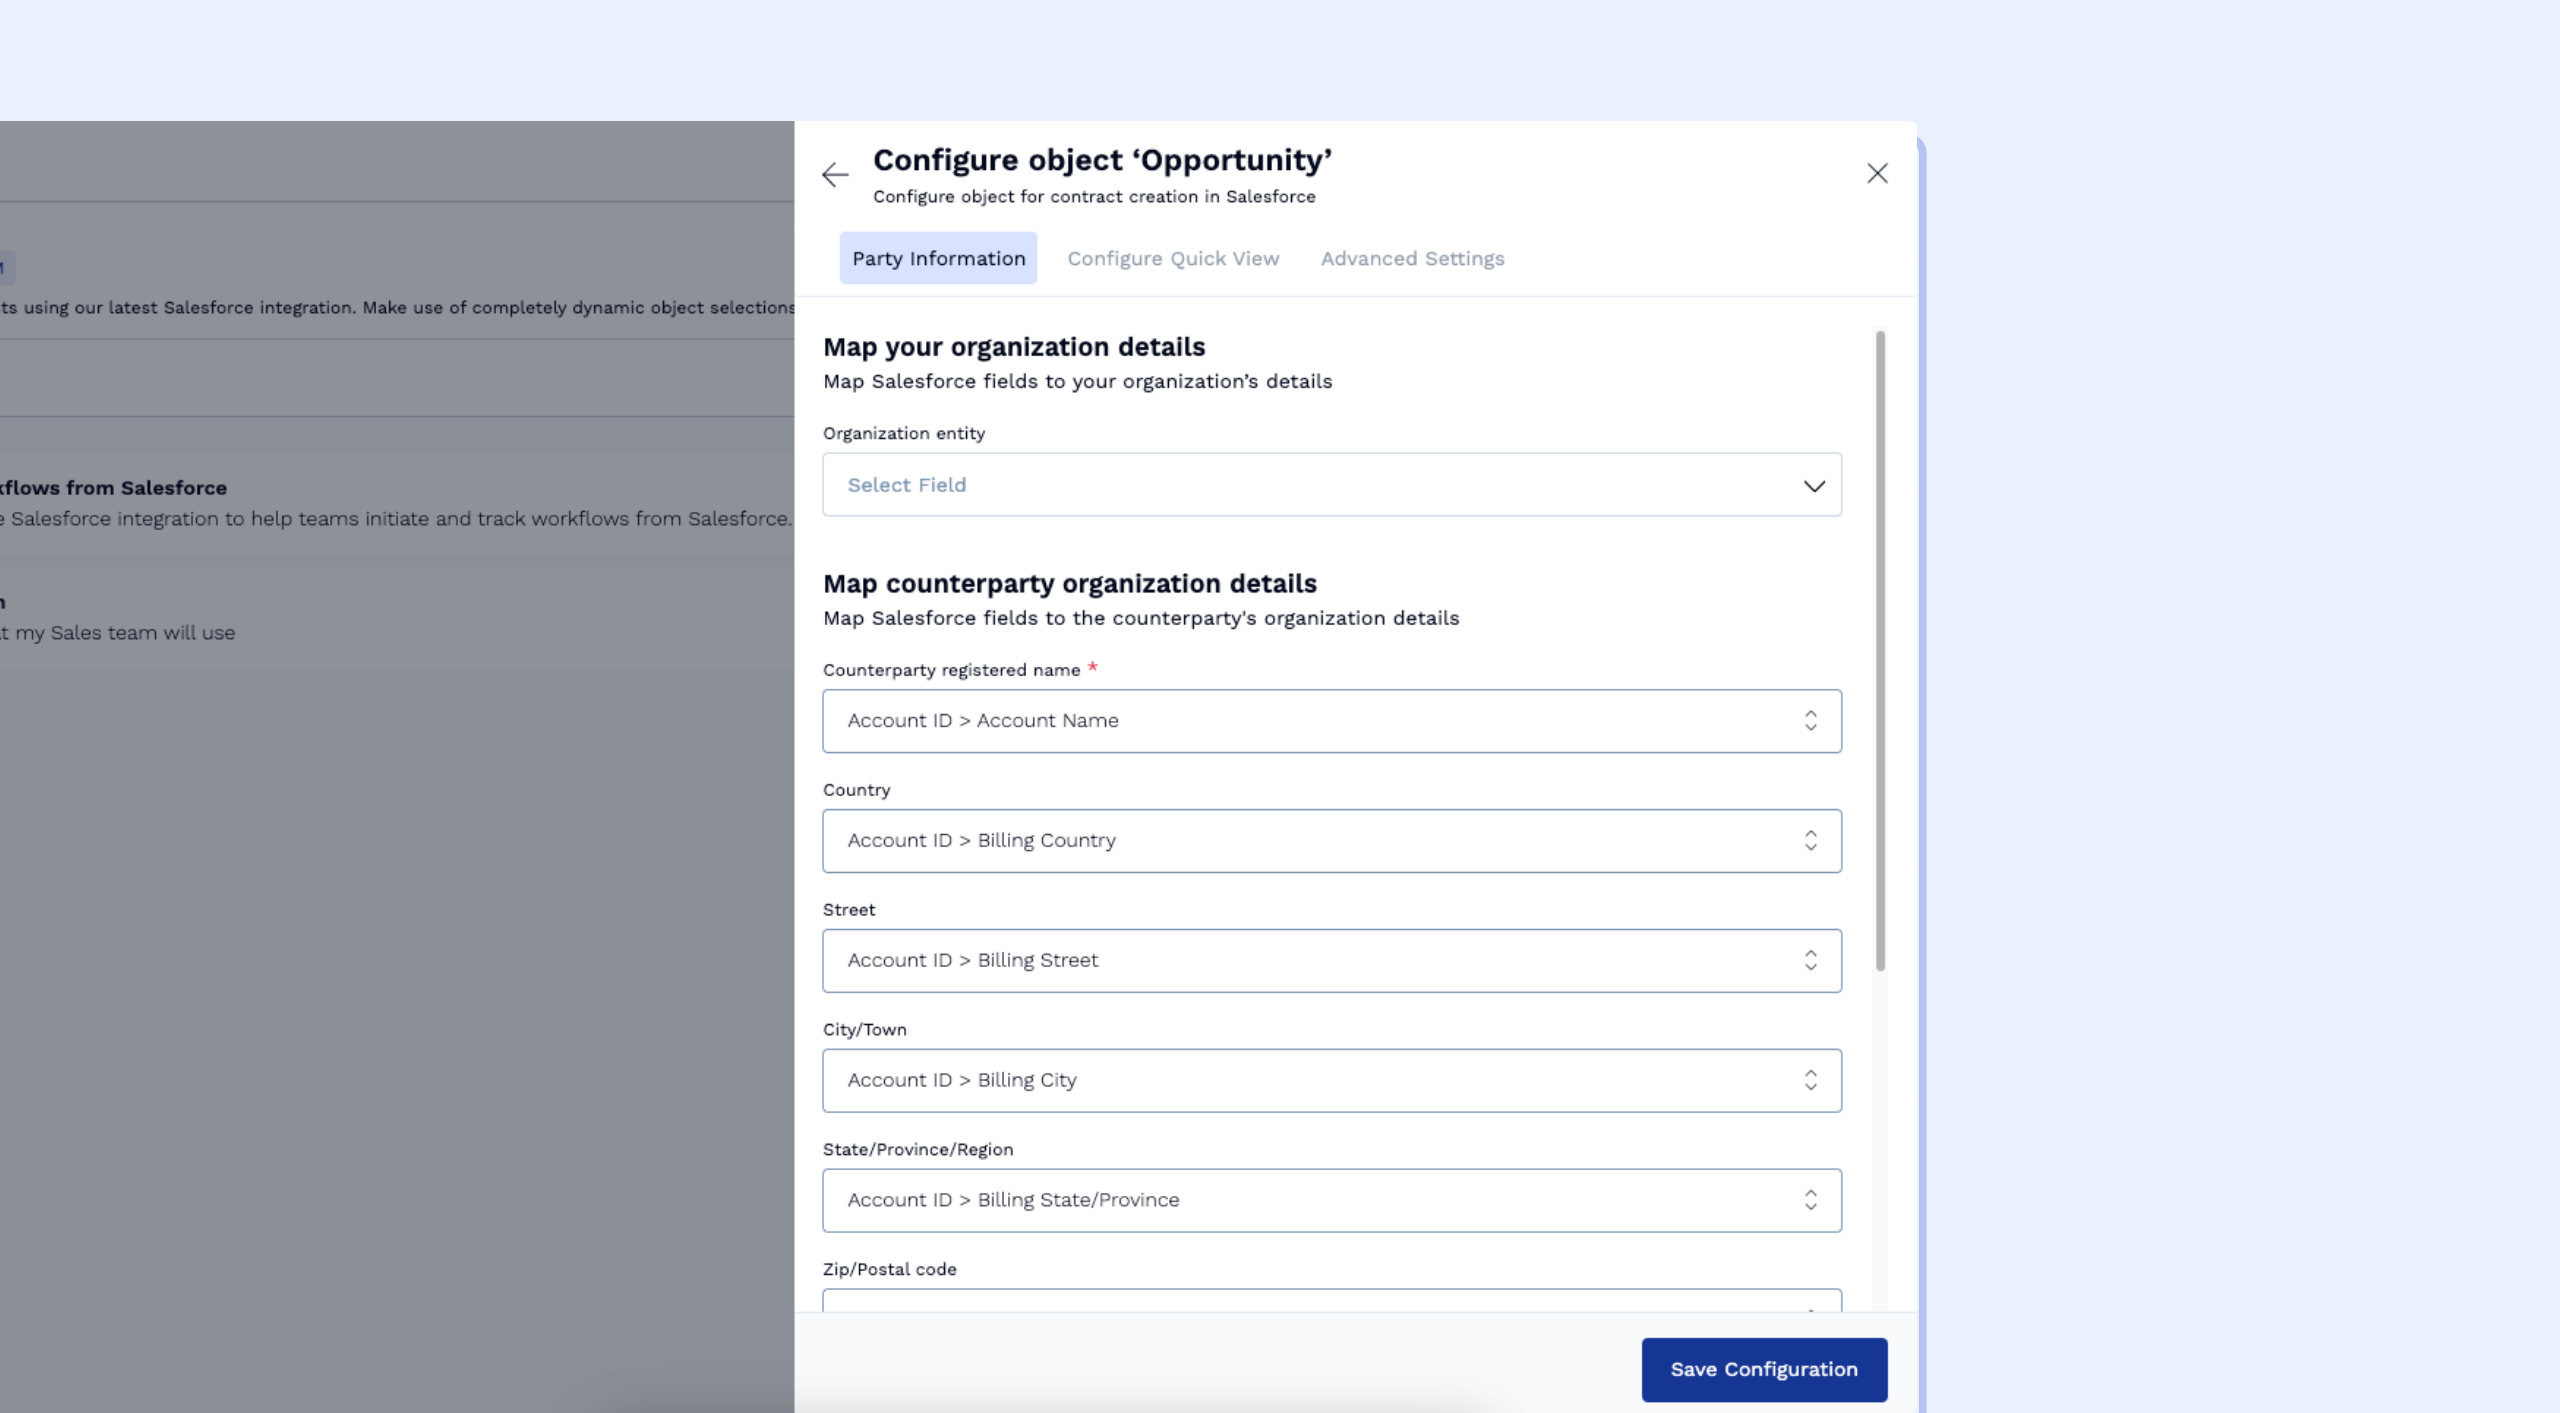
Step 3: Configure Global Settings
SpotDraft allows you to set global or generic settings for your workflows. These settings include fields like Counterparty Name and Points of Contact, which are used across workflows.
Once you select the necessary Salesforce objects, click Configure to open a sidesheet with three tabs.
Fill in the required information in each tab. You will be able to save the configuration only after all mandatory fields are completed.
After saving, proceed to the next step.
Tip:
You can also configure options such as:
When users can create contracts.
Whether users can manually edit mapped fields.
Important: When "Allow users to manually edit the questionnaire" is set to No, users creating contracts from Salesforce will not be able to edit any questionnaire responses. The system will automatically use the mapped values from Salesforce or the default values configured for each question. This means users cannot override these values even if their specific situation requires different inputs. Set this option to Yes if you want users to have the flexibility to modify questionnaire responses when creating contracts from Salesforce.
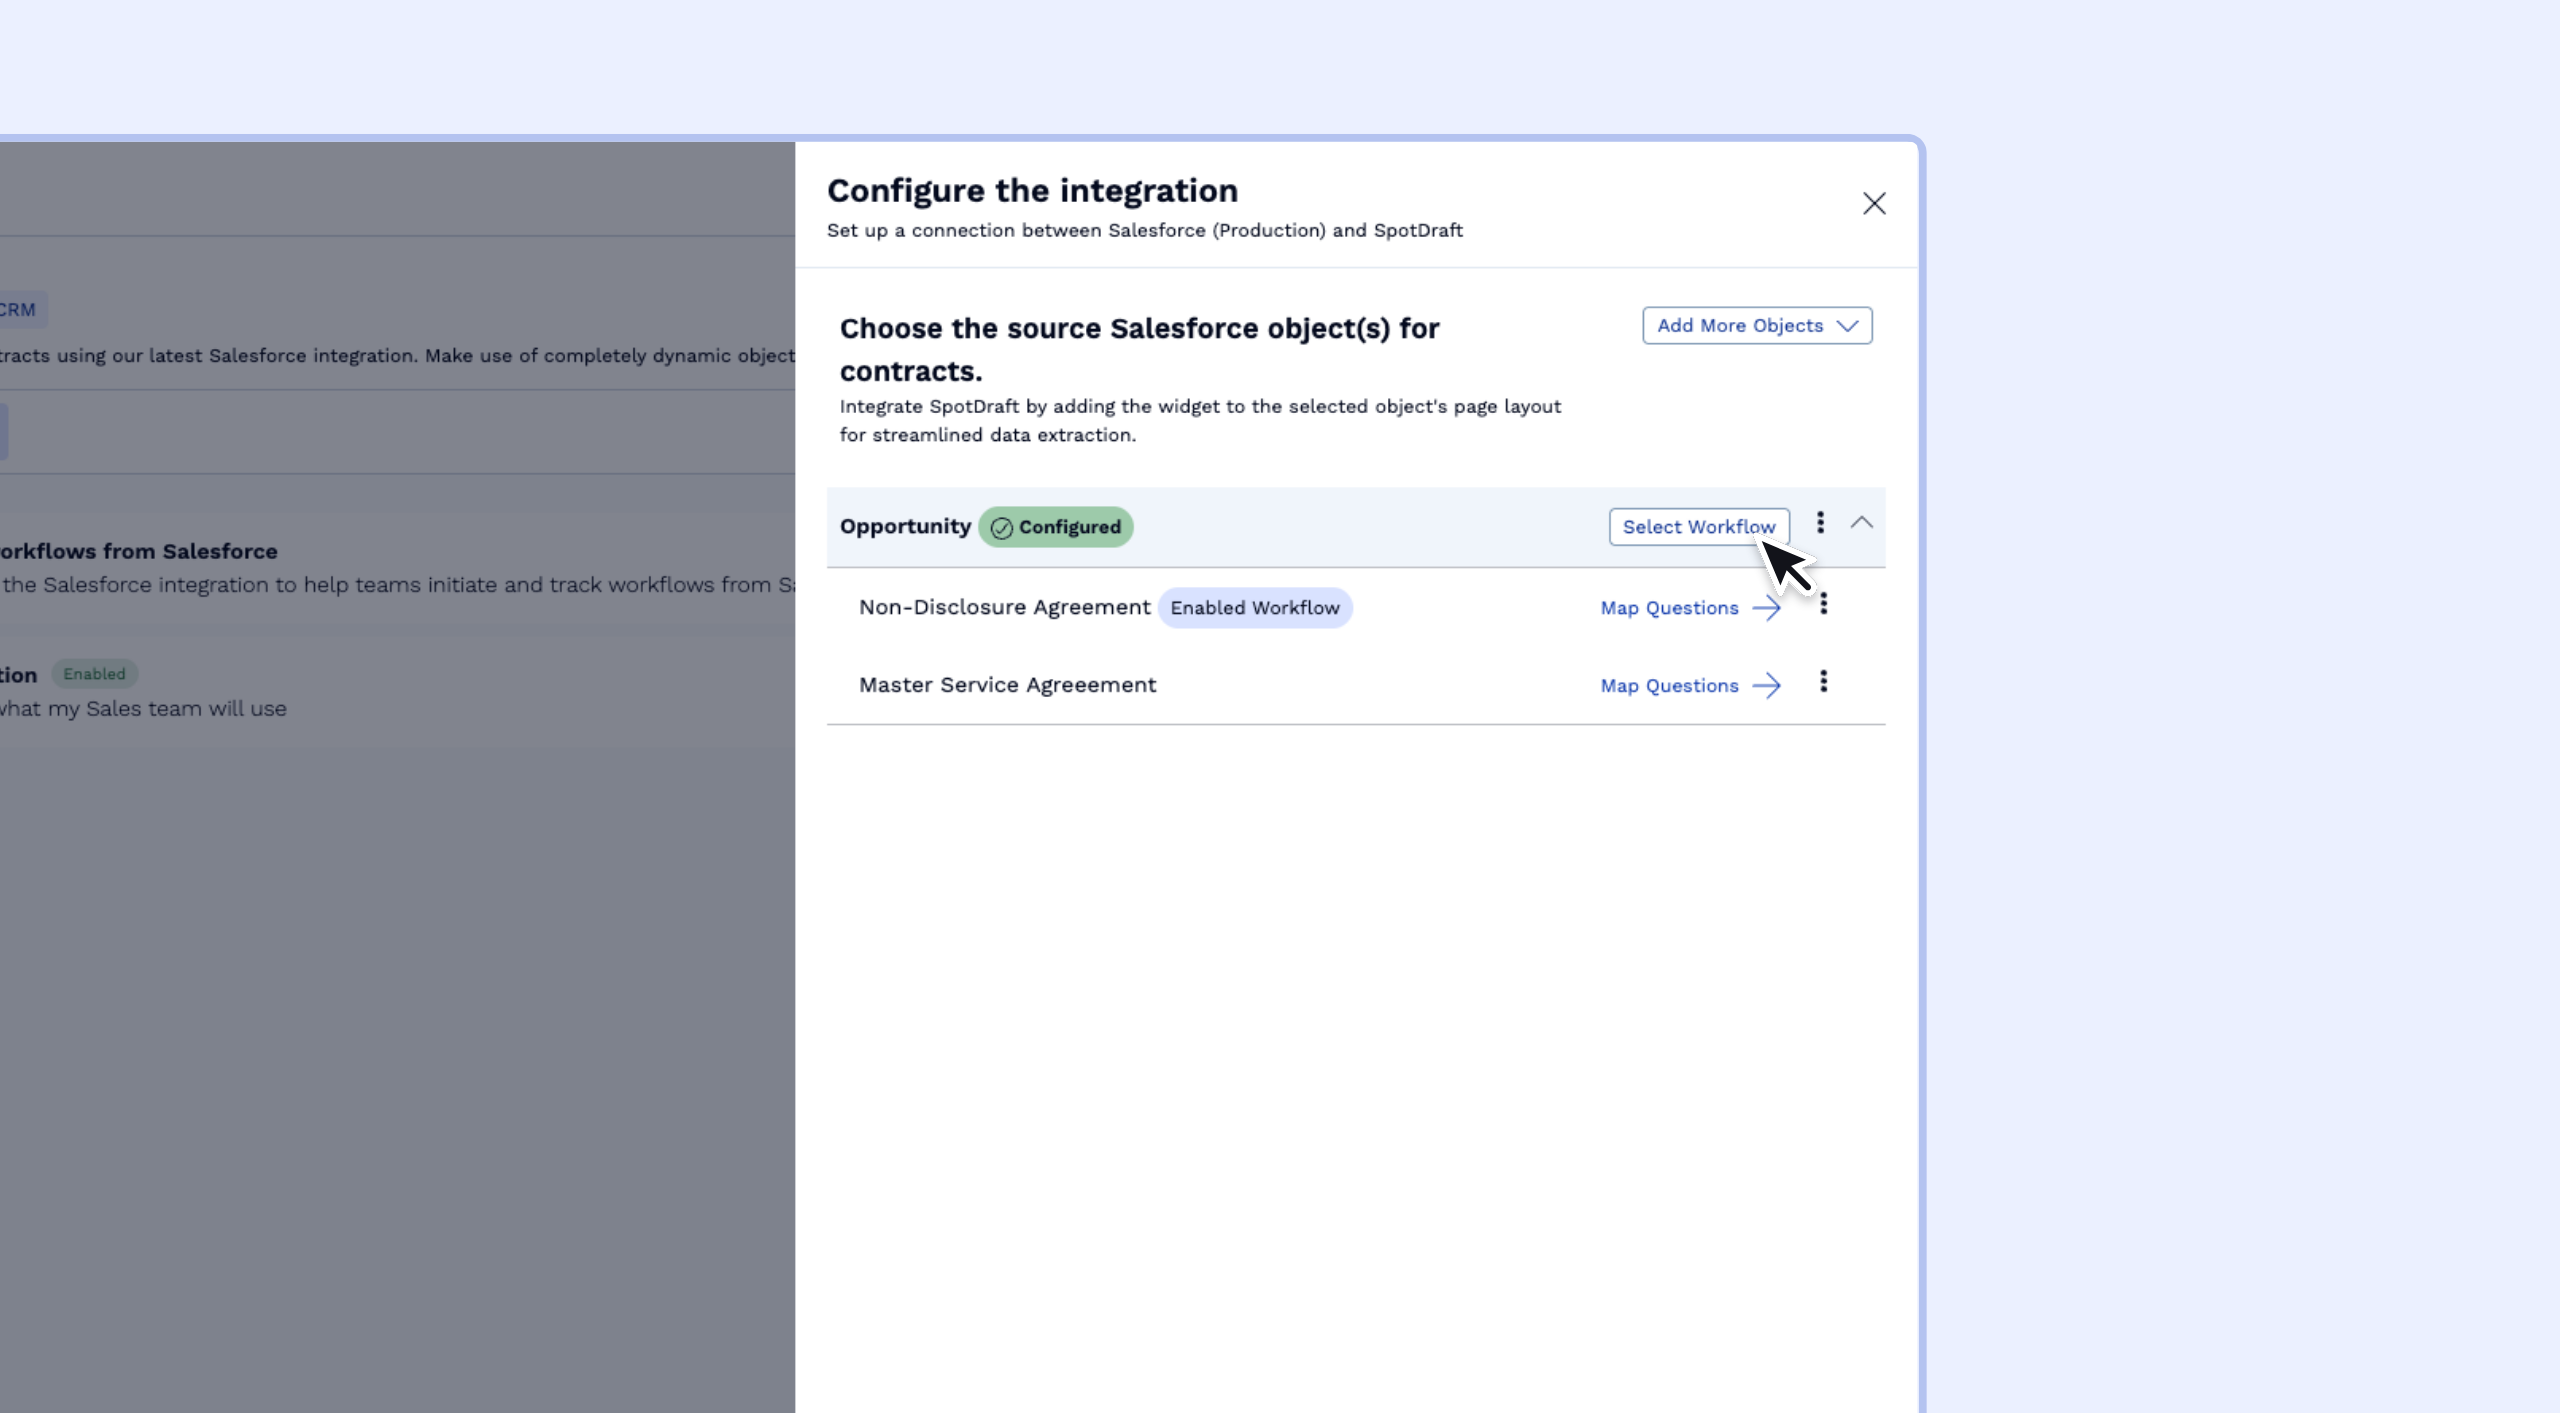
Step 4: Select Workflows to Configure
Not all SpotDraft workflows need to be integrated with Salesforce. Here, you can choose which workflows to expose for your Sales team.
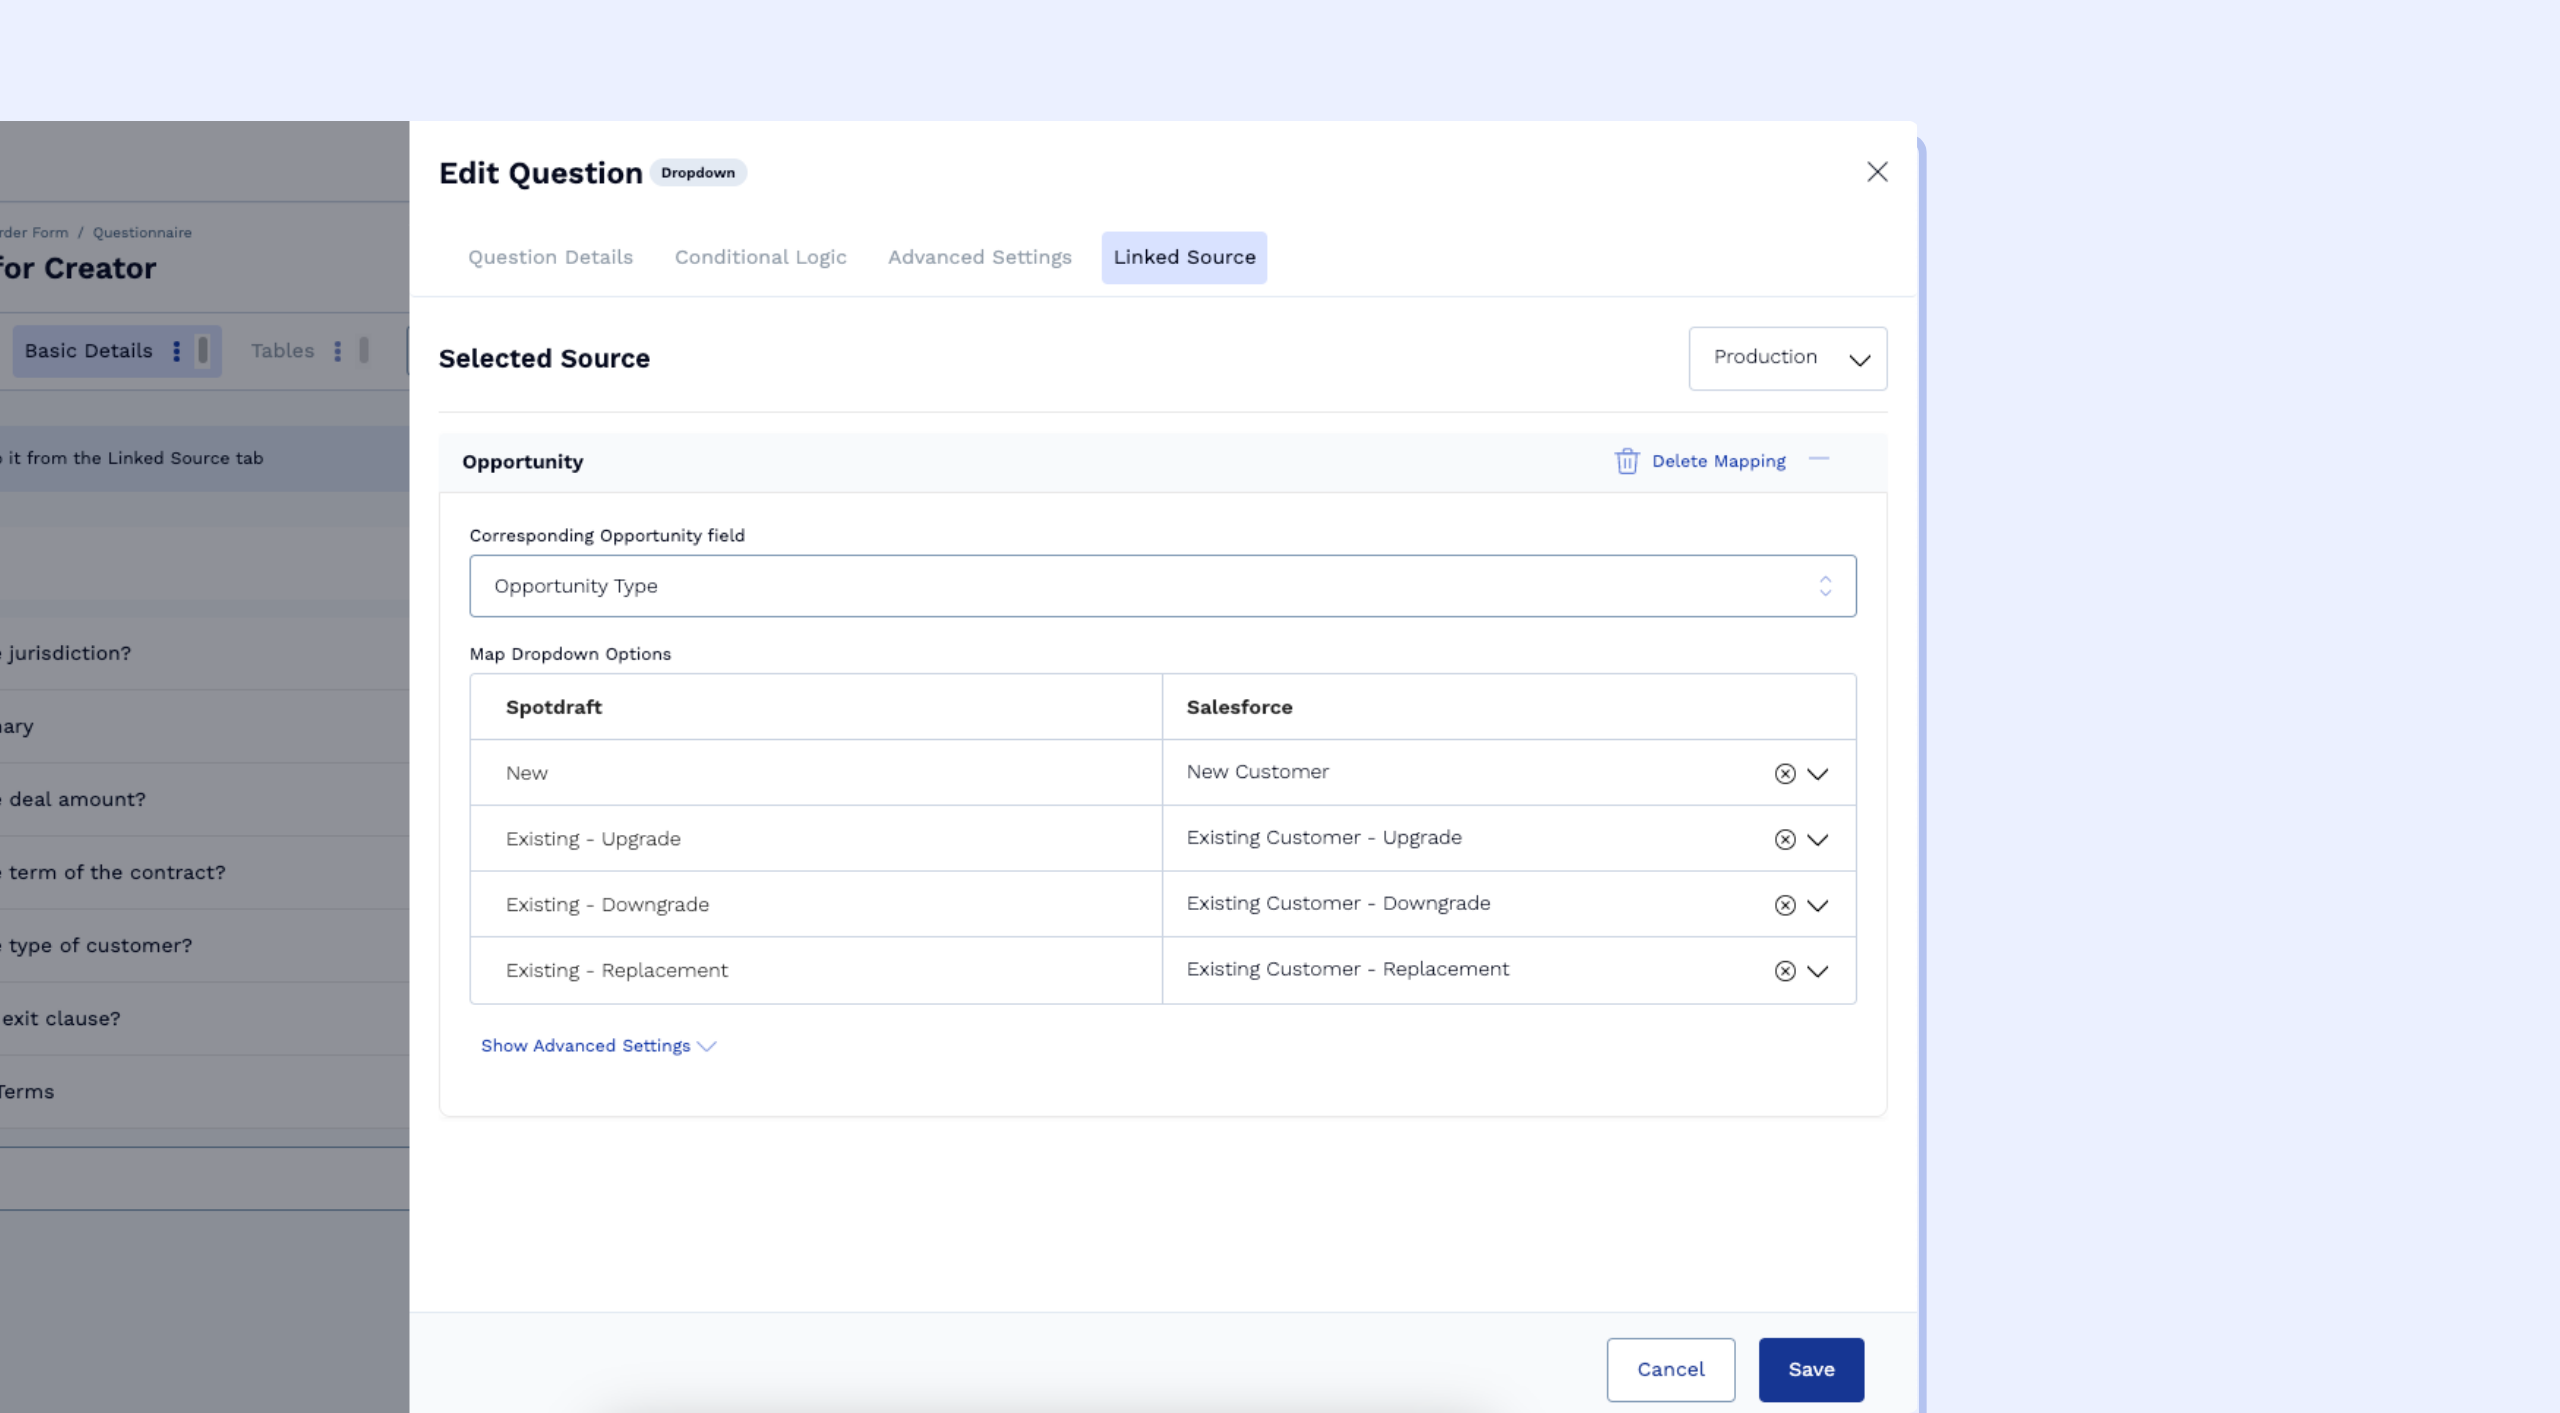
Step 5: Map Workflow Questions to Salesforce Fields
One of the key features of the Salesforce integration is the ability to map SpotDraft workflow questions to Salesforce fields. This eliminates manual data entry when creating contracts, as the integration pulls relevant data directly from Salesforce. Note that these mappings must be configured separately for each authentication—mappings from one authentication (e.g., Production) do not automatically copy to another authentication (e.g., Sandbox).
Critical PDF Syncing Requirements for Salesforce Integration Setup
When configuring your Salesforce integration, ensure your SpotDraft workflows include specific field mappings that are essential for PDF syncing functionality but are not automatically configured during the standard setup process.
Required Field Mappings for PDF Syncing
For signed PDFs to successfully sync to Salesforce, you must map both the Salesforce Account ID and Opportunity ID fields in your workflow configuration.
Implementation Steps
During Step 5 of your integration setup (Map Workflow Questions to Salesforce Fields), prioritize mapping these critical fields:
Salesforce Account ID field
Salesforce Opportunity ID field
Verify these mappings exist before publishing your workflow, as missing these fields will cause PDF sync failures that may not be immediately apparent during testing.
Test PDF syncing functionality after completing your integration setup to confirm signed documents are properly saving to the associated Salesforce records.
Why This Matters
This requirement is not part of the standard field mapping process and can be easily overlooked during initial setup. Users often discover this issue only after contracts are signed and PDFs fail to appear in Salesforce, requiring retroactive configuration and potential re‑processing of documents.
Click on Map Questions next to the workflow you want to configure. This will open the workflow questionnaire in a new tab.
For each question you wish to map, click Edit. In the sidesheet that opens, navigate to the Linked Source tab.
Select the appropriate Salesforce field to map to the selected SpotDraft question.
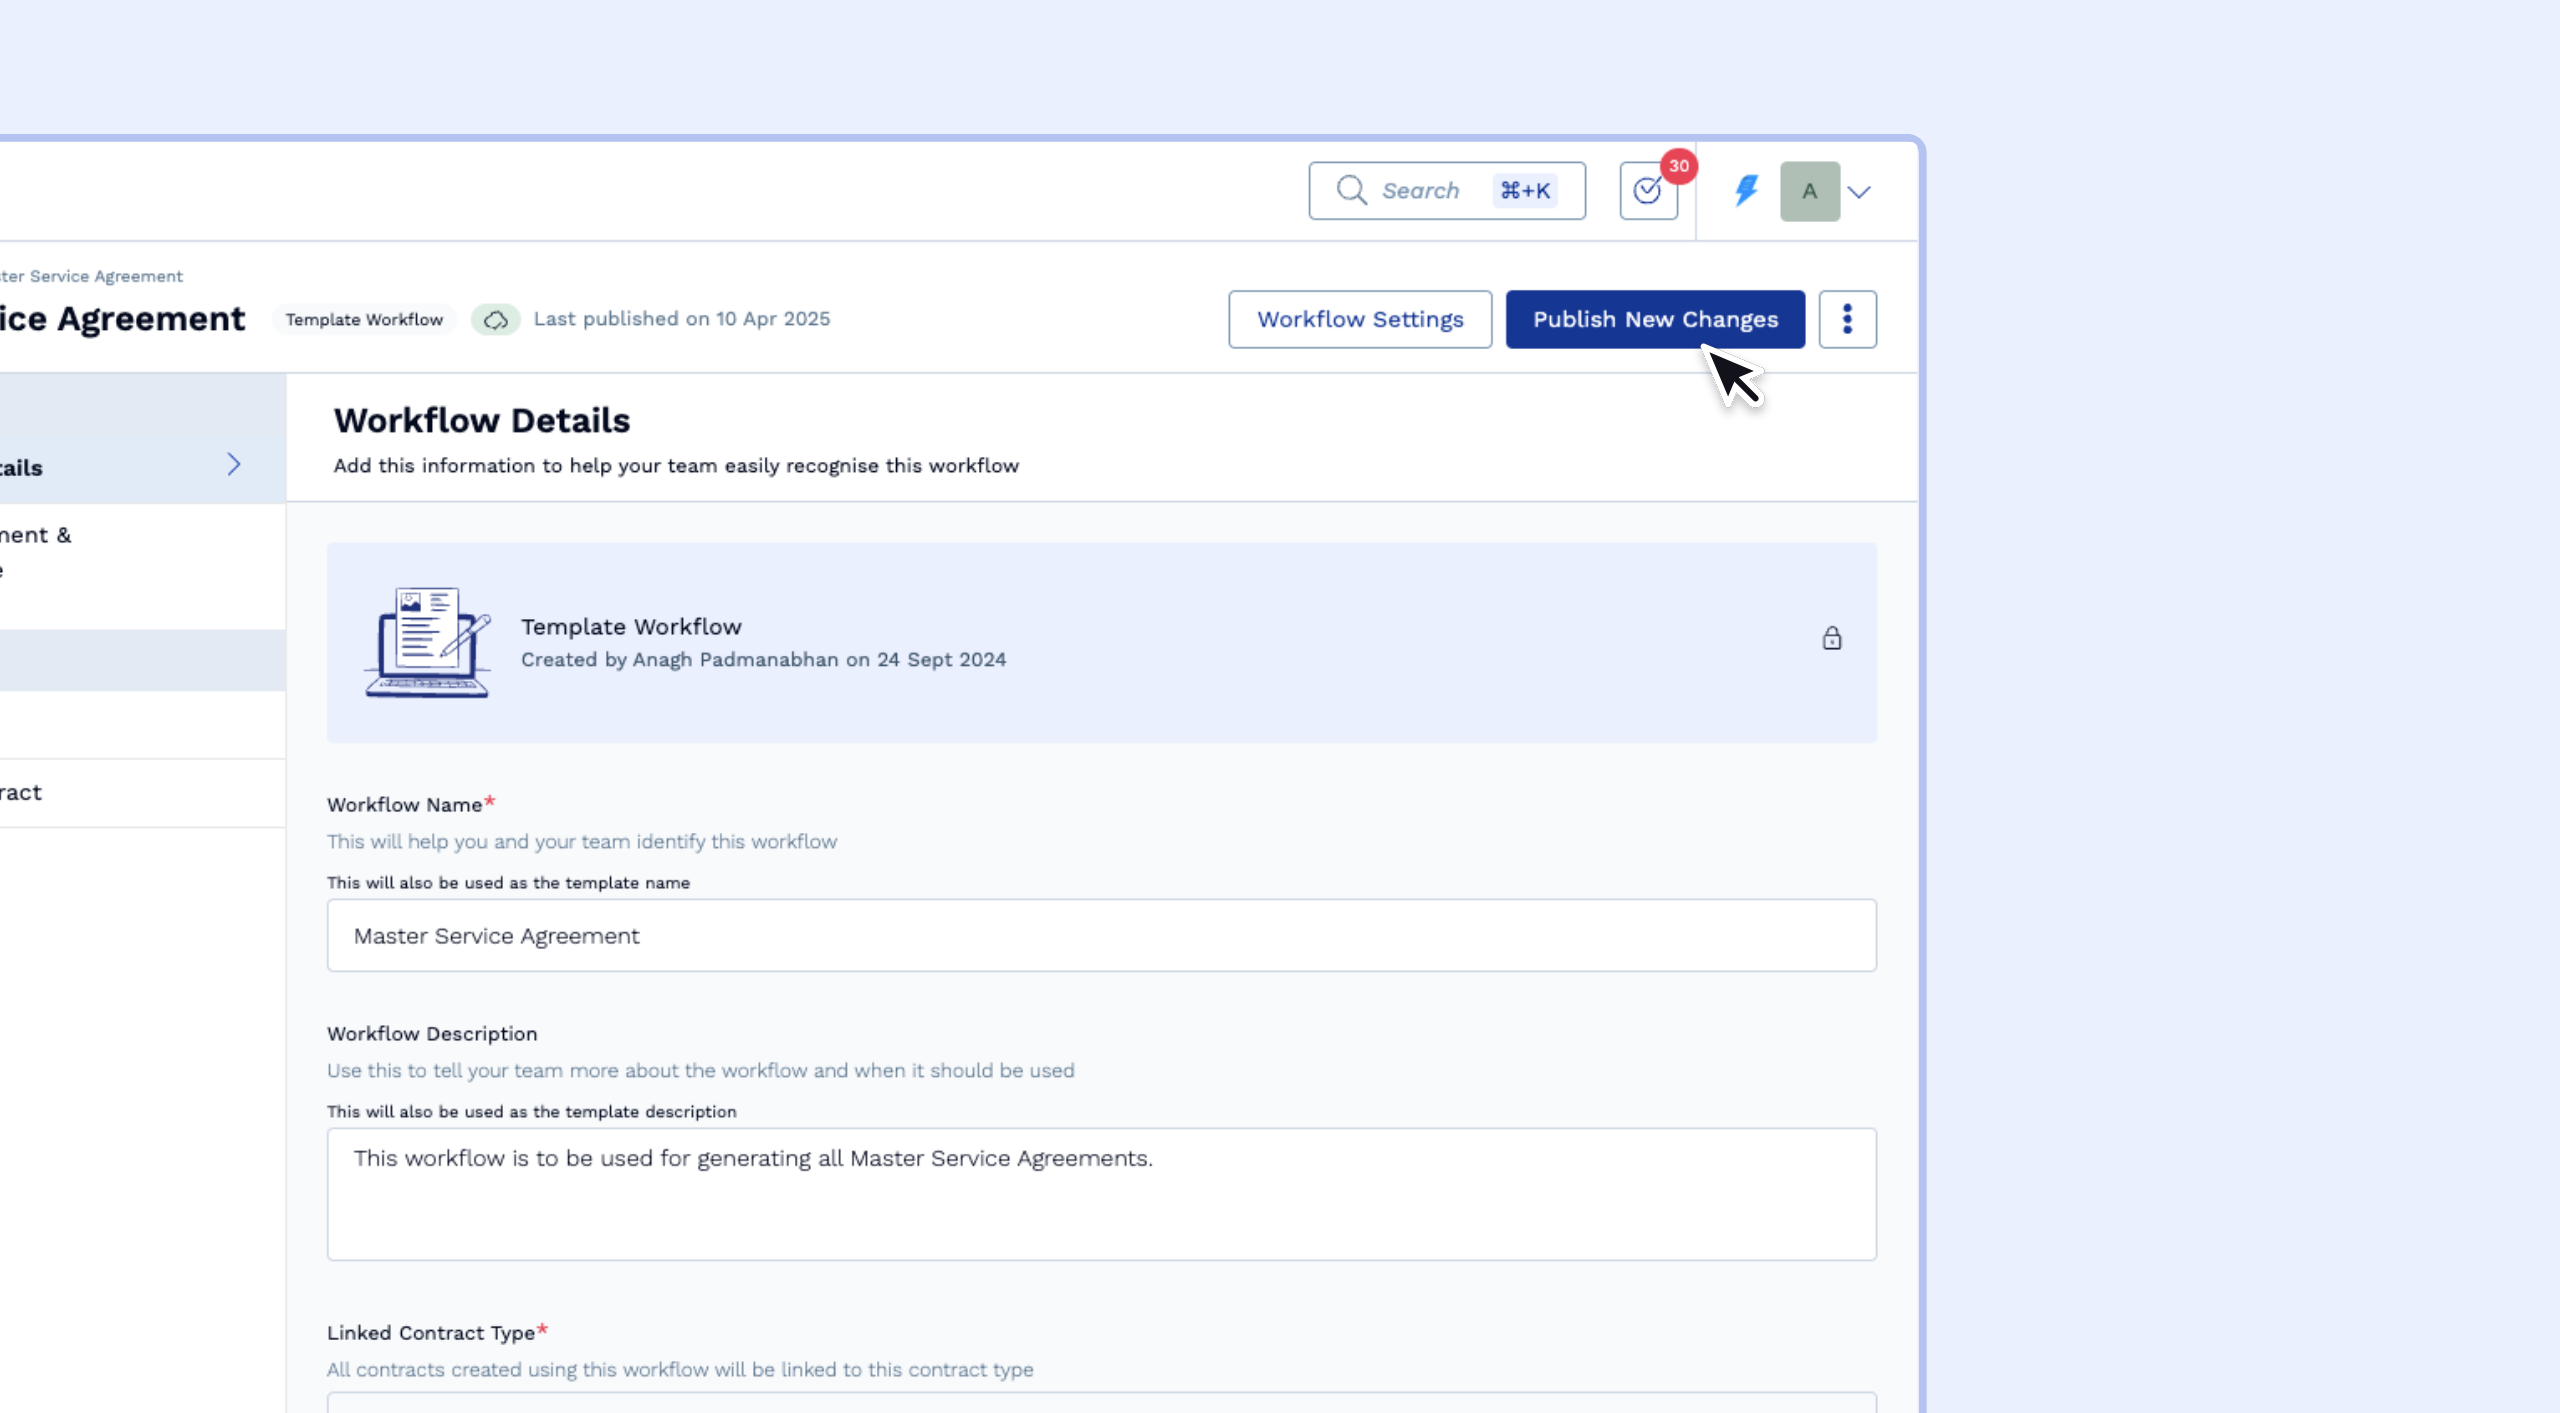
Step 6: Publish the workflow
Once the required mappings are done, publish the workflow for the changes to take effect.
Note: This will apply only to newly created contracts. The in-flight contracts will continue to use the previous configuration.
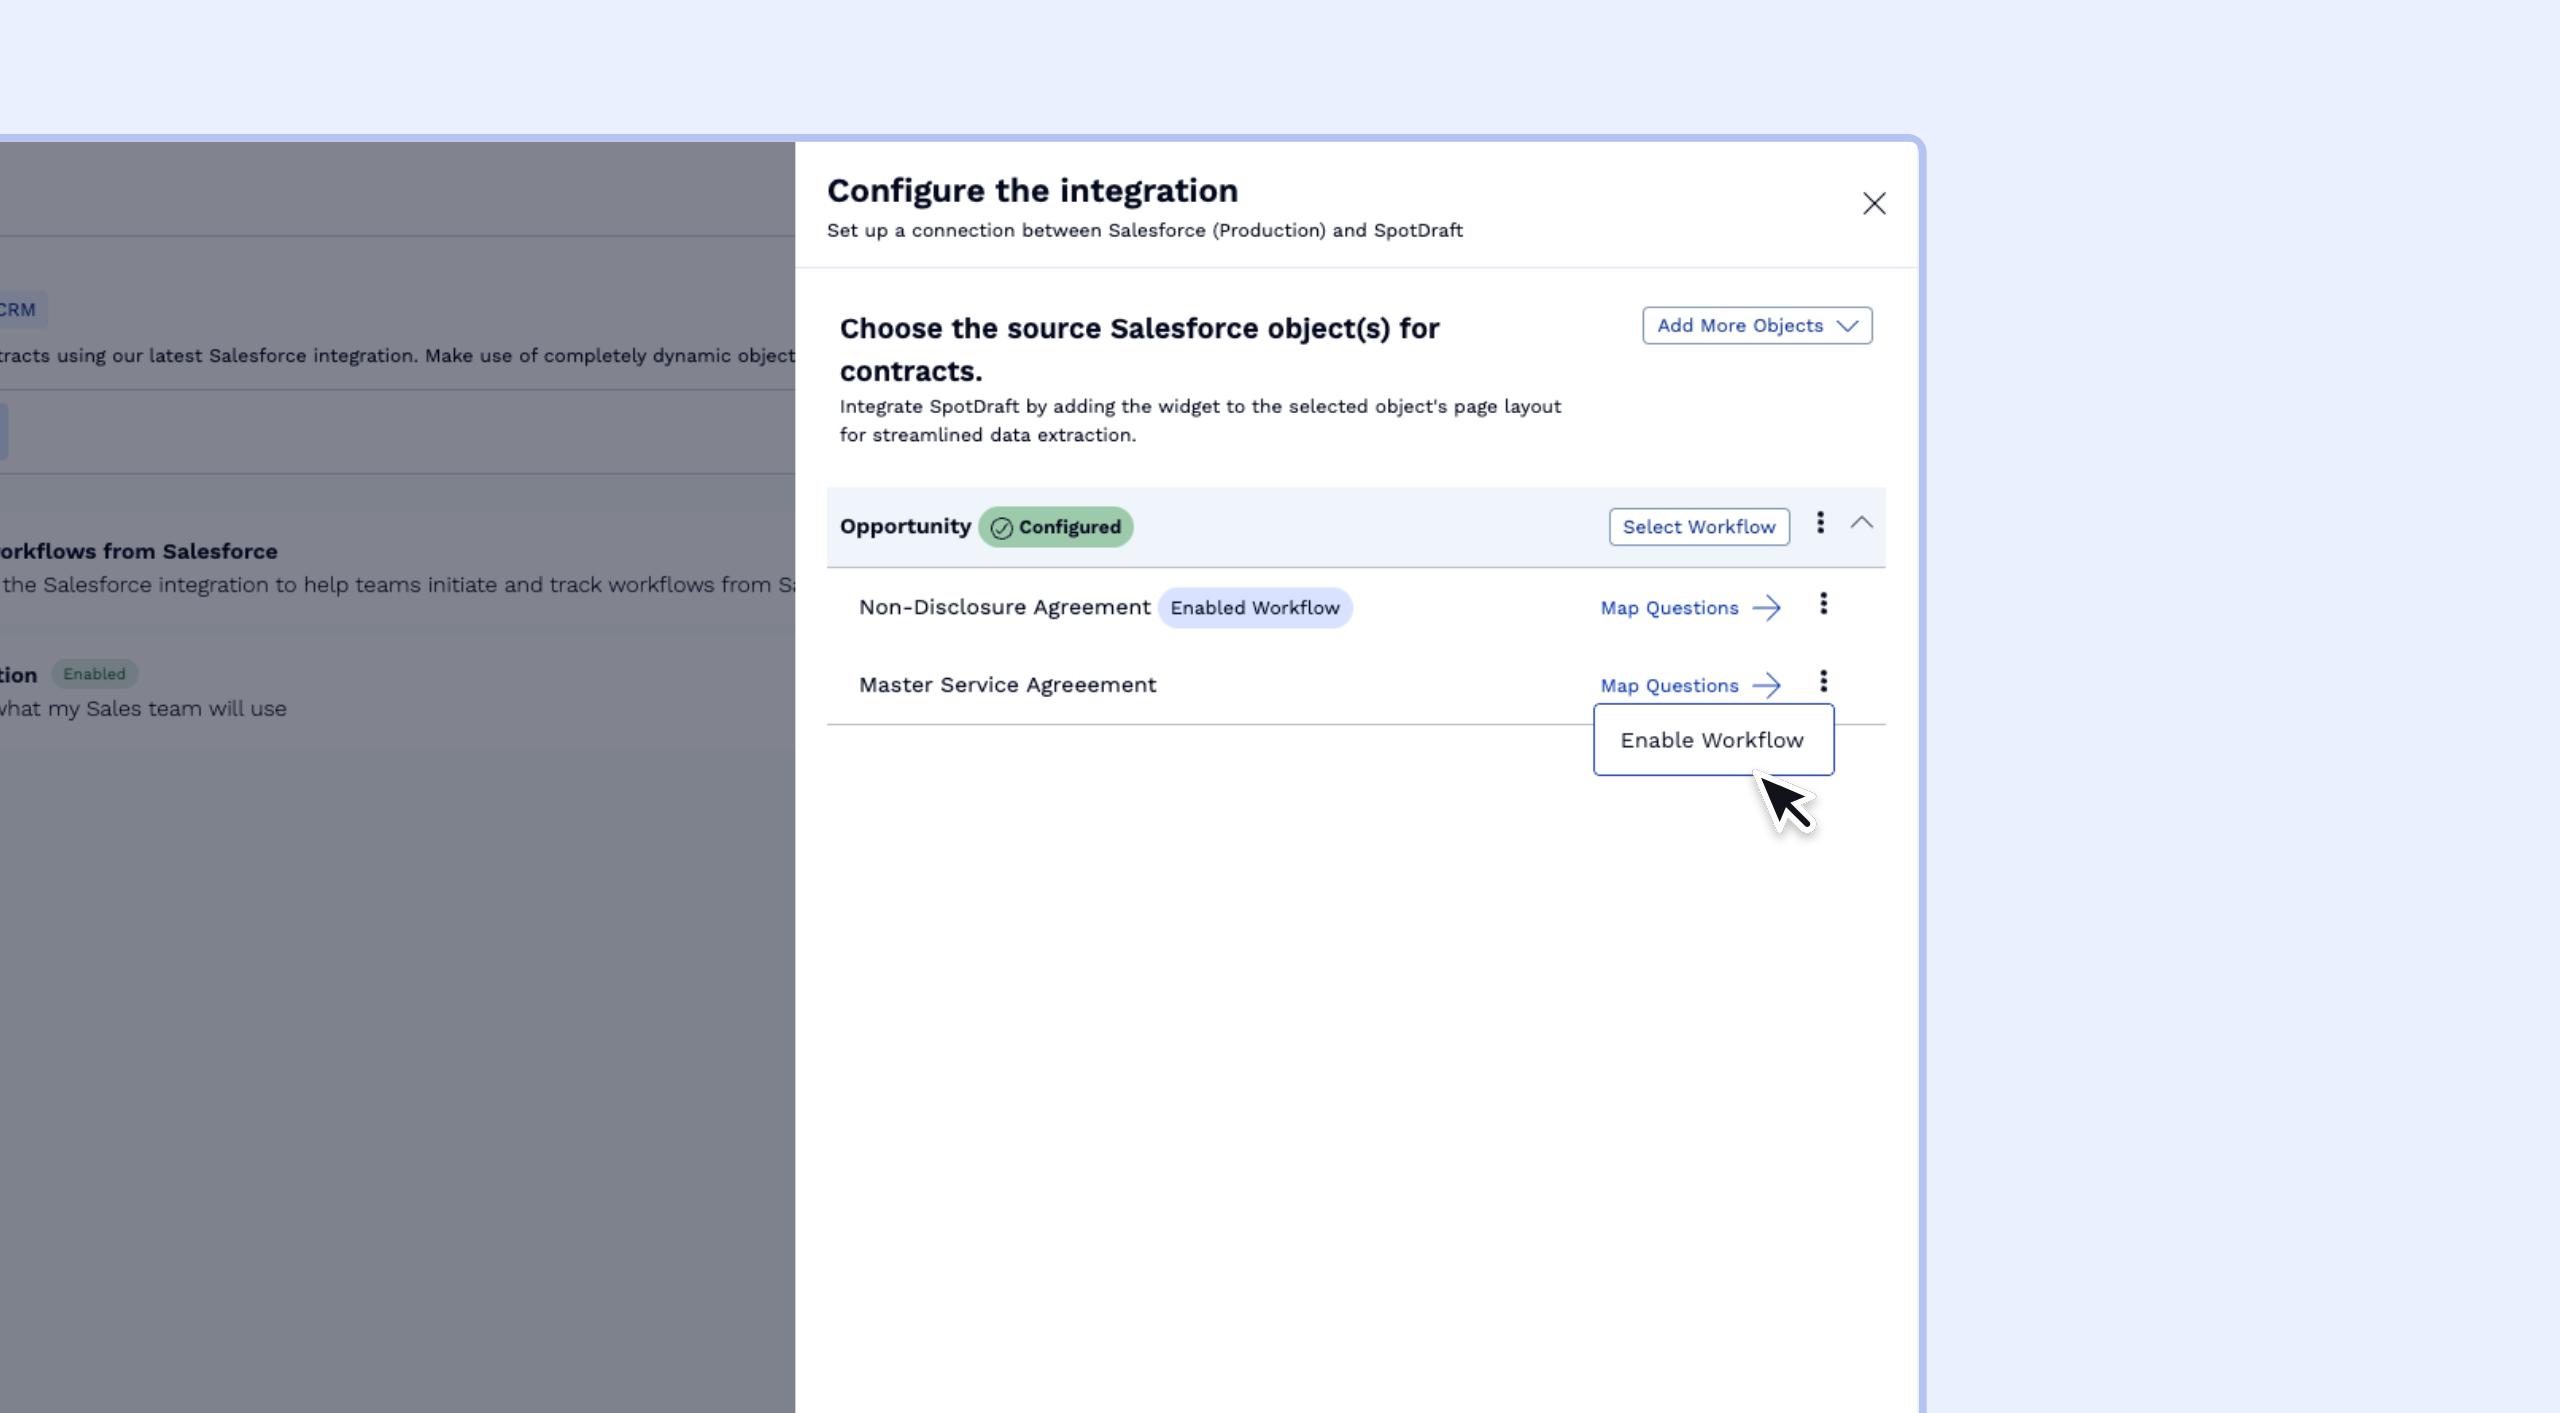
Step 7: Enable the workflow
Go back to the workflow selection page and enable it for it to become available on Salesforce.
Video tutorial
Part 1 - Authorization (Outdated video. Refer to the steps mentioned above)
Part 2 - Configuring a Salesforce object
Part 3 - Mapping basic questions in a workflow
Part 4 - Mapping dynamic tables